Strawberry
There’s something magical about the moment you realize you’ve created something truly special in your own kitchen. I still remember the first time I made homemade strawberry syrup – it was a rainy Saturday afternoon, and my three-year-old daughter had just devoured an entire pint of fresh strawberries before I could even think about washing them. With half a flat of berries still sitting on my counter, rapidly approaching their prime, I panicked. Then I remembered my grandmother’s old recipe book, stained with what looked like decades of love (and probably a fair amount of spilled vanilla extract). That afternoon changed everything. What came out of that pot wasn’t just syrup – it was liquid gold, bottled sunshine, a taste of summer that would last us through the darkest winter months.
Now, before we dive deep into this delicious journey, let me tell you why this article exists. You see, homemade strawberry syrup isn’t just another recipe you’ll try once and forget. It’s a skill that will transform how you think about breakfast, desserts, drinks, and even gift-giving. By the time you finish reading this comprehensive guide, you’ll not only know exactly how to make the perfect batch – you’ll be convinced that buying that red-dyed, high-fructose corn syrup stuff from the grocery store is nothing short of a culinary crime.
Why Homemade Strawberry Syrup Beats Store-Bought Every Single Time
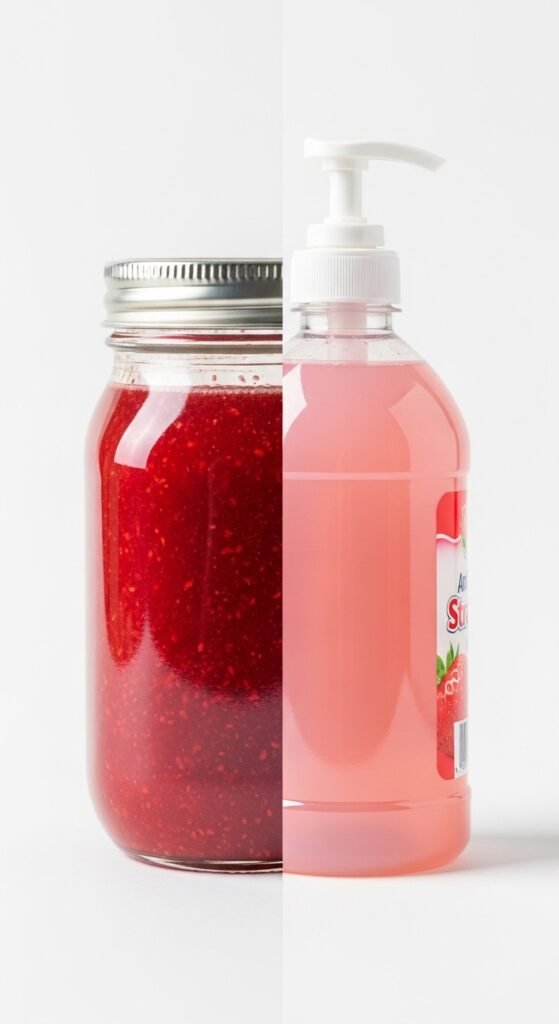
Let me paint you a picture. Walk down the breakfast aisle of any supermarket. See those rows of syrup bottles? Now flip one over and read the ingredients. Go ahead, I’ll wait. You’ll likely find “high fructose corn syrup, natural and artificial flavors, red 40, sodium benzoate, and” – get this – “strawberry juice concentrate” listed somewhere near the bottom, usually after the preservatives. Now, here’s the kicker: many commercial “strawberry” syrups contain absolutely no real strawberries whatsoever. Shocking, right?
When you make homemade strawberry syrup, you control everything. You decide how many strawberries go in. You choose whether to use organic berries or the ones from your local farmer’s market. You decide on the sweetener – white sugar, brown sugar, honey, maple syrup, or even a sugar-free alternative. You know exactly what’s going into your body and your family’s bodies. Furthermore, the taste difference is genuinely night and day. I’ve conducted blind taste tests with friends (yes, I’m that person), and every single person could instantly identify the real stuff.
The Life-Changing Moment That Made Me a Believer
Before we get into the nitty-gritty, let me share another quick story. Last summer, my neighbor Sarah knocked on my door looking defeated. She’d spent forty dollars on organic strawberries from a local farm, planning to make jam. Long story short, her jam turned into something resembling strawberry-flavored rubber. She was about to throw everything away when I stopped her. “Give me thirty minutes,” I said. We took her failed jam, added some water, simmered it down, strained out the lumps, and created the most incredible homemade strawberry syrup she’d ever tasted. She went home that day with two bottles and a new perspective on kitchen failures. That’s the beauty of this recipe – it’s almost impossible to mess up completely, and even your “mistakes” can become something wonderful.
What Exactly Is Homemade Strawberry Syrup?
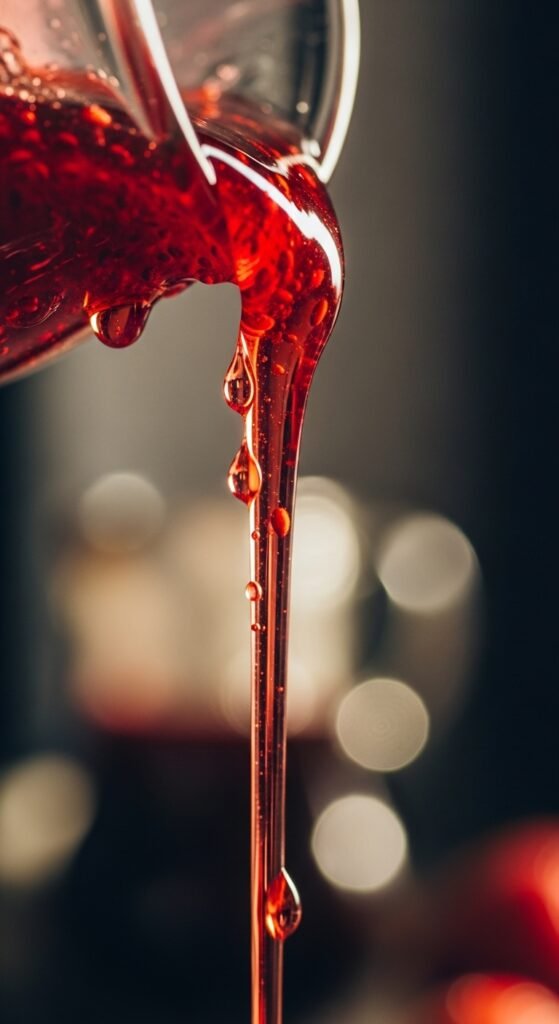
At its core, homemade strawberry syrup is a simple reduction of strawberries, sugar, and water, often enhanced with a few flavor boosters like lemon juice or vanilla. However, calling it “simple” doesn’t do it justice. Think of it as the concentrated essence of strawberry season, captured in a bottle. When you make it properly, you’re extracting all the color, flavor, and aroma from the berries, leaving behind a syrup that’s intensely fruity, perfectly sweet, and versatile beyond imagination.
The beauty of homemade strawberry syrup lies in its adaptability. You can make a thin, pourable syrup for pancakes and waffles. You can cook it down further into a thick, almost jammy consistency for drizzling over ice cream or filling crepes. You can even leave some fruit chunks intact for a rustic, textured version that’s perfect for topping cheesecake or swirling into yogurt.
Also Read:Southern Fried Chicken: The Golden, Juicy Secret of the American South
Essential Ingredients for the Perfect Homemade Strawberry Syrup

Let me walk you through everything you’ll need. Remember, the quality of your ingredients directly impacts the final product, so choose wisely.
Strawberries: The Star of the Show
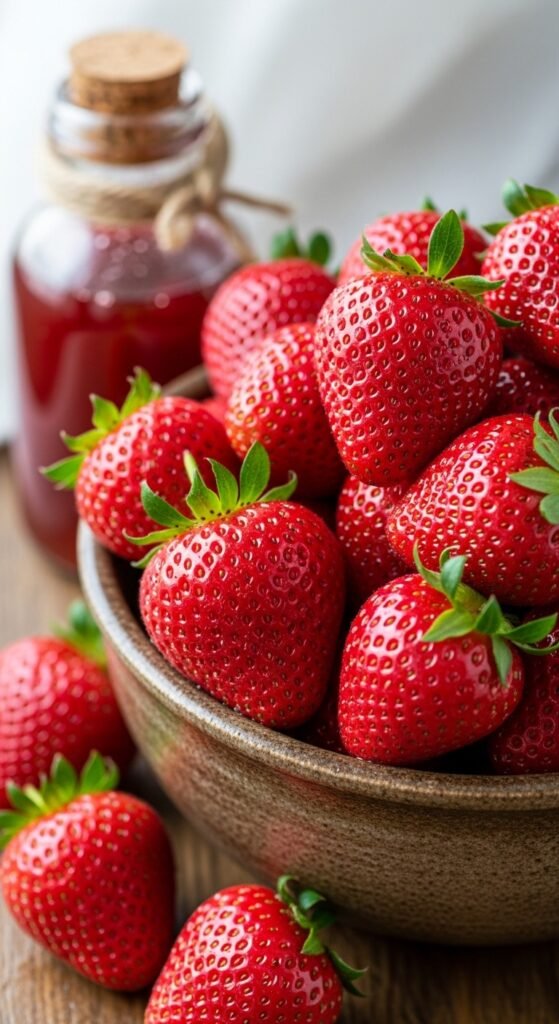
For the best homemade strawberry syrup, you want strawberries that are ripe, fragrant, and deeply red. However – and this is important – they don’t need to be perfect. Unlike eating strawberries fresh, where every berry needs to be pristine, syrup is incredibly forgiving. Those slightly bruised berries? Perfect. The ones that are a day or two past their prime? Even better, as they’re often sweeter and more flavorful. The slightly mushy ones you were about to throw away? They’re ideal candidates.
How many strawberries do you need? For a standard batch that yields about two cups of homemade strawberry syrup, start with two pounds of fresh strawberries. If you’re using frozen strawberries, the same weight applies. In fact, frozen berries often work beautifully because they’ve been picked at peak ripeness and flash-frozen, locking in all that summer flavor.
Sweeteners: Finding Your Perfect Balance
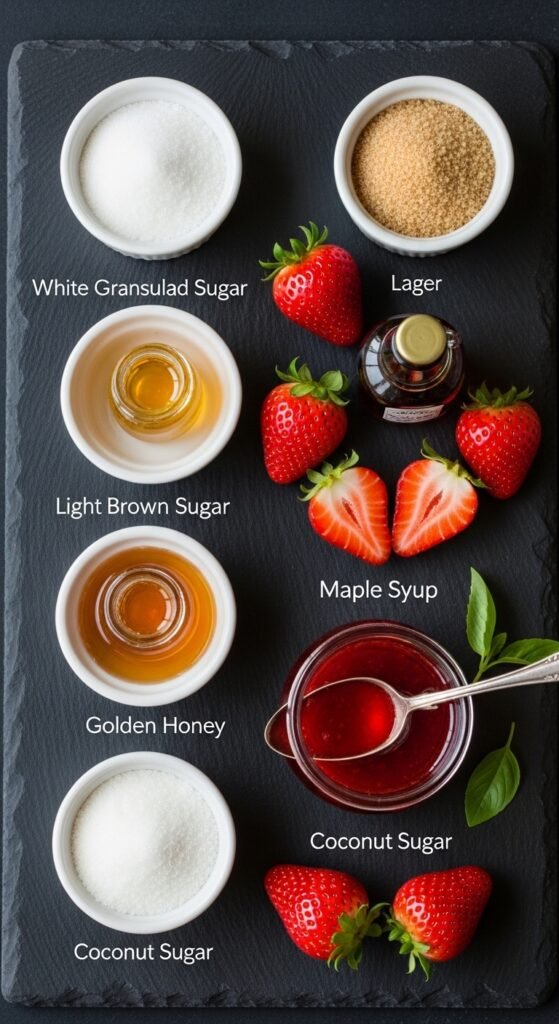
White granulated sugar is the traditional choice for homemade strawberry syrup, and for good reason. It dissolves cleanly, doesn’t introduce competing flavors, and creates that beautiful, clear syrup consistency we all love. However, don’t feel limited. Here are your options:
- White Sugar: The standard. Use one cup of sugar for every pound of strawberries for a traditionally sweet syrup.
- Brown Sugar: Adds a subtle molasses note and deeper color. Fantastic for syrup destined for oatmeal or baked goods.
- Honey: Creates a more complex, floral syrup. Reduce other liquids slightly since honey adds moisture.
- Maple Syrup: Yes, you can make strawberry-maple syrup, and it’s incredible on pancakes.
- Sugar Substitutes: Monk fruit, erythritol, or stevia work well for sugar-free versions, though the texture may be slightly different.
The Secret Weapons: Lemon and Vanilla
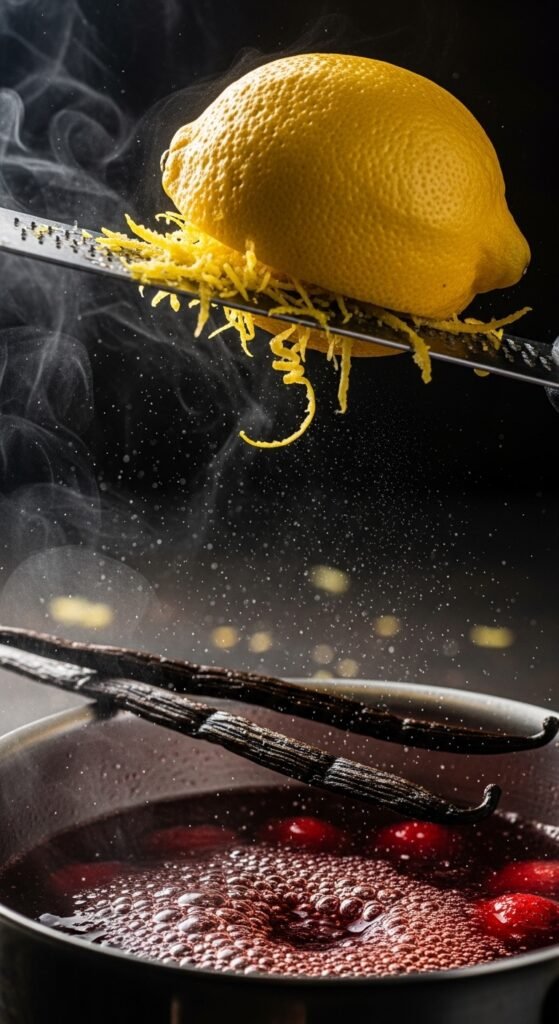
Never underestimate the power of acid and aromatics. A tablespoon of fresh lemon juice does two crucial things in homemade strawberry syrup. First, it brightens the flavor, making the strawberries taste more like themselves. Second – and this is the science part – lemon juice helps preserve the syrup’s vibrant red color. Without it, your syrup might turn brownish or muddy-looking.
Similarly, a teaspoon of pure vanilla extract (not imitation, please) adds depth and warmth that makes your syrup taste infinitely more complex. Some people also add a cinnamon stick, a few black peppercorns for an unexpected kick, or even a splash of balsamic vinegar for grown-up sophistication.
Step-by-Step Guide to Making Homemade Strawberry Syrup
Alright, friends, this is what you came for. Put on your favorite playlist, pour yourself something refreshing, and let’s make some magic together.
Step 1: Prepare Your Strawberries
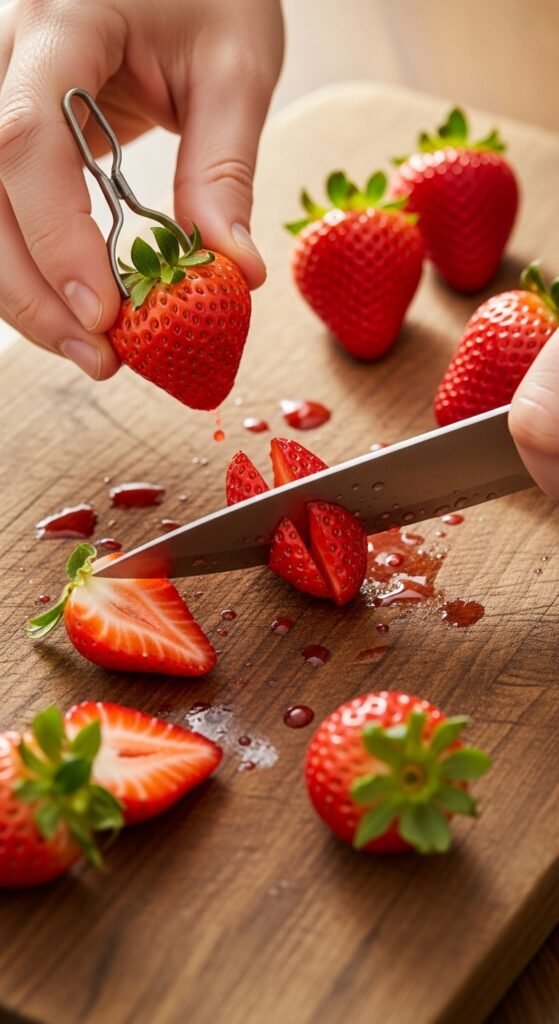
Wash your strawberries thoroughly under cool running water. Here’s a pro tip: don’t remove the green tops until after washing, because once you remove the stems, water can seep into the berries and dilute their flavor. After washing, pat them dry with a clean kitchen towel.
Now, remove the green tops and any soft or bruised spots. You don’t need to be meticulous about cutting them into uniform pieces – a rough chop is perfectly fine since everything will cook down anyway. I usually just slice each berry in half or quarters, depending on size. For two pounds of strawberries, this takes about five minutes.
Step 2: The Maceration Magic
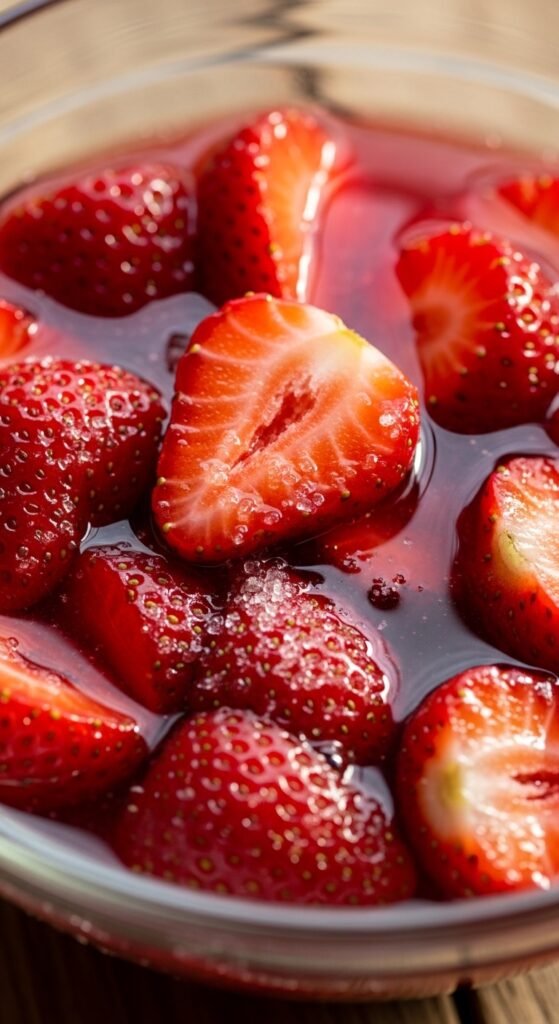
Here’s where homemade strawberry syrup starts to get really exciting. Place your chopped strawberries in a large, non-reactive bowl (glass or stainless steel – avoid aluminum, which can react with the acid). Add your sugar and the lemon juice, then stir everything together until the strawberries are well-coated.
Cover the bowl and let it sit at room temperature for at least an hour, though two to three hours is even better. If you have the patience, you can even refrigerate it overnight. What’s happening during this time is called maceration – the sugar is drawing out the strawberries’ natural juices through osmosis. You’ll notice the berries softening and a beautiful red liquid pooling at the bottom of the bowl. This liquid is pure strawberry essence, and it’s the foundation of your syrup.
I remember the first time I tried this method – I was skeptical. Why wait an extra hour when I could just throw everything in a pot and start cooking? But trust me on this. The maceration step is what separates good homemade strawberry syrup from extraordinary syrup. It intensifies the flavor in a way that simply cooking cannot achieve.
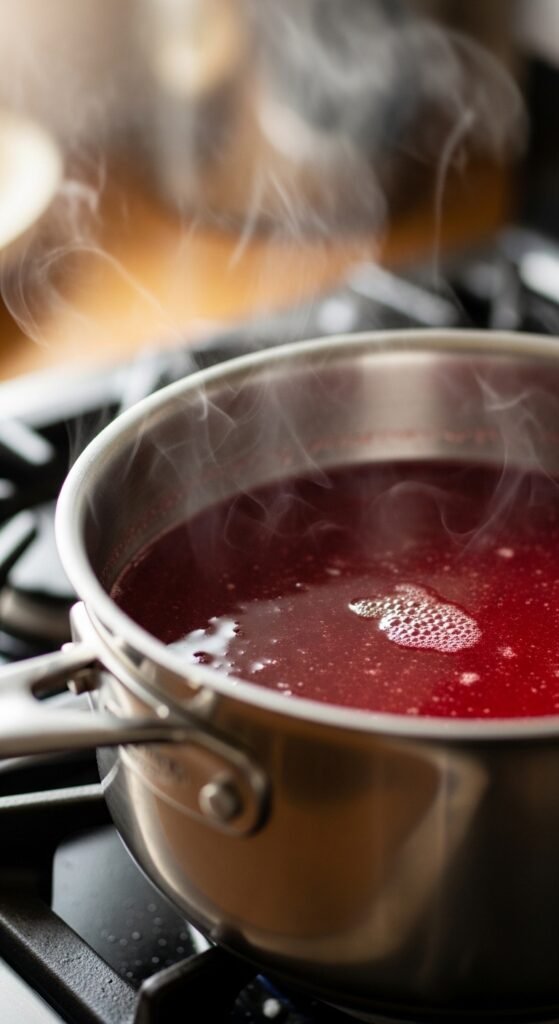
Step 3: Cooking the Syrup
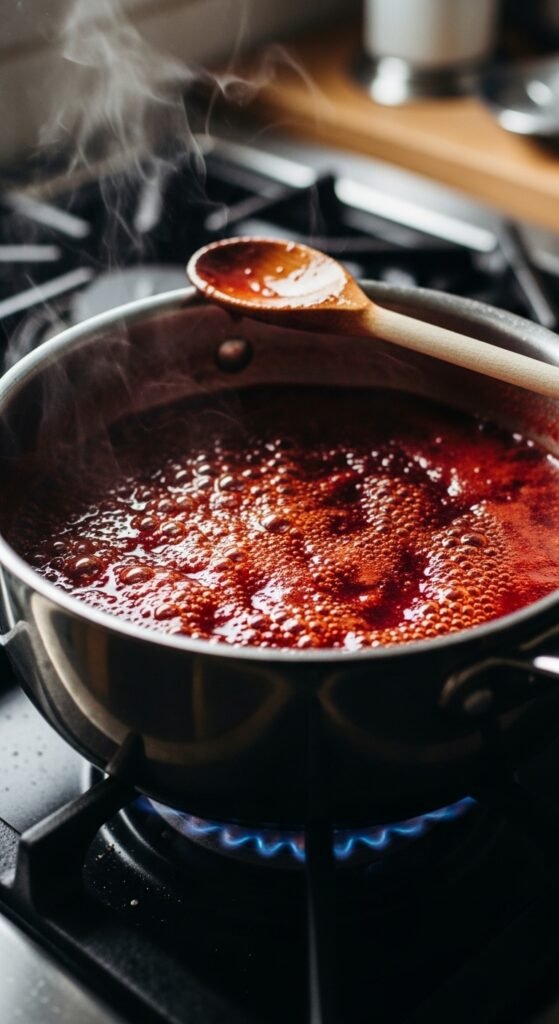
Transfer the macerated strawberry mixture to a large, heavy-bottomed pot. I recommend a Dutch oven or a large saucepan – something with good heat distribution to prevent scorching. Add your water (about half a cup for every pound of strawberries) and any additional flavorings like a vanilla bean split lengthwise or a cinnamon stick.
Turn the heat to medium and bring the mixture to a gentle simmer. Don’t crank the heat to high and walk away – patience is your friend here. You want to see small bubbles breaking the surface, not a violent, splattering boil. Stir occasionally to prevent the sugar from sticking to the bottom and burning.
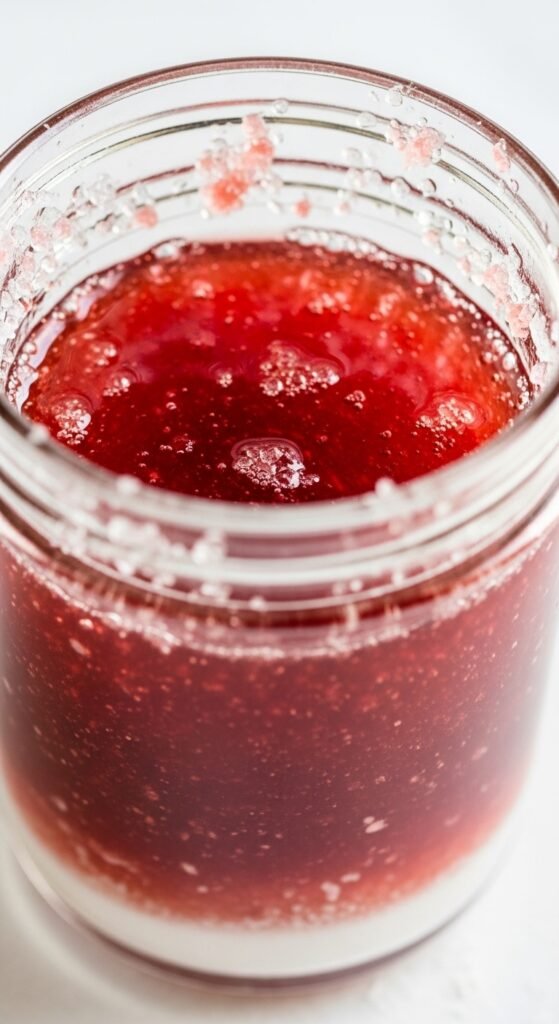
Let the mixture simmer for about 15 to 20 minutes. During this time, the strawberries will break down completely, releasing all their remaining juices and color. Your kitchen will smell absolutely incredible – like a strawberry patch on a warm summer morning. The liquid will reduce slightly and thicken, but don’t worry if it still seems thin at this point. It will thicken more as it cools.
Step 4: The Straining Decision
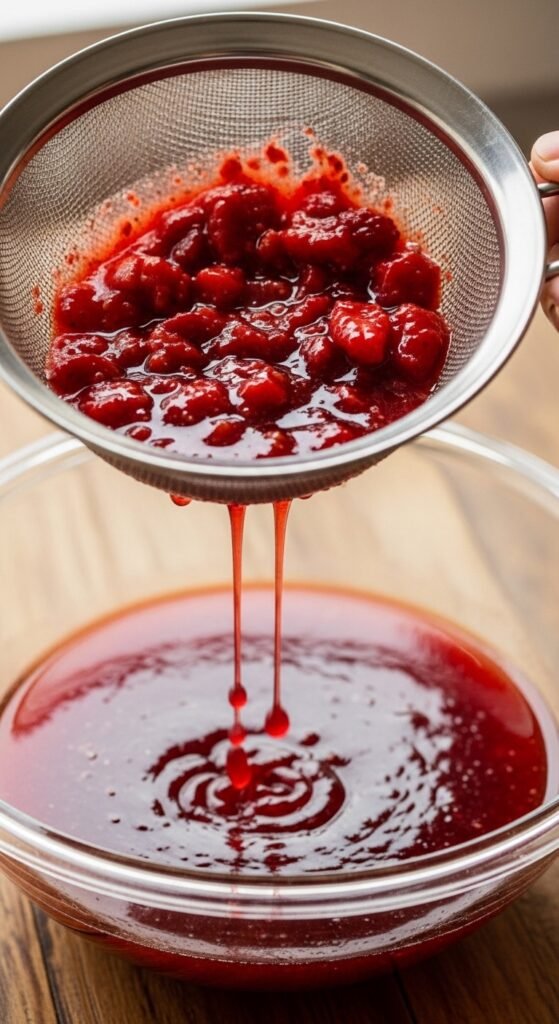
Here’s where you need to make a choice about your homemade strawberry syrup. Do you want a clear, smooth syrup, or do you prefer a chunky, rustic version?
For clear syrup: Place a fine-mesh strainer over a large bowl or another pot. Line the strainer with several layers of cheesecloth for the clearest possible result. Pour the cooked strawberry mixture through the strainer. Use a spoon or spatula to press gently on the solids to extract every last drop of liquid, but don’t press too hard – aggressive pressing can push fine sediment through, making your syrup cloudy.
Let the mixture drain for at least 30 minutes, or even an hour if you have the time. Resist the urge to squeeze the cheesecloth – that’s how you get cloudy syrup. The solids left behind (mostly seeds and pulp) can be discarded or, better yet, spread on toast or mixed into yogurt for a delicious treat.
For rustic syrup: Skip the straining entirely, or simply remove any large chunks with a slotted spoon. You can also use an immersion blender to puree everything smooth, creating a thicker, almost sauce-like consistency. This version is fantastic for topping ice cream or swirling into hot chocolate.
Step 5: Return to the Pot
Once you’ve strained your syrup, pour the liquid back into a clean pot. Bring it back to a gentle simmer. This is your opportunity to adjust the consistency. For a thinner syrup that pours easily from a bottle, simmer for just five more minutes. For a thicker, more luxurious syrup, continue simmering for another 10 to 15 minutes. Remember that the syrup will thicken significantly as it cools, so always err on the side of slightly thinner than you want.
This is also the time to add any heat-sensitive flavorings. Stir in your vanilla extract now, along with any other extracts or spices you’re using. Remove any whole spices like cinnamon sticks or star anise.
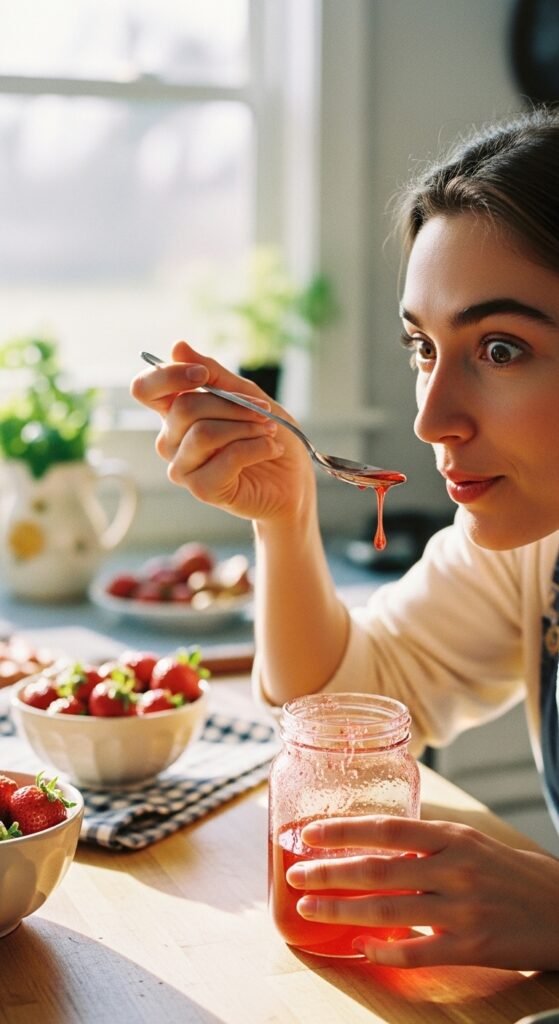
Step 6: The All-Important Taste Test
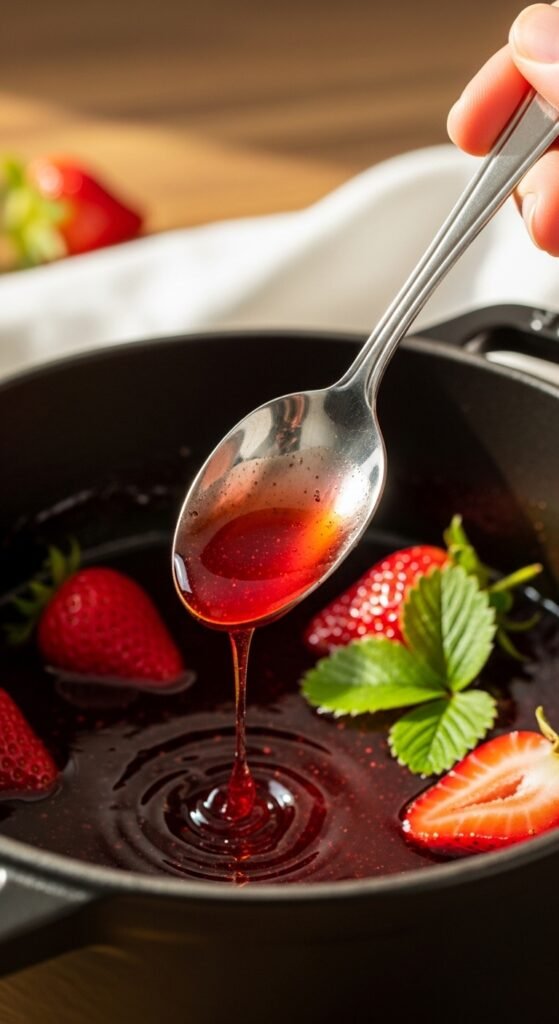
Before you bottle your homemade strawberry syrup, taste it. I mean really taste it. Dip a clean spoon in, let it cool slightly, and experience what you’ve created. Does it need more sugar? Stir in a little more, a tablespoon at a time, until it tastes right to you. Does it need more brightness? Add another squeeze of lemon juice. Does it need more strawberry intensity? Simmer it a little longer to concentrate the flavor further.
This is your syrup, and you’re the boss. One of the greatest joys of making homemade strawberry syrup is that you can customize it exactly to your preferences. I personally like mine on the tarter side, with a double dose of vanilla. My husband prefers it sweeter and thicker, almost like a fruit topping. So we make two different batches – it’s really that simple.
Step 7: Bottling and Storage
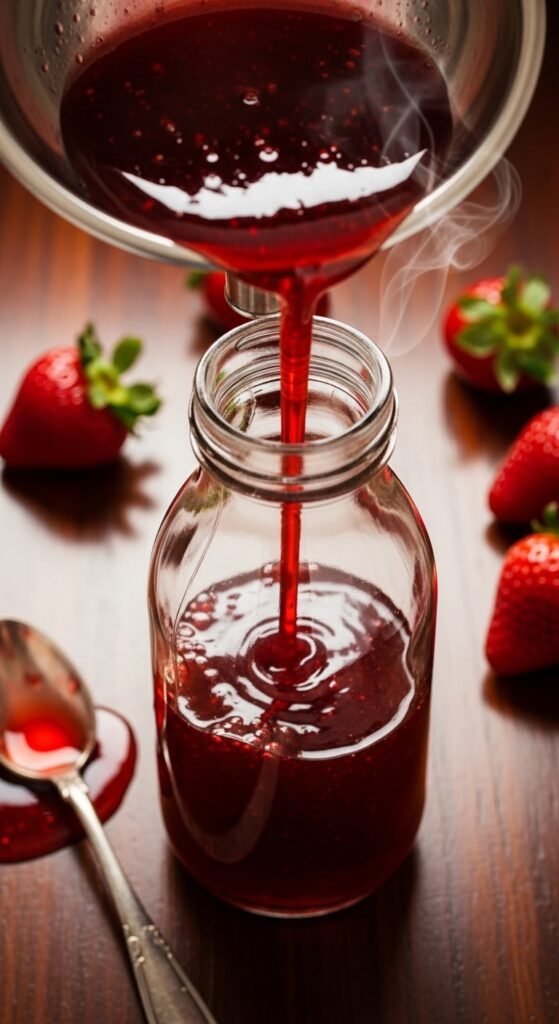
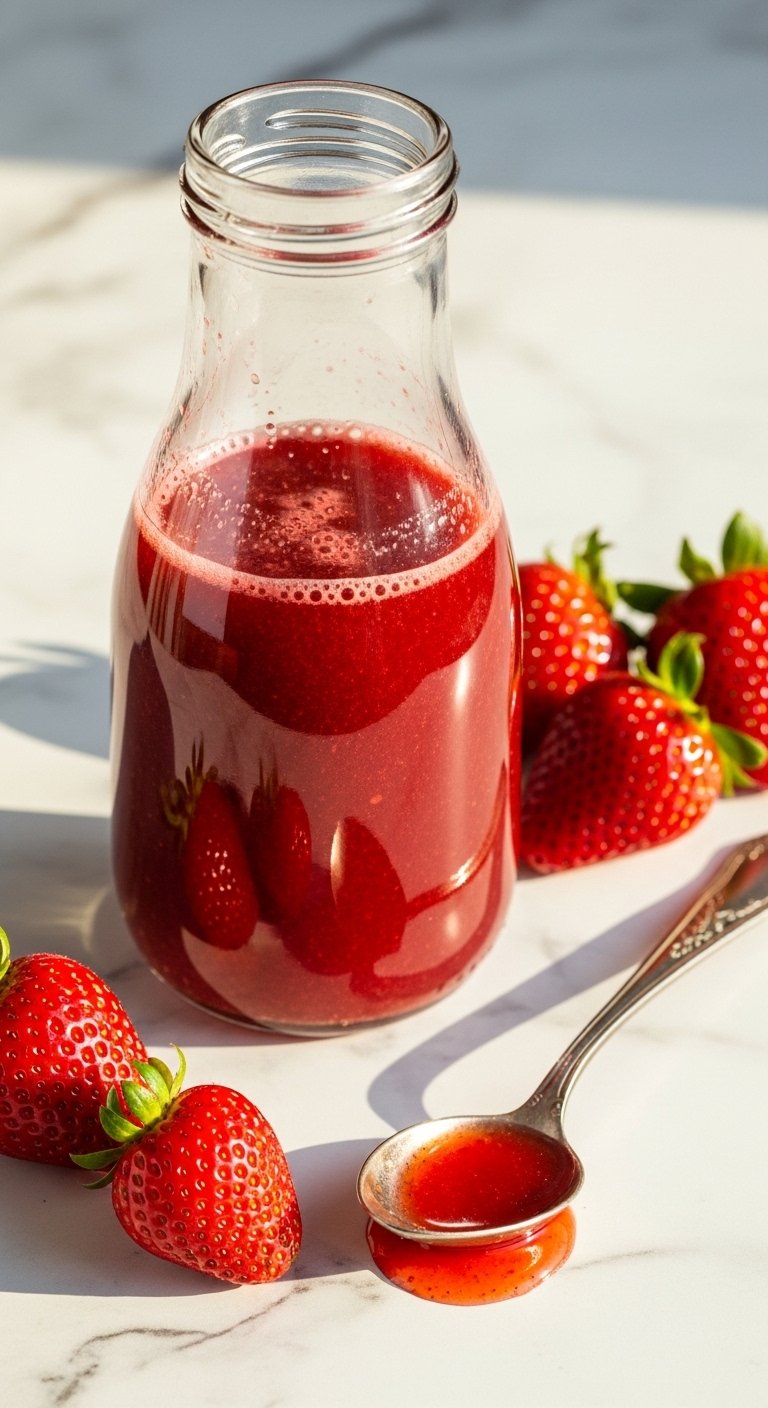
Now for the final step. While your syrup is still hot, carefully pour it into clean glass jars or bottles. I prefer using glass bottles with tight-fitting lids – you can find these at kitchen supply stores or online for very reasonable prices. If you plan to give your homemade strawberry syrup as gifts, swing-top bottles look particularly charming.
Leave about half an inch of headspace at the top of each bottle to allow for expansion. Let the bottles cool completely at room temperature before moving them to the refrigerator. Don’t put hot bottles directly into the fridge – the thermal shock could crack the glass, and the sudden temperature change can affect the syrup’s consistency.
How Long Does Homemade Strawberry Syrup Last?
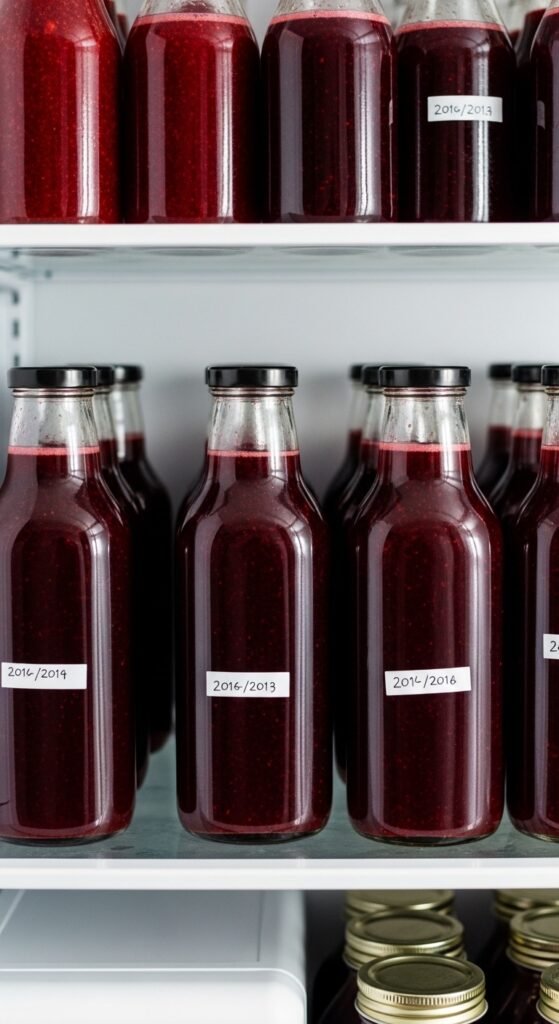
Here’s some good news. Properly made and stored homemade strawberry syrup will keep in the refrigerator for up to three weeks. However, I should warn you – it rarely lasts that long in my house. We typically go through a batch within a week because we find ourselves putting it on everything.
If you want to extend the shelf life, you have two excellent options. First, you can freeze your syrup. Pour it into ice cube trays, freeze solid, then transfer the cubes to a freezer bag. These strawberry syrup cubes are perfect for dropping into cocktails, lemonade, or sparkling water. They’ll keep for up to six months.
Second, you can properly can your homemade strawberry syrup for shelf-stable storage. This requires sterilizing your jars, processing them in a water bath canner for 10 minutes, and ensuring you’ve achieved a proper seal. Canned syrup will last for up to a year in your pantry. However, for most home cooks, refrigerator storage is perfectly adequate.
Creative Ways to Use Your Homemade Strawberry Syrup
This is the fun part. Once you have a bottle of homemade strawberry syrup in your refrigerator, you’ll start seeing opportunities to use it everywhere. Let me share some of my favorite applications.
Breakfast Brilliance
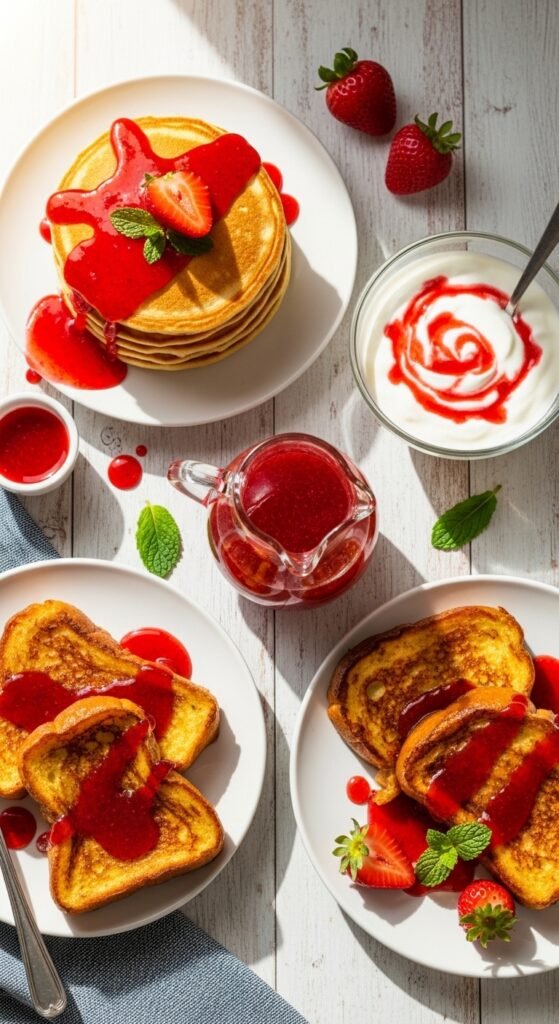
Obviously, homemade strawberry syrup is spectacular on pancakes, waffles, and French toast. But don’t stop there. Drizzle it over oatmeal, cream of wheat, or quinoa breakfast bowls. Swirl it into plain Greek yogurt with some granola. Stir it into your morning smoothie. Soak your chia seeds in it overnight for strawberry chia pudding. The possibilities are genuinely endless.
Dessert Dreams
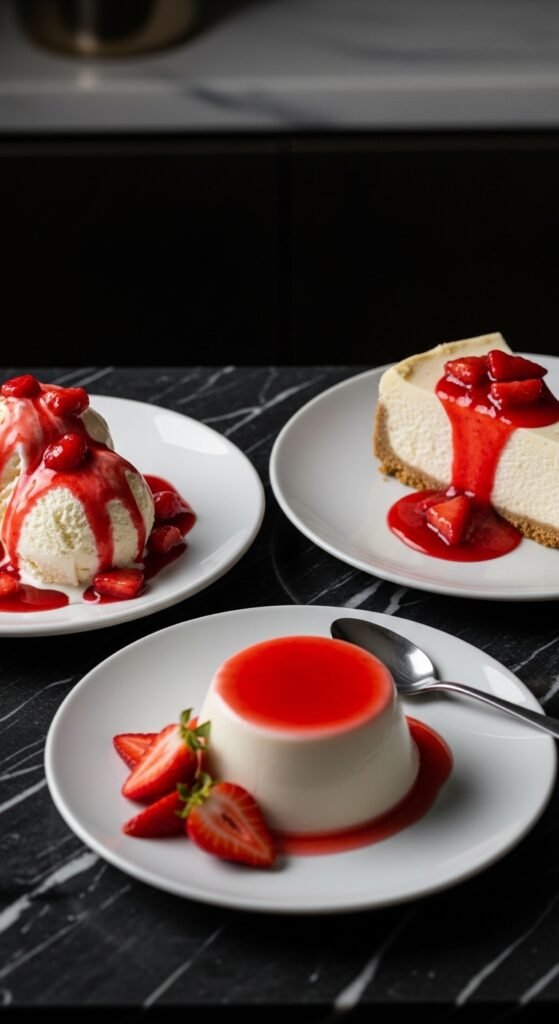
Spoon warm homemade strawberry syrup over vanilla ice cream, and you’ll understand why this is my family’s go-to dessert. It’s also incredible on cheesecake, pound cake, angel food cake, or simple shortcakes. Drizzle it over brownies for a strawberry-chocolate combination that will make you weep with joy. Use it as a filling for crepes or as a topping for panna cotta.
Drink Creations
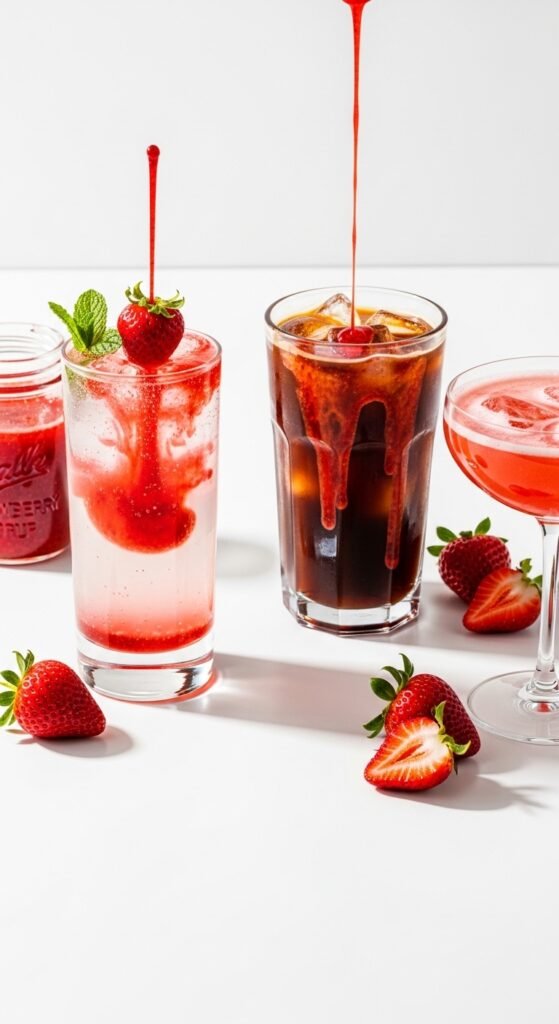
Here’s where homemade strawberry syrup really shines. Add it to lemonade for strawberry lemonade. Stir it into iced tea for strawberry iced tea. Mix it with sparkling water and a squeeze of lime for a homemade strawberry soda that puts commercial versions to shame. Use it in cocktails – a strawberry margarita, a strawberry mojito, or a simple vodka soda with strawberry syrup is absolute perfection.
For the kids (or the designated drivers), make a strawberry milkshake by blending vanilla ice cream, milk, and a generous pour of your syrup. Or warm some milk, add the syrup, and top with whipped cream for a strawberry steamier that will make you forget hot chocolate exists.
Savory Surprises
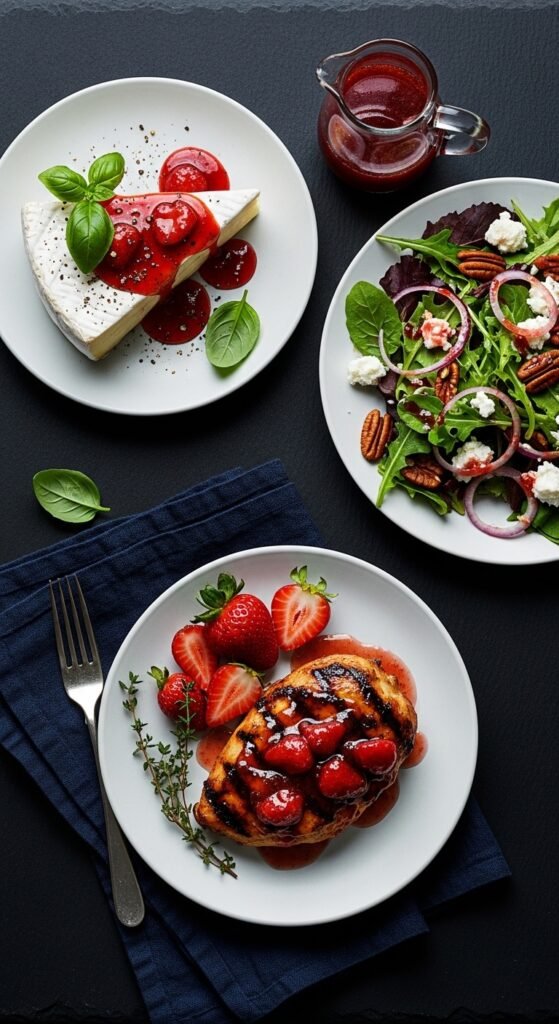
Don’t limit your homemade strawberry syrup to sweet applications. It’s fantastic as a glaze for grilled chicken or pork. Brush it on during the last few minutes of cooking for a beautiful, caramelized finish. Mix it with balsamic vinegar and olive oil for a stunning salad dressing. Drizzle it over a cheese plate – it pairs beautifully with brie, goat cheese, or aged cheddar.
Troubleshooting Common Problems with Homemade Strawberry Syrup
Even with a simple recipe, things can sometimes go wrong. Let me address the most common issues people encounter when making homemade strawberry syrup.
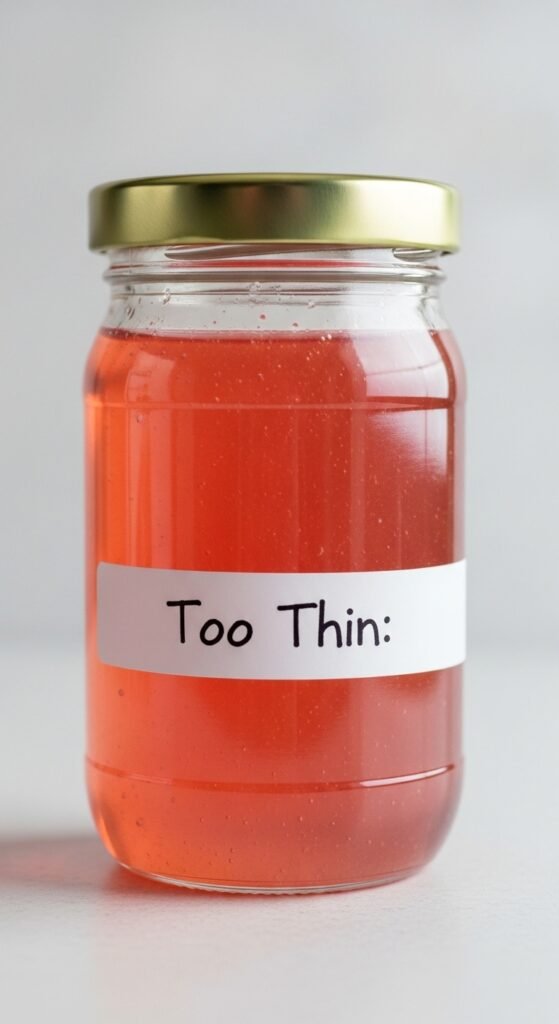
My Syrup Is Too Thin
This is the most common complaint, and it has an easy fix. Simply return your syrup to the pot and simmer it longer. The water needs to evaporate to concentrate the sugars and create thickness. Be patient – this can take another 10 to 20 minutes. Alternatively, you can add a cornstarch slurry (one tablespoon cornstarch mixed with two tablespoons cold water) and simmer for two minutes to thicken instantly.
My Syrup Crystallized
Sugar crystallization happens when sugar molecules re-form into crystals. This usually occurs if you stirred the syrup too much during cooking or if you had undissolved sugar crystals on the sides of your pot. To prevent this in the future, brush down the sides of your pot with a wet pastry brush during cooking. If your syrup has already crystallized, don’t panic. Gently reheat it with a tablespoon of lemon juice or corn syrup, which will help dissolve the crystals.
My Syrup Tastes Burnt
Unfortunately, there’s no fixing burnt syrup. The bitter, acrid flavor of scorched sugar will ruin the entire batch. Prevention is key here. Always use a heavy-bottomed pot, keep your heat at a gentle simmer rather than a rolling boil, and stir frequently, especially as the syrup thickens. If you smell even a hint of burning, remove the pot from the heat immediately and transfer the syrup to a clean container – sometimes you can salvage most of it if you act quickly.
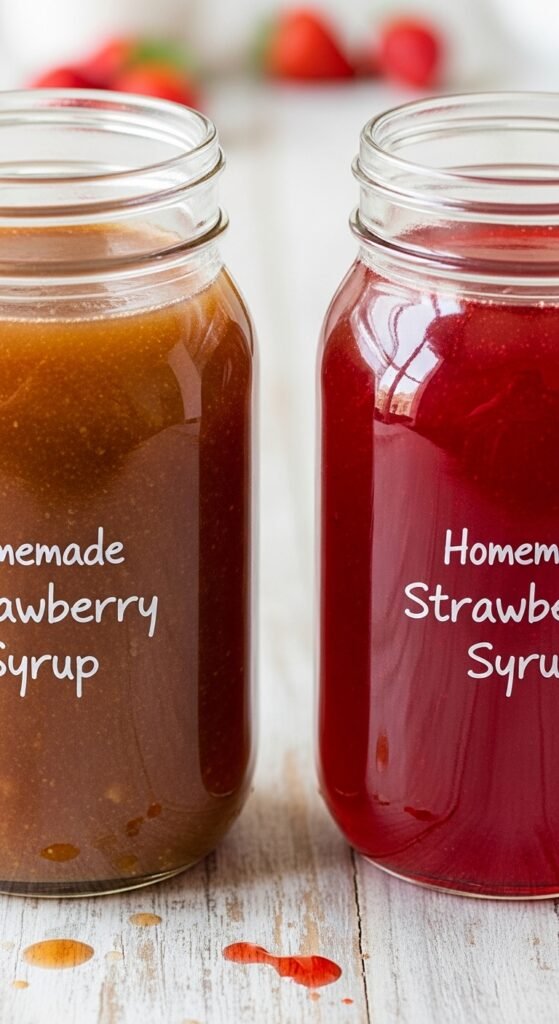
My Syrup Turned Brown or Muddy-Looking
This usually happens for one of two reasons. Either you didn’t add enough lemon juice (remember, acid preserves the red color), or you overheated your syrup. Strawberries contain anthocyanins – the compounds responsible for their red color – and these break down at high temperatures. Keep your simmer gentle, and always include that tablespoon of lemon juice.
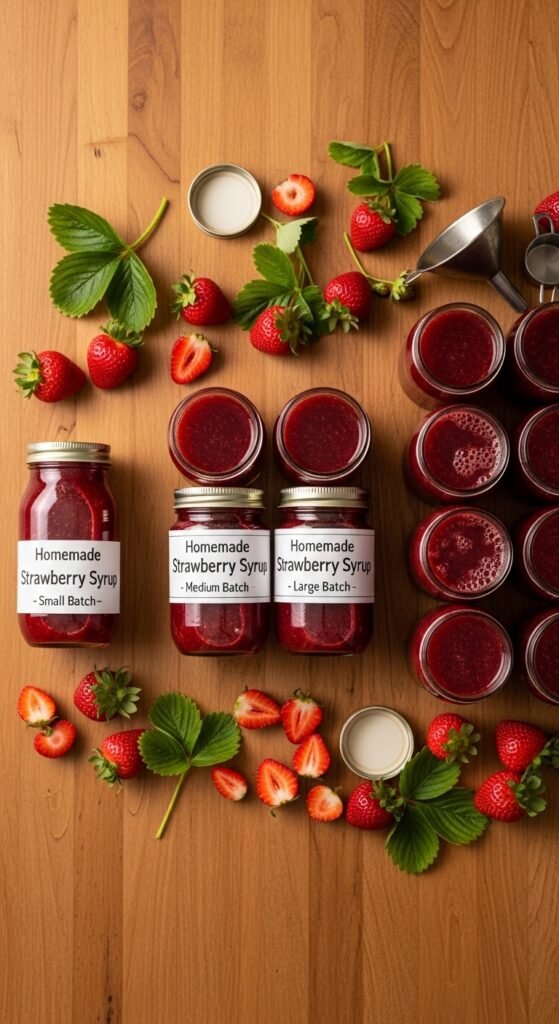
Scaling Your Homemade Strawberry Syrup Production
Once you’ve mastered the basic recipe, you might find yourself wanting to make larger batches. Perhaps you have an abundance of strawberries from your garden, or you’ve stumbled upon an incredible sale at the farmer’s market. Good news – this recipe scales beautifully.
For a larger batch, simply multiply all ingredients proportionally. However, keep a few things in mind. Larger batches take longer to come to a simmer and longer to reduce. You’ll also need a very large pot – don’t fill it more than two-thirds full, as the mixture can foam up and boil over. Stir more frequently with larger batches to prevent scorching on the bottom.
I once made a batch using twenty pounds of strawberries from a local farm. It took most of a Saturday, but I ended up with twelve bottles of homemade strawberry syrup – enough for gifts, for our family, and for the freezer. That syrup lasted us through the entire winter, and every time we opened a bottle, it was like tasting summer all over again.
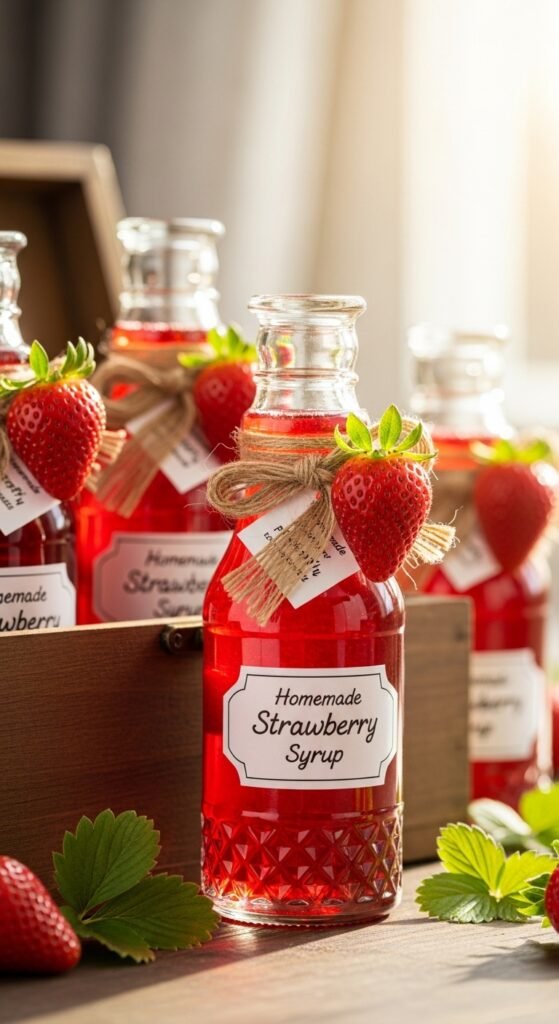
Gift-Giving with Homemade Strawberry Syrup
Let me tell you, homemade strawberry syrup makes an absolutely spectacular gift. It’s personal, it’s useful, and it’s something most people would never think to make for themselves. I’ve given bottles as housewarming gifts, holiday presents, hostess gifts, and just-because presents, and they’ve always been received with genuine delight.
For gift-giving, presentation matters. Use attractive glass bottles – the swing-top kind with rubber gaskets look especially charming. Create custom labels using adhesive address labels or printable sticker paper. Include a tag with serving suggestions and storage instructions. Tie a ribbon around the neck of the bottle, perhaps with a small wooden spoon attached.
Package multiple small bottles together as a gift set. Pair a bottle of homemade strawberry syrup with a box of pancake mix, a small bottle of pure maple syrup, and a whisk for a complete breakfast gift basket. Or pair it with a bottle of vodka and some fancy cocktail glasses for the mixology enthusiast in your life.
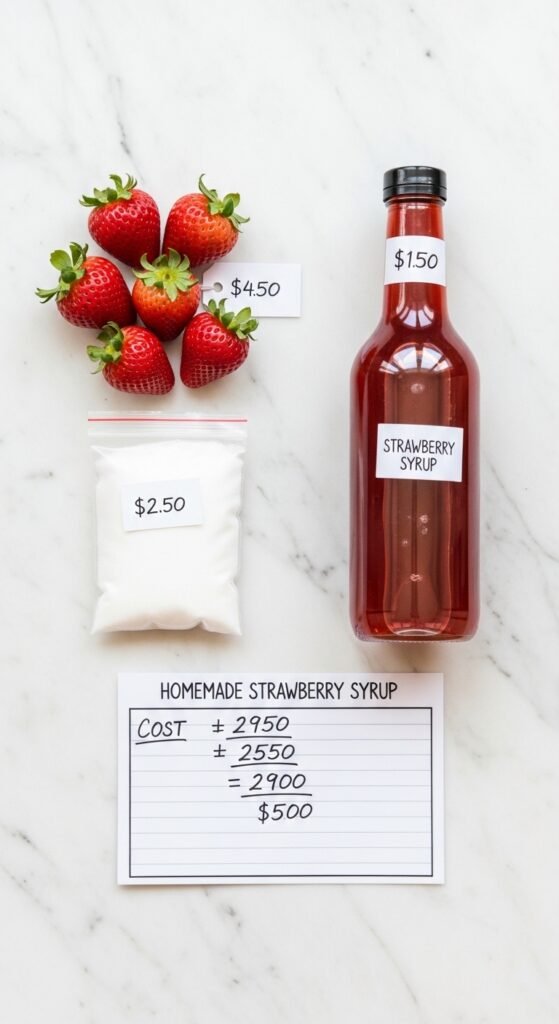
The Economics of Homemade Strawberry Syrup
Let’s talk money, because I know that matters. A decent quality store-bought strawberry syrup typically costs between $4 and $8 for a 12-ounce bottle. And remember – those often contain little to no actual strawberries. A premium organic version might run you $10 or more.
Now, let’s calculate the cost of homemade strawberry syrup. Two pounds of strawberries – if you buy them at peak season from a farmer’s market or grocery store sale – might cost you $4 to $6. A cup of sugar is about 50 cents. Lemon and vanilla add maybe another 50 cents. So for roughly $5 to $7, you’ll produce about 20 ounces of syrup (two and a half standard bottles’ worth). That’s $2 to $2.80 per bottle – significantly cheaper than store-bought, and infinitely better quality.
Of course, if you grow your own strawberries or pick them at a you-pick farm, your costs drop even further. Last year, my family picked fifteen pounds of strawberries at a local farm for $20. After eating our fill fresh, we made syrup, jam, and froze the rest. That’s the kind of value you just can’t beat.
Frequently Asked Questions About Homemade Strawberry Syrup
Can I use frozen strawberries?
Absolutely. In fact, frozen strawberries are often preferable because they’ve been frozen at peak ripeness. There’s no need to thaw them first – just add them to your pot with the sugar and lemon juice. They’ll release their liquid as they heat up.
Can I make this sugar-free?
Yes, with some adjustments. Use a sugar substitute like monk fruit, erythritol, or allulose. Keep in mind that sugar-free versions may not thicken as well and might have a slightly different texture. You can add a small amount of xanthan gum or glucomannan to improve thickness.
Why did my syrup mold?
If your homemade strawberry syrup developed mold, it means either your jars weren’t properly sterilized, you introduced contamination (like a dirty spoon), or you stored it for too long. Always use clean utensils, store in the refrigerator, and use within three weeks.
Can I reuse the leftover strawberry solids?
Yes! The strained solids are still full of flavor and fiber. Spread them on toast, stir them into muffin batter, mix them into oatmeal, or fold them into cream cheese for a delicious spread. Don’t throw away this wonderful byproduct.
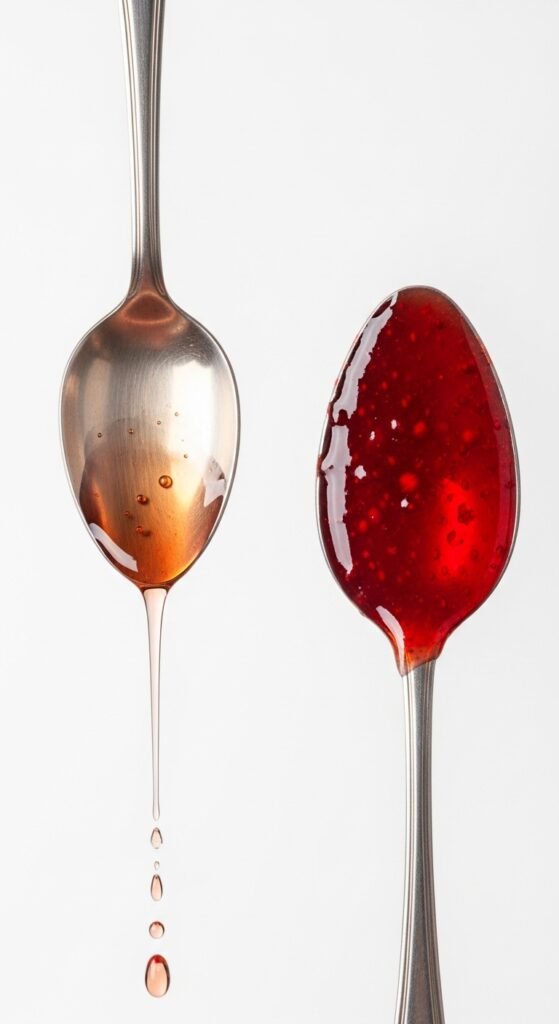
How do I know when my syrup is done?
The spoon test works well. Dip a cold metal spoon into your syrup, then hold it up. If the syrup runs off in a thin, steady stream, it’s thin. If it clings to the spoon and runs off slowly in thick drops, it’s ready. You can also use a candy thermometer – your syrup is done when it reaches 220°F (104°C) at sea level.
Final Thoughts and Encouragement
As we wrap up this comprehensive guide to homemade strawberry syrup, I want to leave you with one final thought. Cooking at home – whether it’s syrup, bread, soup, or anything else – is an act of love. It’s a statement that you care about what goes into your body and the bodies of the people you feed. It’s a connection to traditions that have nourished families for generations.
The first time you make homemade strawberry syrup, you might feel a little nervous. What if it doesn’t turn out right? What if you waste expensive strawberries? I promise you – even your “failed” batches will taste better than anything from a bottle. And every time you make it, you’ll get better. You’ll learn the little tricks that work for your kitchen, your stove, your taste preferences.
So go ahead. Buy those strawberries. Clear some space on your counter. Put on some good music. And make some homemade strawberry syrup. Your pancakes will thank you. Your cocktails will thank you. Your family will thank you. And somewhere, your grandmother – or whoever taught you that good food is worth making from scratch – will be smiling.
Now go make something delicious. You’ve got this.