Let me tell you something embarrassing. For the first three years of my sewing journey, I worked out of a cramped corner of my bedroom. My fabric lived in three different trash bags. My threads were a tangled mess in an old shoebox. And my scissors? I lost four pairs in six months. I actually cried once when I couldn’t find my seam ripper because I had spent forty minutes looking for it.
Then one Saturday, my best friend came over, looked at my chaos, and said something that changed everything: “Girl, your sewing space is fighting against you instead of working for you.”
She was right. So that afternoon, we completely rearranged everything. And let me tell you, the difference was night and day. Suddenly, I wasn’t fighting my supplies anymore. I was actually enjoying the process again.
That’s why I’ve put together these 19 sewing room ideas that will completely transform how you approach your craft. Whether you have an entire basement or just a tiny nook in your living room, these strategies will help you create a sewing space that actually works for you.
By the end of this guide, you’ll know exactly how to set up your creative workspace for maximum efficiency, joy, and productivity. Plus, I’ll show you which products are worth your hard-earned money—and which ones you can absolutely skip.
Ready? Let’s dive in.
Why Your Sewing Room Setup Matters More Than You Think

Before we get into the specific 19 sewing room ideas, let me share a quick story. My aunt has been quilting for over thirty years. She has a beautiful dedicated sewing room that’s about twelve feet by fourteen feet. But for years, she kept her ironing board in the hallway, her cutting mat under the bed, and her sewing machine on a wobbly folding table.
She complained constantly about back pain. She dreaded starting new projects because just getting everything set up took twenty minutes. She actually stopped sewing for almost six months out of sheer frustration.
Then one Christmas, her husband surprised her with a proper sewing table and some organization systems. Within a week, she had finished three quilts she had been avoiding for over a year. Her back pain? Gone. Her frustration? Vanished.
The point is simple: your environment directly impacts your creativity, your physical health, and your enjoyment of sewing. When your craft room organization works well, you work well. When it doesn’t, everything becomes a struggle.
So let’s fix that.
Idea #1: Start With a Serious Declutter (The KonMari Method for Sewing)
Here’s the truth nobody wants to admit: most of us have way too much stuff we never use. Before you buy a single storage container or rearrange a single shelf, you need to purge.
Step-by-step guide to decluttering your sewing space:
- Pull everything out of every drawer, cabinet, and container. Yes, everything. I mean it. Empty the entire room if you have to.
- Create four piles: Keep, Donate/Sell, Trash, and Maybe. Be ruthless with the Maybe pile. If you haven’t touched it in a year, it probably belongs in Donate.
- Sort by category: Put all fabrics together, all threads together, all patterns together, all tools together.
- Ask the magic question for each item: “Does this spark joy in my sewing life?” If not, why are you keeping it?
I did this two years ago and donated seven garbage bags full of fabric I was never going to use. It felt terrifying at first. But afterward? I felt lighter. I could actually see what I owned. And I stopped buying duplicates of things I already had.
Pro tip: Be especially honest about unfinished projects. If you haven’t touched that half-done dress in eighteen months, either commit to finishing it this week or let it go. Your sewing space deserves better than guilt-inducing clutter.
Idea #2: Invest in a Quality Sewing Table (Your Back Will Thank You)

This is where I see so many sewists make a costly mistake. They spend hundreds of dollars on fancy fabric but sew on a flimsy folding table that wobbles with every stitch.
Let me explain why this matters. When your sewing machine sits on an unstable surface, several bad things happen:
- Your stitch quality suffers because the machine vibrates
- You develop back and neck pain from hunching over
- Your fabric doesn’t feed smoothly
- You get frustrated much faster
What to look for in a sewing table:
First, consider height. Standard desk height (29–30 inches) works for many people, but the ideal height allows your elbows to rest at a 90-degree angle when your hands are on the machine. For most people, that means a slightly lower table, around 26–28 inches.
Second, look for a drop-in mechanism. This allows your sewing machine to sit flush with the table surface, creating a flat sewing bed. This is an absolute game-changer for quilting and working with large projects.
Third, consider storage. Many sewing tables come with built-in drawers, shelves, or cubbies. These are worth their weight in gold for keeping your immediate supplies close at hand.
My recommendation: The Sew Ready brand tables are consistently excellent. The Sew Ready Studio line offers adjustable height options and smooth rolling casters. For a more budget-friendly option, the Arrow Sewing Cabinet series provides solid construction without breaking the bank.
I personally use the Sew Ready Sit-and-Sew table, and I cannot overstate how much it improved my sewing experience. No more wobbling. No more back pain. Just smooth, enjoyable stitching every single time.
Also Read: The 15 Rocking Chair: Your Ultimate Guide to Comfort, Health, and Smart Buying
Idea #3: Create a Cutting Table That Fits Your Body
Cutting fabric is physically demanding. You stand, you lean, you reach, you bend. And if your cutting table is the wrong height, you’re setting yourself up for back pain, shoulder strain, and general misery.
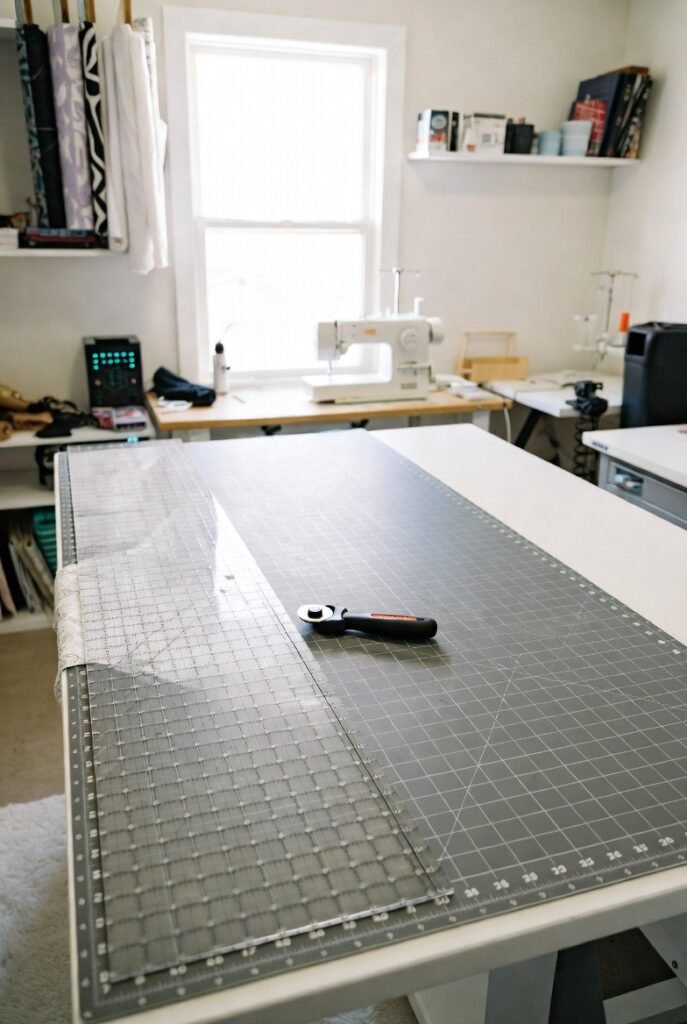
The ideal cutting table height depends on your height. Here’s a simple formula: stand up straight, bend your elbows to 90 degrees, and measure from the floor to your elbows. That’s your ideal cutting height. For most people, that’s between 36 and 40 inches.
Standard kitchen counters are 36 inches, which works well for many. But if you’re taller than 5’7″, you might need something higher.
Three great options for cutting tables:
- Adjustable height tables – These are the gold standard. You can raise them for cutting and lower them for other tasks. Look for crank-adjustable or electric options.
- Riser blocks – If you already have a table you love, you can buy bed risers to lift it up. This is a budget-friendly hack that actually works quite well.
- DIY solution – Buy a hollow core door from a hardware store (about $40) and place it on top of two short bookcases or filing cabinets. Instant giant cutting table for under $100.
Pro tip: Whatever table you choose, make sure it’s at least 36 inches wide and 60 inches long. You need room to spread out fabric without it hanging off the edges and pulling as you cut.
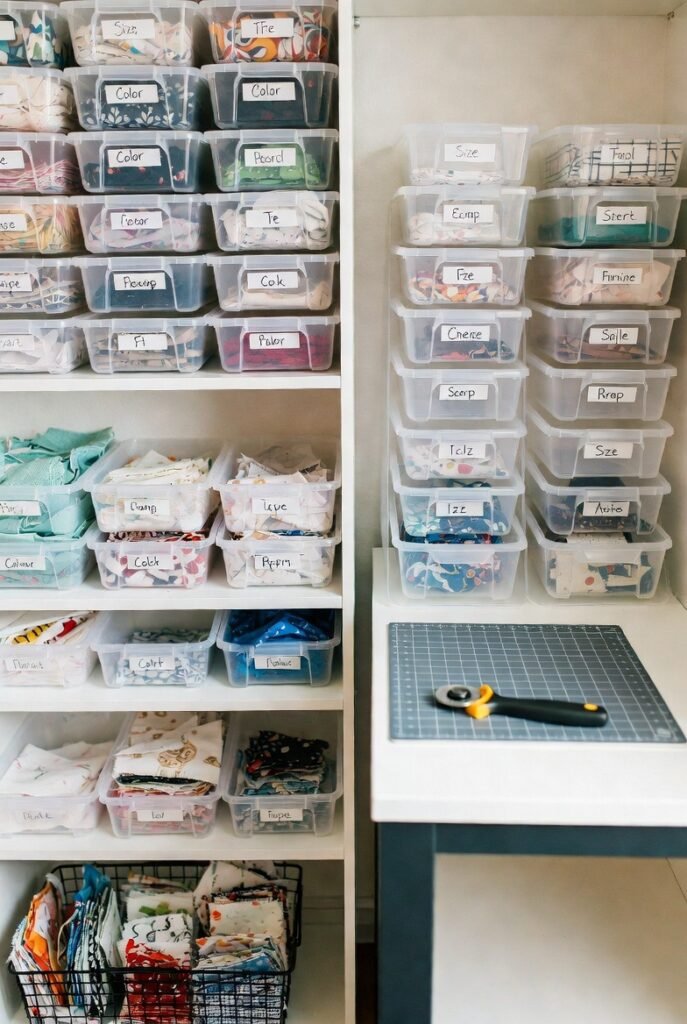
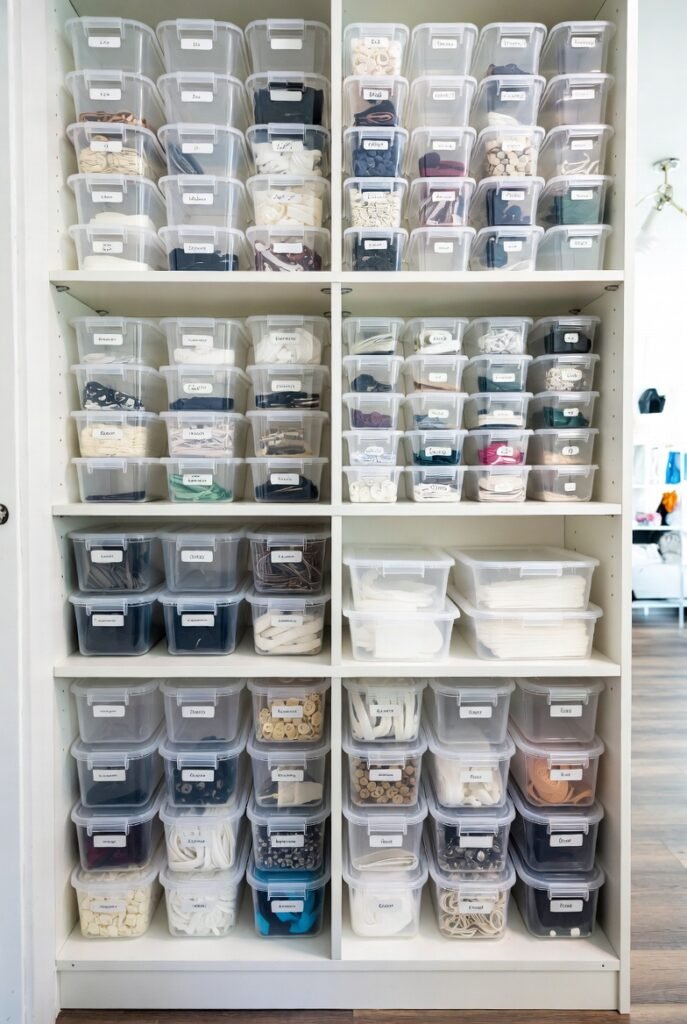
Idea #4: Master Fabric Storage With Clear Visibility
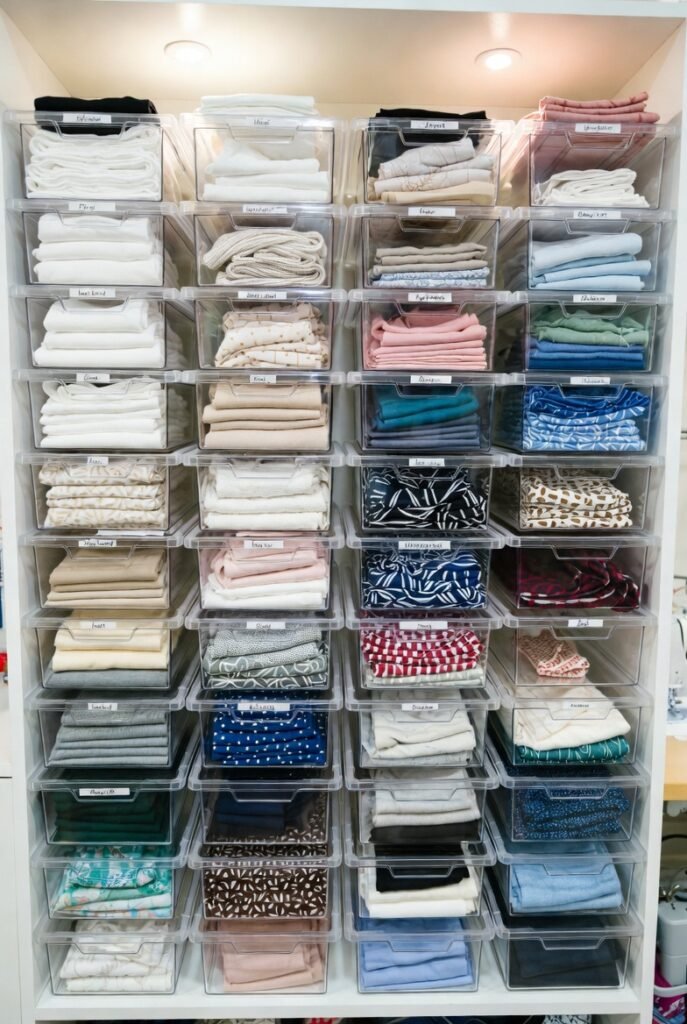
Here’s a mistake I made for years: I stored my fabric folded in deep drawers or stacked in opaque bins. The result? I forgot what I owned. I bought duplicate fabrics. And I wasted hours digging through piles looking for that specific piece I knew I had somewhere.
The solution is clear, visible fabric storage.
Shelving systems with clear bins or baskets allow you to see exactly what you have at a glance. Mini bolt boards (basically cardboard wrapped around fabric) let you store fabric vertically like a real fabric store.
Step-by-step for organizing fabric by type:
- Start with your largest categories: quilting cotton, garment fabrics, knits, wovens, specialty fabrics.
- Within each category, organize by color (ROYGBIV works great).
- For smaller pieces (fat quarters and less), use clear bins labeled by color family.
- For larger pieces, fold them around comic book boards or mini bolts.
My favorite product for fabric storage: The Simple Houseware Clear Stackable Storage Bins are affordable, sturdy, and perfectly sized for fabric. I have twelve of them labeled by color, and I can see every single piece I own without opening a single drawer.
For fabric that’s already on a bolt or large piece, consider a rolling garment rack with hanging fabric organizers. These are brilliant for keeping large cuts wrinkle-free and accessible.
Idea #5: Build a Thread Storage System That Actually Works
Thread is one of those things that seems simple until you have fifty spools in twenty different colors and you can never find the one you need.
The problem with most thread storage: It hides the thread. Drawers, boxes, and opaque containers all force you to dig and search.
Better solutions for thread storage:
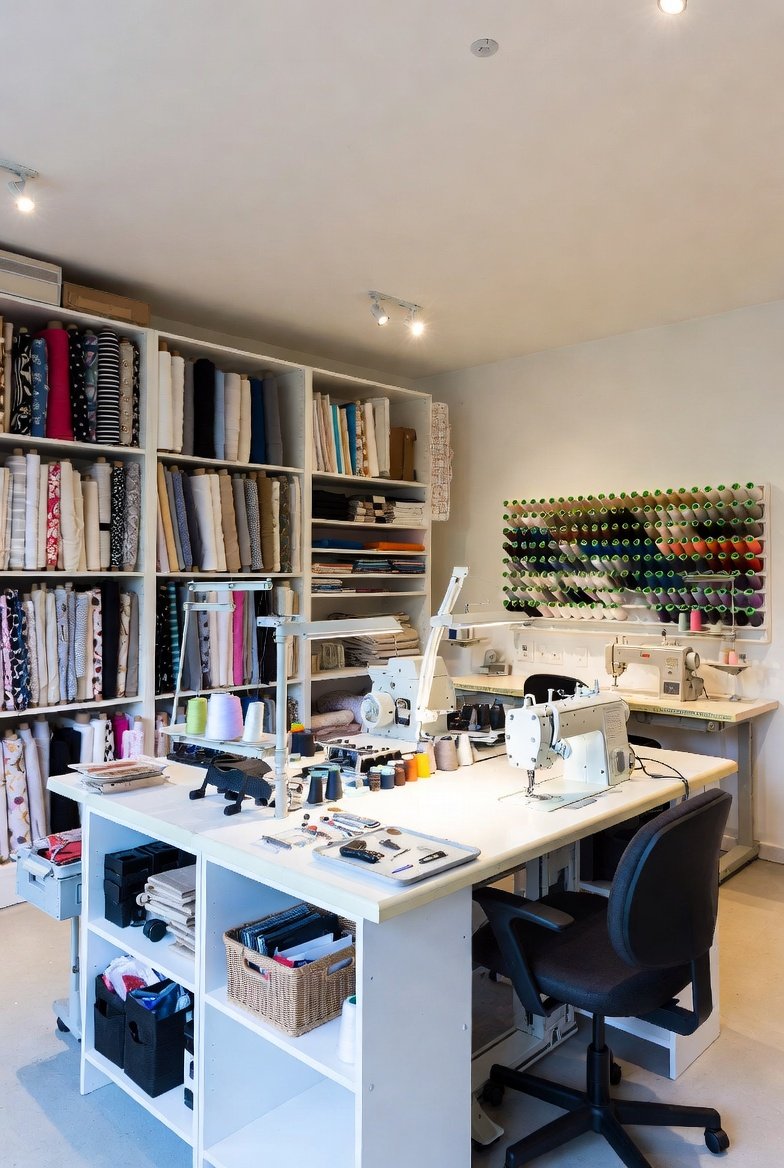
Wall-mounted thread racks are my absolute favorite. You mount a wooden rack on your wall, and it holds dozens of spools on pegs. Every color is visible at a glance. You can see when you’re running low. And honestly, they look beautiful. A wall of colorful thread is like art for your sewing room.
If wall space is limited, consider a rotating thread tower. These spin like a lazy susan and hold 50–100 spools. They take up very little floor space but keep everything accessible.
For travel or small spaces, thread storage boxes with clear lids work well. Just make sure the box has individual pegs or dividers so your threads don’t tangle together.
A word about thread quality: Not all thread is created equal. I learned this the hard way when cheap thread shredded inside my machine and I had to pay $80 for a repair. Stick with quality brands like Gutermann, Coats & Clark, or Aurifil. These threads create less lint, break less often, and keep your machine happier.
Pro tip: Store thread away from direct sunlight. UV rays degrade thread over time, making it brittle and weak. A wall rack on a north-facing wall is perfect.
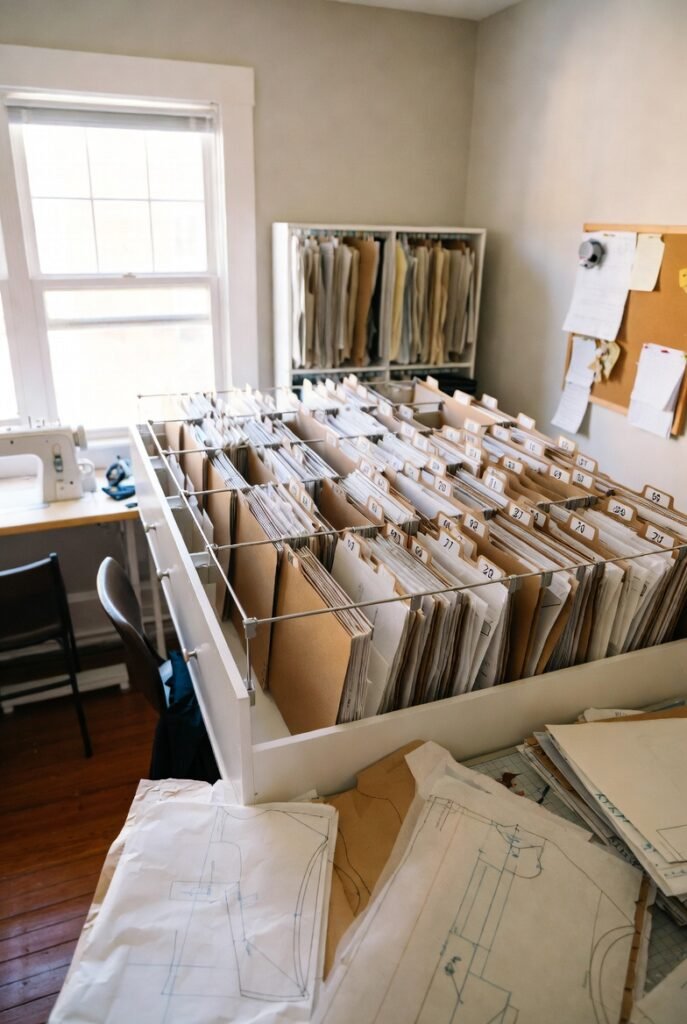
Idea #6: Design a Pattern Organization System That Makes Sense
Paper patterns are wonderful until you have a hundred of them stuffed in envelopes, falling out, and getting torn. Digital patterns are great until you can’t remember which hard drive you saved them on.
For physical patterns:
Hanging file folders inside a filing cabinet or storage box work beautifully. Label each folder by pattern type (dresses, tops, pants, bags, quilts) and then alphabetically by designer or pattern number.
For even better visibility, try clear plastic envelope bags with a hole punched in the top. Hang these on a metal ring or in a hanging binder system. This keeps each pattern completely protected while still allowing you to flip through and see what you have.
For digital patterns:
Create a master folder on your computer called “Sewing Patterns.” Inside, create subfolders by category (again, dresses, tops, etc.). Then, and this is crucial, rename every PDF file with a consistent system. I use “Designer_PatternNumber_PatternName” so I can search easily.
Backup your digital patterns on an external hard drive AND cloud storage. I use Google Drive and Dropbox both. Patterns are too expensive to lose to a computer crash.
My favorite pattern storage product: The Simply Tidy Pattern Storage Box from Michael’s is perfectly sized for hanging file folders. It’s sturdy, portable, and fits nicely on a shelf. For digital patterns, the WD 2TB External Hard Drive gives me peace of mind.
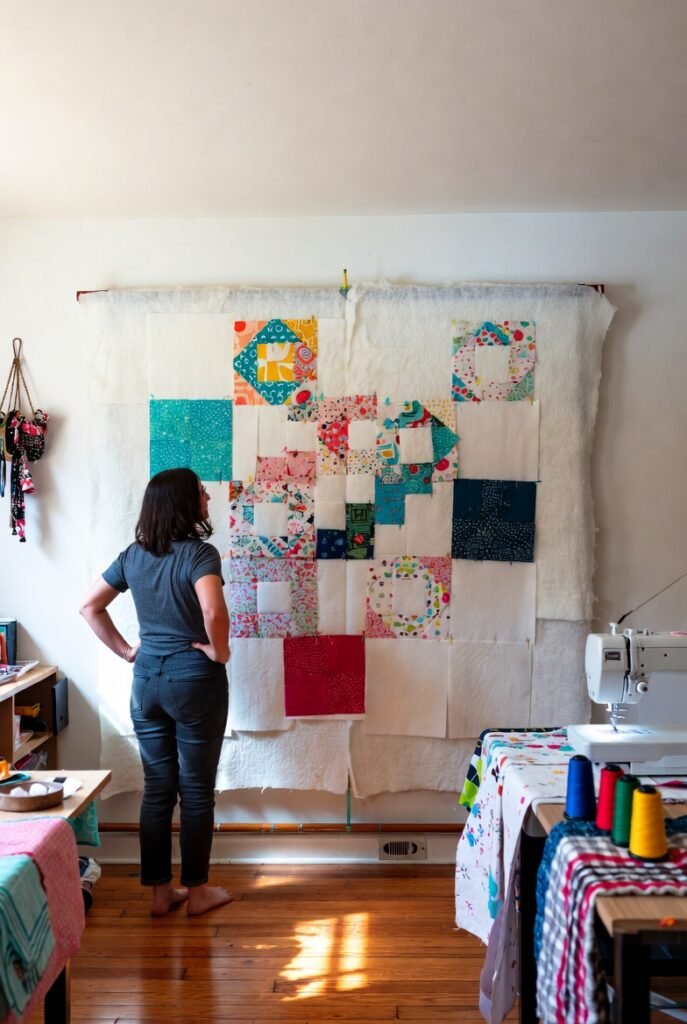
Idea #7: Install a Design Wall for Quilters and Garment Sewists Alike
If you’ve never used a design wall, you’re missing out on one of the most useful tools in sewing. A design wall is simply a large, flat surface where you can pin or stick fabric pieces to see how they look together.
For quilters, a design wall lets you arrange blocks, see color combinations, and adjust layouts without bending over a table or crawling on the floor. It saves your back and your sanity.
For garment sewists, a design wall holds pattern pieces, fabric swatches, and inspiration images. You can pin up a half-finished dress and step back to assess fit and proportion.
How to make a design wall:
- Option 1 (cheapest): Buy a large piece of foam insulation board from a hardware store (about $15 for a 4×8 foot sheet). Cover it with flannel fabric or batting, secured on the back with duct tape. Mount it on your wall or lean it against the wall.
- Option 2 (nicer): Purchase a commercial design wall from a quilting supply company. These are often magnetic or have a self-healing surface that holds pins beautifully.
- Option 3 (temporary): Hang a large piece of flannel fabric directly on your wall, smoothing out wrinkles as much as possible. The fabric’s texture will hold other fabric pieces without pins.
Pro tip: Position your design wall where you can see it from your sewing machine. Being able to glance up at your layout while sewing saves so much time and mental energy.
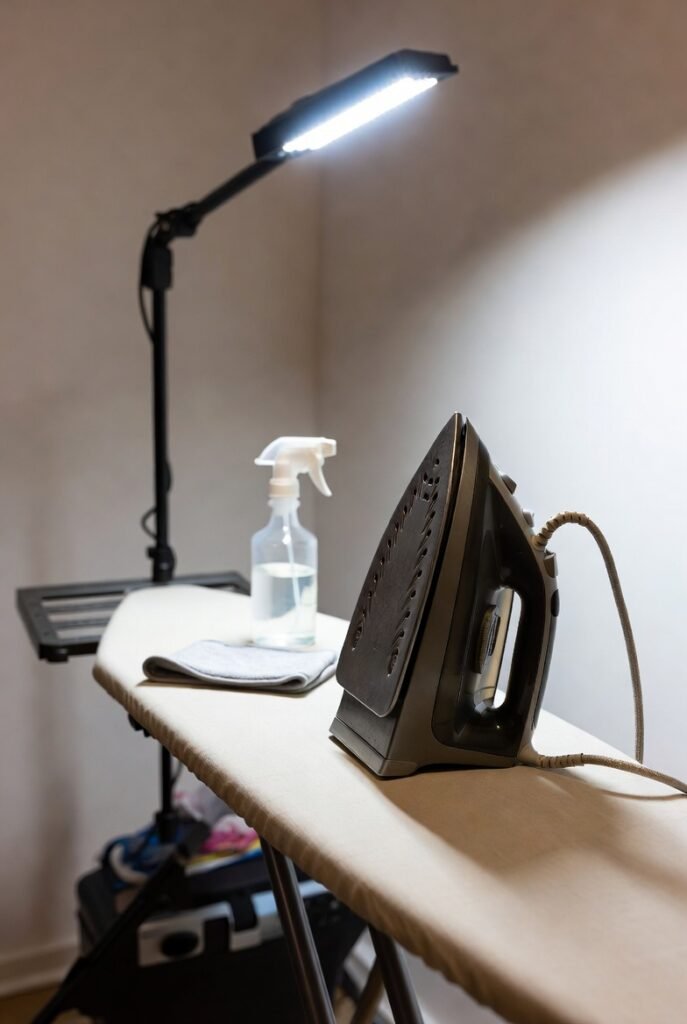
Idea #8: Set Up an Ironing Station That’s Always Ready
Here’s the thing about ironing in sewing: you do it constantly. Before you cut. After every seam. Before you topstitch. Before you hem. Constant, constant ironing.
If your ironing board is stored in a closet or another room, you will skip ironing steps. I promise you this. And when you skip ironing, your projects look “homemade” instead of “handmade.”
The solution is a dedicated, always-accessible ironing station.
- If you have floor space: Leave your ironing board set up at all times. Position it near your cutting table and sewing machine so you can move between tasks efficiently.
- If space is tight: Consider a wall-mounted ironing board that folds down when needed. These are brilliant for small sewing rooms because they take up almost no space when folded.
- For the truly space-challenged: An ironing mat placed on top of your cutting table works surprisingly well. These heat-resistant mats roll up for storage but provide a perfectly flat ironing surface when unrolled.
Don’t forget the accessories: A quality spray bottle (I love the continuous mist type), a tailor’s ham for curved seams, a sleeve board for small tubes, and a press cloth to protect delicate fabrics.
My iron recommendation: The Oliso Pro Plus Smart Iron is expensive but worth every penny. It senses your hand and automatically lowers and raises its feet. No more bending to pick up your iron. It’s genuinely life-changing for sewists who iron constantly.
Idea #9: Create a Scrap Management System
Let’s talk about scraps. We all save them. We all feel guilty throwing them away. And yet, most of us end up with bins and bags and boxes of tiny fabric pieces we never actually use.
A better approach to scraps:
First, be honest about what you’ll actually use. I save scraps smaller than a fat quarter only if they’re in colors I use constantly. Everything else gets donated or trashed.
For scraps worth keeping, organize them by size:
- Strips (1–3 inches wide): Store in clear jars sorted by color. These are perfect for string quilts, selvage projects, and binding.
- Squares (up to 5 inches): Stack in clear bins by color family. Great for postage stamp quilts and patchwork.
- Larger pieces: Fold and store with your main fabric by color.
The best scrap storage products: Mason jars for tiny pieces (they look adorable on a shelf). Clear shoebox bins for larger scraps. Hanging file folders for sorted strips by color.
Pro tip: Set a scrap limit. Decide you’ll keep only one bin of scraps. When it fills up, you must use some or donate some before adding more. This prevents the dreaded scrap avalanche.
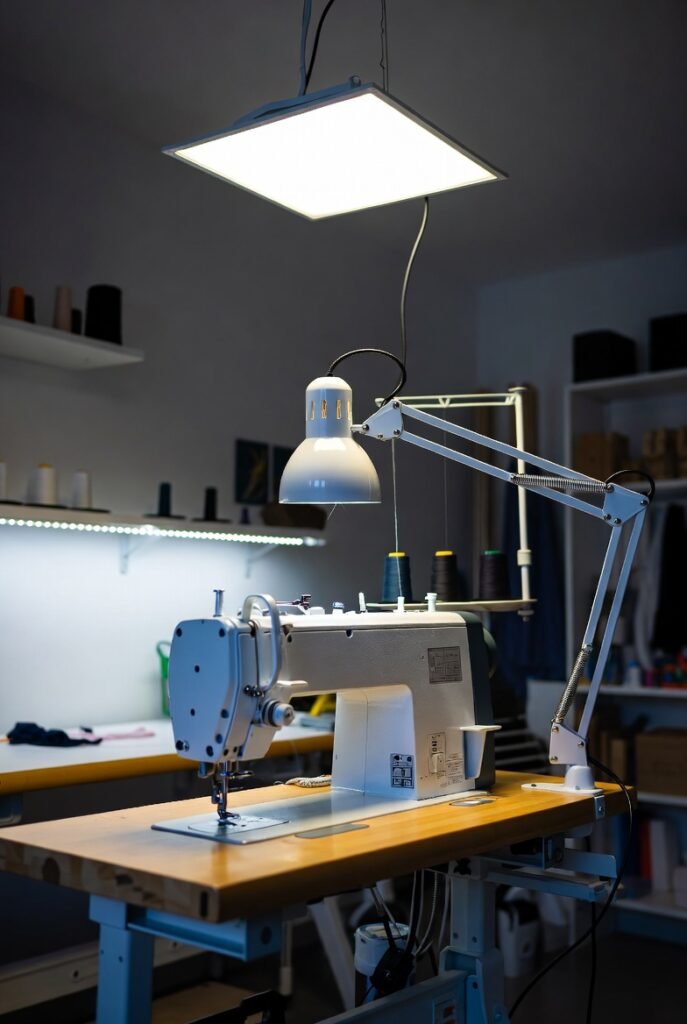
Idea #10: Install Proper Task Lighting Everywhere
You know what ages your eyes faster than anything? Sewing under bad lighting. I’m not exaggerating when I say that upgrading your lighting will change your sewing life.
The problem with overhead lights: They cast shadows. Your sewing machine creates a shadow over your needle area. Your own body blocks light from your cutting table. Overhead lights alone are never enough.
You need layered lighting:
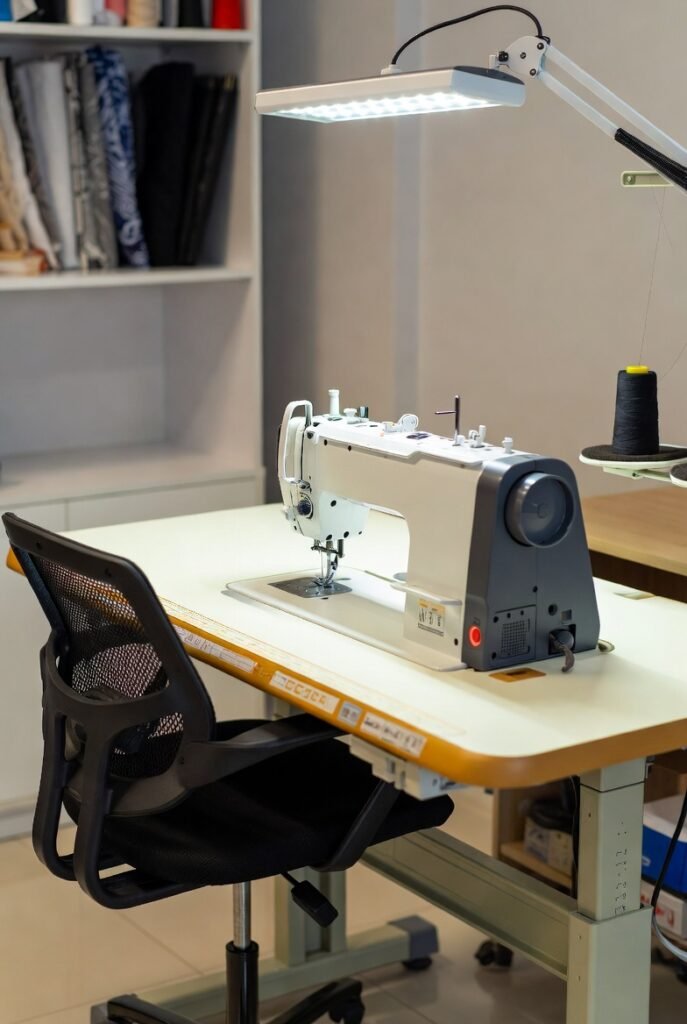
- At your sewing machine: A daylight LED task lamp positioned to shine directly on your needle area. Look for lamps with adjustable arms and magnifying lenses if your eyes need extra help.
- At your cutting table: Overhead lighting directly above the table plus a portable task lamp you can move around as needed.
- At your ironing board: Good overhead light plus a small lamp nearby for inspecting seams.
What to look for in sewing lights: Color temperature matters. Look for bulbs rated at 5000K–6500K (daylight range). This shows colors accurately. CRI (Color Rendering Index) should be 90 or above for true color representation.
My favorite sewing lamp: The OttLite LED Task Lamp provides perfect daylight spectrum lighting with no glare or shadows. I have two in my sewing room and I’m considering a third.
Budget option: IKEA Tertial work lamps with Philips Daylight LED bulbs. Under $20 total and works surprisingly well.
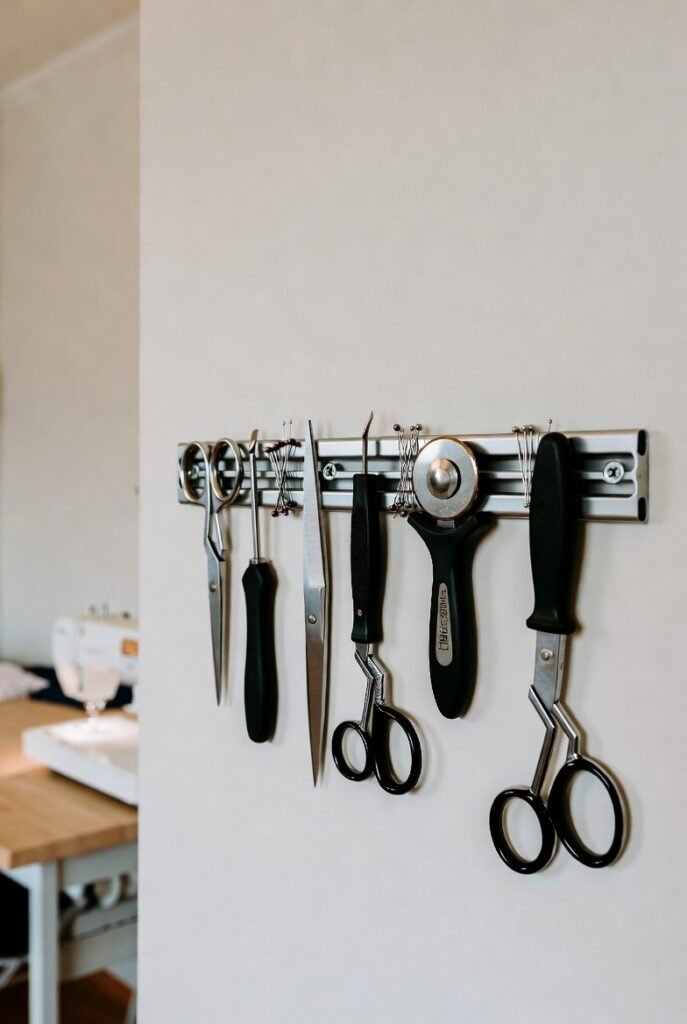
Idea #11: Add Magnetic Strips for Metal Tool Storage
This is one of those sewing room ideas that sounds weird until you try it, and then you wonder how you ever lived without it.
Magnetic strips (the kind designed for kitchen knives) are perfect for storing all your metal sewing tools. Screwdrivers, seam rippers, small scissors, pins, needles, rotary cutter blades, even your machine’s accessory feet.
Where to install magnetic strips:
- On the wall right above your sewing machine (tools at eye level)
- On the side of a cabinet or shelf
- On the front of a drawer
- On the wall near your cutting table
What you can store on magnetic strips:
- Seam rippers (you’ll never lose one again)
- Small scissors and snips
- Rotary cutter (with blade guard on!)
- Machine needles in their plastic cases
- Safety pins and straight pins in magnetic pin holders
- Bobbins (metal ones only)
- Tweezers and thread snips
Pro tip: Buy neodymium magnetic strips rather than the cheaper rubber ones. The neodymium magnets are much stronger and will hold heavier tools securely.
My recommendation: The MAGZO Magnetic Knife Strip comes in several lengths and has a strong hold. I have the 12-inch strip above my machine and the 18-inch strip near my cutting table.
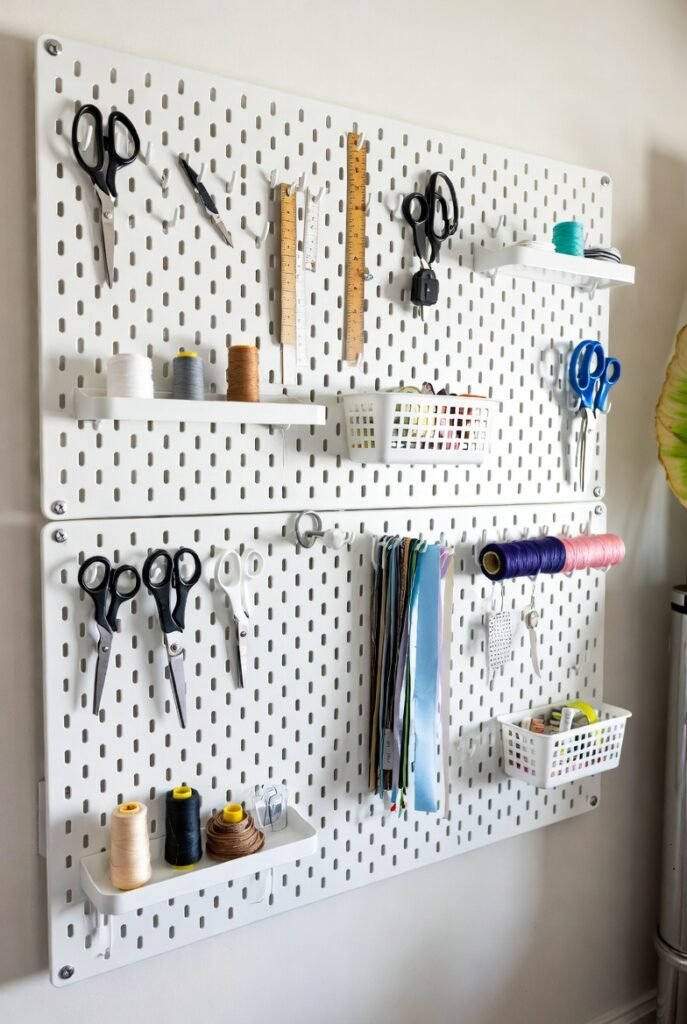
Idea #12: Build a Pegboard Wall for Flexible Storage
If I could only recommend one storage solution for a sewing room, it would be pegboard. Pegboard is flexible, affordable, and customizable. You can rearrange it as your needs change. And it keeps everything visible and accessible.
How to set up a pegboard wall:
- Buy pegboard panels from a hardware store (the white coated kind looks nicest).
- Mount them on your wall using furring strips (small wood pieces) to create a gap between the pegboard and wall. This gap allows peg hooks to slide in.
- Paint the pegboard if you want a specific color. Light gray or white keeps things bright.
- Stock up on pegboard hooks in various sizes: straight hooks, curved hooks, baskets, and shelves.
What to put on your pegboard:
- Scissors of all sizes (hang them by the handle)
- Rulers and measuring tapes
- Rotary cutters (with blade guards)
- Small containers for bobbins, needles, and buttons
- Spools of thread (use pegboard thread racks)
- Patterns in clear bags with holes punched
- Notions like tracing wheels, awls, and stilettos
Pro tip: Outline each tool’s position with a permanent marker. Draw around your scissors so you know exactly where each pair belongs. This makes cleanup fast and helps you notice when something is missing.
My pegboard setup: I have a 4×8 foot pegboard wall behind my sewing machine. It holds everything I reach for regularly. Nothing is in drawers. Nothing is hidden. Everything is two seconds away.
Idea #13: Use Clear Storage Containers for Everything

I’ve mentioned this a few times already, but it bears repeating: opaque containers are the enemy of organization. If you can’t see what’s inside, you won’t use what’s inside.
The rule: Every storage container in your sewing room should be clear or clearly labeled. No exceptions.
What to put in clear containers:
- Bobbins (wound and unwound, separated)
- Elastic (by width)
- Velcro (by color and width)
- Bias tape (by width and color)
- Zippers (by length and color)
- Buttons (by color and size)
- Snaps and hooks and eyes
- Elastic cord and drawstring cord
- Fusible interfacing (by weight)
The best clear containers for sewing:
- For small notions: Stackable bead storage containers with adjustable dividers. These are perfect for buttons, snaps, and small hardware.
- For medium items: Shoebox-sized clear bins with latching lids. I have about twenty of these, each labeled with a category.
- For large items: Under-bed storage boxes (clear, of course) for large cuts of fabric, batting, and interfacing.
My favorite brand: The IRIS USA Clear Storage Boxes are sturdy, stack perfectly, and have tight-sealing lids. Worth the slightly higher price.
Idea #14: Create a Notions Station Near Your Machine
Here’s a simple test: sit at your sewing machine and reach for your most-used notions. Can you reach them without getting up? Without stretching awkwardly? Without digging through a drawer?
If the answer is no, you need a notions station.
A notions station is simply a designated spot near your machine where you keep the tools you reach for constantly. This includes:
- Seam ripper (let’s be honest, we all need this frequently)
- Small scissors or thread snips
- Extra needles (machine and hand sewing)
- Bobbins (pre-wound in common colors)
- Pins and pin cushion
- Measuring tape
- Seam gauge
- Tweezers
- Thread conditioner (like Thread Magic)
How to create your notions station:
- Option 1: A rotating caddy on your sewing table. These hold multiple compartments and spin for easy access.
- Option 2: A wall-mounted organizer near your machine. Small bins or cups attached to the wall keep everything upright and visible.
- Option 3: A magnetic board for metal tools plus small clear cups for non-metal items.
- Option 4: A sewing machine accessory tray that attaches to your machine’s extension table.
Pro tip: Keep your notions station minimal. Only the things you use in every single sewing session. Everything else can go in drawers or on the pegboard.
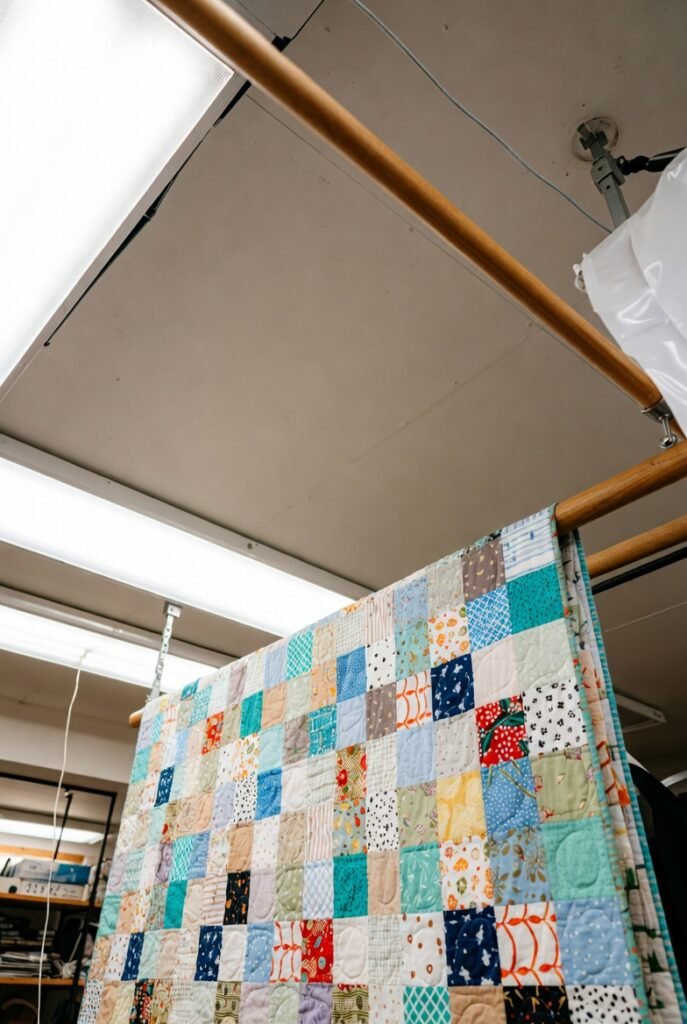
Idea #15: Install a Ceiling-Mounted Quilt Holder
If you quilt, you know the struggle. You’re trying to feed a king-sized quilt through your machine, and the weight of the quilt is pulling it sideways and down. Your stitches go wonky. Your arms get tired. Your shoulders ache.
The solution is a ceiling-mounted quilt holder.
These devices hang from your ceiling and use rollers or bars to support the weight of your quilt as it passes through your machine. The quilt glides smoothly instead of dragging.
Types of quilt holders:
- Roller systems: These have two bars that roll. One bar holds the quilt before it goes through the machine, and one bar catches it as it comes out. This is the gold standard for serious quilters.
- Hanging bar systems: Simpler and cheaper. These just have a bar that hangs above your machine, and you drape the quilt over it. Not as smooth as rollers but still helpful.
- DIY option: Install a heavy-duty curtain rod above your machine. Drape your quilt over it. For less than $20, you’ve solved the dragging problem.
My recommendation: The Quilt Glide Ceiling Mount System is expensive but incredible. It completely eliminates quilt drag and makes free-motion quilting actually enjoyable instead of physically exhausting.
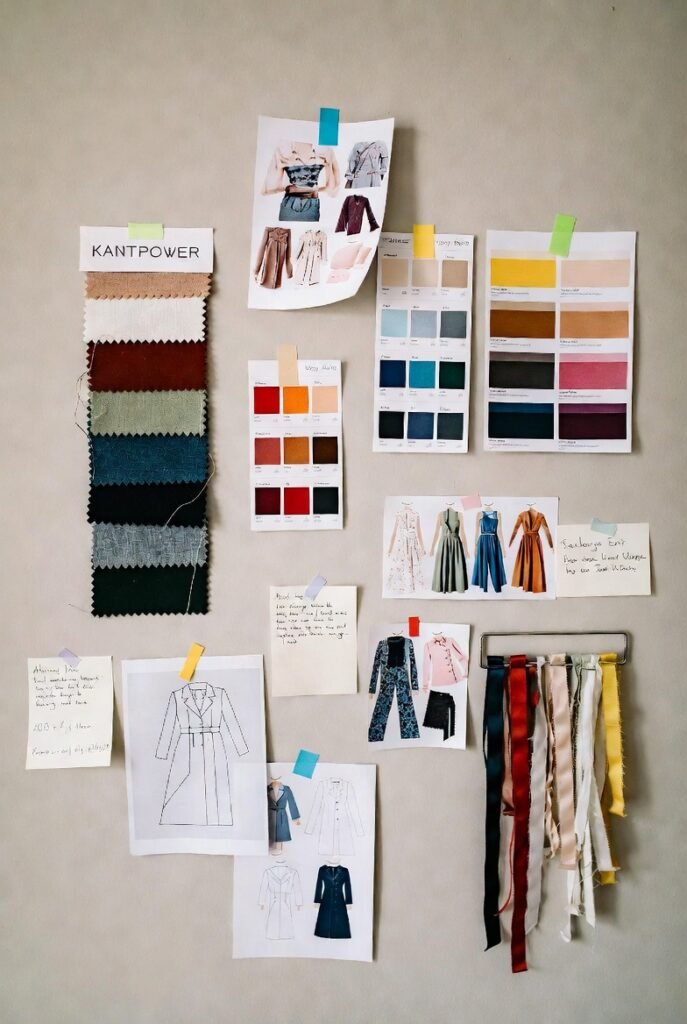
Idea #16: Create an Inspiration Board for Creative Fuel
Sewing is creative work. And creative work needs inspiration. You can’t pour from an empty cup, and you can’t sew beautiful things if your brain is empty of ideas.
An inspiration board is a dedicated space where you collect images, fabrics, colors, and ideas that excite you. When you’re stuck or unmotivated, you look at your board and remember why you love sewing.
How to build your inspiration board:
Start with a large cork board, foam board, or magnetic board. Hang it where you’ll see it every day.
Then collect inspiration:
- Fabric swatches in color combinations you love
- Photos of garments or quilts you admire
- Paint chips from the hardware store
- Magazine clippings of fashion or home decor
- Postcards and greeting cards with beautiful art
- Nature items like pressed leaves or feathers
- Ribbon samples and trim
Arrange and rearrange as your mood shifts. There are no rules. This is your creative space.
Pro tip: Also keep a digital inspiration board on Pinterest. Save images you find online to the same categories as your physical board. Between the two, you’ll never run out of ideas.
My favorite inspiration board products: The U Brands Magnetic Dry Erase Board doubles as a place to write notes and hold magnets. Cork boards from IKEA are affordable and come in many sizes.
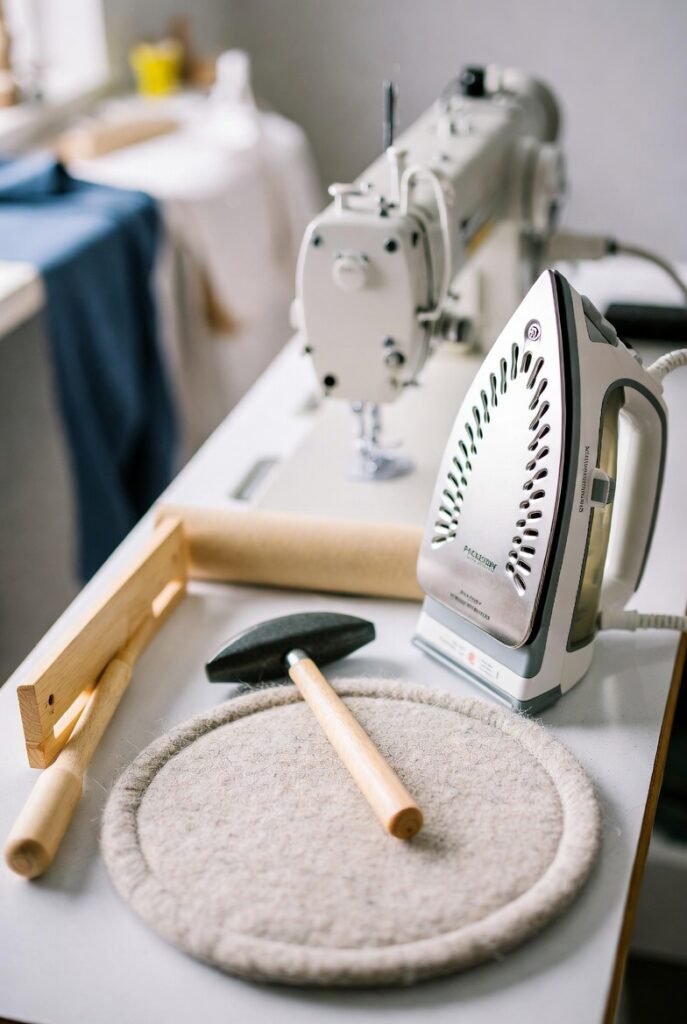
Idea #17: Set Up a Pressing Station With Multiple Tools
Earlier I talked about an ironing station that’s always ready. But for serious sewists, one ironing surface isn’t enough. You need a pressing station with multiple specialized tools.
What a complete pressing station includes:
- A full-size ironing board for large pieces like yardage and quilt backs.
- A tabletop pressing mat for small pieces you’re pressing while sewing. Keep this right next to your machine so you can press a seam and sew the next one without getting up.
- A tailor’s ham for pressing curved seams like darts, armholes, and collars. The curved shape matches the curves of the human body.
- A sleeve board for pressing small tubes like sleeves and pant legs. It’s like a tiny ironing board that fits inside narrow spaces.
- A seam roll for pressing long, straight seams open without imprinting the seam allowance on the outside of the garment.
- A point presser and clapper for crisp edges on collars, cuffs, and hems. The clapper absorbs heat and moisture to set seams perfectly flat.
Where to put all these tools: Hang them on your pegboard or store them in a nearby drawer. They should be accessible but not cluttering your work surface.
Pro tip: Once you use a clapper, you’ll never go back. It creates the flattest, crispest seams you’ve ever seen. It’s one of those tools that seems unnecessary until you try it, and then you wonder how you managed without it.
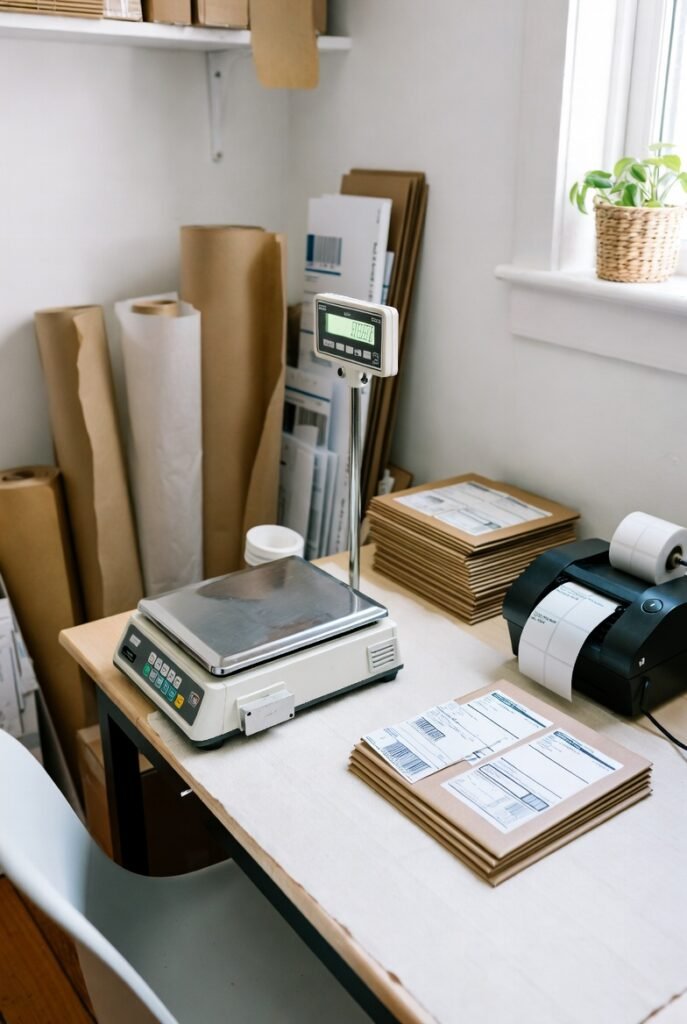
Idea #18: Create a Shipping and Packaging Station
If you sell what you sew (or even if you just gift handmade items), a shipping station will save you so much time and frustration.
What you need for a shipping station:
- A scale for weighing packages (kitchen scales work for small items, but get a postal scale for larger things).
- A label printer or access to a regular printer for shipping labels.
- Clear plastic bags for protecting finished items before they go in the mailer.
- Poly mailers in several sizes for fabric items.
- Boxes in standard sizes for larger or fragile items.
- Tape gun with packing tape.
- Scissors specifically for cutting tape and opening packages.
Where to set it up: If you have space, dedicate a small shelf or cabinet to shipping supplies. If space is tight, store everything in a single bin that you pull out when needed.
Pro tip for selling: Keep a notebook or spreadsheet tracking what you shipped, to whom, and for how much. This makes tax time so much easier.
My shipping recommendations: Pirate Ship is a free shipping service with discounted USPS and UPS rates. Avery EasyPeel Shipping Labels print clearly and stick securely. Poly mailers from Upaknship are durable and affordable.
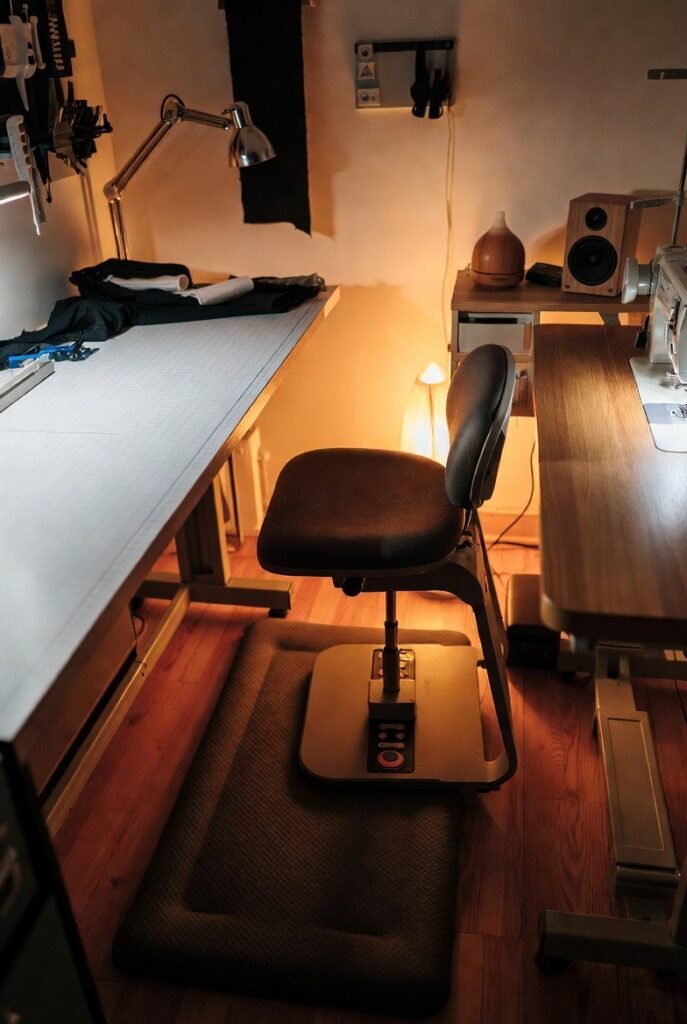
Idea #19: Add Comfort Features for Long Sewing Sessions
Let me tell you about the time I sewed for eight hours straight finishing a Halloween costume. I was so focused that I ignored my body’s signals. The next morning, I could barely turn my head. My neck was locked up for three days. My lower back ached for a week.
Don’t be like me.
Comfort features aren’t luxuries. They’re necessities for anyone who sews regularly.
Essential comfort features for your sewing room:
- An anti-fatigue mat in front of your cutting table. Standing on concrete or hard floors destroys your joints. A cushioned mat makes standing bearable for hours.
- An ergonomic sewing chair with good lumbar support. Your sewing chair should have adjustable height so your knees are at 90 degrees and your feet rest flat on the floor.
- A footrest if your chair height is correct but your feet don’t quite reach the floor. (Yes, even short sewists need proper ergonomics.)
- Good wrist support while sewing. Many sewists develop wrist pain from repetitive motion. A wrist brace worn during breaks can help. So can ergonomic scissors and rotary cutters.
- Proper temperature control. A too-cold or too-hot room will make you rush through projects. Install a small space heater or fan as needed.
- A water bottle within reach. Dehydration causes fatigue and brain fog. Drink water while you sew.
- Good music or podcasts playing. I sew much longer when I’m entertained. A Bluetooth speaker in your sewing room makes a huge difference.
My comfort product recommendations: The Gorilla Grip Anti-Fatigue Mat is thick and supportive. The Hbada Ergonomic Office Chair provides excellent lumbar support for under $150. The Copper Compression Wrist Brace helps during intense sewing periods.
Bringing It All Together: Your Action Plan
Okay, we’ve covered 19 sewing room ideas. That’s a lot of information. You might be feeling overwhelmed. That’s normal.
Here’s your step-by-step action plan to transform your sewing space without losing your mind:
- Week 1: Declutter completely. Purge everything you don’t use. Be ruthless.
- Week 2: Assess your big furniture. Do you need a better sewing table? A proper cutting table? Order what you need.
- Week 3: Install your organization systems. Pegboard, magnetic strips, clear containers, shelves. Get everything off the floor and onto walls.
- Week 4: Focus on lighting and comfort. Install task lights, buy an anti-fatigue mat, set up your ergonomic chair.
- Week 5: Add the specialized stations. Design wall, pressing station, shipping station, inspiration board.
- Week 6: Fine-tune and adjust. Live with your new setup for a week, then move anything that isn’t working.
Why Investing in Your Sewing Room Is Worth Every Penny
Here’s what I want you to understand. When I finally invested in my sewing space, something unexpected happened. I started sewing more. Not because I had more time, but because sewing became easier and more enjoyable.
No more hunting for tools. No more pressing on the floor. No more cutting on a table that was too low. No more squinting at my needle under bad light.
Sewing went from being a struggle to being a joy again.
And here’s the thing about joy: it’s worth paying for. If spending $200 on a proper sewing table means you sew for five more years without back pain, that’s money well spent. If buying clear storage bins means you actually use the fabric you already own instead of buying more, that’s money saved.
The products I’ve recommended in this article are all things I either use myself or have used extensively in the past. I don’t recommend things lightly. Every single product here has been tested and proven in real sewing rooms.
So here’s my challenge to you: Pick three things from this list. Just three. Implement them this month. See how they feel. I guarantee you’ll notice a difference. And once you do, you’ll want to implement the rest.
Your sewing room should be a place of creativity, peace, and productivity. Not frustration, clutter, and back pain. You deserve better. Your projects deserve better.
So go ahead. Clear that clutter. Buy that table. Install that pegboard. Transform your space.
And then go make something beautiful.
Frequently Asked Questions About Sewing Room Organization
How much space do I really need for a sewing room?
Less than you think. I’ve seen incredible sewing spaces in 5×5 foot closets. The key isn’t square footage; it’s smart organization. Use vertical space, wall storage, and multi-functional furniture. A tiny space that’s well-organized beats a large space that’s chaotic every time.
What’s the single most important investment for a sewing room?
Your chair and your lighting. Bad chair = back pain. Bad lighting = eye strain and headaches. Everything else is secondary. Spend money on ergonomics and illumination first, fancy storage second.
How do I organize fabric when I have hundreds of pieces?
Go vertical. Comic book boards (or mini bolts) let you fold fabric around a rigid core and stand them upright like books on a shelf. You can see every fabric at a glance. It’s life-changing for large fabric collections.
Should I buy a combo sewing/cutting table or separate tables?
Separate tables are almost always better. Combo tables force you to choose between cutting height and sewing height, and they’re rarely good at either. A dedicated sewing table at the right height plus a dedicated cutting table at the right height will serve you much better.
How do I keep my sewing room organized long-term?
The secret is “a place for everything and everything in its place.” Every tool needs a designated home. Every time you finish sewing, spend five minutes putting things back. Those five minutes of cleanup save hours of searching later.
What’s the best way to store patterns?
Hanging file folders in a filing cabinet or storage box. Label clearly by category and alphabetically within categories. For digital patterns, create a consistent naming system and back everything up in two places.
How often should I declutter my sewing room?
Do a quick declutter (15–20 minutes) at the end of every project. Do a serious declutter (a few hours) every six months. Do a complete purge (everything out, sort completely) once a year.
Final Thoughts
Creating the perfect sewing room isn’t about having the biggest space or the most expensive equipment. It’s about creating a space that works for you—your body, your workflow, your creative process.
The 19 sewing room ideas I’ve shared here come from years of trial and error, from mistakes I’ve made, and from solutions I’ve discovered. I’ve spent money on products that didn’t work and wasted time on organization systems that failed. But everything I’ve recommended here is battle-tested and proven.
So take what works for you. Adapt what doesn’t. And remember: your sewing space is never truly finished. It will evolve as your sewing does. That’s not a flaw. That’s the beauty of it.
Now go make something wonderful. And for goodness’ sake, put your scissors back on the magnetic strip when you’re done.
Happy sewing, friends.
Also Read: