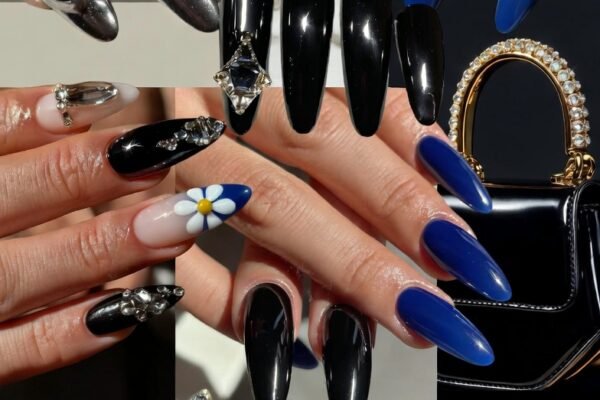
Work Desk Decor Idea
Let me start with a little confession. For the longest time, my desk was what you might politely call “organized chaos.” Actually, that’s too kind. It was a disaster zone. Sticky coffee rings, tangled charging cables, a mountain of sticky notes that had achieved structural integrity, and exactly zero things that brought me any joy. I spent eight hours a day at this desk, and honestly? It felt like punishment.
Then one Tuesday afternoon, something clicked. I was on yet another mind-numbing conference call, doodling on a scrap of paper, when my eyes landed on my colleague’s desk across the room. She had a small succulent, a warm-toned lamp, and this beautiful little pen holder that looked like it belonged in a magazine. Her desk made me feel calm just looking at it. My desk made me feel anxious. That was the moment I realized: work desk decor isn’t just about making things look pretty. It’s about creating an environment where you actually want to spend time.
So I did what any reasonable person would do. I fell down a rabbit hole of research, testing, and quite a few impulse purchases. After three months of experimentation (and one very regrettable lava lamp incident), I’ve curated this list of 15 desk accessories that genuinely transform your workspace. Whether you’re working from a corporate cubicle, a home office, or the corner of your bedroom, these ideas will help you build a personalized workspace that works for you.
Let’s dive in.
Why Your Desk Decor Matters More Than You Think
Before we get to the list, let’s talk about the “why.” You might be thinking, “It’s just a desk. Who cares what’s on it?” But here’s the thing. The average person spends nearly 2,000 hours at their desk each year. That’s roughly 83 full days. Imagine spending 83 days in a room that felt cluttered, uninspiring, or uncomfortable. Now imagine spending those same 83 days in a space that felt organized, warm, and distinctly yours.
Research in environmental psychology consistently shows that our surroundings directly impact our mood, focus, and even creativity. A study from the University of Exeter found that people who have control over their workspace design are not only happier but also up to 32% more productive. Thirty-two percent! That’s not just a nice-to-have. That’s a career advantage.
Office organization reduces mental clutter. Desk plants lower stress levels. Proper lighting prevents eye strain and headaches. And those little personal touches? They remind you that you’re a human being with a life outside of spreadsheets and emails.
So no, this isn’t frivolous. This is self-care with a side of productivity boost. Now, let’s get into the good stuff.
1. A Desk Plant That Doesn’t Need a Green Thumb
Let me tell you about my first desk plant. Her name was Fernanda, and she was a beautiful, lush fern. For three glorious weeks, she thrived. Then I forgot to water her. Then I overwatered her to make up for it. Then she turned brown and crispy, and I had to have a very sad funeral involving a trash can and a moment of silence.
The lesson? Not all plants are created equal for desk life. What you want is something that can survive your forgetfulness, your inconsistent office temperatures, and probably that one corner that never gets direct sunlight.
Enter the low-maintenance succulent or snake plant. These little warriors are practically indestructible. They thrive on neglect. Snake plants, in particular, are fascinating because they release oxygen at night (most plants do this during the day), making them excellent air purifiers for your workspace.
Why this works: Biophilia is the scientific term for our innate human desire to connect with nature. Even a tiny desk plant reduces stress hormones, lowers blood pressure, and increases attention span. One study found that people working in spaces with plants completed tasks 12% faster and reported feeling significantly less fatigued.
Step-by-step guide to choosing your desk plant:
- Assess your light situation – Hold your hand six inches above your desk. If you see a distinct shadow, you have bright indirect light. If the shadow is fuzzy, that’s medium light. No shadow means low light.
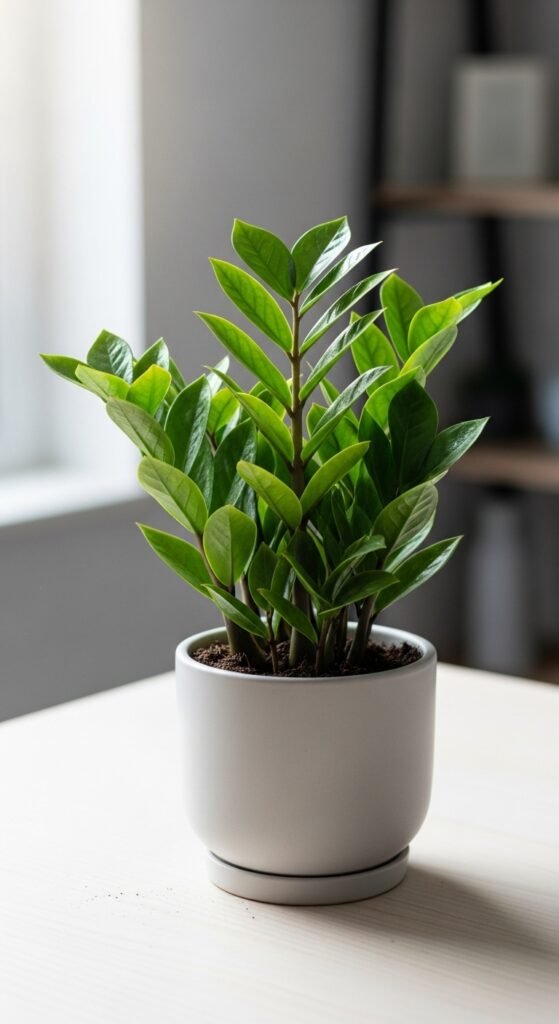
- Match the plant to the light – Bright light: succulents, aloe vera. Medium light: pothos, ZZ plant. Low light: snake plant, peace lily.
- Choose the right pot – Make sure it has drainage holes. A ceramic or terracotta pot allows the soil to breathe.
- Set a watering reminder – For most desk plants, once every 10–14 days is plenty. Stick your finger an inch into the soil. If it’s dry, water it. If it’s damp, leave it alone.
Recommended product: A small potted succulent in a white ceramic planter. It’s classic, clean, and nearly impossible to kill.
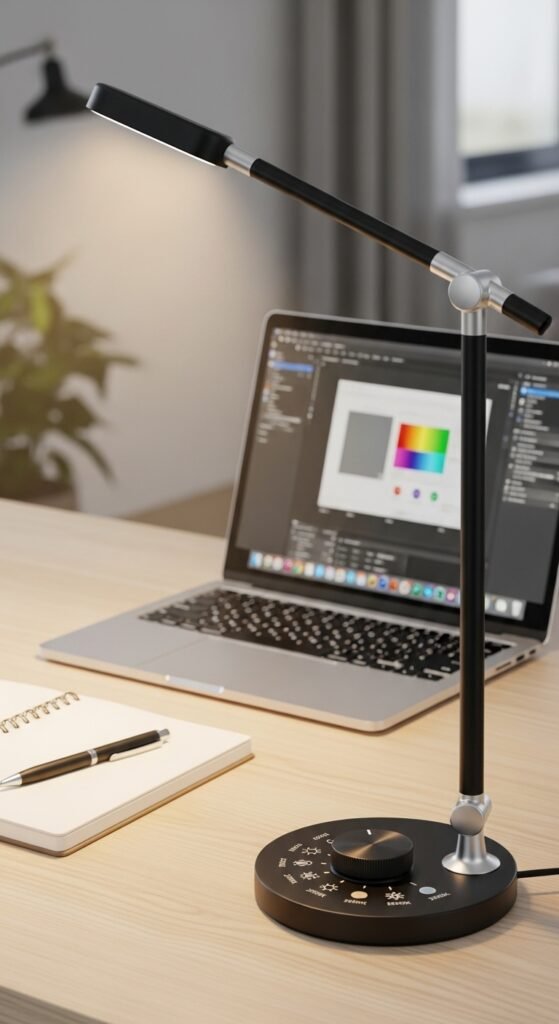
2. A Quality Desk Lamp with Adjustable Color Temperature
I used to think all desk lamps were basically the same. You plug them in, they make light, done. Then I spent a week working in a room with terrible overhead fluorescent lighting, and I thought my eyeballs were going to stage a revolt. The headaches, the eye strain, the weird yellowish-green tint that made everyone look slightly ill.
Here’s what I learned. The quality of light at your desk affects everything from your sleep cycle to your ability to focus. The blue light emitted by screens and harsh overhead lights suppresses melatonin production. That’s why you feel wide awake at 11 PM when you should be winding down.
A good adjustable desk lamp solves this beautifully. Look for one with multiple color temperature settings. During the day, you want cool white light (4000K–5000K) that mimics natural daylight and keeps you alert. In the afternoon, you can switch to warm white light (2700K–3000K) that’s gentler on your eyes and signals to your brain that the day is winding down.
Why this works: Proper lighting reduces eye fatigue by up to 50%. It also improves your color perception, which matters if you do any design work, review documents with color coding, or simply want to see your notes clearly.
Step-by-step guide to setting up your desk lighting:
- Position the lamp on your non-dominant side – If you’re right-handed, place the lamp on your left. This prevents your hand from casting shadows on your work.
- Angle the light slightly away from your screen – Direct light on your monitor creates glare. Aim the lamp at your keyboard and documents instead.
- Use multiple light sources – One overhead light plus one desk lamp eliminates harsh shadows.
- Match your light to your task – Reading paper documents? Go warmer. Doing detailed work or using screens? Go cooler.
Recommended product: A LED desk lamp with touch controls and USB charging port. The dimmable feature and multiple color modes give you complete control over your lighting environment.
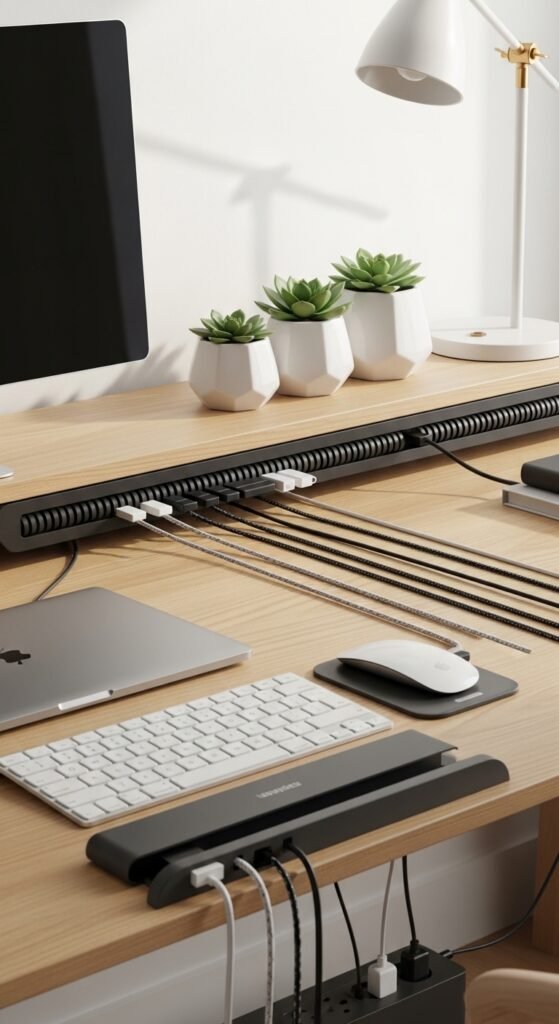
3. A Cable Management System That Hides the Mess

Here’s an embarrassing story. Last year, I was on a video call with a major client. Everything was going perfectly until I reached for my water bottle. My foot caught on the tangled mess of cables under my desk. My laptop slid six inches to the left. My webcam captured my panicked face as I flailed to catch everything. The client laughed. I died inside.
That was the day I declared war on cable clutter. And let me tell you, winning that war changed my entire relationship with my desk.
A proper cable management system isn’t glamorous, but it’s arguably the most important productivity tool on this list. Those tangled cords aren’t just ugly. They’re dangerous (trip hazard), frustrating (good luck unplugging one specific thing), and visually distracting. Every time you see that rat’s nest, your brain registers it as “unfinished business,” which adds to your cognitive load.
What you need:
- Cable clips or raceways that stick to the underside of your desk
- Velcro cable ties (reusable and adjustable)
- A cable management box that hides power strips and excess cord length
- Adhesive cable mounts for keeping cords routed along desk legs
Why this works: Visual clutter competes for your attention, even when you’re not consciously looking at it. A clean, organized cable setup reduces that subconscious distraction, allowing your brain to focus fully on your work. Plus, it makes cleaning your desk infinitely easier.
Step-by-step guide to cable management:
- Unplug everything – Yes, everything. Start from scratch.
- Identify what actually needs to stay – Do you really need that second monitor? That ancient external hard drive?
- Group cables by function – Power cables together, data cables together.
- Measure and route – Plan the shortest possible path for each cable.
- Use cable ties every 6–8 inches – This prevents sagging and tangling.
- Label both ends of each cable – A small piece of masking tape and a marker will save you hours of future frustration.
- Mount the power strip under your desk – Use heavy-duty adhesive strips or screw mounts.
Recommended product: A complete cable management kit with assorted clips, ties, and an under-desk wire tray. Trust me on this one. Your future self will thank you.
27 Small Porch Decor Ideas That Will Transform Your Tiny Outdoor Space
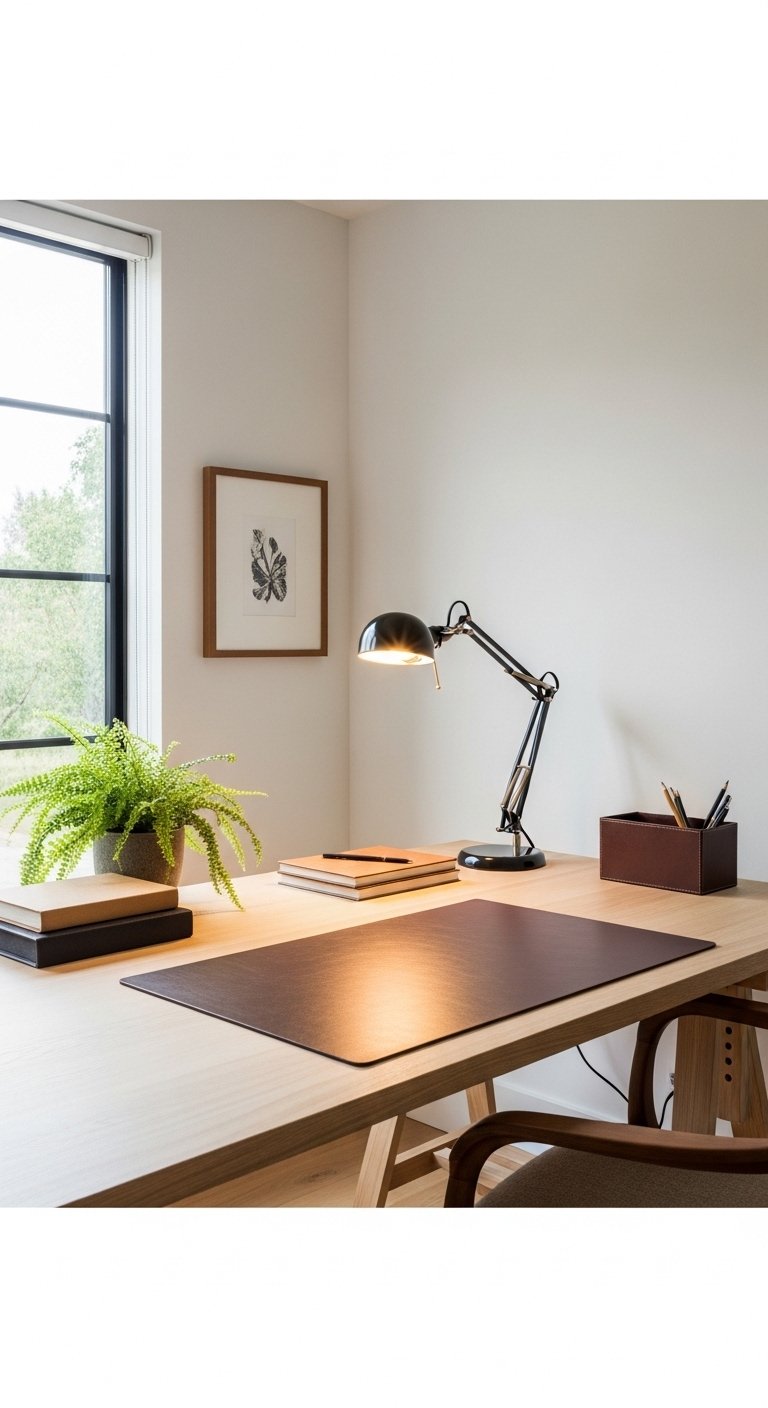
4. A Comfortable and Supportive Desk Mat
For two years, I used a cheap mouse pad that came free with a keyboard. It was thin, it slid around constantly, and after about six months, it developed this weird sticky texture that I’m still trying not to think about. Then I upgraded to a proper desk mat, and I genuinely didn’t know what I’d been missing.
A good desk mat does three things. First, it protects your desk surface from scratches, spills, and heat damage. Second, it creates a defined workspace boundary that helps your brain transition into “work mode.” Third, and most importantly, it provides wrist support that prevents the kind of repetitive strain injuries that sneak up on you after years of typing.
Leather desk mats look professional and wipe clean easily. Felt desk mats have a soft, warm texture that feels lovely under your hands. Gel-filled wrist rest mats are ideal if you already have wrist pain or spend hours mousing.
Why this works: Ergonomics isn’t just about avoiding pain. It’s about maintaining comfortable posture so you can work longer without fatigue. A proper desk mat with wrist support keeps your hands in a neutral position, reducing strain on your carpal tunnel nerves.
Step-by-step guide to choosing your desk mat:
- Measure your desk space – Your mat should be wide enough for both your keyboard and mouse, with about 2–3 inches of extra space on each side.
- Consider your mouse type – Optical mice work on almost any surface. Trackball mice need a firmer surface.
- Think about cleaning – Leather and silicone wipe clean. Felt requires vacuuming or shaking out.
- Check the thickness – 2–3mm is standard. Thicker mats (4–5mm) offer more cushioning but might interfere with the edge of your desk.
Recommended product: A large leather desk pad in a neutral color like gray, tan, or navy. The stitched edges prevent peeling, and the nonslip backing keeps everything in place.
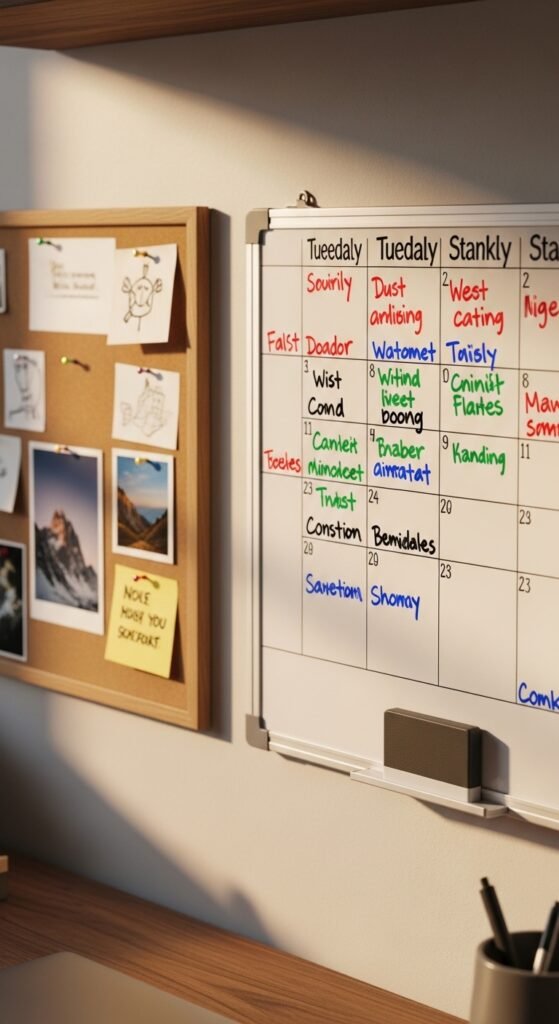
5. A Small Whiteboard or Bulletin Board

I have the memory of a goldfish. No offense to goldfish, but if something isn’t written down in front of my face, it might as well not exist. For a while, I tried using digital reminders. My phone would buzz, I’d glance at it, think “I’ll do that in a minute,” and then immediately forget. The digital notifications became background noise.
Then I installed a small whiteboard right at eye level next to my monitor. Game changer. Suddenly, my tasks were visible without requiring any clicks, unlocks, or app openings. I could see my priorities at a single glance. Plus, there’s something deeply satisfying about physically wiping a task off the board when it’s complete.
Whiteboards are perfect for daily task lists, project timelines, or brainstorming. Bulletin boards are better for pinning reference materials, inspiration images, or important documents. Some people use a combination of both.
Why this works: The Zeigarnik effect is a psychological phenomenon where uncompleted tasks keep popping into your awareness. A visible task board externalizes that mental load. You’re not constantly reminding yourself to “send that email” because you can see it right there. Your brain relaxes.
Step-by-step guide to setting up a task board:
- Choose your location – Within arm’s reach but not blocking your monitor. Eye level is ideal.
- Decide on your system – Daily tasks, weekly goals, or long-term projects? Pick one to start.
- Use color coding – Red for urgent, yellow for important but not urgent, green for done.
- Review and reset each morning – Spend two minutes updating your board before you start working.
- Keep a small section for “brain dumps” – Random thoughts and ideas that you don’t want to forget.
Recommended product: A magnetic glass whiteboard that looks sleek and doesn’t stain like traditional whiteboards. Pair it with fine-tip dry erase markers in multiple colors.
6. A Wireless Charging Station

Here’s a scenario you’ll recognize. It’s 2 PM. Your phone is at 12% battery. You rummage through your drawer for the charging cable, untangle it from three other cables, and plug it in. Then you need to send a message, so you unplug it. Then you plug it back in. Then you stand up to get coffee and forget your phone is attached to your desk, and it crashes to the floor. We’ve all been there.
A wireless charging station eliminates this entire dance. You set your phone down, and it charges. That’s it. No cables, no searching, no accidental drops. Many modern charging stations also include spots for your smartwatch and earbuds, creating a single tech organization hub.
Why this works: Reducing friction in your daily routines adds up. Those 10-second inconveniences might not seem like much, but they interrupt your flow state. Every time you stop working to find a cable or untangle a cord, it takes an average of 23 minutes to fully refocus. A wireless charger removes that friction entirely.
Step-by-step guide to setting up a charging station:
- Identify everything you charge daily – Phone, watch, earbuds, tablet, keyboard, mouse.
- Choose a central location – The corner of your desk near your dominant hand.
- Measure the space – Make sure you have room for everything without crowding your work area.
- Consider a stand vs. a pad – Stands let you see notifications while charging. Pads are more compact.
- Check your phone case – Some thick cases block wireless charging. Look for “Qi-compatible” on the case packaging.
Recommended product: A 3-in-1 wireless charging station that charges your phone, Apple Watch, and AirPods simultaneously. The weighted base keeps it from sliding around.
7. A Stylish Pen Holder That Brings You Joy
This might sound ridiculous, but hear me out. My grandmother had this beautiful ceramic pen holder on her desk. It was handmade, slightly imperfect, glazed in a deep blue that reminded me of the ocean. She used it every single day for forty years. When she passed away, I inherited that pen holder, and now it sits on my desk.
Every time I reach for a pen, I think of her. I remember her telling me that small beauties matter. That you should surround yourself with things that make you feel something, even if they’re “just” functional objects.
Your pen holder doesn’t need to be an heirloom. But it should be something you genuinely like looking at. A ceramic desk organizer in a color that makes you happy. A geometric metal holder that feels modern and sharp. A wooden block with a natural grain that brings warmth to your workspace.
Why this works: These small aesthetic touches seem insignificant, but they’re not. They’re anchors of positive emotion in your workday. When you’re stressed about a deadline or frustrated with a difficult task, your eyes land on that little object that makes you smile, and it recalibrates your mood.
Step-by-step guide to organizing your pen holder:
- Purge first – Test every pen. Throw away the dead ones. Donate duplicates.
- Separate by type – Pens, pencils, markers, highlighters, scissors, rulers.
- Store only what you use weekly – Everything else goes in a drawer.
- Face pens the same direction – This sounds neurotic, but it genuinely makes your desk look cleaner.
- Leave 20% empty space – A crowded holder is hard to use.
Recommended product: A rotating bamboo desk organizer with multiple compartments. The rotation feature keeps everything accessible without taking up much space.
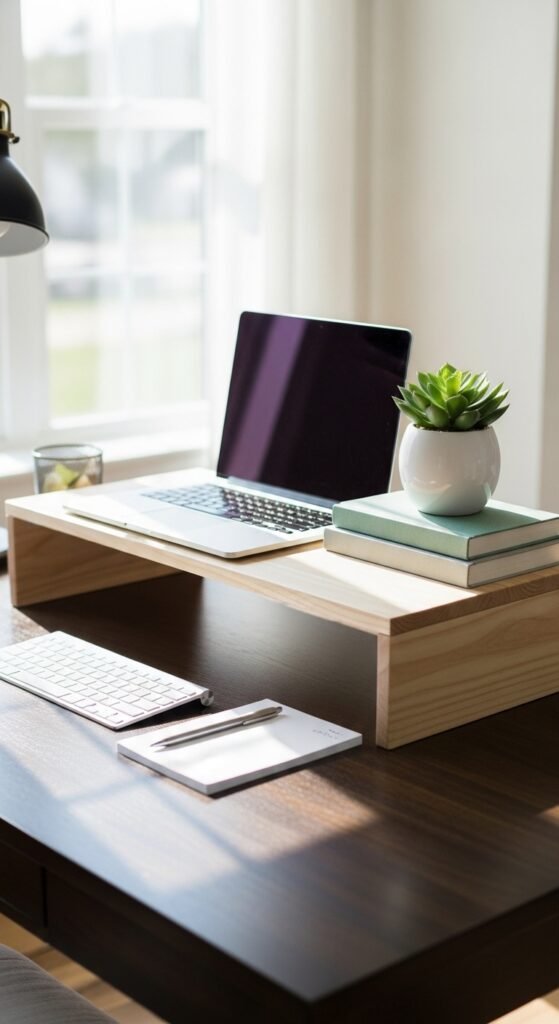
8. A Desktop Shelf or Riser
My monitor used to sit directly on my desk. I didn’t think anything of it until I started getting these weird knots in my upper back and neck. My physical therapist took one look at my posture and said, “Your screen is too low. You’re looking down all day.”
She was right. The top of your monitor should be at or slightly below eye level. For most people, that means raising your screen by 4–6 inches. A monitor riser or desktop shelf solves this instantly. But here’s the clever part. The space underneath that riser becomes prime real estate for storage.
You can slide your keyboard under the riser when you’re not typing. You can store notebooks, a calculator, or your desk accessories in the gap. Some risers come with built-in drawers for even more office organization.
Why this works: Proper monitor height reduces neck strain, prevents headaches, and improves your breathing (slouching compresses your diaphragm). The added storage space is a bonus that helps keep your main work surface clear.
Step-by-step guide to setting up a monitor riser:
- Measure your current setup – Sit in your normal working posture. Have someone mark the height of your eyes on the wall.
- Measure your monitor – The top of the screen should reach that eye-level mark.
- Calculate the riser height needed – Usually 4–6 inches, but measure to be sure.
- Check the depth – Your riser needs to be deep enough for your monitor base plus a few inches of stability.
- Test the keyboard clearance – Make sure you can slide your keyboard underneath without hitting the riser.
Recommended product: A bamboo monitor riser with a built-in drawer for small supplies. The natural wood adds warmth, and the rounded edges prevent wrist strain.
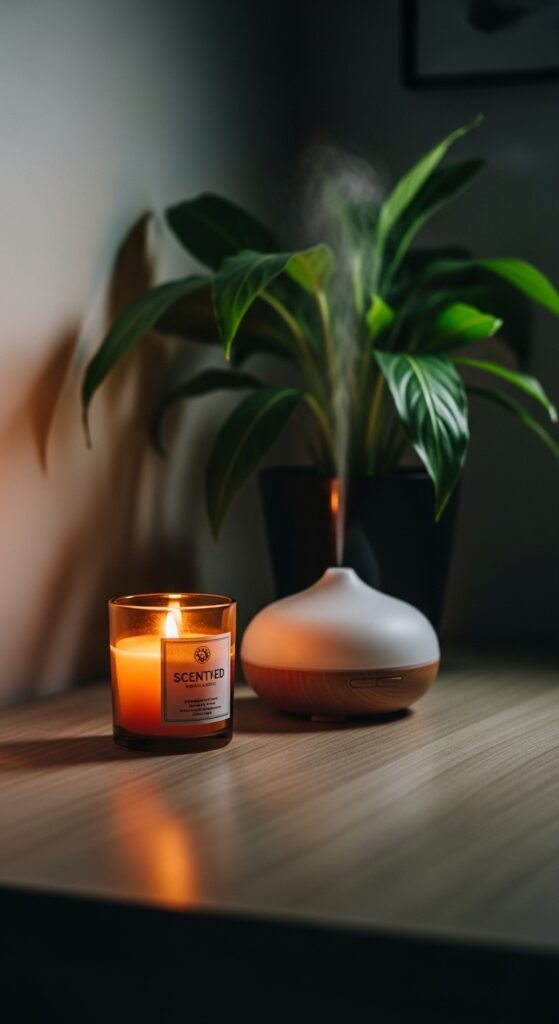
9. A Small Scented Candle or Essential Oil Diffuser
Okay, let me address the elephant in the room. Yes, some offices don’t allow candles. Fire safety, totally reasonable. If that’s your situation, skip to the essential oil diffuser. But if you work from home or have a candle-friendly workplace, a small scented candle can transform your desk experience.
I’m not talking about those giant, overpowering candles that give you a headache. I’m talking about a mini candle with a clean, subtle scent. Think: white tea, fresh linen, sandalwood, or citrus. Something that refreshes the air without demanding attention.
An essential oil diffuser is an excellent alternative. Ultrasonic diffusers use water and a few drops of oil to create a cool, scented mist. They’re silent, safe, and many have built-in LED lights that double as ambient lighting.
Why this works: Scent is the sense most directly connected to memory and emotion. The right fragrance can signal to your brain that it’s time to focus. Lavender and chamomile calm anxiety. Peppermint and citrus increase alertness. Rosemary improves memory retention. You can actually train your brain to enter “work mode” when you smell your desk scent.
Step-by-step guide to desk scenting:
- Choose your intention – Focus? Calm? Energy? Pick a scent family that matches.
- Start subtle – One drop of oil or a small candle. You can always add more.
- Position safely – Away from papers, cables, and the edge of your desk.
- Set a timer – For diffusers, 30 minutes on, 60 minutes off prevents olfactory fatigue (when you stop noticing the scent).
- Rotate scents – Using the same scent every day can make you nose-blind. Switch it up weekly.
Recommended product: A mini ultrasonic essential oil diffuser with automatic shut-off and color-changing LED lights. Pair it with a focus blend like peppermint, rosemary, and lemon.
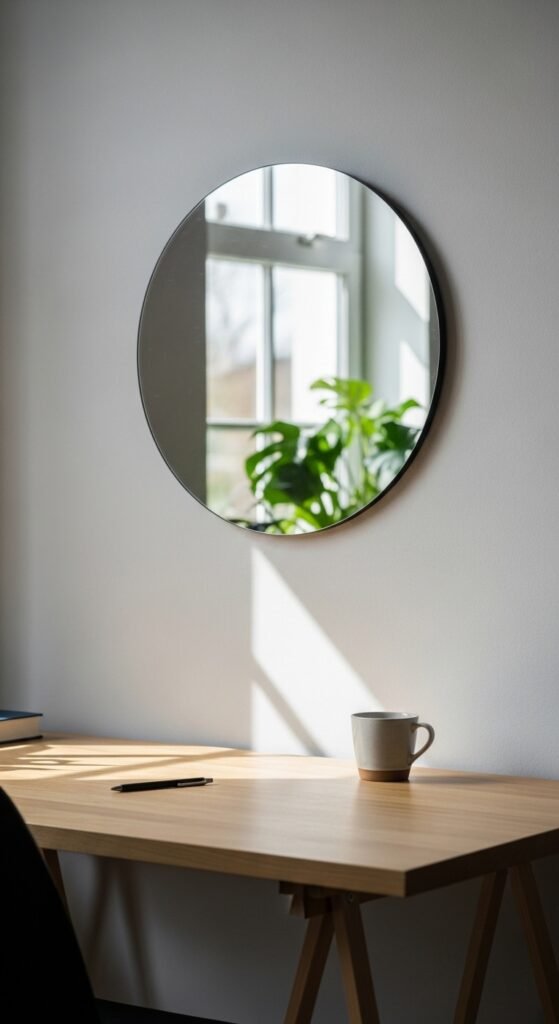
10. A Small Mirror Placed Strategically

This one surprised me. I added a small mirror to my desk area on a whim, mostly because I found a cute vintage one at a flea market. But after a few weeks, I noticed something unexpected. I was sitting up straighter. I was checking my posture throughout the day. I was even remembering to smile more during video calls.
Here’s the psychology behind it. Mirrors increase self-awareness. When you can see yourself, you’re more likely to adjust behaviors that don’t align with how you want to present yourself. Slouching, frowning, even the way you hold your phone during calls. A mirror provides gentle, real-time feedback.
Plus, mirrors reflect light. If you’re in a dim corner, a strategically placed small mirror can bounce natural light from a window across your workspace. This is especially useful for home offices that don’t get great sunlight.
Why this works: The mirror doesn’t need to be large. A 4×6 inch mirror is plenty. Position it off to the side of your monitor, angled slightly toward you. You shouldn’t see your full face constantly, just enough that you catch glimpses when you glance in that direction.
Step-by-step guide to mirror placement:
- Identify your light source – Window, lamp, overhead light. You want to reflect existing light, not create glare.
- Angle the mirror – Tilt it slightly upward to capture ceiling light, or slightly toward your window.
- Test the reflection – Sit in your working position. Adjust until you can see your upper body without turning your head.
- Secure it – Use adhesive putty or a small stand. A falling mirror is dangerous and distracting.
Recommended product: A small adhesive mirror designed for lockers or cubicles. These are lightweight, shatter-resistant, and come with strong mounting tape.
11. A Rotating Turntable for Frequently Used Items
I saw this hack in a video about small kitchen organization and had an immediate lightbulb moment. If it works for spices, why wouldn’t it work for desk supplies? I bought a small rotating turntable (sometimes called a lazy Susan) and loaded it with my most-used items. Sticky notes, paper clips, a small stapler, tape, white-out, my favorite highlighters.
Now, instead of reaching and stretching and knocking things over, I just spin the turntable. Everything I need is within a 6-inch radius. It’s one of those “why didn’t I think of this sooner” solutions that feels obvious in retrospect.
Why this works: The turntable keeps your desk accessories organized without forcing you to stack or nest things. You can see everything at once. You never have to move one thing to get to another thing. It’s a small change that eliminates dozens of tiny frustrations throughout your day.
Step-by-step guide to setting up a desk turntable:
- Audit your daily reaches – For one week, pay attention to what you touch most often.
- Gather those items – Aim for 8–12 small items. Too many defeats the purpose.
- Group by frequency – Your most-used item goes in the front-facing position.
- Leave breathing room – Items shouldn’t touch each other. You need space to grab.
- Test the rotation – Make sure nothing catches or interferes with the turntable’s movement.
Recommended product: A non-skid bamboo rotating turntable with a raised lip to prevent items from sliding off. The bamboo matches most desk aesthetics and doesn’t look like kitchen storage.
12. A Daily Affirmation or Quote Card
This might be the most personal item on the list, and that’s exactly the point. Your personalized workspace should reflect you. For some people, that means a photo of their family. For others, it’s a ticket stub from a concert or a postcard from a favorite trip. For me, it’s a small card with a quote that matters to me.
The quote is from the writer Anne Lamott. It says: “Almost everything will work again if you unplug it for a few minutes, including you.” I look at that card when I’m stuck, when I’m frustrated, when I’ve been staring at the same problem for an hour without making progress. It reminds me to step away, take a break, and come back fresh.
Why this works: Your brain is a meaning-making machine. It craves narrative and purpose. A daily affirmation or meaningful quote acts as an anchor for your values. When work feels pointless or overwhelming, that little card reminds you why you’re doing this and who you’re becoming in the process.
Step-by-step guide to choosing your quote or affirmation:
- Identify your biggest work challenge – Is it perfectionism? Procrastination? Imposter syndrome?
- Find a counter-message – Something that directly addresses that challenge.
- Keep it short – One sentence, maximum two. You need to read it at a glance.
- Write it by hand – Handwriting has more emotional resonance than printing.
- Replace it seasonally – Your needs change. So should your reminder.
Recommended product: A small acrylic sign holder that stands on your desk. You can swap out the card whenever you want. Or a mini letter board where you can change the message weekly.
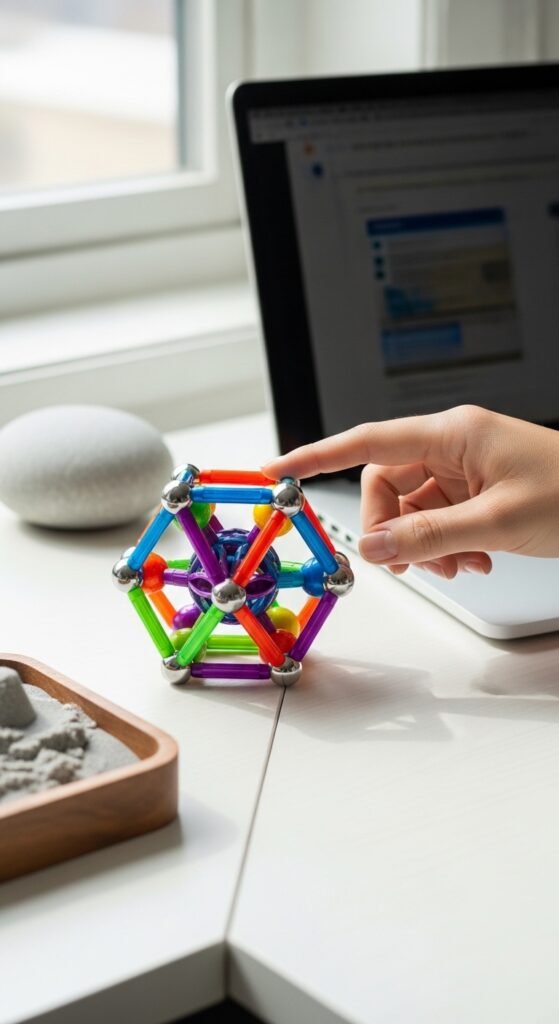
13. A Fidget Toy or Stress Relief Object

I used to think fidget toys were just for kids or people with diagnosed attention difficulties. Then I caught myself clicking my pen open and closed for fifteen solid minutes during a tense meeting. My coworker reached over and gently took the pen away. “You’re driving everyone crazy,” she whispered.
That’s when I realized that I needed a designated stress relief object. Something to occupy my hands when I’m anxious, thinking deeply, or listening without needing to take notes. A fidget toy isn’t a distraction. It’s a tool that channels nervous energy away from disruptive behaviors.
Good options for desk use: A smooth worry stone, a magnetic fidget slider, a small stress ball that fits in your palm, or even a piece of Blue Tac that you can squish and stretch. The key is that it should be quiet and small enough to use with one hand while your other hand continues working.
Why this works: Kinesthetic learning and movement help some people focus better. The small, repetitive motion of a fidget toy provides just enough sensory input to calm your nervous system without pulling your attention away from your primary task.
Step-by-step guide to choosing a fidget tool:
- Identify your fidgeting style – Do you squeeze? Roll? Click? Spin? Stretch?
- Test the noise level – In an open office, silence is golden. Avoid anything that clicks or rattles.
- Check the size – It should fit entirely in a closed fist.
- Consider the visual – Bright colors can be distracting. Neutral tones blend in.
- Keep it at your desk, not in your hand – Use it when you need it, not constantly.
Recommended product: A small worry stone made of polished marble or agate. The smooth texture and slight weight are calming without being juvenile. Or a magnetic ring fidget that you wear and spin.
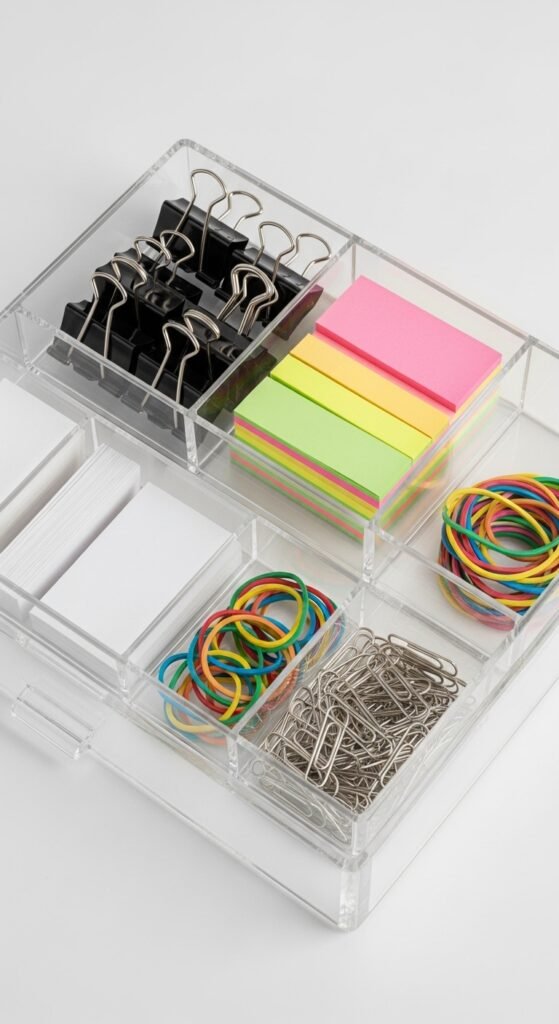
14. A Clear Desk Organizer for Drawers
The top of your desk is just the beginning. What’s inside your drawers matters just as much. For months, my desk drawers were what I’d call “abysses of despair.” I’d open a drawer looking for a specific cable or a spare USB drive, and I’d have to dig through a chaos of old receipts, expired snacks, and at least three dead AA batteries.
Then I invested in a set of clear desk organizers for my drawers. Adjustable dividers, small bins, stackable trays. Suddenly, I could see everything at once. I knew exactly where my spare earbuds were. I could find a sticky note without emptying the entire drawer.
Why this works: Hidden clutter creates hidden stress. Even if you don’t see the mess, you know it’s there. Your brain keeps a mental inventory of “things I need to organize” that drains cognitive resources. A clear, organized drawer system eliminates that background anxiety.
Step-by-step guide to organizing desk drawers:
- Empty the entire drawer – Yes, everything. Onto your desk.
- Sort into piles – Keep, trash, donate, relocate (things that don’t belong at your desk).
- Measure the drawer interior – Length, width, depth. Bring these measurements shopping.
- Categorize your keep pile – Writing tools, tech accessories, paper goods, personal items.
- Assign a home for each category – Use dividers or small bins to create zones.
- Label the zones – A label maker or even masking tape with marker. Future you will be grateful.
- Maintain the 80% rule – Leave 20% of drawer space empty for new items.
Recommended product: A modular clear drawer organizer set with adjustable dividers. The clear material means you can see contents without opening anything.
15. A Small Plant or Flower Vase (Yes, Another One)
I know, I already talked about desk plants. But hear me out. That first plant was about adding life and purifying air. This one is about adding color and seasonal change. A small vase that you fill with fresh flowers every week or two serves a completely different purpose than a succulent.
Fresh flowers are temporal. They bloom, they fade, you replace them. This cycle reminds you that time is passing, that beauty is fleeting, and that small rituals matter. Every Monday morning, I stop at the grocery store and spend $5 on a small bunch of flowers. I trim the stems, arrange them in my desk vase, and start my work week with that small act of care.
Why this works: The practice of tending to something beautiful, even for two minutes, is a form of mindfulness. It breaks the autopilot of your workday. And the visual contrast of fresh flowers against a screen or a stack of papers is genuinely uplifting.
Step-by-step guide to desk flowers:
- Choose a narrow vase – A test tube style or a small bud vase takes up minimal space.
- Pick flowers with staying power – Carnations last two weeks. Chrysanthemums last three. Tulips last five days but are worth it.
- Change the water every 2–3 days – This prevents bacteria and that weird smell.
- Trim stems at an angle – This increases water absorption.
- Remove leaves below the water line – Rotting leaves kill flowers faster.
Recommended product: A small glass bud vase with a weighted bottom so it doesn’t tip over. Or a magnetic vase that attaches to the side of your monitor stand.
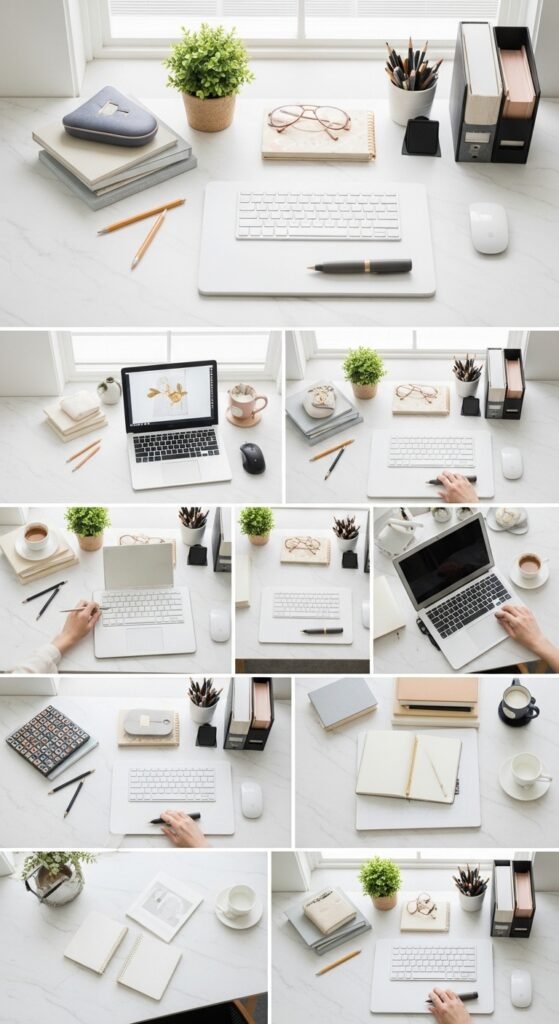
Putting It All Together: Your Step-by-Step Desk Transformation
Okay, you’ve made it through all 15 ideas. That’s a lot of information. You might be feeling excited, overwhelmed, or both. Let me give you a simple, actionable plan to transform your desk without spending a fortune or losing an entire weekend.
Week One: The Foundation
- Clear everything off your desk. Everything.
- Clean the surface thoroughly.
- Set up your cable management system.
- Position your desk lamp for optimal lighting.
- Install your monitor riser if needed.
Week Two: The Functional Core
- Add your desk mat.
- Set up your wireless charging station.
- Organize your pen holder and rotating turntable.
- Sort your drawers with clear organizers.
Week Three: The Living Elements
- Add your first desk plant.
- Set up your scent diffuser or candle.
- Install your task board (whiteboard or bulletin board).
Week Four: The Personal Touches
- Place your small mirror.
- Add your quote card or affirmation.
- Put your fidget tool in an accessible spot.
- Start your fresh flower ritual.
Week Five: Refine and Adjust
- Live with your new setup for a week.
- Notice what’s working and what’s not.
- Make small adjustments.
- Add one more plant if you want. Or remove something that feels like clutter.
Final Thoughts: Your Desk Is a Tool, Not a Museum
Here’s what I want you to remember. The goal of work desk decor isn’t to create a perfect, Instagram-worthy workspace that looks untouched. The goal is to create a space that works for you. A space where you can do your best work, feel relatively calm, and maybe even enjoy yourself a little.
Some days, your desk will get messy. That’s fine. Some days, you’ll knock over your plant or spill coffee on your desk mat. That’s also fine. The system you’ve built is resilient. It can handle real life.
Start small. Pick two or three items from this list that speak to you most directly. Maybe it’s the cable management (because you’re tired of the tangles). Maybe it’s the desk plant (because you need more living things in your life). Maybe it’s the quote card (because you need a daily reminder to be kind to yourself).
Buy those things first. Live with them for a week. Notice how they make you feel. Then add more if you want.
And here’s my promise to you. When you walk into your workspace tomorrow morning and see a desk that feels organized, comfortable, and distinctly yours, you won’t regret a single penny you spent. That feeling of “ah, I’m home” in the middle of your workday? That’s worth everything.
Ready to transform your workspace? Start with one item today. Just one. Your future self, the one who sits at that desk for 2,000 hours this year, will thank you.