15 baby nursery ideas are more than just a checklist—they are the foundation of your parenting journey’s first big creative project. When I was expecting my first child, I remember standing in the middle of an empty room, completely overwhelmed by paint chips, crib options, and conflicting advice from well-meaning relatives. My mother-in-law insisted on pastel pink, while my best friend swore by minimalist Scandinavian design. Honestly? I had no clue where to begin.
After raising three children and helping countless friends design their own nurseries, I have learned that the perfect nursery is not about following trends or pleasing everyone else. It is about creating a functional, peaceful space where you and your baby will spend countless hours bonding, feeding, and resting. That is why I have compiled these 15 baby nursery ideas to guide you through every decision, from layout to lighting, storage to safety.
In this comprehensive guide, we will walk through each idea step by step, using real-life examples and practical advice that will not break the bank or your sanity. Whether you are a first-time parent feeling anxious about getting everything right or an experienced mom looking for fresh inspiration, these baby nursery design tips will help you create a room you will genuinely love spending time in—even at 3 AM.
Why Thoughtful Nursery Planning Matters More Than You Think

Before diving into our 15 baby nursery ideas, let me share a quick story. My neighbor Sarah rushed to complete her nursery in two weeks before her scheduled C-section. She chose a gorgeous, expensive wallpaper with delicate gold foil accents. It looked like something from a magazine. However, within three months, she was miserable. The wallpaper reflected every bit of light, making daytime naps nearly impossible. The changing table was on the opposite side of the room from the diaper pail, leading to midnight stumbles. And her nursery storage solutions looked beautiful but held practically nothing.
She ended up completely rearranging the room at four months postpartum—exhausted and frustrated. Do not be Sarah. Smart planning upfront saves enormous stress later.
Idea #1: Start with a Neutral Foundation
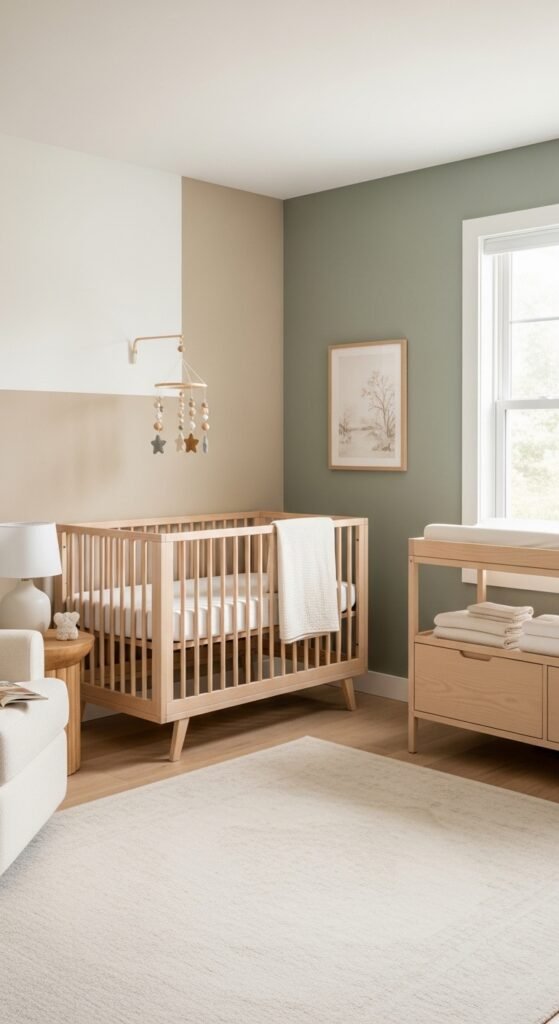
Neutral nursery color schemes provide the perfect backdrop for any theme or style. Think warm whites, soft beiges, gentle greys, or muted taupes. Why start neutral? Because babies change rapidly, and their preferences evolve even faster. That elaborate dinosaur theme might feel perfect during pregnancy but seem tacky when your toddler falls in love with unicorns.
Step-by-step guide to choosing neutral nursery colors:
- Select three neutral shades – one for walls (lightest), one for large furniture (medium), and one for accents (darkest).
- Test paint samples on at least two different walls, observing them morning, noon, and night.
- Consider your room’s natural light – north-facing rooms benefit from warmer neutrals like cream or greige.
- Buy sample-sized paints before committing to gallons (worth every penny).
- Paint the ceiling slightly lighter than walls to create an airy, open feeling.
I used Benjamin Moore’s “White Dove” for my second daughter’s nursery walls, paired with natural oak furniture and charcoal grey accents. Three years later, that room transitioned seamlessly into a big-girl bedroom with just new bedding and wall art. The neutral nursery foundation saved us hundreds of dollars and hours of repainting.
Recommended product: Low-VOC neutral paint from brands like Benjamin Moore, Sherwin-Williams, or Clare. These emit fewer harmful chemicals, creating a safe nursery environment for your newborn’s developing respiratory system.
Idea #2: Choose a Crib That Grows with Your Baby
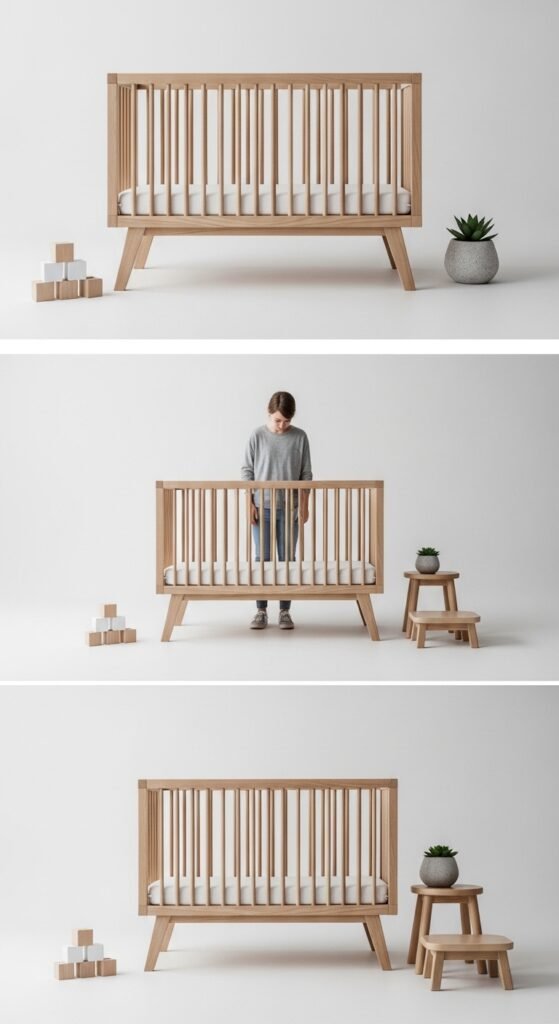
Convertible cribs are arguably the smartest investment you will make in your nursery. Unlike stationary cribs that become useless after two or three years, convertible models transform into toddler beds, daybeds, and even full-sized headboards. When you calculate the cost-per-year, a quality convertible crib actually saves money despite higher upfront pricing.
What to look for in a convertible crib:
- Four-in-one conversion capability (crib, toddler bed, daybed, full bed)
- Adjustable mattress heights (at least three positions)
- Solid hardwood construction (avoid particle board or MDF)
- Non-toxic finishes (look for GREENGUARD Gold certification)
- No drop-side mechanisms (these are now banned in the US for safety reasons)
My cousin bought a cheap stationary crib for $120 and ended up spending $400 on a toddler bed two years later. Meanwhile, my convertible crib cost $350 and is now serving as my son’s full-sized bed frame at age seven. That is what I call smart nursery planning.
Safety reminder: Always use a new crib mattress that fits snugly (less than two finger widths between mattress and crib frame). Never add bumpers, pillows, or soft toys to the crib, regardless of how adorable they look on Pinterest.
Recommended product: Babyletto Gelato 4-in-1 Convertible Crib – GREENGUARD Gold certified, made from sustainable New Zealand pine, and available in multiple finishes.
Also Read:The Ultimate White Sauce Recipe: A Creamy, Foolproof Guide to Sauce Perfection
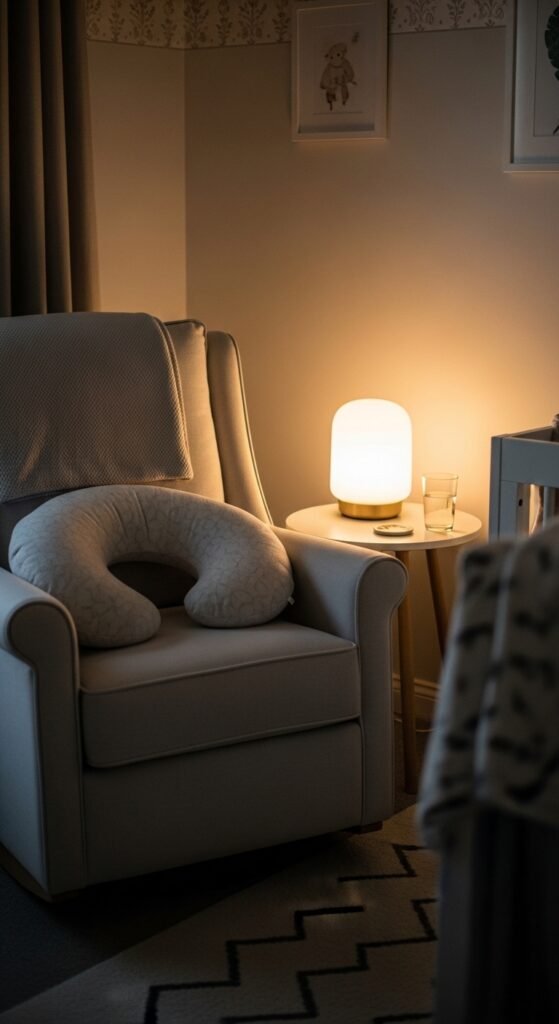
Idea #3: Invest in a Comfortable Nursery Glider or Rocking Chair
You will spend hundreds of hours in your nursery chair. Middle-of-the-night feedings, teething nights, bedtime stories, and quiet cuddles all happen here. This is not the place to cut corners or prioritize style over comfort.
Step-by-step guide to selecting the perfect nursery chair:
- Test chairs in person whenever possible – sit for at least ten minutes in your typical nursing or feeding position.
- Check the seat depth – your feet should comfortably reach the floor when seated.
- Look for tall backs that support your head and neck during exhausted 3 AM feedings.
- Consider armrest height – too low strains your shoulders; too high prevents comfortable baby positioning.
- Decide between glider vs. rocker – gliders move smoothly; rockers often provide more motion.
- Choose performance fabrics that resist stains, spills, and endless washing.
- Measure your doorways before purchasing – many nursery chairs will not fit through standard bedroom doors assembled.
My first nursery chair was a beautiful, inexpensive rocker from a big box store. Within six months, the padding compressed into a hard, uncomfortable slab, and the rocking motion developed an annoying squeak. For my second baby, I splurged on a high-quality nursery glider with replaceable cushions and a silent gliding mechanism. The difference in my back pain and overall comfort was staggering.
Recommended product: DaVinci Olive Glider and Ottoman – includes USB charging port, hidden storage pocket, and a machine-washable cover. The swivel feature alone makes middle-of-the-night feedings much easier.
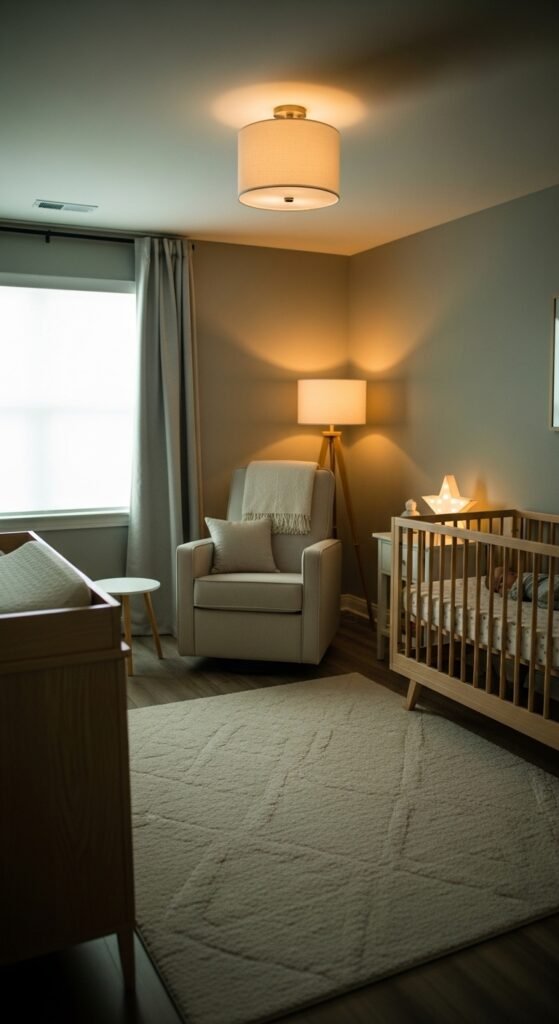
Idea #4: Create Layered Lighting for Every Situation
One overhead light fixture will not cut it in a nursery. You need multiple light sources with different brightness levels and purposes. Think of nursery lighting in three layers: ambient (general illumination), task (focused light for specific activities), and accent (mood-setting or decorative).
The essential nursery lighting setup:
- Dimmable overhead light on a dimmer switch (non-negotiable)
- Blackout curtains or shades (more on this in Idea #11)
- Adjustable nursery lamp beside the glider for nighttime feedings
- Nightlight near the changing table or door
- Closet light (battery-operated options work perfectly)
Step-by-step guide to lighting your nursery:
- Install a dimmer switch on your overhead light (under $20 and takes fifteen minutes).
- Position a nursery lamp within arm’s reach of your glider, ideally with a three-way bulb or dimming feature.
- Add a portable nightlight that you can move between changing table and feeding area.
- Test your lighting setup during a simulated nighttime routine before baby arrives.
- Consider smart bulbs that you can control from your phone – game-changing for late-night adjustments.
Here is a tip I learned from a sleep consultant: use a red-toned nightlight for nighttime changes and feedings. Red light does not suppress melatonin production like blue or white light, helping both you and baby fall back asleep more quickly. A simple red bulb in a small lamp transformed our nighttime wake-ups.
Recommended product: Hatch Rest Baby Sound Machine and Nightlight – combines white noise, customizable colors (including red), and a programmable nighttime routine in one device. The toddler lock feature means little fingers cannot accidentally change settings.
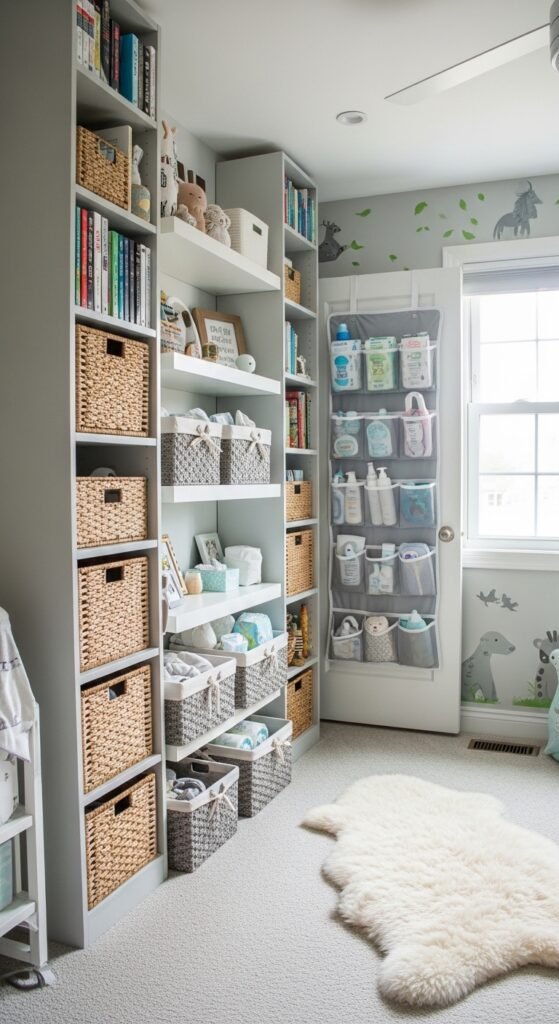
Idea #5: Maximize Vertical Space with Smart Storage
Babies come with an astonishing amount of stuff. Tiny humans somehow require more equipment, clothing, and accessories than most adults. Nursery storage solutions that use vertical space keep essentials accessible without cluttering your limited floor area.
Clever vertical storage ideas for nurseries:
- Floating shelves above the changing table for diapers, wipes, and creams.
- Wall-mounted pegboards for hanging bibs, burp cloths, and swaddles.
- Over-the-door organizers with clear pockets for tiny socks, hats, and accessories.
- Tall, narrow bookcases that use inches rather than feet of floor space.
- Hanging closet organizers with adjustable shelves for different-sized clothing.
- Ceiling-mounted hooks for frequently used items like diaper bags or carriers.
My friend Jessica transformed her tiny 8×10 foot nursery using vertical storage exclusively. She installed floor-to-ceiling shelving on one wall, storing out-of-season clothing in labeled bins on top shelves and daily items within easy reach below. The room felt twice as large afterward.
Step-by-step guide to planning nursery storage:
- Empty the room completely and live with it empty for one day.
- List everything you need to store (be realistic – include future items through age two).
- Measure every wall, including height to ceiling.
- Purchase storage pieces that fit your exact dimensions (custom shelving costs surprisingly little at hardware stores).
- Install baby-proofed storage for medications, lotions, and small items.
- Label everything clearly – sleep deprivation destroys memory.
Recommended product: 3M Command Nursery Shelves and Organizers – damage-free installation means you can rearrange as needs change without patching walls. Their picture hanging strips hold surprisingly heavy loads.
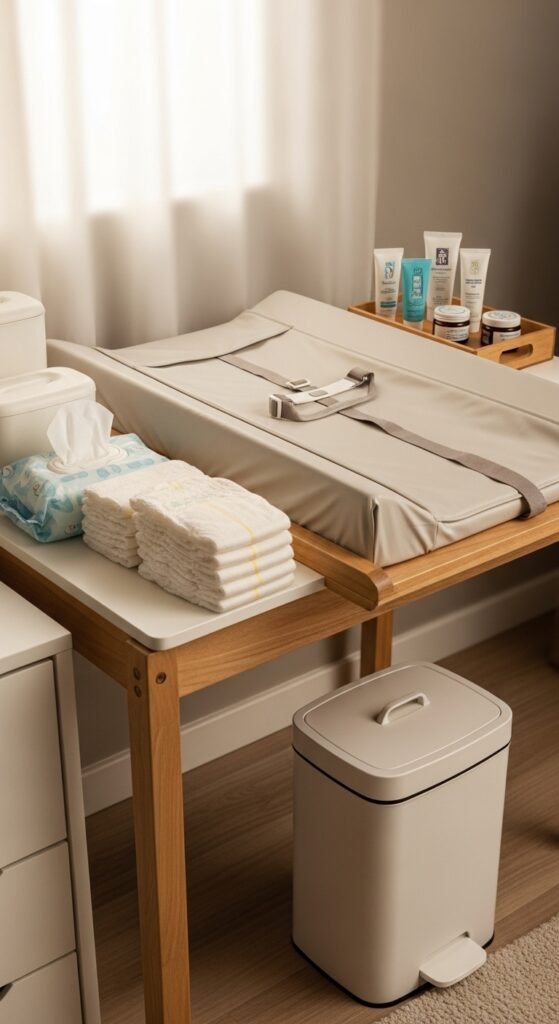
Idea #6: Design an Efficient Diaper Changing Station
You will change approximately 2,500 diapers in your baby’s first year. That is roughly seven changes per day, every single day. An ergonomic diaper changing station turns this repetitive task from frustrating to almost pleasant.
Essential elements of an efficient changing station:
- Changing table or dresser at standing elbow height (measure from floor to your bent elbow)
- Wipeable changing pad with raised sides and safety strap
- Diaper caddy stocked with diapers in current size plus one size up
- Wipes warmer (controversial but genuinely helpful for nighttime changes)
- Diaper cream spatula (keeps cream off your fingers and out from under nails)
- Hand sanitizer pump (faster than walking to sink after every change)
- Small trash can with lid (Diaper Genie or similar)
- Spare changing pad cover within reach – trust me on this one
Step-by-step guide to organizing your changing station:
- Position the changing table near both the door and the crib for easy access.
- Keep a small nursery trash can within arm’s reach of your dominant hand.
- Stock multiple diaper sizes – babies grow unpredictably.
- Roll several complete outfit changes and store them in clear bins nearby.
- Place a wet bag for cloth diapers or soiled clothes right next to the trash can.
- Install a small shelf above the changing table at eye level for distraction items (mirrors, high-contrast cards, small toys).
My personal changing station revelation came with baby number two: keep a complete backup outfit, including socks and a burp cloth, pre-rolled for each diaper size. When a blowout happens (and it will), you grab one roll and everything you need is together. No midnight searching for matching socks.
Recommended product: Keekaroo Peanut Changer – this wipeable, waterproof changing pad eliminates the need for covers and laundering. Just wipe it down with disinfectant after changes. The non-slip bottom and safety strap provide safe nursery design peace of mind.
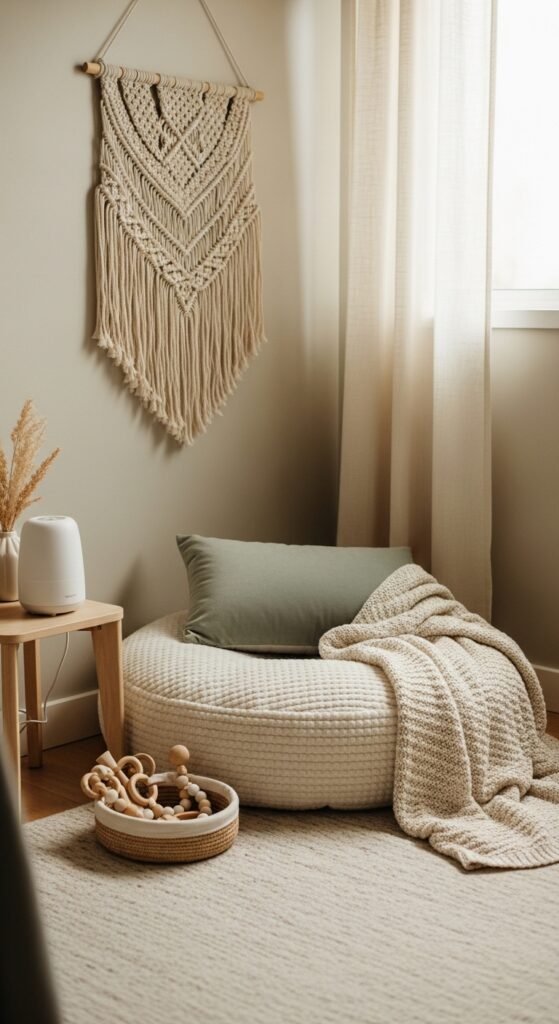
Idea #7: Incorporate Low-Stimulation Zones for Overstimulated Babies
Newborns get overwhelmed easily. Their developing nervous systems cannot process bright colors, loud patterns, or constant motion. Creating low-stimulation nursery zones gives your baby a visual and sensory break, which improves sleep quality and reduces fussiness.
How to create low-stimulation areas:
- Choose solid-colored bedding rather than busy patterns.
- Use soft, muted wall art on one wall only.
- Position the crib away from windows with moving shadows or busy views.
- Hang a canopy or crib tent (breathable mesh only) to reduce visual clutter.
- Keep floor clutter minimal – rotate toys rather than displaying everything at once.
- Install dim-to-warm bulbs that mimic natural sunset colors.
My first nursery was a riot of color—rainbow decals, patterned rug, stuffed animals everywhere. My daughter would stare at everything with wide eyes but struggled to settle. When I simplified to cream walls, natural wood, and just two soft-colored items in her line of sight, her daytime naps extended from thirty minutes to ninety minutes. The connection was unmistakable.
For the visual learner: Imagine your baby lying in the crib, looking around. What is in their direct line of sight? Remove anything with high contrast, moving parts, or bright colors from that field of vision. Save those stimulating items for tummy time and play mats.
Recommended product: Newton Baby Crib Mattress – completely washable and breathable, with a simple solid cover rather than patterned options. The breathable design provides safe sleep environment peace of mind for anxious new parents.
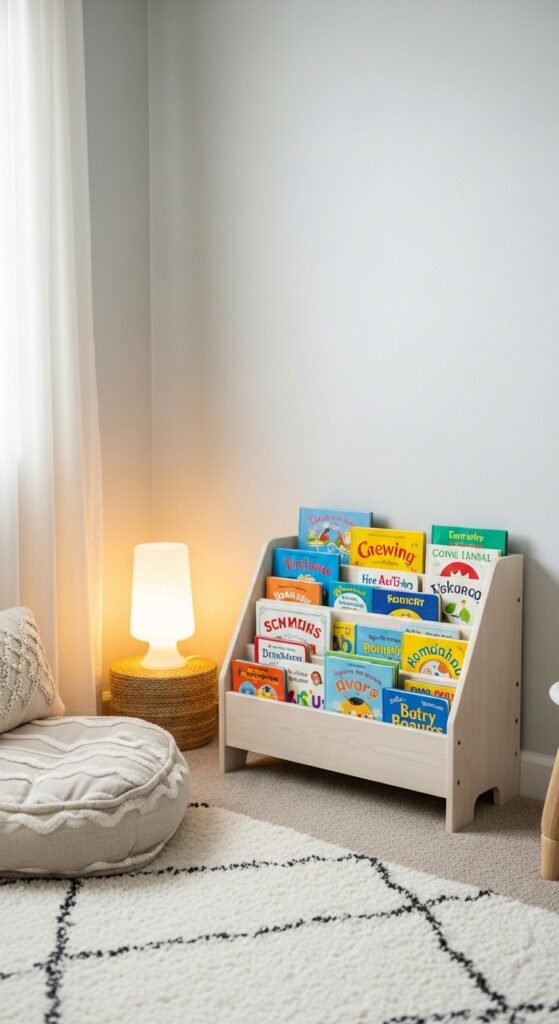
Idea #8: Create a Reading Nook for Future Literacy
It is never too early to establish reading routines. Even newborns benefit from hearing your voice and seeing high-contrast board books. A dedicated nursery reading nook signals that books and stories are special, setting the stage for lifelong literacy.
Reading nook essentials:
- Comfortable floor cushion or small child-sized chair
- Low, accessible bookshelf (front-facing displays work best for babies)
- Good task lighting positioned to illuminate book pages without glare
- Soft rug for tummy time reading
- Book rotation system (10–15 books at a time, swap monthly)
- Basket of board books reachable from floor level
Step-by-step guide to building a reading nook:
- Choose a quiet corner away from windows and high-traffic areas.
- Place a soft rug or play mat as the foundation.
- Add a child-friendly book display – front-facing covers attract baby attention.
- Position a floor lamp or wall sconce for even lighting.
- Keep a basket of high-contrast books for newborns plus textured books for older babies.
- Add a small pillow or nursing cushion for parent comfort during reading time.
We started reading to our son in his nursery reading nook from his first week home. By four months, he would turn his head toward the book basket when we sat down. By eight months, he could flip board book pages (mostly). Now at two years old, he “reads” independently for twenty-minute stretches. That reading nook became the most-used area of his nursery after the crib.
Recommended product: KidKraft Wooden Bookcase with Storage Bins – front-facing display on top, bin storage below, and tip-resistant hardware included. The rounded corners and smooth finish meet baby safety standards perfectly.
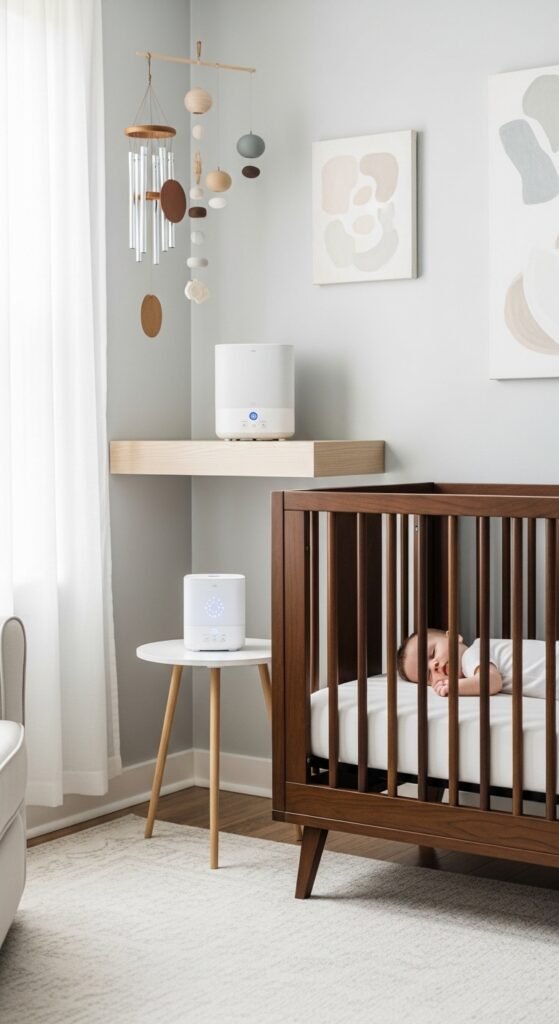
Idea #9: Install a Ceiling-Mounted Baby Mobile with Intention
A nursery ceiling mobile does more than look pretty – it supports visual development, provides calming entertainment, and can even become part of your sleep routine. But not all mobiles are created equal, and placement matters enormously.
What makes an effective baby mobile:
- High-contrast colors for newborns (black, white, red)
- Simple shapes rather than complex figures
- Slow, smooth movement (avoid jerky or fast-spinning mobiles)
- Secure ceiling mount (never use adhesive hooks)
- Remove before baby can pull up (typically around five months)
Step-by-step guide to mobile installation:
- Position the mobile directly over the crib’s center.
- Hang at least 12 inches above the mattress (further for taller mobiles).
- Ensure no strings or hanging elements reach within baby’s grasp.
- Test the motion from multiple angles.
- Consider a DIY mobile with removable elements you can swap as baby grows.
- Mark your calendar to remove the mobile when baby shows signs of pushing up.
Here is something I learned the hard way: mobiles are for newborns, not older babies. Once your baby can push up onto hands and knees (usually 5–7 months), the mobile becomes a hazard. Enjoy the mobile during those early months, then replace it with a ceiling-mounted decor piece or remove it entirely.
Recommended product: Tiny Love Meadow Days Super Star Mobile – includes multiple attachment options (ceiling or crib side), six different melodies, and high-contrast characters. The arms fold flat for storage between children.
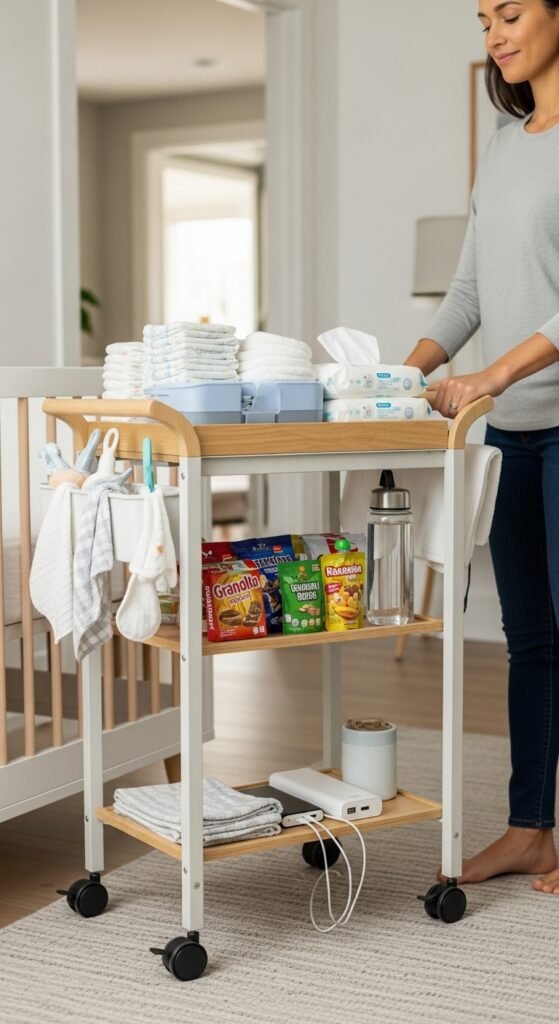
Idea #10: Add a Caddy System for Mobile Stations

Babies do not stay in one place, and neither should your supplies. A portable nursery caddy system lets you bring essentials wherever you need them – the living room, your bedroom, even outside on nice days.
Setting up your caddy system:
- Main caddy (large) – diapers, wipes, changing pad, cream, hand sanitizer, spare onesie
- Feeding caddy (medium) – burp cloths, nipple cream or bottles, pacifiers, small towel
- Emergency caddy (small) – nail clippers, thermometer, nasal aspirator, gas drops
- Travel caddy (compact) – duplicates of essentials for diaper bag or car
Step-by-step guide to caddy organization:
- Purchase clear, washable caddies with comfortable handles.
- Use smaller containers inside caddies to prevent rummaging (pencil cases work perfectly).
- Label each caddy section with simple icons (visual cues help exhausted brains).
- Restock caddies every morning during first feeding.
- Keep one caddy permanently in your most-used non-nursery location.
- Create a “low stock” signal (I use a red hair tie on the handle).
When my second baby spent two weeks in the NICU, my organized caddy system kept me sane. I could grab one caddy for each visit, knowing everything I needed was inside. The nurses even commented on how efficiently I could do diaper changes in their cramped parent room.
Recommended product: mDesign Portable Nursery Caddy – deep side pockets, sturdy metal handles, and a removable divider. The breathable mesh pockets let you see contents at a glance. Available in multiple colors to color-code your caddy system.
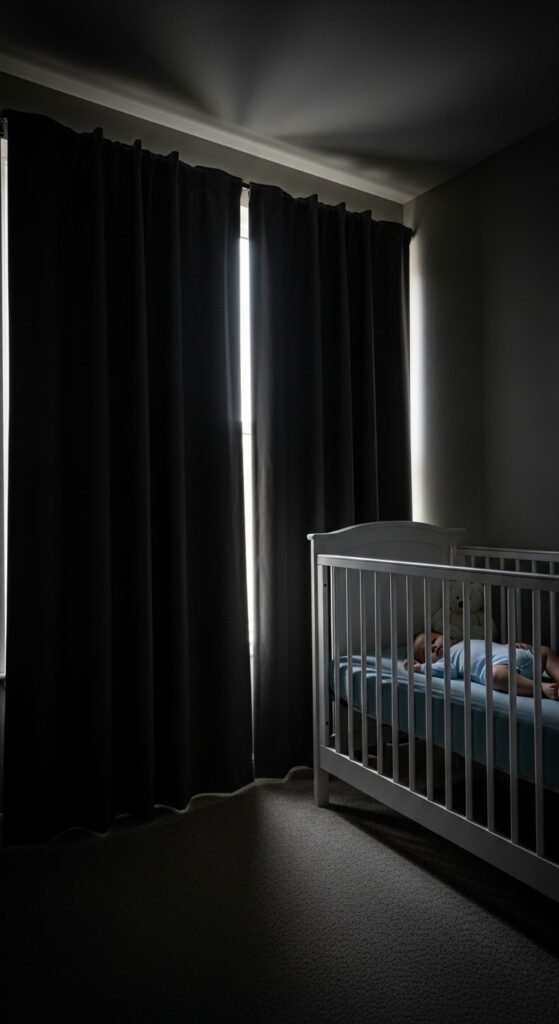
Idea #11: Invest in True Blackout Window Treatments
Light is the enemy of newborn sleep. Those adorable sheer curtains might look beautiful, but they will sabotage your baby’s naps and your sanity. Blackout nursery curtains or shades are non-negotiable for healthy sleep patterns.
Types of blackout solutions:
- Blackout curtains (most affordable, best for rental properties)
- Cellular blackout shades (best insulation, cleanest look)
- Blackout roller shades (easiest to operate one-handed)
- Blackout window film (best for oddly shaped windows)
- Portable blackout panels (great for travel or temporary setups)
Step-by-step guide to blackout installation:
- Measure your window width and add 4–6 inches on each side.
- Mount curtain rods 4–6 inches above and wider than the window frame.
- Layer two blackout panels per window for complete coverage.
- Use velcro strips along the edges to seal light gaps.
- Test during the brightest part of the day (2 PM is ideal).
- Add a door draft stopper if light seeps under the nursery door.
A friend once complained that blackout curtains “didn’t work” in her nursery. When I visited, I saw the problem immediately: her curtain rod was mounted flush with the window frame, leaving two inches of light gap on each side. We remounted the rod properly and added velcro seals. Her baby’s naps extended from thirty minutes to two hours the very next day.
Recommended product: NICETOWN Blackout Curtains – these affordable panels block 99% of light when properly installed, come in dozens of colors, and are machine washable. The thermal insulation also helps maintain consistent nursery temperature year-round.
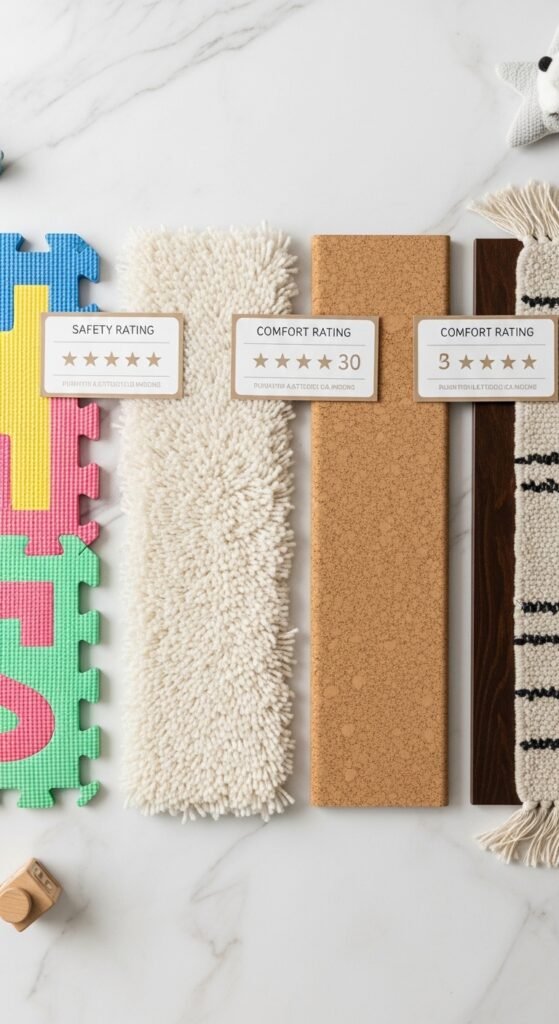
Idea #12: Choose Flooring That Prioritizes Safety and Comfort
Your baby will spend significant time on the nursery floor – tummy time, crawling practice, playing, and eventually toddling around. Nursery flooring choices directly impact safety, warmth, and ease of cleaning.
Best flooring options for nurseries:
- Soft carpet with low pile (warmest, softest for falls, but hardest to clean)
- Cork flooring (naturally antimicrobial, warm underfoot, moderate cleanup)
- Luxury vinyl plank (waterproof, easy to clean, can add area rugs)
- Foam play mats (most affordable, best cushioning, temporary solution)
- Hardwood with area rugs (beautiful, durable, requires rug cleaning)
What to avoid:
- High-pile or shag carpet (traps allergens, hard to clean, crawling hazard)
- Smooth tile or stone (cold, slippery, hard falls)
- Wall-to-wall carpet in rental properties (unknown cleaning history)
Step-by-step guide to nursery flooring:
- Assess your subfloor and existing flooring condition.
- Prioritize non-toxic materials (look for GreenGuard Gold certification).
- Add washable area rugs over hard surfaces for warmth and cushioning.
- Use non-slip rug pads under all area rugs.
- Deep clean carpets before baby arrives (professional steam cleaning).
- Consider cork play mats for dedicated play areas.
We installed cork flooring in our third nursery and added a large washable wool rug. The cork stayed warm even in winter, cleaned up beautifully after spit-up incidents, and provided just enough cushion for early crawling attempts. Three years later, that floor still looks new.
Recommended product: House of Noa Cork Play Mat – non-toxic, waterproof, and reversible with different patterns on each side. The 1-inch thickness provides safe baby play area cushioning without creating a tripping hazard for parents.
Idea #13: Create a Calming Sound Environment
Sound management in a nursery involves two elements: blocking disruptive noises and adding beneficial sounds. A thoughtful nursery sound design improves sleep quality for both baby and parents.
Sound solutions for nurseries:
- White noise machine (continuous, non-looping sound is best)
- Brown or pink noise (lower frequencies than white, often more soothing)
- Sound-absorbing panels (reduce echo and outside noise transmission)
- Draft stoppers (block sound under doors)
- Weather stripping (seal windows against outdoor noise)
- Rug padding (absorb impact sound from upstairs neighbors)
Step-by-step guide to nursery sound design:
- Spend a night in the nursery to identify noise issues.
- Position the crib away from shared walls and windows.
- Place the white noise machine between the crib and the noise source.
- Set white noise volume to 50–60 decibels (about shower volume).
- Use continuous play rather than timer settings.
- Have a battery-powered backup for power outages.
My neighbor’s dog barking used to wake my daughter from every nap. We tried everything until a sleep consultant suggested adding a second white noise machine near the shared wall, playing brown noise at a slightly lower frequency. The difference was immediate and dramatic. Now I recommend dual noise machines for anyone with noise issues.
Recommended product: LectroFan High-Fidelity White Noise Machine – twenty non-looping sounds, precise volume control, and no Bluetooth or Wi-Fi (no interference or hacking concerns). The fan-based mechanism creates truly random sound.
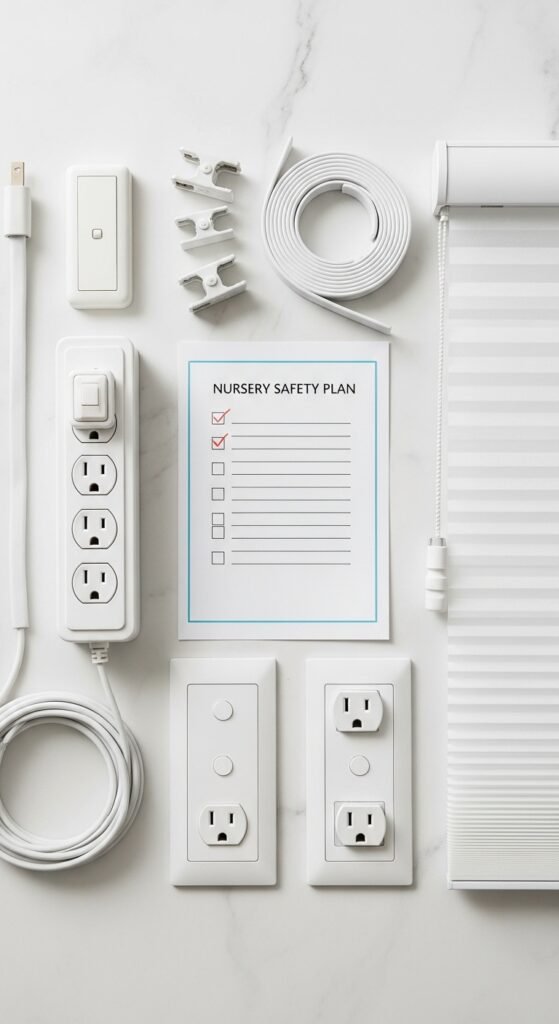
Idea #14: Plan Your Electrical and Cord Safety in Advance
Electrical hazards in nurseries are often overlooked until it is almost too late. Baby-proofed nursery electrical systems should be designed before furniture arrangement, not added as an afterthought.
Essential electrical safety measures:
- Outlet covers (sliding plate covers are safest)
- Cord shorteners (wrap excess cord length securely)
- Cordless window blinds (retrofit kits available for existing blinds)
- Anchor furniture straps (dressers, bookshelves, changing tables)
- Cover unused outlets behind furniture as well as visible ones
- Secure floor lamps with weighted bases or wall straps
Step-by-step guide to nursery electrical safety:
- Walk through the nursery at baby’s eye level (crawl if possible).
- Identify every cord, outlet, and electronic device.
- Replace all window blinds with cordless versions.
- Install tamper-resistant outlets (required in new construction but worth retrofitting).
- Use cord covers to run wires along baseboards rather than across floors.
- Test outlet covers weekly – babies figure them out faster than you expect.
When my son was nine months old, he managed to pull a floor lamp over by grabbing the cord. The lamp missed him by inches. That same week, I anchored every piece of furniture in our house and installed cord shorteners on everything. Do not wait for a close call – baby safety standards exist for good reason.
Recommended product: Safety 1st Outlet Cover with Cord Shortener – this two-in-one solution covers the outlet while securing excess cord length. The sliding mechanism requires two distinct motions to open, which toddlers cannot master until around age three.
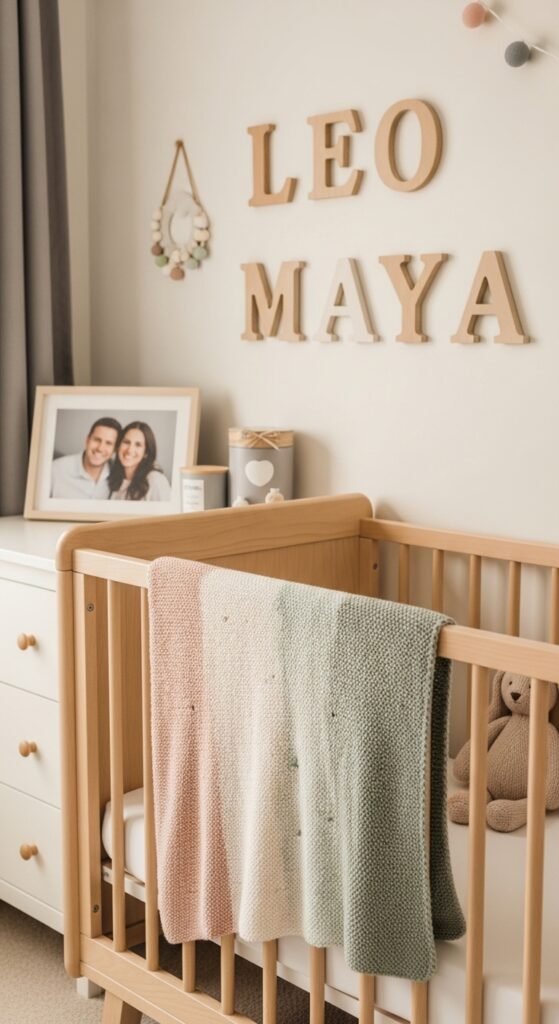
Idea #15: Personalize with Meaningful, Safe Decor
Finally, after all the practical considerations, make the nursery feel like yours. Personalized nursery decor creates emotional connection and warmth, but safety should always come first.
Safe personalization ideas:
- Family photos in shatterproof frames mounted high on walls
- Hand-painted murals using non-toxic paint (no vinyl decals near crib)
- Keepsake shadow boxes for hospital bracelets or first outfit (mounted securely)
- Growth chart painted directly on wall (no hanging elements)
- Name letters made from soft fabric rather than wood (wall-mounted well above crib)
- Seasonal rotation of simple wall art for variety without clutter
What to avoid in nursery decor:
- Hanging shelves above the crib (falling hazard)
- String lights or garlands anywhere near crib
- Heavy picture frames (even mounted frames can fall during earthquakes)
- Stuffed animals in crib or on low shelves (suffocation hazard)
- Scented candles, plug-in air fresheners, or essential oil diffusers
Step-by-step guide to safe nursery personalization:
- Choose one focal wall for personalized elements.
- Mount everything at least three feet above floor level.
- Use museum putty behind frames to prevent vibration movement.
- Take photos of your personalized decor for baby books.
- Plan for easy removal or modification as baby grows.
- Consider a digital photo frame for rotating family pictures.
For my children’s nurseries, I painted simple watercolor animals directly on the walls using non-toxic craft paint. Each animal represented a family member or inside joke. The murals cost under $20 in supplies, took one afternoon each, and remain conversation pieces years later.
Recommended product: Munchkin Nursery Projector and Sound Machine – projects peaceful images on the ceiling while playing lullabies. The automatic shut-off timer and remote control make this a safer alternative to hanging decor near the crib.
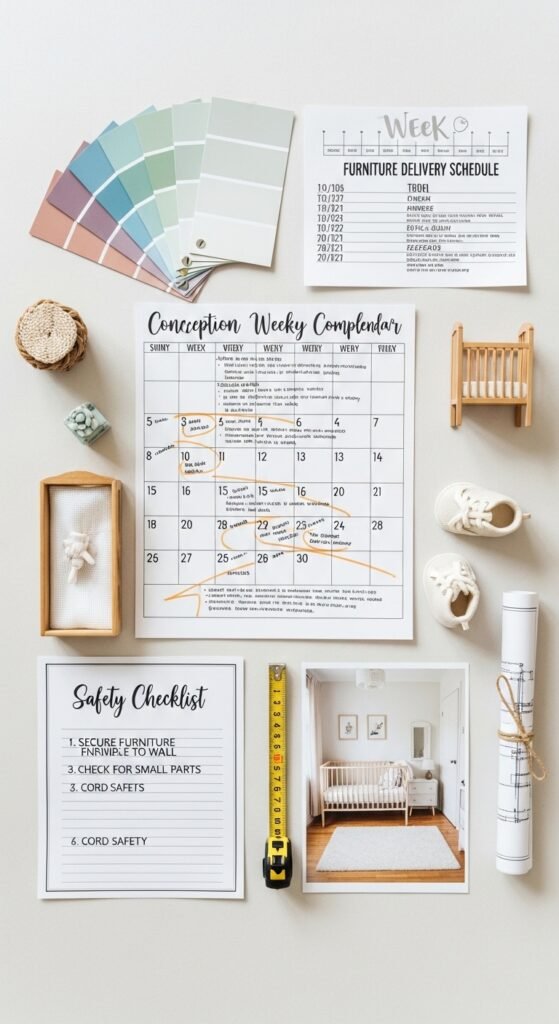
Bringing It All Together: Your Nursery Creation Timeline
Now that you have these 15 baby nursery ideas, how do you actually execute them without becoming overwhelmed? Here is a realistic timeline based on my three nursery projects:
Second trimester (weeks 14–26):
- Choose neutral paint colors and flooring
- Purchase convertible crib and safe mattress
- Order nursery glider (longest lead time item)
- Install blackout window treatments
- Complete electrical safety updates
Early third trimester (weeks 27–34):
- Paint walls and ceiling
- Assemble and anchor furniture
- Install lighting and sound systems
- Create caddy system
- Set up changing station
Late third trimester (weeks 35–birth):
- Add personal decor touches
- Organize reading nook
- Wash all bedding and clothing
- Install baby mobile (temporarily)
- Final safety walk-through
After baby arrives:
- Remove mobile at first signs of pushing up
- Adjust caddy contents as needs change
- Rotate books and toys monthly
- Deep clean flooring every 3–6 months
Final Thoughts: Confidence in Your Nursery Choices
Creating your baby’s first room should feel exciting, not terrifying. These 15 baby nursery ideas have helped thousands of parents design spaces that work beautifully for real life – not just Pinterest photos. Every recommendation here comes from actual experience, late-night trial and error, and conversations with pediatricians, sleep consultants, and safety experts.
Remember that perfect nurseries do not exist. Your baby will not care if the curtains perfectly match the rug or if the wall art came from an expensive boutique. What matters is that the space is safe, functional, and filled with love. Everything else is just decoration.
You have got this. Start with the neutral foundation, invest in quality where it counts (crib, glider, blackout curtains), and add personal touches gradually. Before you know it, you will be rocking your sleeping baby in a room that feels like a peaceful haven – exactly as it should be.
Ready to start your nursery project? Explore our curated nursery collection featuring all the products mentioned in this guide, plus exclusive discounts for first-time parents. Every product meets strict safety and quality standards, and our parent support team is available 24/7 to answer questions about assembly, installation, or design decisions.
Your dream nursery is closer than you think. Let’s build it together.