Short nails are not a limitation—they’re an invitation to be clever. You don’t need long talons to turn heads; you need smart, scaled-down ideas that work with your nail bed, not against it. The right short nail arts tips can make your fingers look longer, your polish last longer, and your creativity shine without feeling cramped. From negative space to micro pearls, the following sixteen techniques are designed to be done at home, enjoyed daily, and adapted to any mood or season. Let’s explore each one in a relaxed, no‑pressure way.
1. Embrace Negative Space for a Breathable, Modern Look
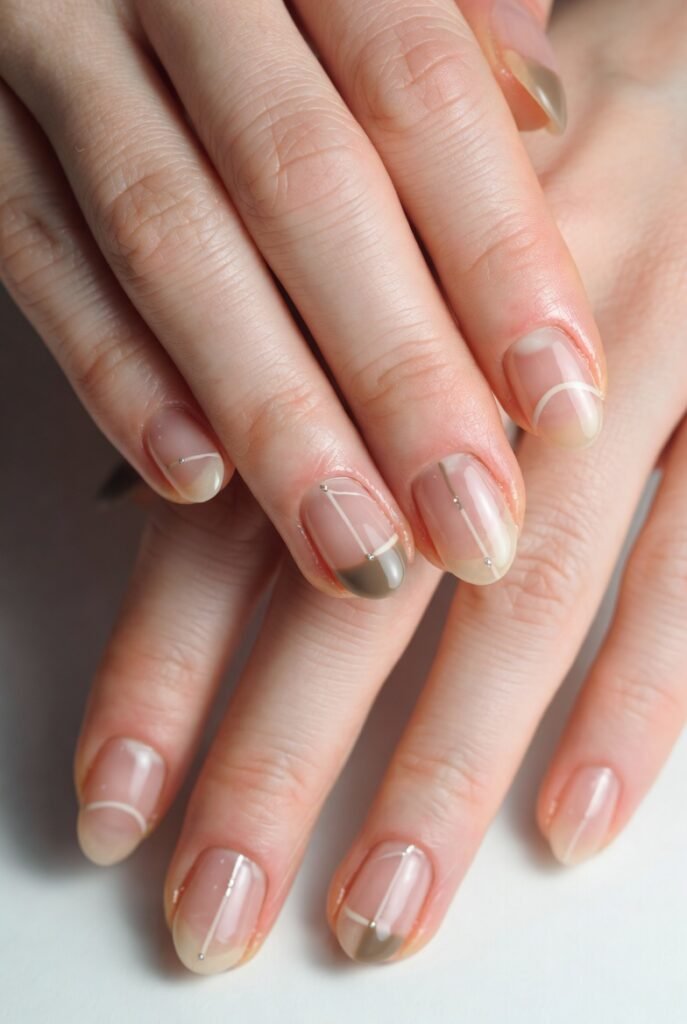
Leaving parts of your natural nail visible isn’t just trendy—it’s a smart strategy for short nails. When you allow bare nail to peek through geometric cutouts or simple half-moon shapes, the eye perceives more length and cleaner lines. This approach works beautifully because it reduces the risk of overcrowding tiny surfaces. A single stripe of color down the center or a tiny triangle near the cuticle can feel intentional and artistic without overwhelming the nail bed.
You can achieve this effect using striping tape or a steady hand with a thin brush. Choose a muted pastel or a bold jewel tone for the painted sections, letting the natural pink of your nail provide contrast. The result is a manicure that looks high‑end yet requires surprisingly little product. Negative space also makes your polish last longer because there’s less surface area to chip, so you’ll enjoy your design for days without constant touch‑ups.
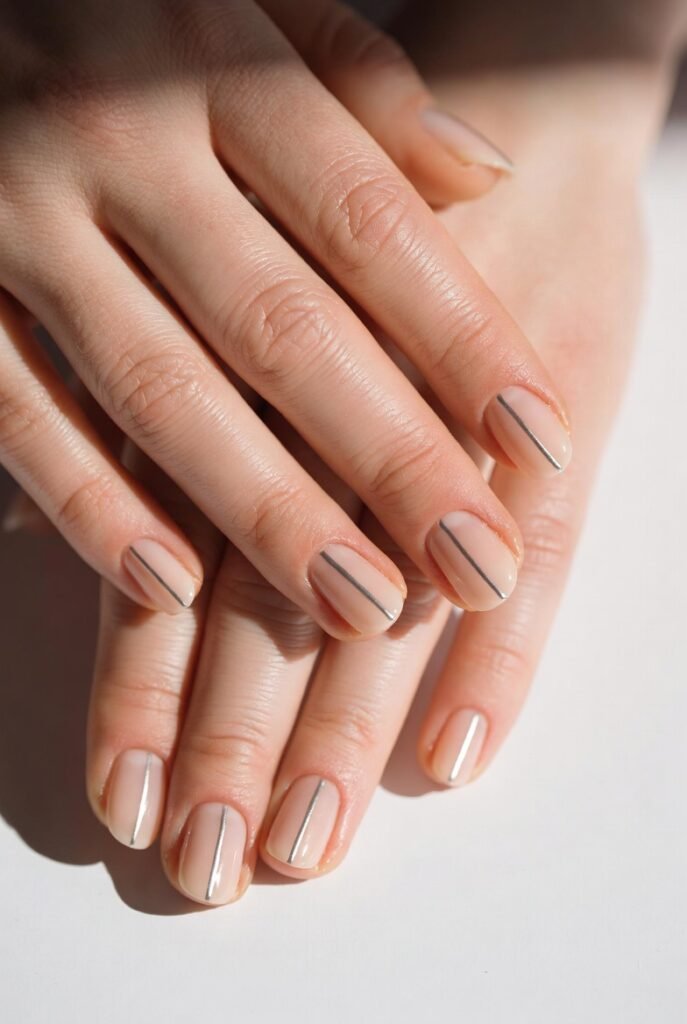
2. Try a Single Floating Line for Instant Elegance
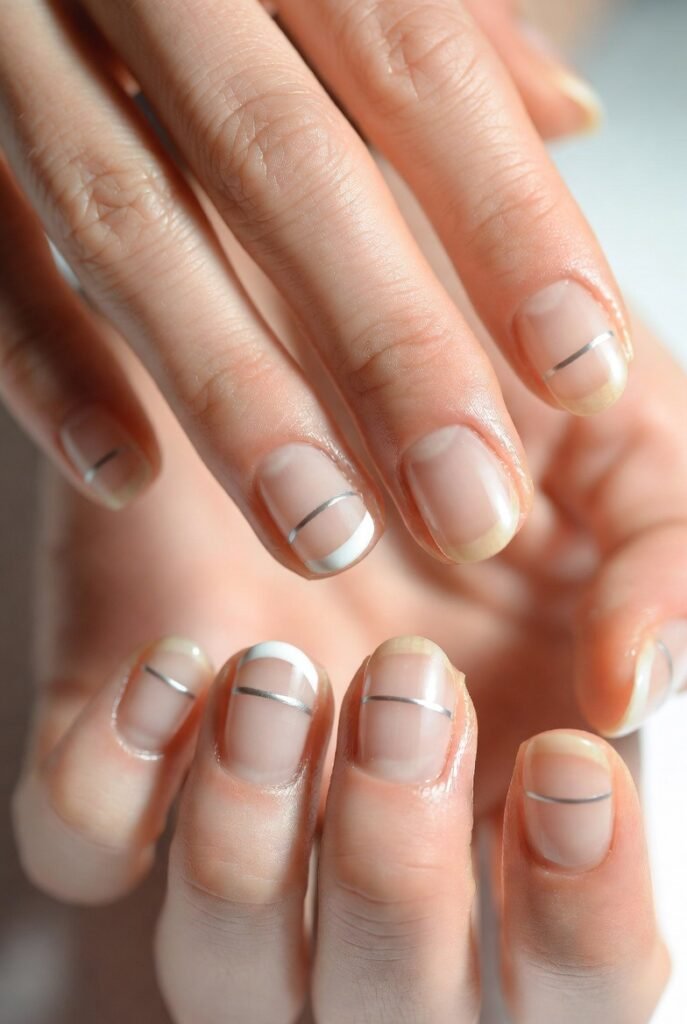
A solitary horizontal or vertical line can do wonders for short nails because it draws the eye along the nail’s natural axis. Instead of busy patterns, this minimalist approach relies on contrast and placement. Using a thin nail art brush or a liner polish, paint one fine stripe from cuticle to tip or across the center. Gold or silver lines over a deep burgundy base look especially striking for evening wear.
You can also experiment with off‑center lines that curve slightly to follow your nail’s edge. The key is keeping the rest of the nail clean and solid, so the line becomes the focal point. This technique works on all short shapes—square, round, or almond—because it doesn’t require extra length to be readable. Pair a matte topcoat with a glossy line, or vice versa, to add texture without adding clutter.
3. Use Dots as Playful Accents Without Overcrowding
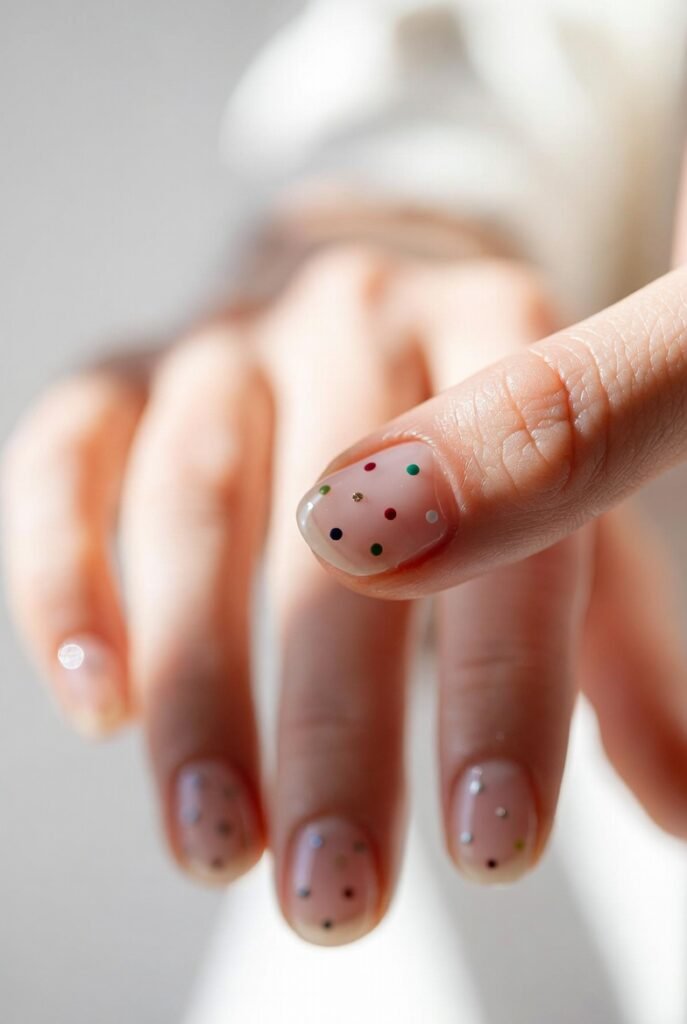
Dots are the gateway to easy nail art because they forgive slight imperfections and scale perfectly to small nails. A single dot near the cuticle, a cluster of three along the sidewall, or a polka dot pattern spaced widely apart all feel cheerful and intentional. Dotting tools or even a bobby pin can create uniform circles that break up a solid color without demanding a steady hand. Pastel backgrounds with white dots evoke spring, while black dots over neon feel edgy and fun.
To avoid a childish look, keep your dots small and well‑spaced. Two dots at the base of each nail mimic subtle studs, while a line of tiny dots tracing the smile line adds whimsy. You can also alternate dot colors on different nails—for example, mint green nails with lavender dots on some, and lavender nails with mint dots on others. Short nails benefit from this because dots don’t get cut off or distorted at the tip the way larger motifs might.
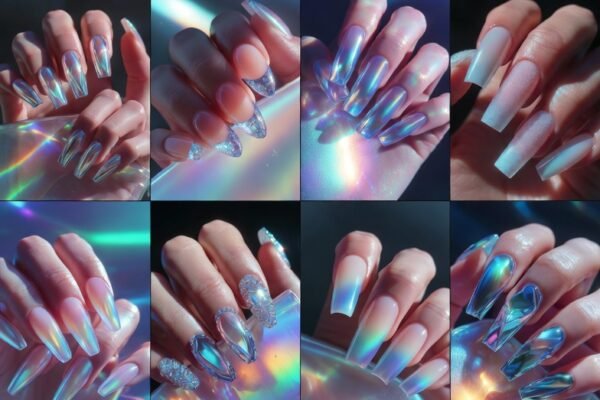
4. Add Metallic Tips for a Reverse French Manicure
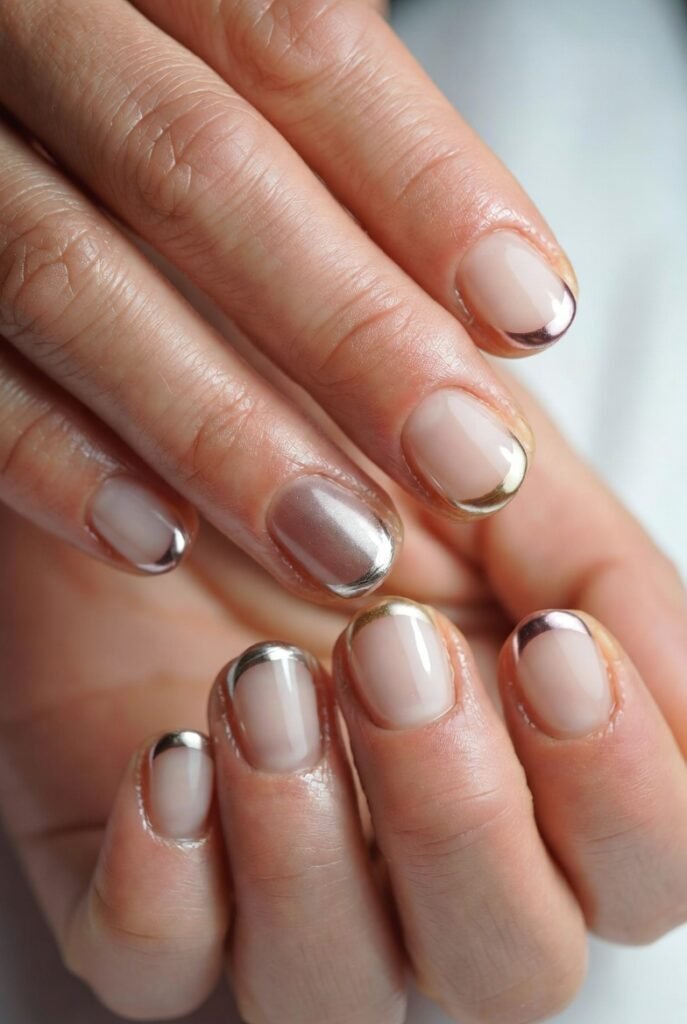
The classic French tip often looks harsh on short nails because the white band consumes too much real estate. Flip the formula by painting the tip with a metallic shade like rose gold, chrome, or copper, keeping the rest of the nail nude or sheer. This modern twist creates the illusion of length because the reflective finish catches light and blurs the actual nail edge. You only need a millimeter of metallic color at the very end—just enough to define the tip without overpowering the short shape.
For an even more innovative look, paint the metallic tip in a V‑shape or a shallow curve instead of the traditional smile line. This draws the eye upward and outward, subtly lengthening the finger. Pair it with a glossy topcoat over the whole nail to seal the metallic flakes and add shine. The effect is polished enough for the office but interesting enough to spark compliments.
5. Create Colorblocked Sections with Masking Tape
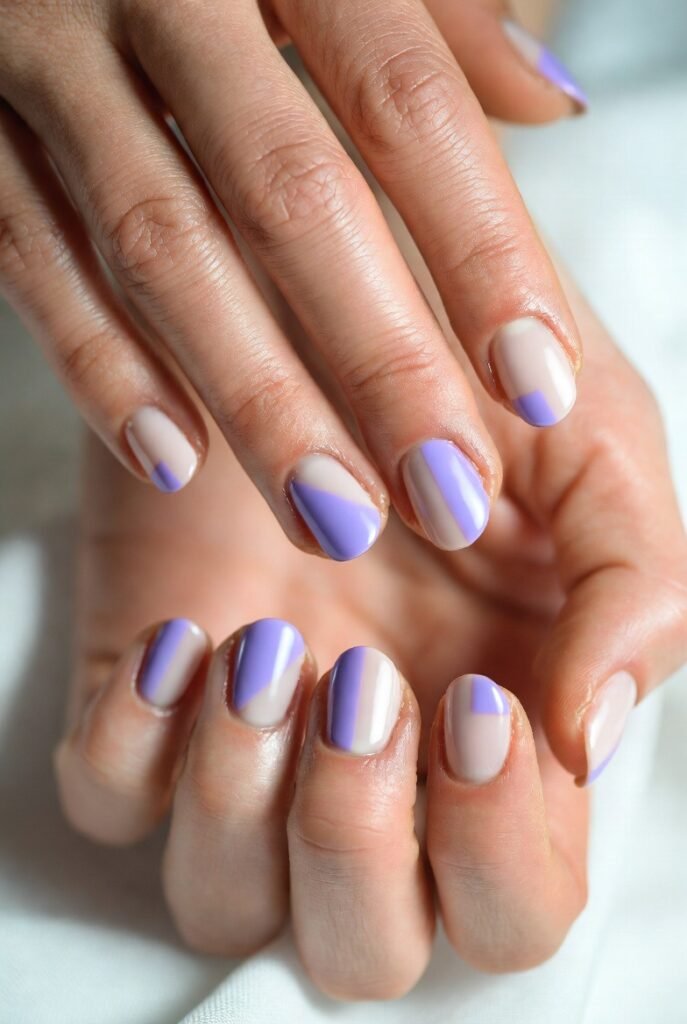
Short nails are ideal for bold colorblocking because the small surface keeps the design from looking chaotic. Using thin strips of masking or washi tape, section off one corner of each nail—say, the lower left quadrant—and paint it a contrasting shade. The precision of this method relies on clean edges, and tape is your best friend. Once the base color dries completely, apply tape, paint the second color, and peel away immediately for razor‑sharp lines. Try navy and tangerine, or blush pink and forest green.
You don’t need to colorblock every nail the same way. Paint the ring finger of each hand with a diagonal split, while other nails feature a small corner block. This variation keeps the manicure dynamic without feeling mismatched. Because your nails are short, the blocked sections won’t look like random patches; instead, they’ll read as deliberate graphic art. Finish with a thick clear coat to smooth over any slight texture from the tape lines.
6. Apply a Glitter Gradient That Fades Upward
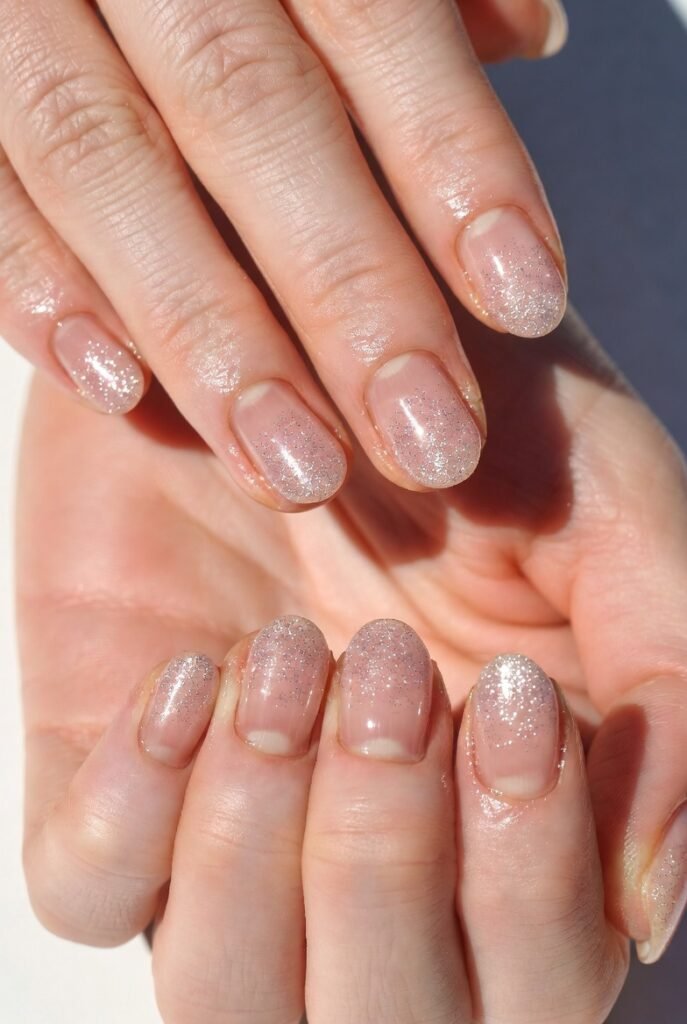
A full glitter nail can feel too heavy on short nails, but a glitter gradient—dense at the tip and fading toward the cuticle—adds sparkle without bulk. Using a makeup sponge, dab glitter polish lightly onto the upper third of each nail, building intensity at the very edge. This technique mimics the look of expensive dip powder but costs nothing extra. The naked or sheer base near the cuticle keeps the nail visually open and longer‑looking, while the glitter draws attention to the tip.
Choose a fine glitter in a tone that complements your skin, such as champagne, silver, or rose. Avoid chunky hexagonal glitters, as they can feel lumpy on short beds. For a sunset effect, layer a pale pink glitter over a coral base, letting the base color peek through the faded area. The sponge method also works with metallic flakies or holographic particles. This design lasts longer than full glitter because the thinner application near the cuticle resists peeling.
7. Paint Half Moons at the Cuticle Base
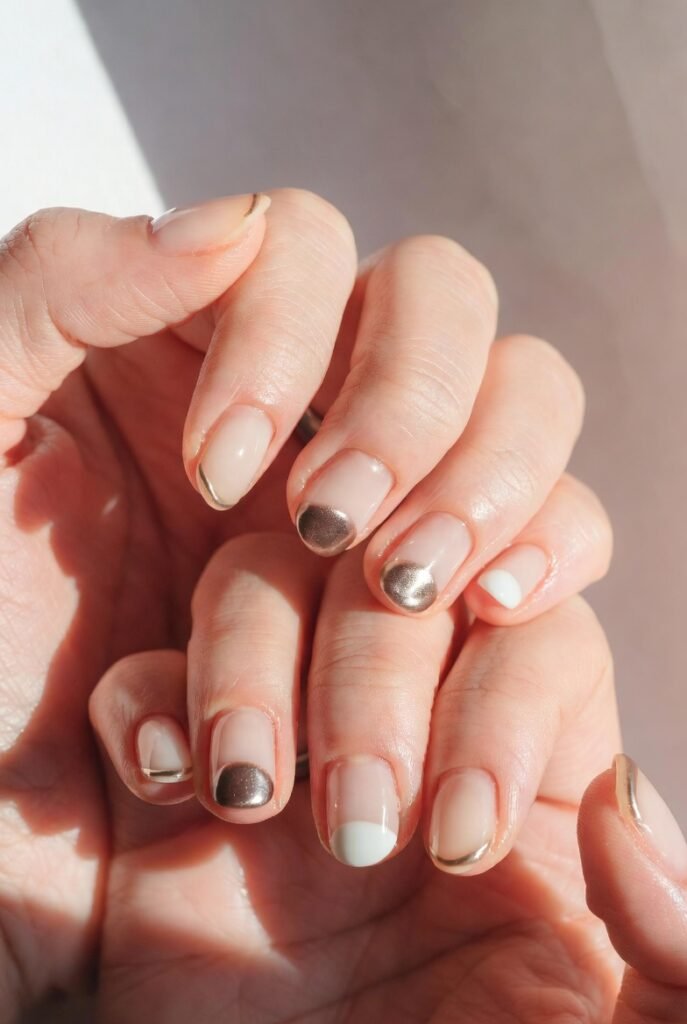
The half‑moon manicure, where a crescent shape at the base of the nail is left bare or painted in a second color, is tailor‑made for short nails. Because the nail is shorter, the half‑moon sits closer to the fingertip, creating a balanced composition. This retro style (popular in the 1930s) feels fresh again. Use reinforcement labels or a hole‑punched piece of tape to mask off a perfect circle at the cuticle, then paint the rest of the nail. When you remove the stencil, a tidy arc remains.
For a subtle version, leave the half‑moon bare and paint the rest in a creamy nude. For more drama, paint the half‑moon in gold leaf or white while the main nail is black or navy. Short square nails show off this design especially well because the straight edges contrast beautifully with the curved cuticle line. You can also reverse the concept by painting the half‑moon as the main event and leaving the tip bare—a “moon negative space” look.
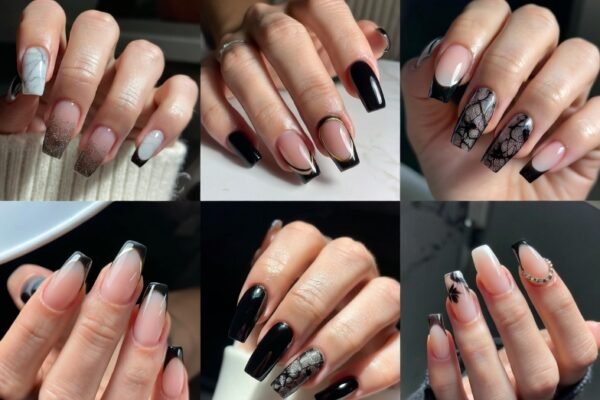
8. Use Matte and Glossy Texture Pairing

Textural contrast adds depth without a single extra color. Paint your short nails with a matte topcoat over a dark shade like charcoal or plum, then use a glossy clear polish to paint thin lines, small triangles, or dots on top. The interplay between matte and glossy finishes elevates basic nail art to artistic. Because the nail is small, the glossy accents catch light in a way that feels like an embedded gem or a lacquered inlay. Your eyes register the pattern even from across a room.
Try a matte black base with glossy white lines forming a tiny grid on just the ring finger. Or go monochromatic with matte blush pink and glossy deeper pink dots. The technique works best when the matte layer is fully dry (about ten minutes) before adding glossy details. Use a detail brush and a high‑shine topcoat, working quickly to avoid smudging. Short nails make this easier because there’s less surface to cover.
9. Create a Single Nail as the Statement Piece
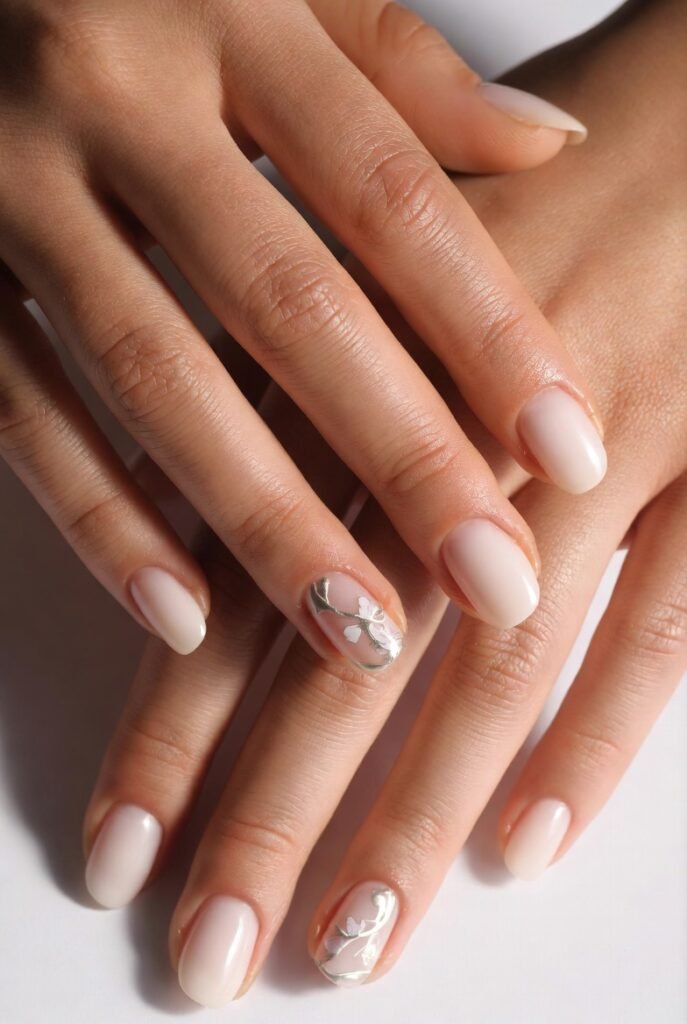
You don’t need to decorate all ten nails the same way. In fact, short nails shine when you let one accent nail do the heavy lifting. Paint nine nails in a solid, neutral shade like cream, taupe, or soft gray. On the tenth (typically the ring finger), apply a more complex design—maybe a tiny flower, a geometric stripe, or a swirl of two colors. This approach prevents visual clutter while still offering creativity. The accent nail becomes a conversation starter rather than an overwhelming pattern.
For even more impact, choose a different accent nail on each hand, or switch the accent every few days. The solid nails act as a calm background, so even a slightly imperfect hand‑painted flower looks charming rather than messy. Consider using a press‑on nail sticker or a nail vinyl for the accent to ensure precision. Short nails benefit from this approach because the accent nail draws focus away from the length and toward the artistry.
10. Apply Thin Vertical Stripes to Lengthen
Vertical lines create an optical illusion of elongation, making them a secret weapon for short nail beds. Using a liner brush and a contrasting color, paint two or three thin stripes running from cuticle to tip. Vertical stripes work with any color combination, but high contrast (white on navy, black on pink) maximizes the lengthening effect. Keep the stripes close together—no wider than the width of a toothpick—for the most flattering result.
You can also vary the stripe direction slightly, allowing them to fan out toward the tip like rays of sun. This draws the eye upward and outward simultaneously. For a more subtle version, use a sheer shimmer base and paint stripes with a slightly darker sheer color so the effect is ghostly and elegant. Avoid horizontal stripes, which visually shorten the nail. Short round nails look especially good with central vertical stripes because the curve of the tip softens the lines.
11. Stamp Tiny Florals for Delicate Romance
Nail stamping is a shortcut to intricate patterns that would be difficult to paint freehand on small nails. A single small floral motif—a rose, a daisy, or a lotus—placed off‑center on each short nail creates a vintage, romantic feel. Stamping is ideal because the plates offer designs perfectly scaled for compact canvases. Use a silicone stamper, a metal scraper, and stamping polish (which is more pigmented than regular polish). Press the stamper onto the plate, then roll it over your nail for a crisp transfer.
The trick is to choose a design that leaves plenty of negative space. A tiny bud near the cuticle or a single petal near the sidewall feels more appropriate than a full bouquet. Pair a white floral stamp over a dusty rose base, or gold floral over forest green. If you don’t own stamping tools, look for temporary nail tattoos or waterslide decals designed for short nails. Apply them over a dry base coat, then seal with two layers of topcoat.
12. Use a Translucent Jelly Finish for Depth
Jelly polishes (sheer, translucent colors with a glass‑like finish) are a godsend for short nails because they add visual interest without opacity. A single coat of jelly pink or jelly amber lets your natural nail show through while giving it a stained‑glass glow. This requires zero artistic skill yet looks thoughtful and custom. You can layer two different jelly colors—blue over yellow to create green—directly on the nail for a gradient effect that has dimension but remains light and airy.
For added detail, embed tiny dried flowers or ultra‑fine glitter between coats of jelly polish. Because the polish is translucent, the embedded elements float like specimens in resin. Short nails benefit from jelly finishes because they don’t emphasize the tip’s edge; instead, the color blurs softly into the skin tone. Wear alone for a clean, “my nails but better” aesthetic, or use as a topper over a milky white base. The high‑shine finish also makes short nails look plumper and healthier.
13. Paint Asymmetric Smile Lines for Whimsy
Break the rules of the classic French by painting your smile lines (the boundary between tip and base) at an angle. An asymmetric smile line that dips lower on one side of the nail than the other creates motion and surprises the eye. This technique is particularly effective on short nails because the diagonal line tricks the brain into perceiving a longer, more sculpted shape. Use a curved brush or a fine liner to freehand a swooping line, filling the tip with a pastel or neon color.
Try a diagonal smile line that starts high on the left side of the nail and ends low on the right, creating a slanted crescent. Pair it with a metallic tip color for extra drama. You can also vary the angle on each finger—some slanting left, some slanting right—for a playful, mismatched set. The key is keeping the rest of the nail simple: one solid base color and one tip color only. Short oval nails handle asymmetric lines beautifully because the natural curve of the nail echoes the uneven edge.
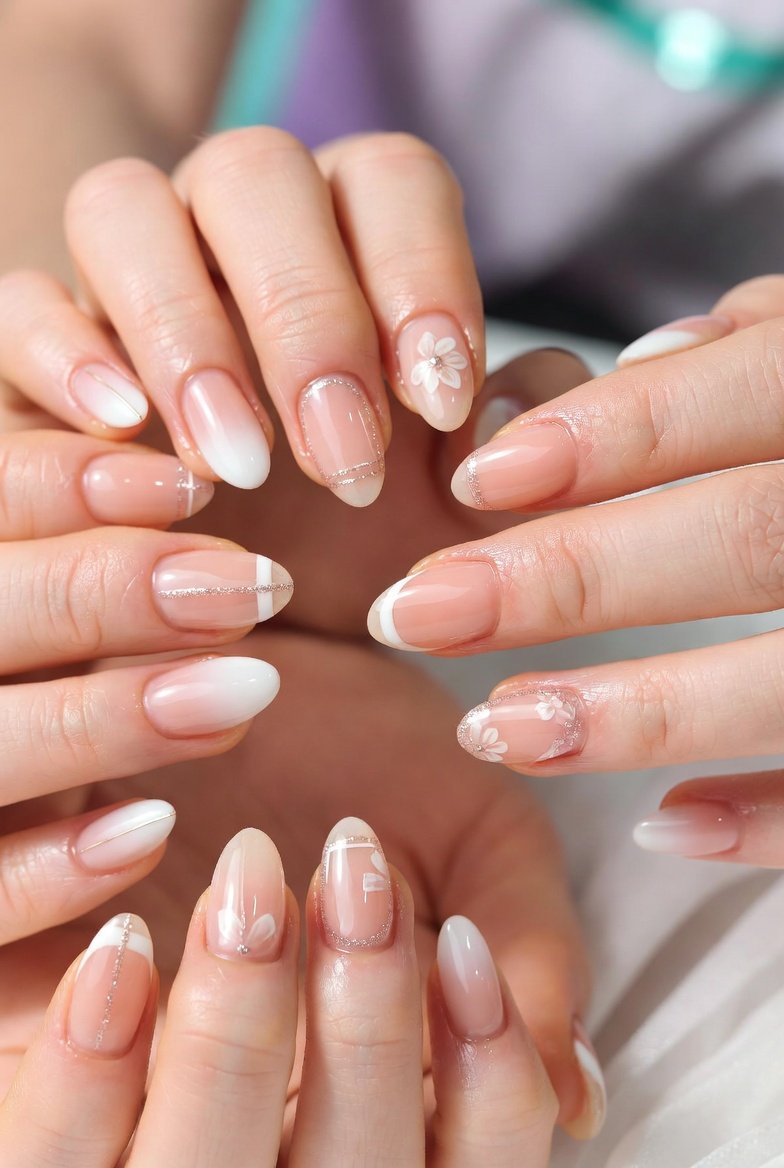
14. Embed Tiny Studs or Micro Pearls
Three‑dimensional embellishments like micro pearls or flat‑backed studs add instant luxury, but only if placed sparingly on short nails. Choose one micro pearl per nail, nestled near the cuticle or at the center of a solid color. This feels extravagant yet remains practical because the embellishment is smaller than a pinhead. Use a dab of nail glue or apply while the topcoat is wet, then seal with another layer of clear polish to lock it in place. Avoid placing studs near the tip, where they might snag on hair or clothing.
For a celestial theme, use gold star studs on a navy blue base. For bridal nails, line three micro pearls in a row along the sidewall of the ring finger only. Because short nails have less surface area, one or two embellishments per hand feel like curated jewelry rather than clutter. Test the placement by holding your hand at different angles; the goal is to see the sparkle when you gesture. Short square or squoval nails provide the flat surface needed for studs to lie flush.
15. Blend Two Colors with a Sponge Gradient
A true ombré gradient—where one color seamlessly melts into another—adds drama and length to short nails. Using a makeup sponge, dab two or three complementary colors (like coral to peach, or lavender to periwinkle) onto the nail, overlapping them in the middle. This is a showstopper because the blended transition distracts from the nail’s actual length. The soft, painterly effect makes the eye travel along the gradient rather than stopping at the tip. Start with a white or very pale base to make the colors pop.
The key for short nails is to keep the gradient centered and avoid dark colors at the cuticle, which can make the nail look truncated. Instead, place the darkest shade at the tip and fade to light at the base. This mimics natural shadow and light, creating an illusion of longer fingers. Clean up any sponge residue around the cuticles with a small brush dipped in acetone. Despite the multi‑step process, this technique forgives uneven edges because the blended nature hides imperfections.
16. Paint a Single Nude with One Textured Finger
Sometimes the most powerful design is the quietest. Paint all ten short nails in a single nude shade that closely matches your skin tone—think sheer beige, milky pink, or soft taupe. Then, on the ring finger of each hand, add a textured element such as matte topcoat over glossy nude, or a single coat of clear sand‑texture polish. This celebrates minimalism while still offering a point of interest. The nearly invisible nails elongate your fingers because there’s no strong color contrast to break the visual line of your hand.
For a more tactile surprise, use a liquid sand polish (one with fine grit) on just the accent nails. The roughness feels unexpected against the smooth nude neighbors. You can also apply a single coat of iridescent flakie topper on the accent nails, which catches light without adding a new color. This manicure works for every occasion—job interviews, weddings, casual brunches—because it whispers rather than shouts. Short nails finally become an advantage, as the uniform nude color makes imperfections like uneven tips disappear.
Conclusion: Your Short Nails Deserve the Spotlight
Short nails are not a compromise—they are a conscious choice for comfort, practicality, and understated beauty. The 16 short nail arts tips shared here prove that with the right techniques, your natural length can become your greatest asset. Whether you prefer a single floating line, a jelly finish, or a tiny pearl at the cuticle, each design respects the compact canvas while maximizing visual impact. Experiment with one idea at a time, mix two or three across your hands, and most importantly, have fun. Your next stunning manicure is only a few brushstrokes away.