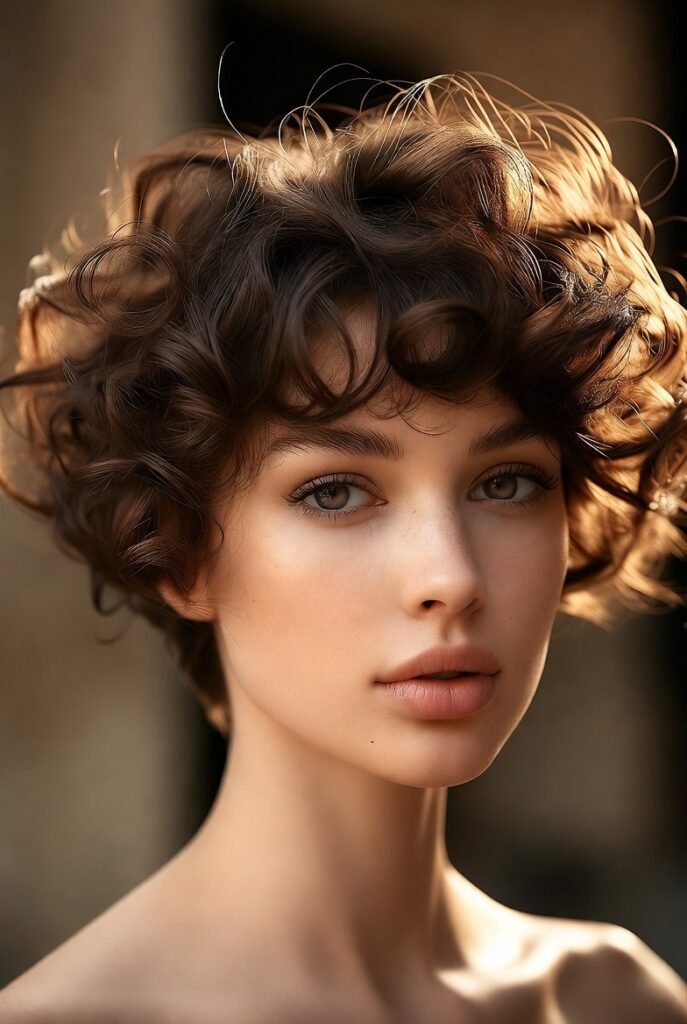
Curly hair and a pixie cut might sound like a daring combination, but when done right, it’s one of the most liberating, low-fuss looks you can embrace. The key is working with your curls, not against them, and the right curly pixie removes bulk while highlighting volume and movement. Whether you have tight coils or loose waves, these 23 ideas prove that short hair can be playful, polished, and surprisingly versatile. Below, you’ll find a complete collection of curly pixie cut ideas, each tailored to different face shapes, curl patterns, and styling preferences.
Tapered Curly Pixie: Soft Volume on Top with Clean Lines
The tapered curly pixie keeps the back and sides closely cropped while leaving length on top for your curls to spring up. This contrast creates a balanced silhouette that feels modern and tidy, especially for tighter curl types like 4A or 4B. The exposed nape and ears add an airy feel, making it ideal for warmer months or anyone tired of heavy hair. You can let the top curls form their natural shape or gently separate them with your fingers for a piece-y finish.
Because the sides are short, this style draws attention upward to your eyes and cheekbones. It works beautifully for round or heart-shaped faces, as the vertical volume elongates the overall look. To maintain the shape, visit your stylist every four to six weeks to keep the taper crisp. At home, a dab of lightweight curl cream on damp hair is all you need to define the top without weighing it down.
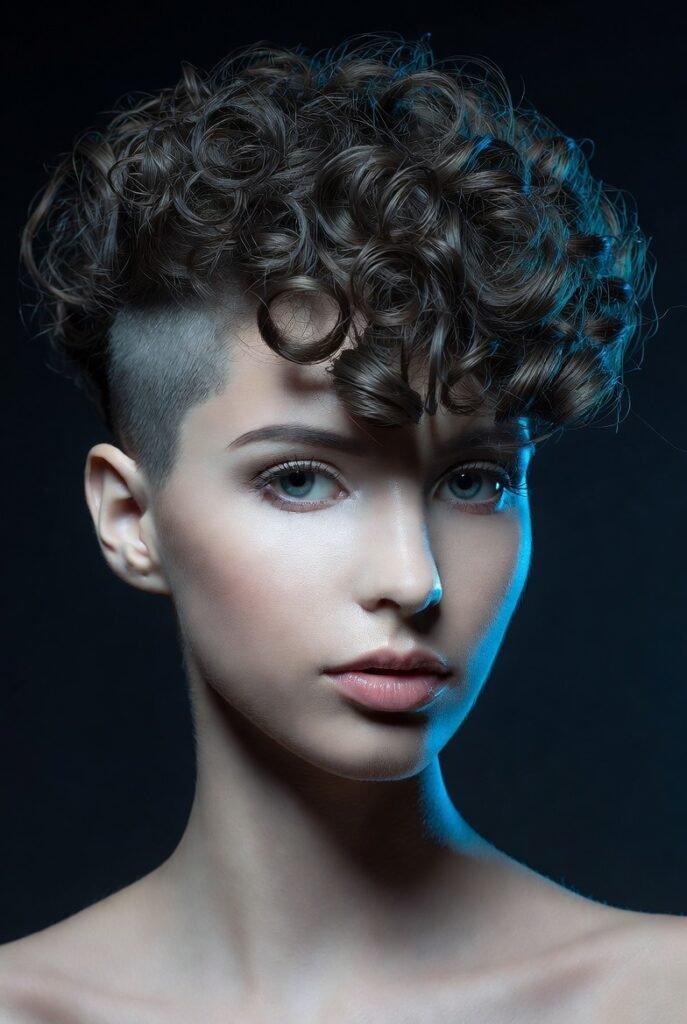
Undercut Curly Pixie: Bold Contrast for Dramatic Flair
An undercut curly pixie takes the shaved concept further by buzzing one or both sides completely, leaving a dramatic cap of curls on top. This edgy variation is perfect for anyone who wants their natural texture to feel rebellious and high-impact. The shaved sections can be hidden under the longer curls when you want a softer look, then revealed by sweeping hair to one side. It’s a two-in-one style that shifts from professional to party-ready in seconds.
The key to pulling off an undercut is keeping the top curls hydrated and defined so they stand apart from the smooth shave. Coarser curl patterns (3C to 4C) shine here because the density creates a lush, cloud-like top. You’ll need regular touch-ups for the undercut, but the styling time drops dramatically—just shake, scrunch, and go. Pair it with bold earrings to play up the asymmetrical vibe.
Also Read: 15 Glam Makeup Look Ideas to Elevate Your Beauty Routine
Finger-Wave Curly Pixie: Vintage Glam with Modern Ease
For a curly pixie that feels polished and retro, finger waves create sculpted S-shaped patterns that sit close to the head. This technique works best on type 3A to 3C curls, where the wave holds shape without stiff products. Instead of fighting your natural bend, you enhance it by molding damp hair with gel and using your fingers to press alternating ridges. The result is a glossy, structured look that lasts for days.
Unlike traditional finger waves on straight hair, the curly version has more plushness and movement. It’s surprisingly low-maintenance once set—sleep with a silk scarf, then refresh by misting water and re-defining a few waves. This style flatters oval and square faces, as the horizontal lines soften angular jaws. Wear it to weddings, gallery openings, or any event where you want your hair to look intentionally artistic yet effortless.
Curly Pixie with Long Side Bangs: Face-Framing Softness
Adding long side bangs to a curly pixie gives you the best of both worlds: shortness at the back and neck, plus sweeping lengths that graze your brow or cheekbone. These bangs are cut to follow your curl pattern, so they coil gently rather than lying flat. You can tuck them behind an ear for a cleaner look or let them fall forward for a romantic, undone feel. This is a fantastic entry point for first-time pixie wearers who want to keep some length.
The side bangs draw attention to your eyes and help balance a longer face shape by breaking up vertical lines. For loose curls (2B to 3A), the bangs will have a gentle wave, while tighter coils create short, springy tendrils. Style by applying a leave-in conditioner, then twisting each bang section around your finger as it dries. Avoid over-trimming—curly bangs shrink up to 50%, so always cut them when dry.
Curly Pixie with Shaved Design: Personalized Art in Your Hair
Why stop at a simple undercut when you can add shaved designs like zigzags, dots, or geometric lines into your curly pixie? This idea transforms your haircut into a wearable statement, with the patterns etched into the buzzed side or nape. The contrast between the soft, textured curls above and the precise shaved art below is visually striking. It’s a fantastic choice for creative professionals, artists, or anyone who loves changing their look frequently.
The design can be subtle—a small crescent behind the ear—or bold, like a full chevron strip from temple to crown. Your stylist will use a trimmer with detail attachments, and the patterns last about two to three weeks before regrowth blurs them. For upkeep, simply let the design fade out or refresh it during your next cut. This style works on all curl types, but tighter textures make the unshaved curls look extra dense against the clean lines.
Asymmetric Curly Pixie: One Side Longer for Unexpected Edge
An asymmetric curly pixie keeps one side noticeably longer than the other, creating a diagonal visual line that breaks traditional short-hair rules. The longer side might reach your jaw or chin, while the opposite side is cropped close to the temple. This imbalance works beautifully with curls because the natural shrinkage on the shorter side contrasts with the stretched coils on the longer side. It’s a curly pixie cut idea that feels architectural, bold, and surprisingly wearable for daily life.
Because the weight sits mostly on one side, this cut helps balance a round or square face by adding asymmetrical length. Your curls will settle into their own rhythm—some days the longer side forms a soft cascade, other days it coils up higher. To style, apply a curl mousse to damp hair, then tilt your head to the heavier side as you diffuse dry. No need to force the asymmetry; your natural texture will enhance it.
Curly Pixie with Cropped Nape: Cool Relief and Clean Lines
Shaving or closely clipping the nape area while leaving length everywhere else defines the cropped nape curly pixie. From the back, you see a sharp, clean line just above the hairline, while the top and sides retain enough length for your curls to form soft shapes. This style is a game-changer for hot, humid climates or anyone who hates the feeling of sweaty curls sticking to their neck. The exposed nape also makes your neck appear longer and more elegant.
For tighter curl patterns like 4B or 4C, the cropped nape highlights the contrast between dense, coiled volume and bare skin. You can ask your stylist for a tapered nape that fades from skin to half an inch, or keep it blunt for a more graphic look. Maintenance is simple: shave the nape every three weeks at home or during salon visits. Wear your curls messy and high on top, and let the clean nape do the talking.
Curly Pixie with Micro Bangs: Playful, Daring, and Retro
Micro bangs—cut well above the eyebrows—turn a standard curly pixie into something deliberately quirky and fashion-forward. On curly hair, micro bangs shrink even further, often landing mid-forehead or higher once dry. This means you need a stylist who understands curl shrinkage and cuts them while your hair is dry and in its natural state. The result is a fringe that floats above your brows, showing off your forehead and eye makeup.
This curly pixie idea works best with type 3A to 3C curls that have enough spring to keep the bangs from falling flat. Pair micro bangs with a longer, textured top and shorter sides for a balanced silhouette. They require daily attention—a quick wet-down and finger-coil each morning—but the payoff is a unique, whimsical look that few people can pull off. Wear with winged liner or bold lipstick to complete the retro-modern vibe.
Voluminous Curly Pixie: Maximum Height and Drama
If you love big hair, the voluminous curly pixie is your answer. Instead of taming or flattening your curls, this cut encourages them to grow upward and outward for serious lift at the crown. The back and sides are kept shorter to direct all attention and density to the top. Think of it as a curly mohawk with softer edges—your curls become a cloud of texture that moves when you walk. This style celebrates natural volume without any teasing or backcombing.
To achieve this, ask your stylist for a rounded shape with layers that release weight from the roots. Type 3B to 4A curls excel here because their natural tightness creates scaffolding for height. On wash days, use a root-lifting foam and diffuse upside down until fully dry. Then flip back and gently shake your head. Avoid heavy butters or oils near the roots; you want your curls to stand tall, not stick to your scalp.
Curly Pixie with Wispy Edges: Soft, Feminine, and Romantic
Not every curly pixie needs sharp lines or dramatic angles. A version with wispy edges keeps the perimeter soft, uneven, and slightly feathery—like curls that have been gently kissed by wind. The ends around your ears, nape, and forehead are cut with point-cutting techniques rather than blunt shears. This creates a halo of delicate tendrils that frame your face without looking severe. It’s an excellent choice for finer curly hair that might appear sparse with a blunt cut.
Wispy edges work particularly well on heart-shaped or diamond faces, as the softness downplays a pointed chin or wide forehead. To style, apply a lightweight curl lotion, then scrunch without breaking up the curl clumps too much. Let some pieces fall over your ears or forehead naturally—perfection isn’t the goal. Refresh between washes with a spritz of water and a tiny drop of argan oil rubbed between your palms, then lightly graze over the ends.
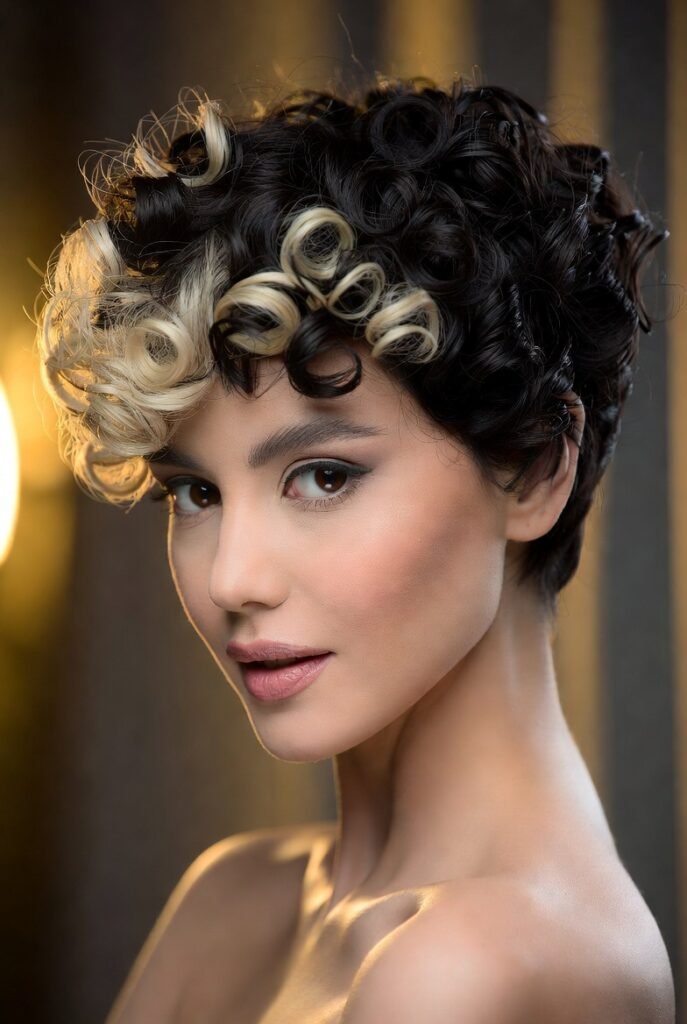
Curly Pixie with Color Blocking: Bold Hues Meet Short Texture
Take your curly pixie cut ideas into vivid territory with color blocking—placing two or three distinct shades on different sections of the cut. For example, keep the back and sides a deep espresso while the top curls glow in copper or platinum. The short length means less damage from bleaching, and regrowth looks intentional rather than sloppy. Curls take color differently than straight hair, so expect dimension and shadows that change as each coil twists.
This style shines on type 3A to 3C curls where the pattern shows off every hue shift. Work with a colorist who specializes in curly hair to avoid over-processing. After coloring, use a sulfate-free shampoo and a deep conditioner weekly to maintain moisture. The best part? When you’re tired of the drama, you can simply grow it out or switch to a single shade—the pixie length makes color commitment feel temporary and fun.
Curly Pixie with Deep Side Part: Instant Red Carpet Polish
A deep side part transforms even the simplest curly pixie into something sleek and intentional. By sweeping most of your top curls to one side, you create a dramatic swoop of volume that arches over your forehead. The other side lies closer to the scalp, often tucked behind an ear. This styling trick requires no new cut—just a comb, some gel, and a few minutes of finger-arranging. It’s an easy way to dress up your curly pixie for meetings, dates, or photos.
This look flatters nearly every face shape, especially round or square ones, because the diagonal line breaks up symmetry. For best results, part your hair while it’s sopping wet, apply a strong-hold curl gel, and let it air-dry without touching. Once dry, you can gently lift the roots on the heavier side with a pick for extra height. Re-part throughout the day if curls shift; the natural texture will hold the shape better than hairspray.
Curly Pixie with Twisted Texture: Defined, Juicy Curls
Instead of letting your curls form randomly, a twisted texture curly pixie enhances each coil by manually twisting sections while wet. This technique creates rope-like, juicy spirals that stay defined for days without frizz. The cut itself is typically uniform in length—about one to two inches all over—so the focus is entirely on the curl definition. It’s a low-maintenance styling method, not a complicated haircut, but the result looks meticulously done.
To achieve this, wash and condition your hair, then apply a curling custard. Divide your hair into small sections and twist each one around your finger, then allow to air-dry or diffuse. Once completely dry, separate the twists gently for volume. This works for curl types 3B through 4C and lasts up to five days if you wear a silk bonnet at night. The compact shape keeps hair off your face while showing off every single spiral.
Curly Pixie with Disconnected Layers: Edgy Contrast in Length
Disconnected layers mean there’s a sudden, intentional jump between short and long sections, rather than a smooth blend. In a curly pixie, this could look like a very short, buzzed side that abruptly meets two-inch curls on top, with no gradual transition. The effect is punk, graphic, and full of attitude. This isn’t a shy haircut—it announces itself. The curls on the longer sections will coil and bounce, while the shorter parts stay neat and close.
This idea works best for naturally dense, tight curls (type 4A and up) because the contrast feels intentional rather than accidental. Styling takes under five minutes: wet your hands, run a curl refresher through the longer sections, and leave the shorter parts alone. You’ll need a stylist comfortable with clippers and scissors working together. The disconnected look grows out surprisingly well—as length appears, the layers reconnect on their own terms.
Curly Pixie with Side-Swept Crown: Effortless Volume and Movement
Similar to a deep side part but with more volume, the side-swept crown keeps the majority of your curl mass piled to one side and slightly forward. From the front, it looks like a soft, asymmetrical cloud that grazes your eyebrow and cheek. The other side is clipped or tucked so short that it nearly disappears. This style is ideal for loose curl types (2B to 3A) because they have enough length to sweep but enough bend to hold shape.
To style, apply a volumizing mousse to damp hair, then use a wide-tooth comb to push everything to your preferred side. Diffuse on low heat while tilting your head toward the swept side. Once dry, do not touch—the cast will break naturally as you move throughout the day. This particular curly pixie cut idea looks stunning with statement earrings on the exposed side. Refresh by dampening just the crown and re-sweeping with your fingers.
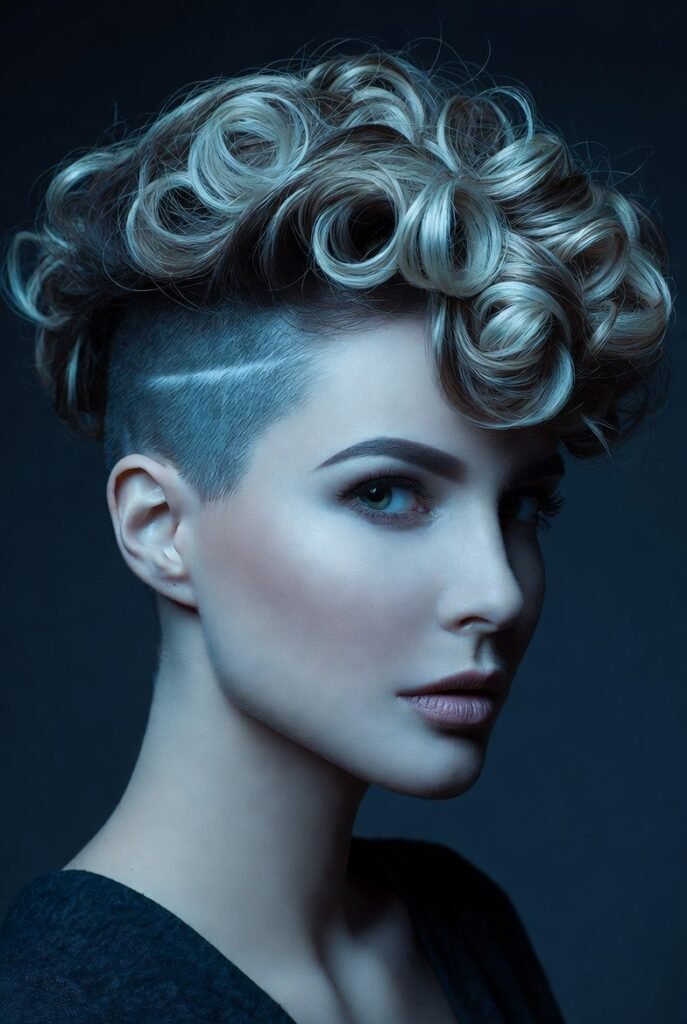
Curly Pixie with Clean-Shaven Sides: Maximum Contrast
Take the undercut further by shaving both sides completely bare, leaving only a strip of curls along the top ridge. This clean-shaven sides look is essentially a curly version of a classic mohawk, but softened by the natural texture on top. The sides are shaved with a razor for a smooth, skin-close finish. The contrast between bare scalp and dense, springy curls is dramatic, edgy, and incredibly freeing. You will feel lighter immediately.
This cut works for all curl types, but coarser textures (4B, 4C) create the most striking top volume. Maintenance involves shaving the sides every two weeks—easy to do at home with a trimmer and a second mirror. Styling the top takes seconds: spritz with water, add a curl cream, and shake. You can also let the top grow longer over time for a evolving shape. Pair with bold glasses or large hoops to balance the exposed skin.
Curly Pixie with Rounded Silhouette: Soft, Classic, and Easy
Not every curly pixie needs sharp angles or shaved sections. A rounded silhouette keeps all the hair—sides, back, and top—curving into a soft, halo-like dome. The perimeter is even and smooth, like a perfect cloud sitting on your head. This shape works particularly well for women with fine or medium-density curls who want fullness without the maintenance of extreme cuts. It’s a classic, timeless option that looks professional and playful at once.
To get this shape, ask your stylist to cut your curls dry, following your natural curl pattern’s spring. The goal is a uniform length when dry, which means cutting each curl at a different wet length. At home, use a curl cream and scrunch upward rather than raking through. The rounded shape hides uneven growth beautifully, so you can stretch salon visits to eight weeks. It’s the curly pixie cut idea for minimalists who want to look polished without trying.
Curly Pixie with Bleached Tips: Sun-Kissed Without the Sun
Add a touch of lightness to your curly pixie by bleaching only the last half-inch of your curls. The bleached tips create a subtle ombré effect that catches light and adds dimension without a full color commitment. On dark curls, the contrast is striking—deep roots fade into honey or platinum ends. On lighter natural hair, try a pastel or rose-gold tone for a whimsical twist. The short length means damaged tips can be trimmed off easily as your hair grows.
This idea shines on type 3A to 3C curls where the bleached portion wraps around each coil, creating a two-tone spiral effect. Use a bond-building treatment before and after bleaching to keep curls elastic. Style with a leave-in conditioner and air-dry; the bleached tips will look brighter when dry. Because pixie cuts grow out every few weeks, you can change the tip color seasonally—copper for fall, lavender for spring—without long-term commitment.
Curly Pixie with Deep Waves: Loose, Relaxed, and Beachy
If your natural pattern is closer to wavy than coily, lean into deep waves for a curly pixie that feels effortless and beach-ready. This cut keeps length throughout—about two to three inches everywhere—with very little layering. The waves form soft, flat S-shapes rather than tight spirals, giving a relaxed, slept-in texture. It’s perfect for anyone transitioning from longer hair who still wants movement and a slightly undone vibe.
To style, wash and condition, then apply a sea salt spray and scrunch gently. Let air-dry without touching, or use a diffuser on low heat while cupping sections upward. Avoid combs or brushes entirely. The deep-wave pixie works best on oval or oblong faces because the horizontal wave pattern softens length. Refresh by misting with water and re-scrunching each morning. No gels or heavy creams necessary—just you, salt spray, and five minutes.
Curly Pixie with Long Top Knot: The Best of Both Lengths
Yes, you can put a curly pixie into a tiny ponytail or knot if the top is long enough. This idea keeps the back and sides short—think half an inch—while leaving the crown long enough to gather into a small top knot or puff. The contrast is dramatic: a neat, cropped base with a playful, curly bundle perched on top. It gives you two looks in one: down for daily ease, up for special moments or second-day hair.
This works best for type 3B to 4C curls with enough density to form a knot that stays put. The top needs at least three to four inches of dry length, so grow out your crown while maintaining the sides. To style the knot, gather the top section with your fingers, twist loosely, and secure with a small elastic or bobby pins. Leave a few tendrils out around your forehead for softness. This is one of the most versatile curly pixie cut ideas for active days.
Curly Pixie with Carved Part Line: Precision Meets Texture
Instead of a natural part, ask your stylist to carve a clean line into your curly pixie using clippers. This creates a razor-sharp part that reveals bare scalp, usually on one side or zigzagging across the crown. The rest of your curls fall away from this line, making your part as deliberate as a geometric drawing. It’s a small detail that adds major edge, especially when the rest of the cut is soft and curly.
The carved part needs to be refreshed every two weeks as regrowth blurs the line. You can shave it yourself with a detail trimmer following the original path. This idea pairs beautifully with color blocking or shaved designs. On curly hair, the carved part stays visible because the hair on either side grows in opposite directions. Wear your curls messy or defined—the line provides structure either way. It’s the detail that makes people look twice.
Curly Pixie with Chin-Length Pieces: Extended Play for the Front

Let the front sections of your curly pixie grow longer than the rest—all the way to your chin when stretched. The back and sides stay short and tapered, so from the side profile you see a clean nape and then a dramatic waterfall of curls in front. This elongated shape frames your face like a soft curtain and gives you pieces to tuck behind your ears or let hang. It’s a great transitional style if you’re growing out a shorter pixie.
This idea works for 3A to 3C curls that have enough weight to stretch downward rather than coiling up tightly. Style by applying a curl elongating cream and twisting the long front pieces around your fingers while damp. Diffuse or air-dry, then separate gently. The contrast between the short, cropped back and the long, face-framing front creates a silhouette that feels modern and romantic. Wear with a side part to keep the longer pieces from falling into your eyes.
Curly Pixie with Natural Gray Blending: Embrace the Silver
Finally, one of the most liberating curly pixie cut ideas is to let your natural gray grow in and blend it seamlessly into the cut. A pixie is the perfect length to transition away from dye because the short hair means you can chop off colored ends in one or two visits. The mix of silver, white, and your original shade creates a shimmering, multidimensional effect that no bottle can replicate. Curly gray hair often has a coarser, crinkly texture that adds incredible volume.
To make the blend look intentional, ask your stylist to layer the cut evenly so dark and light curls mix throughout. Use a purple shampoo once a week to keep silver tones bright and brass-free. Moisture is essential—gray curls tend to be drier, so use a rich leave-in conditioner and seal with a light oil. This style works on all curl types and face shapes. Wear your silver with confidence; the pixie cut puts it front and center, and that’s exactly where it belongs.
Final Thoughts
A curly pixie cut isn’t just a haircut—it’s a declaration that you’re done hiding your texture under layers of length. Whether you crave the clean lines of a tapered nape, the drama of an undercut, or the soft romance of wispy edges, there’s a version here that fits your personality and curl pattern. The beauty of going short with curls is how little you need to do each morning: a spritz, a scrunch, and you’re out the door. Work with a stylist who respects your natural pattern, invest in a good leave-in conditioner, and don’t be afraid to experiment. Your best hair days might just be the shortest ones.