Have you ever stared at your tiny backyard, balcony, or patio and thought, “There’s just no way I can create a beautiful garden here”? I certainly have. Let me tell you a quick story. Three years ago, I moved into a charming little apartment with what the real estate agent enthusiastically called “a cozy outdoor space.” In reality, it was a 10‑foot by 12‑foot concrete slab with a rusty drainpipe and absolutely zero charm. My heart sank. I had dreamed of lush greenery, fragrant flowers, and maybe even a few homegrown vegetables. But this? This felt impossible.
Fast forward to today, and that same space is now a thriving oasis that my neighbors actually compliment. The secret? I discovered the magic of the 18 small garden layout approach. And now, I’m going to share everything I’ve learned with you.
Whether you’re working with a sliver of a side yard, a modest balcony, or a postage‑stamp backyard, this comprehensive guide will walk you through 18 small garden layout ideas that actually work. Furthermore, I’ll provide step‑by‑step instructions, practical tips, and plenty of encouragement along the way. By the end of this article, you’ll not only feel inspired but also completely confident in transforming your own compact space.
So, grab a cup of coffee, settle into your favorite chair, and let’s embark on this gardening journey together.
Why Small Gardens Deserve Just as Much Attention as Large Ones
Before diving into the specific layouts, let’s address an important point. Many people believe that small gardens are limiting or somehow inferior to sprawling landscapes. However, nothing could be further from the truth. In fact, small gardens offer several distinct advantages.
First, they require less maintenance. You won’t spend entire weekends weeding, pruning, or mowing. Second, they’re more affordable to plant and maintain. Third, and most importantly, small garden layout designs force you to be intentional and creative. Every plant, every pot, and every path serves a purpose. Consequently, small gardens often feel more intimate, more personal, and more magical than their larger counterparts.
As the famous garden designer Russell Page once said, “A garden is a reflection of the soul of its creator.” And honestly, small spaces give you the chance to pour your personality into every square inch.
Essential Principles Before You Start
Let me share another quick anecdote. My first attempt at designing my small garden was a complete disaster. I bought too many plants, placed them randomly, and ended up with a cluttered mess that looked like a plant nursery threw up on my patio. I was frustrated, embarrassed, and ready to give up.
That’s when I learned the foundational principles of successful 18 small garden layout designs. These principles saved my garden, and they’ll save yours too.
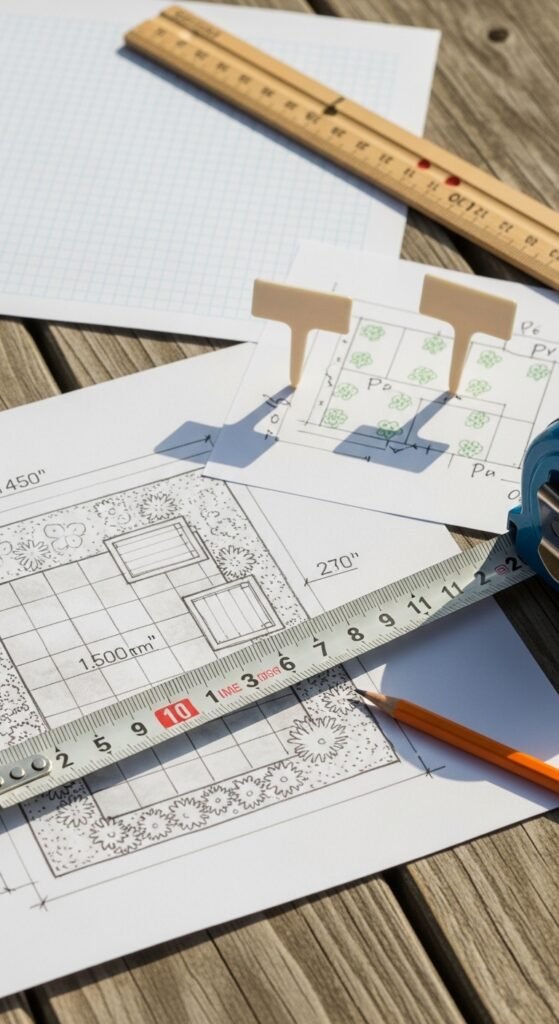
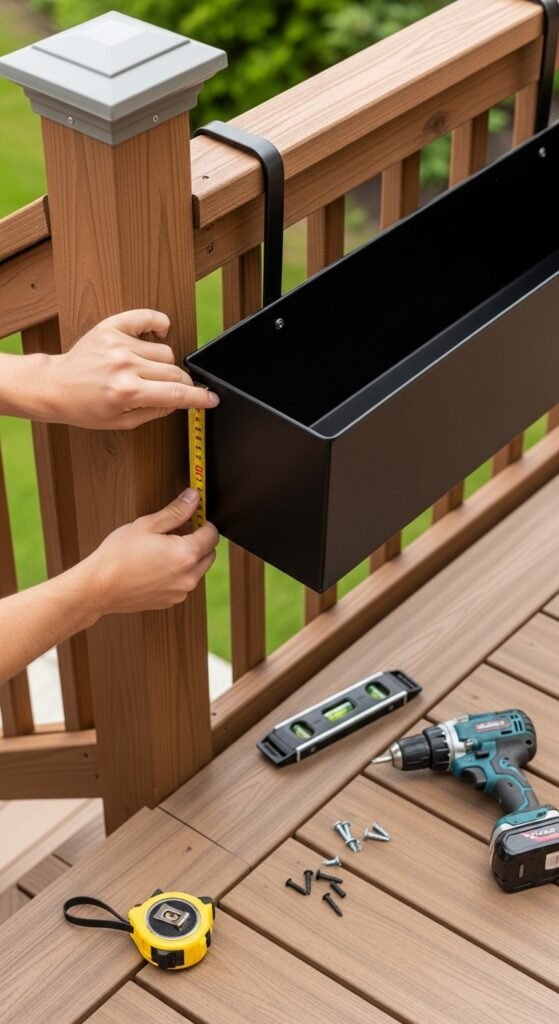
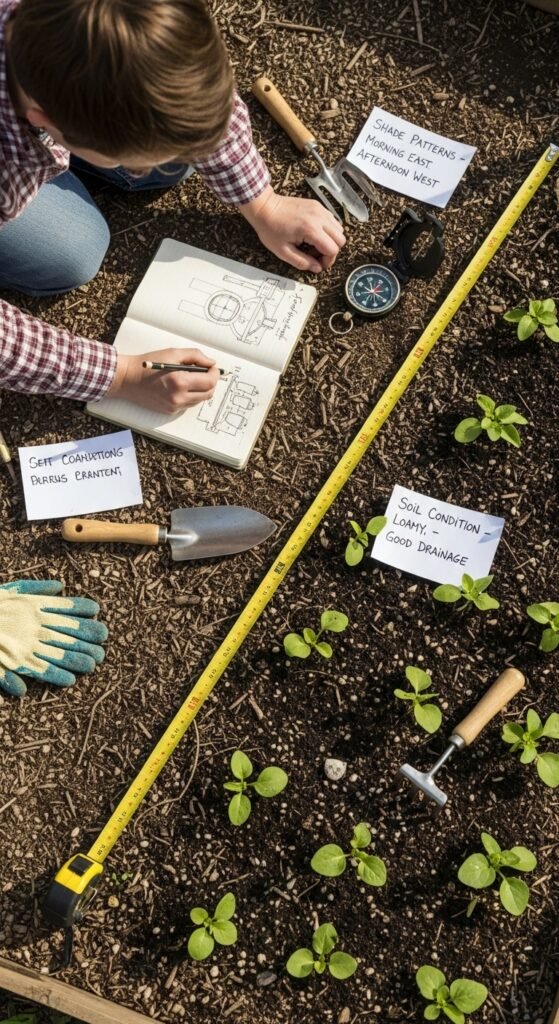
Principle 1: Measure Twice, Plant Once
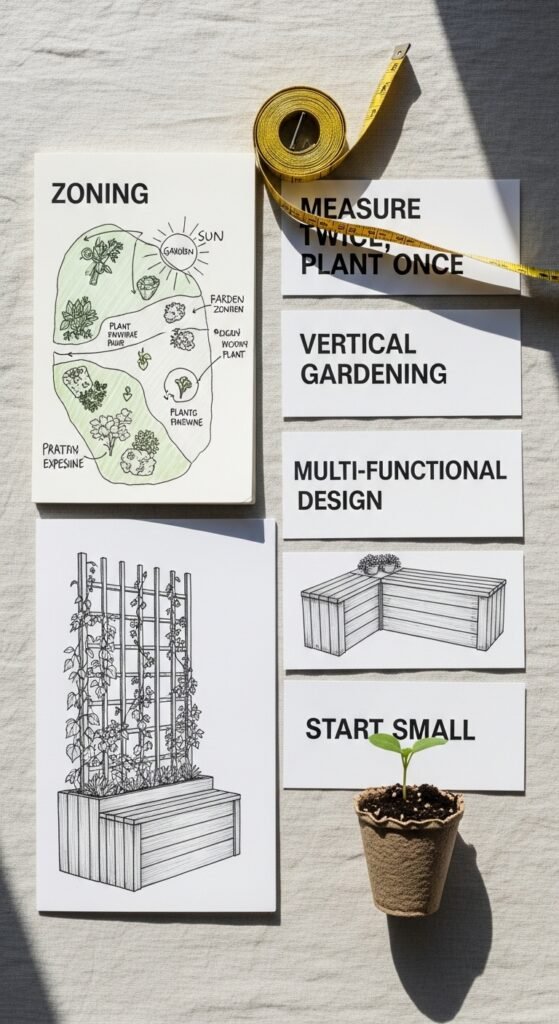
Grab a measuring tape and sketch your space. Note where the sun hits at different times of day. Identify shady corners, windy spots, and areas that stay wet after rain. This information is gold.
Principle 2: Create Zones
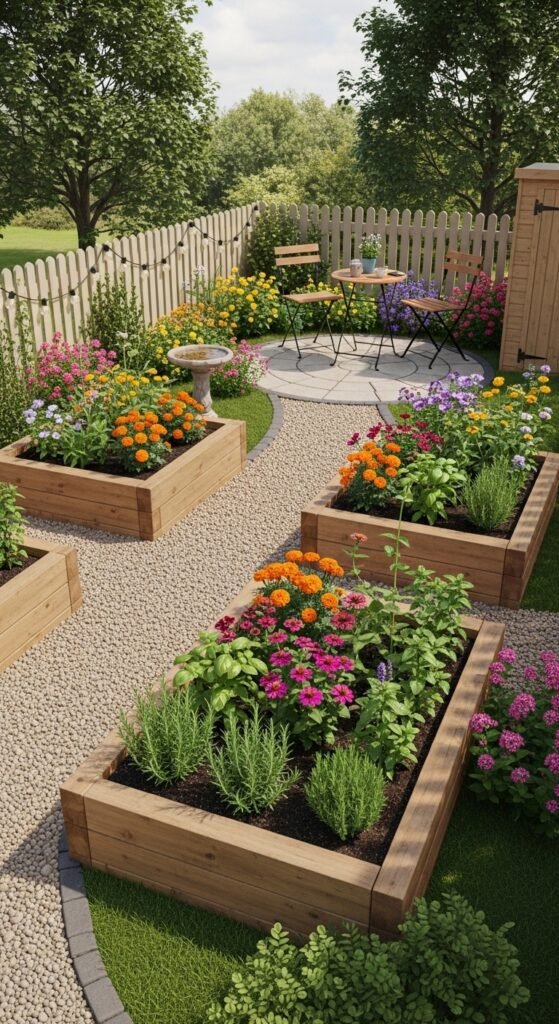
Even in a tiny space, you need distinct areas for different activities. Perhaps a seating zone, a planting zone, and a storage zone. This prevents the “everything everywhere” chaos I initially created.
Also Read: The Ultimate Coconut Rice Recipe: A Creamy, Aromatic Journey to Perfect Rice Every Time
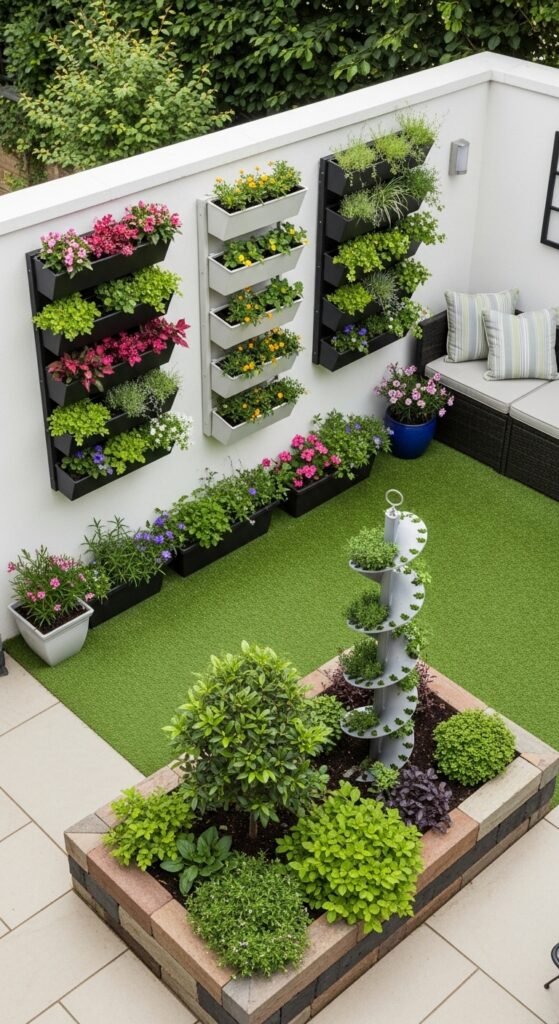
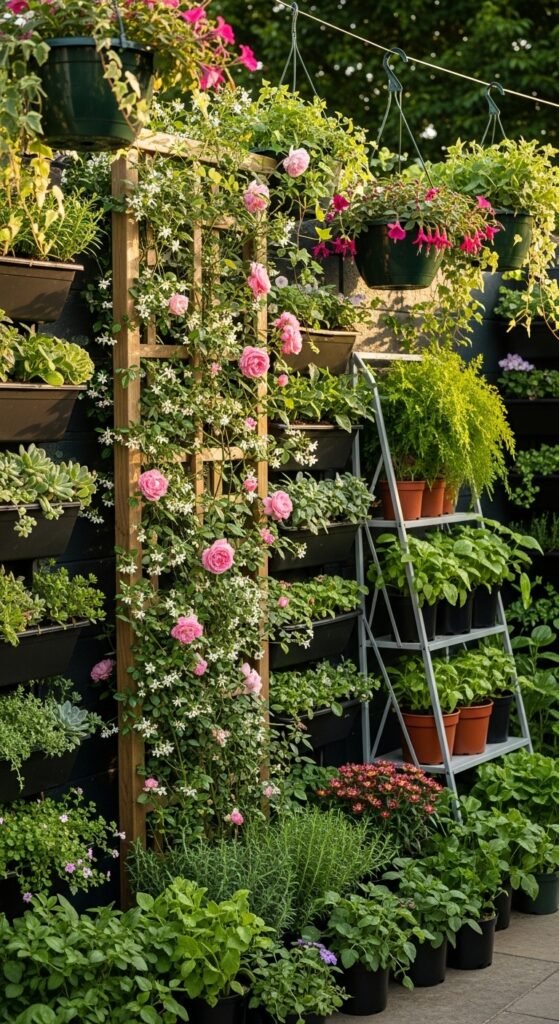
Principle 3: Think Vertical
When ground space is limited, the walls, fences, and railings become your best friends. Vertical gardening doubles or even triples your usable space.
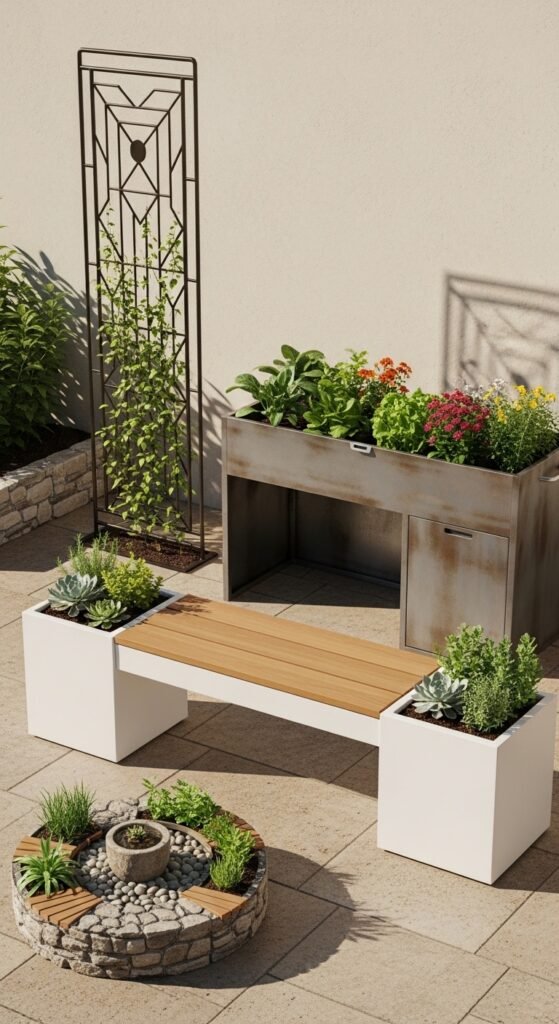
Principle 4: Choose Multi‑Functional Elements
A bench that stores tools. A table that holds plants. A trellis that provides privacy. Every element should earn its keep.
Principle 5: Start Small, Then Expand
This is perhaps the most important principle. Begin with just a few plants and containers. See what works. Then gradually add more. Patience prevents overwhelm.
With these principles in mind, let’s explore the 18 small garden layout designs that will revolutionize your outdoor space.
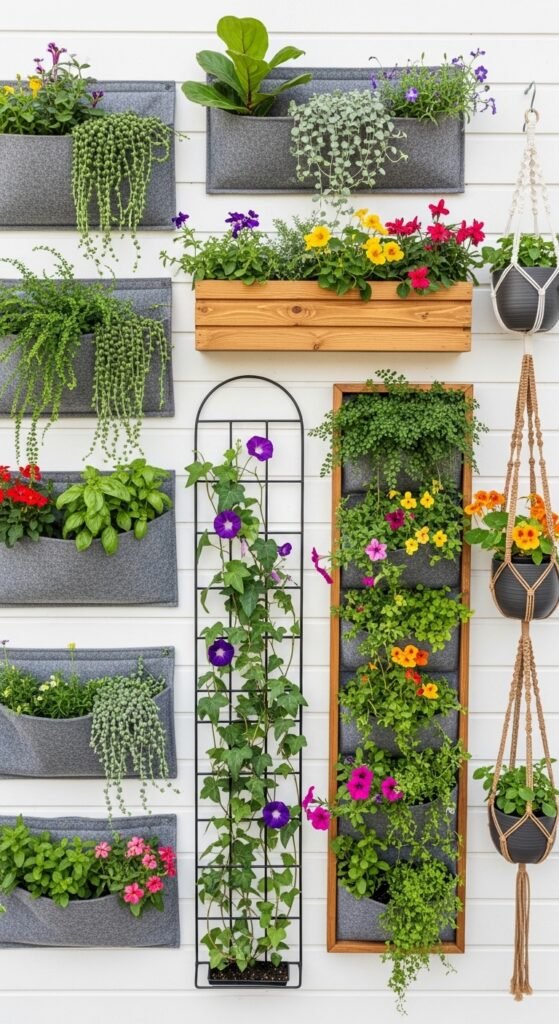
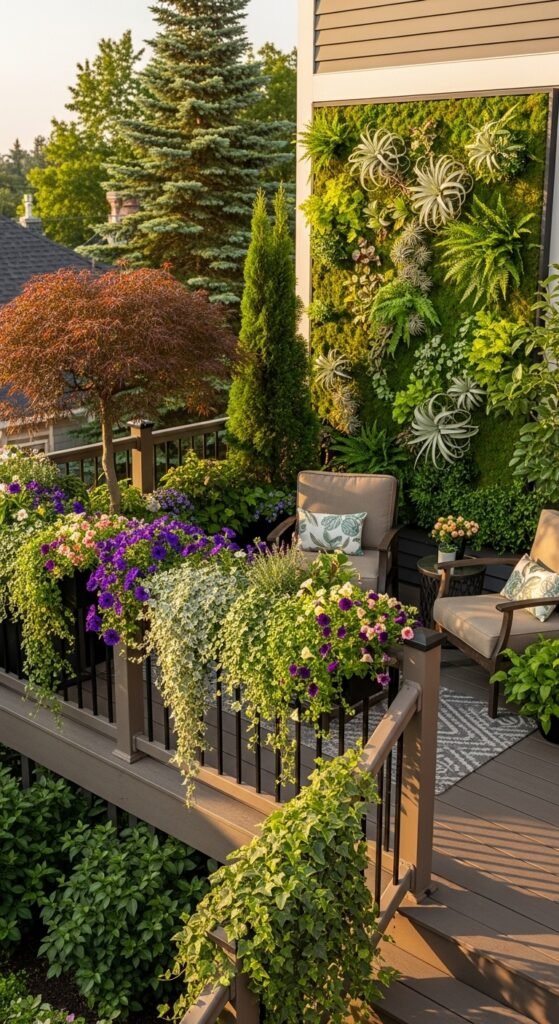
Layout 1: The Vertical Paradise
Best for: Balconies, patios, and narrow side yards
Have you ever looked at a bare wall and seen wasted potential? The Vertical Paradise layout transforms empty vertical surfaces into lush, living tapestries. Consequently, this is one of the most popular 18 small garden layout designs for urban dwellers.
Step‑by‑Step Guide:
Step 1: Assess your wall space. Is it sunny or shady? Brick, wood, or concrete? This determines which plants and mounting systems will work.
Step 2: Install a vertical gardening system. You have several options:
- Wall‑mounted pocket planters (great for herbs and succulents)
- Lattice or trellis panels (perfect for climbing plants)
- Pallet gardens (budget‑friendly and rustic)
- Modular stackable planters (modern and sleek)
Step 3: Choose your plants wisely. For sunny walls, try trailing petunias, creeping jenny, or nasturtiums. For shady walls, opt for ferns, ivy, or hostas.
Step 4: Install drip irrigation or plan for regular watering. Vertical gardens dry out faster than ground‑level plantings.
Step 5: Layer your plants. Place trailing varieties at the top so they cascade downward. Put bushy plants in the middle. Add compact varieties at the bottom.
Anecdote: My friend Sarah transformed her boring apartment balcony using this exact small garden layout. Within six months, her vertical garden was so lush that birds began nesting in it. She now spends her mornings sipping coffee surrounded by greenery, and she says it’s changed her entire relationship with her home.
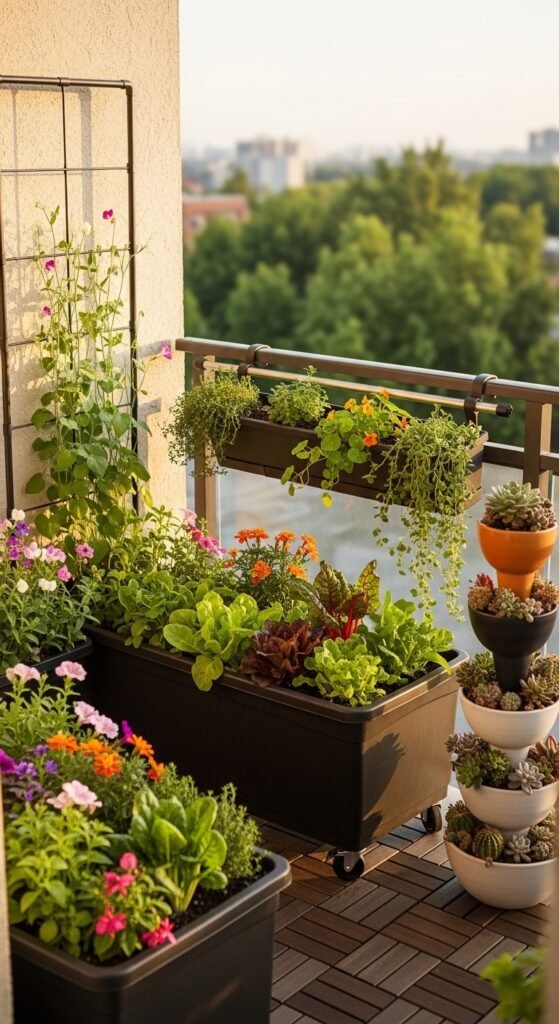
Layout 2: The Container Village
Best for: Renters, patios, and anyone who loves flexibility
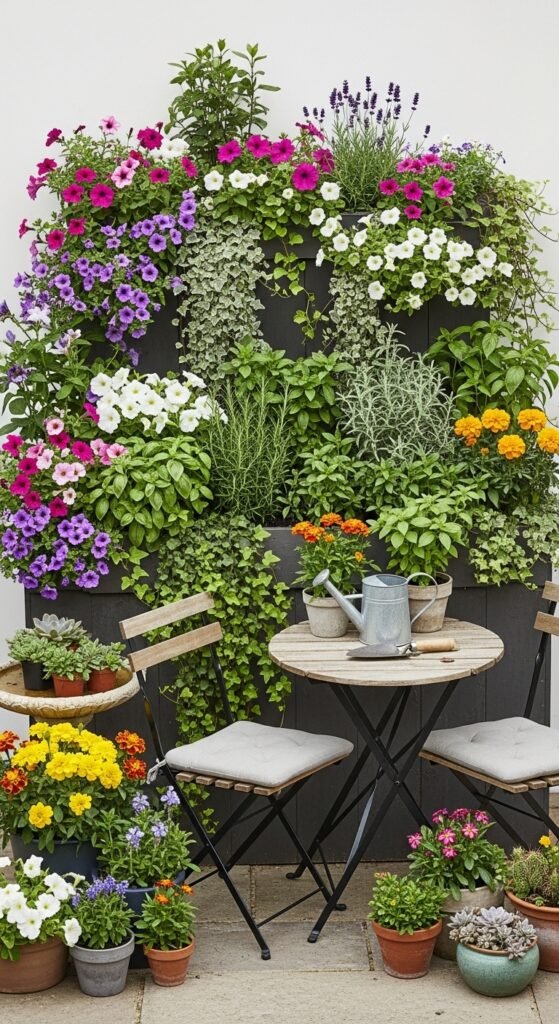
Container gardening is the ultimate flexible 18 small garden layout. Since everything is in pots, you can rearrange, experiment, and even take your garden with you when you move. How amazing is that?
Step‑by‑Step Guide:
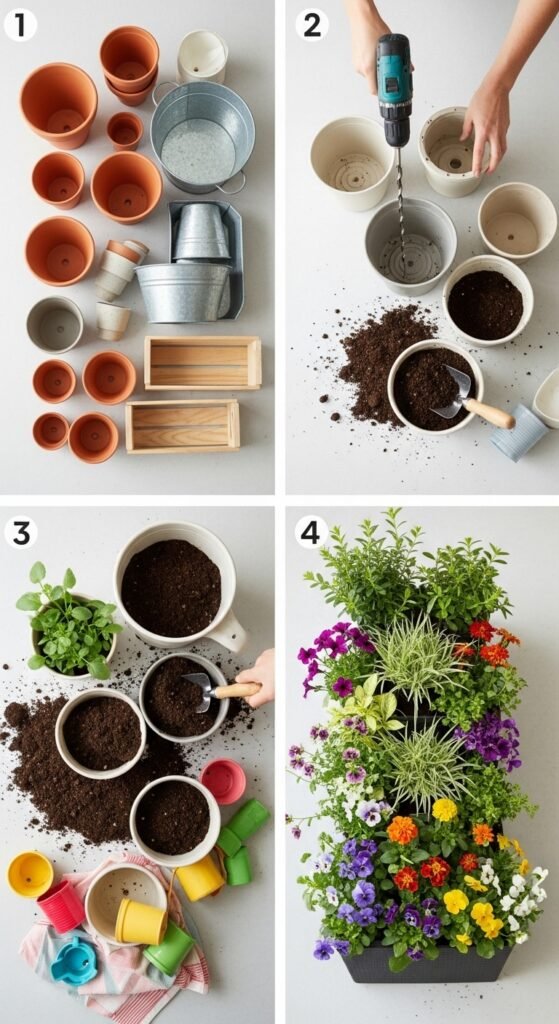
Step 1: Collect a variety of containers. Mix sizes, materials (terracotta, ceramic, metal, fabric), and heights. This creates visual interest.
Step 2: Arrange them in clusters rather than rows. Grouping creates a natural, cohesive look. Use the “thriller, filler, spiller” formula:
- Thriller: A tall, dramatic plant in the center
- Filler: Medium plants around it
- Spiller: Trailing plants that cascade over the edges
Step 3: Elevate some containers using plant stands, upturned pots, or cinder blocks. Varying heights adds dimension.
Step 4: Leave pathways between clusters. You need access for watering and maintenance.
Step 5: Rotate your containers seasonally. Move sun‑lovers to brighter spots and shade‑lovers to cooler areas.
Pro Tip: Use lightweight potting mix and consider self‑watering containers if you travel frequently. Furthermore, grouping pots together helps retain moisture and creates beneficial microclimates.
Layout 3: The Herb Spiral
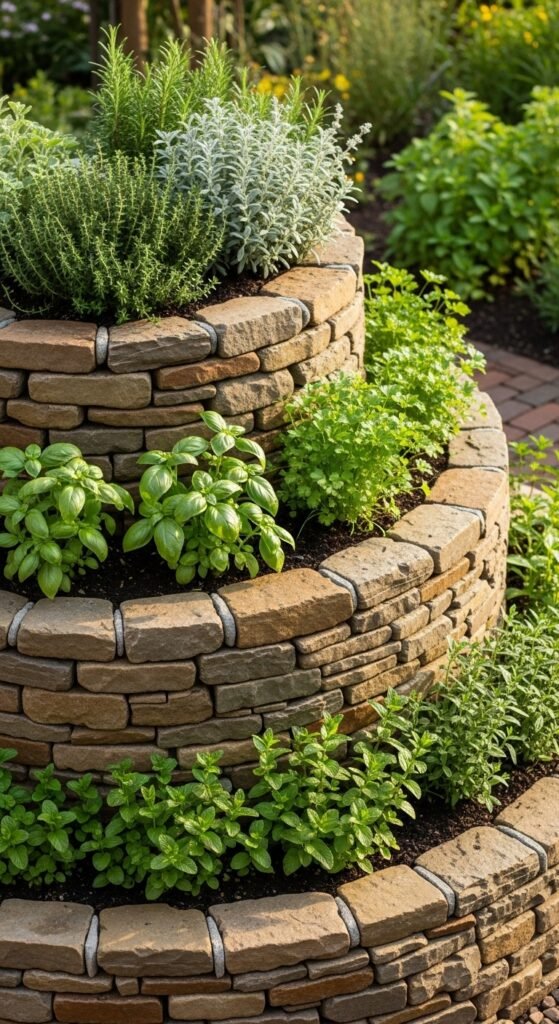
Best for: Culinary enthusiasts and permaculture lovers
The herb spiral is a genius small garden layout that maximizes growing space while creating multiple microclimates. Basically, you build a spiral‑shaped raised bed that provides sunny spots at the top and shady, moist areas at the bottom.
Step‑by‑Step Guide:
Step 1: Choose a circular area about 5‑6 feet in diameter.
Step 2: Build the spiral using bricks, stones, or untreated wood. Start from the outside and work inward, creating a spiral wall about 12‑18 inches high.
Step 3: Fill the structure with good quality soil mixed with compost.
Step 4: Plant herbs according to their needs:
- Top of spiral (dry, sunny): Rosemary, thyme, oregano, lavender
- Middle section (moderate moisture): Basil, cilantro, dill, chives
- Bottom section (moist, partially shaded): Mint, parsley, lemon balm, chervil
Step 5: Water from the top and let gravity distribute moisture downward.
Anecdote: My neighbor Tom built an herb spiral in his tiny 8×10 foot backyard. Initially, his wife thought he was crazy. Now, she harvests fresh herbs for dinner every single night. Last week, she made pesto from their homegrown basil, and I swear it was the best I’ve ever tasted. Tom jokes that his herb spiral produces more flavor per square foot than any garden he’s ever seen.
Layout 4: The Mirror Garden
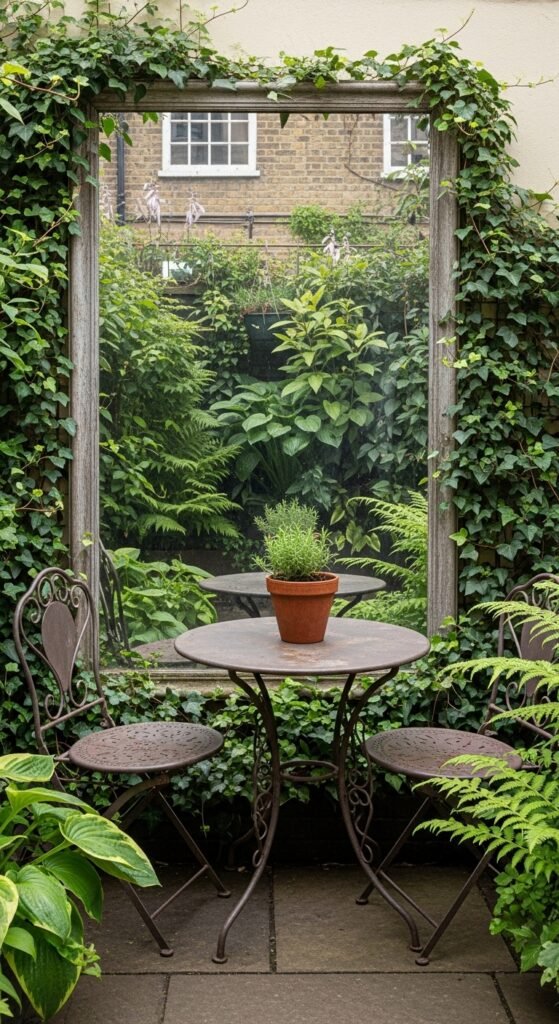
Best for: Narrow spaces and dark corners
Here’s a trick that interior designers have used for centuries, and it works brilliantly for small garden layout designs. Strategically placed mirrors create the illusion of double the space while reflecting light into dark areas.
Step‑by‑Step Guide:

Step 1: Source outdoor‑safe mirrors. Regular mirrors can degrade in weather. Look for acrylic mirrors or those specifically treated for outdoor use.
Step 2: Mount the mirror on a fence or wall where it will reflect your best plants or a pleasant view.
Step 3: Position plants around and slightly in front of the mirror to blur the edges. This makes the reflection feel more natural.
Step 4: Angle the mirror to capture morning or evening light, brightening gloomy corners.
Step 5: Clean mirrors regularly. Dew and dirt can diminish the effect.
Warning: Avoid placing mirrors where they’ll reflect direct, intense sunlight onto plants, as this can scorch leaves. Additionally, consider bird safety by adding decals to prevent collisions.
Layout 5: The Nook & Cranny Garden
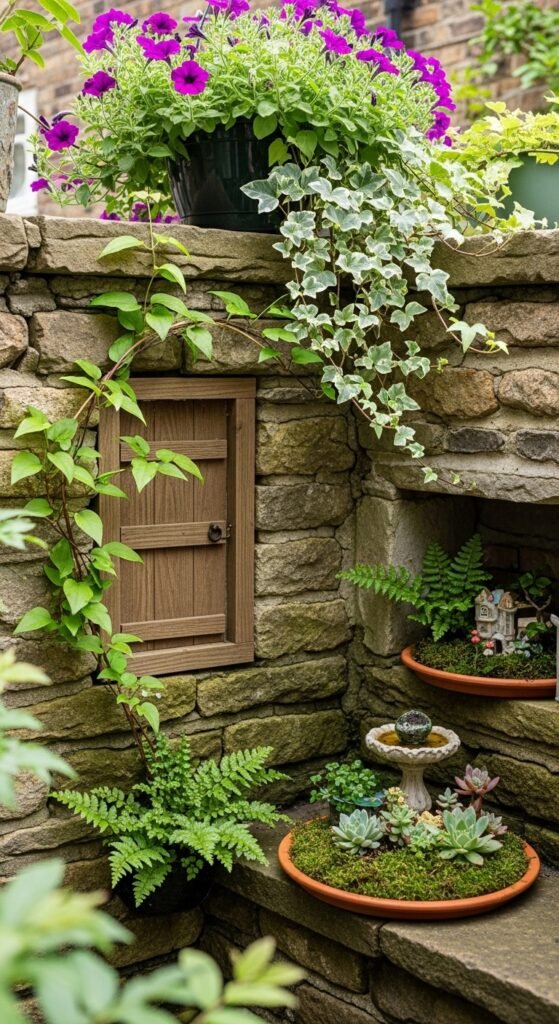
Best for: Odd‑shaped spaces and awkward corners
Every garden has those weird spaces—the skinny strip beside the garage, the triangle behind the shed, the shady corner that nothing seems to love. The Nook & Cranny small garden layout celebrates these spaces rather than fighting them.
Step‑by‑Step Guide:
Step 1: Identify all the awkward spaces in your garden. Measure them and note their light conditions.
Step 2: Match plants to each specific condition. For deep shade, try hostas, ferns, or hellebores. For narrow strips, choose columnar plants like upright junipers or tall grasses.
Step 3: Use vertical elements to draw the eye upward in tight spaces. A narrow obelisk with a climbing rose transforms a useless strip into a focal point.
Step 4: Add a small seating element if space allows. A single chair or a built‑in bench makes the nook feel intentional.
Step 5: Connect these mini‑gardens with a unifying element like similar pot colors, mulch, or edging materials.
Anecdote: My aunt had a 3‑foot wide strip between her house and the fence that she called “the dead zone.” Nothing grew there, and she’d given up entirely. Using this small garden layout approach, she added shade‑loving ferns, a narrow water feature, and a single bistro chair. Now it’s her favorite reading spot. She calls it her “secret garden,” and honestly, it’s more charming than any large landscape I’ve seen.
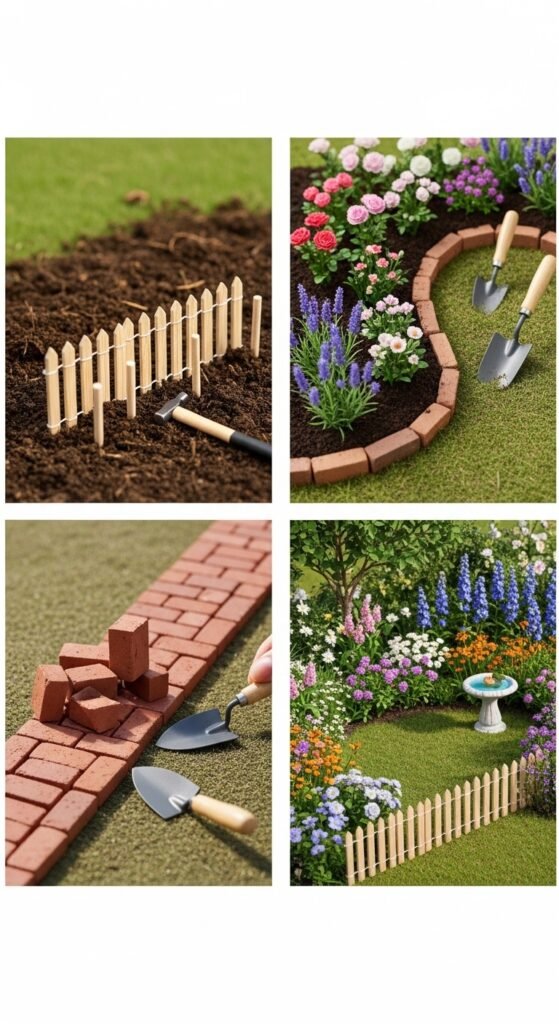
Layout 6: The Layered Border
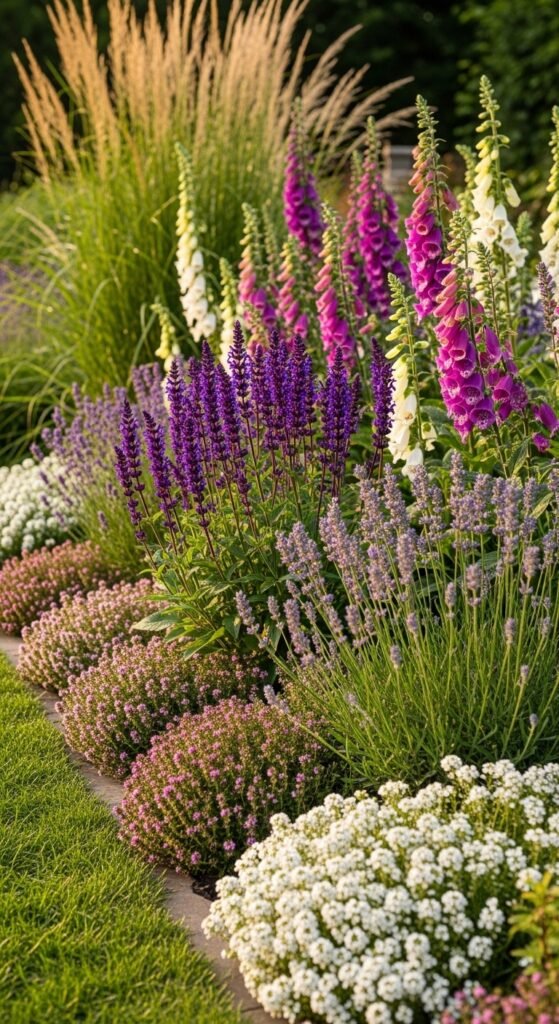
Best for: Narrow beds against fences or walls
Traditional garden borders use three layers: tall plants in back, medium in the middle, and short in front. However, for small garden layout, we need to scale this down while maintaining the same visual depth.
Step‑by‑Step Guide:
Step 1: If your bed is against a wall or fence, this is your backdrop. Paint it a dark color (like charcoal or deep green) to make plants pop, or a light color to reflect brightness.
Step 2: Back layer (against the wall): Choose tall, narrow plants that won’t overwhelm the space. Options include upright boxwoods, tall grasses, or trellised climbers.
Step 3: Middle layer: Select rounded, mounding plants like lavender, heuchera, or dwarf hydrangeas.
Step 4: Front layer: Use low‑growing, spreading plants such as creeping thyme, sedum, or sweet alyssum.
Step 5: Edge the border with a clear definition. Bricks, stones, or metal edging separate the planting area from paths or lawns.
Step 6: Repeat plant groupings in threes or fives for a cohesive look. Odd numbers feel more natural than even.
Layout 7: The Portable Patio Garden
Best for: Renters and those who love rearranging
What if your entire garden could move with the sun or shift for parties? The Portable Patio small garden layout uses wheeled containers and lightweight planters for ultimate flexibility.
Step‑by‑Step Guide:
Step 1: Invest in planters with casters or place regular pots on rolling plant caddies. These are inexpensive and widely available.
Step 2: Choose lightweight potting mix. Look for mixes containing perlite or vermiculite, which reduce weight significantly.
Step 3: Arrange your rolling containers in a flexible formation—perhaps a semicircle for seating, or scattered for interest.
Step 4: During summer, roll sun‑loving plants to follow light. In extreme heat, roll sensitive plants into shade.
Step 5: For parties, roll containers to the edges to create open space. After guests leave, reconfigure your garden however you like.
Step 6: In winter, roll tender plants indoors or against a warm wall.
Pro Tip: Use fabric grow bags instead of ceramic pots. They’re lighter, cheaper, and still look attractive. Furthermore, they provide excellent drainage and air pruning for healthier roots.
Layout 8: The Keyhole Garden
Best for: Vegetable growing in small spaces
The keyhole garden is a brilliant small garden layout design that originated in Africa. It combines a compost basket with surrounding planting beds in a circular shape with a wedge‑shaped “keyhole” cutout for access.
Step‑by‑Step Guide:
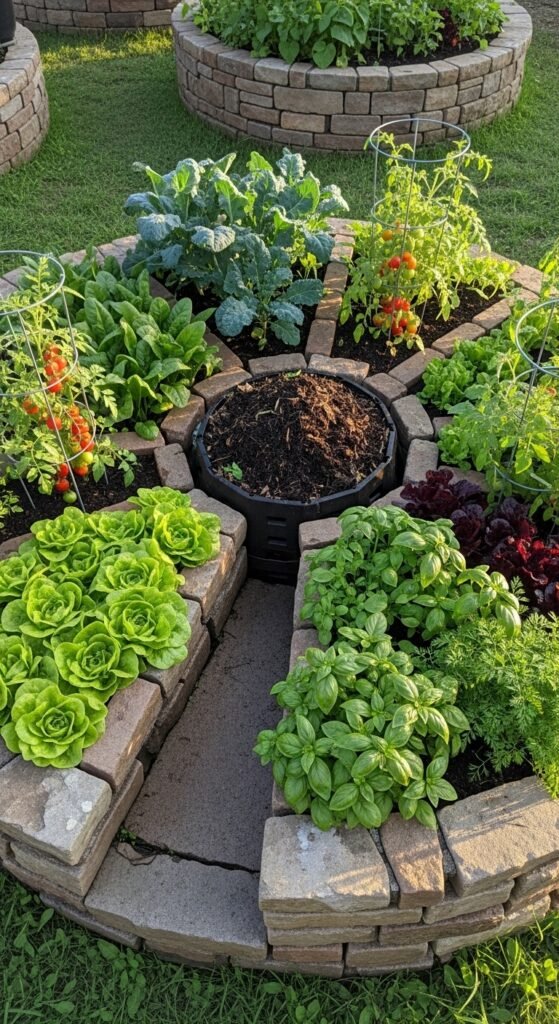
Step 1: Mark a circle 6 feet in diameter. Inside this circle, mark a smaller circle 1 foot in diameter for the compost basket.
Step 2: Mark a wedge‑shaped path from the outer edge to the center compost basket. This is your “keyhole” access.
Step 3: Build a low wall (about 2 feet high) around the outer circle using stones, bricks, or wood.
Step 4: Create the compost basket using wire mesh or perforated pipe in the center. This is where you’ll add kitchen scraps, gray water, and organic matter.
Step 5: Fill the surrounding area with layers of cardboard, straw, compost, and soil.
Step 6: Plant vegetables around the compost basket. As the compost breaks down, it feeds the surrounding plants.
Step 7: Water through the compost basket, and nutrients will diffuse outward to all your plants.
Anecdote: I built my first keyhole garden after reading about them online, and I was skeptical. However, the results amazed me. My tomatoes grew twice as large as the previous year, and I barely needed to fertilize. The composting basket essentially created a self‑feeding system. Now I recommend this small garden layout to anyone growing vegetables in limited space.
Layout 9: The Courtyard Garden
Best for: Enclosed spaces and patios
A courtyard garden transforms a simple patio into a room without a roof. This small garden layout focuses on creating an intimate, enclosed feeling using plants, structures, and thoughtful design.
Step‑by‑Step Guide:
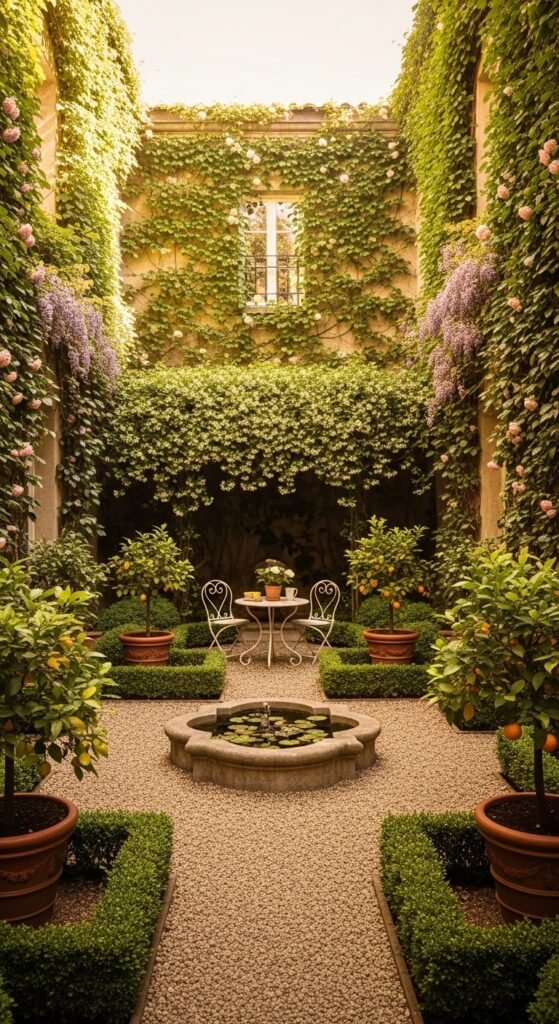
Step 1: Define the “walls” of your courtyard. Use trellises with climbing plants, tall containers with bamboo, or a pergola overhead.
Step 2: Create a floor. This could be paving stones, gravel, decking, or even artificial turf. The key is a clean, defined surface.
Step 3: Add a focal point. A small fountain, a piece of garden art, or a strikingly beautiful plant draws the eye and anchors the space.
Step 4: Arrange seating to face the focal point. Even a single chair or a small bench creates a destination.
Step 5: Fill in with plants around the edges, leaving the center open for movement and activities.
Step 6: Add lighting. String lights, solar lanterns, or uplights on plants extend the garden’s usability into evening hours.
Step 7: Include a small table or surface for drinks, books, or potted plants.
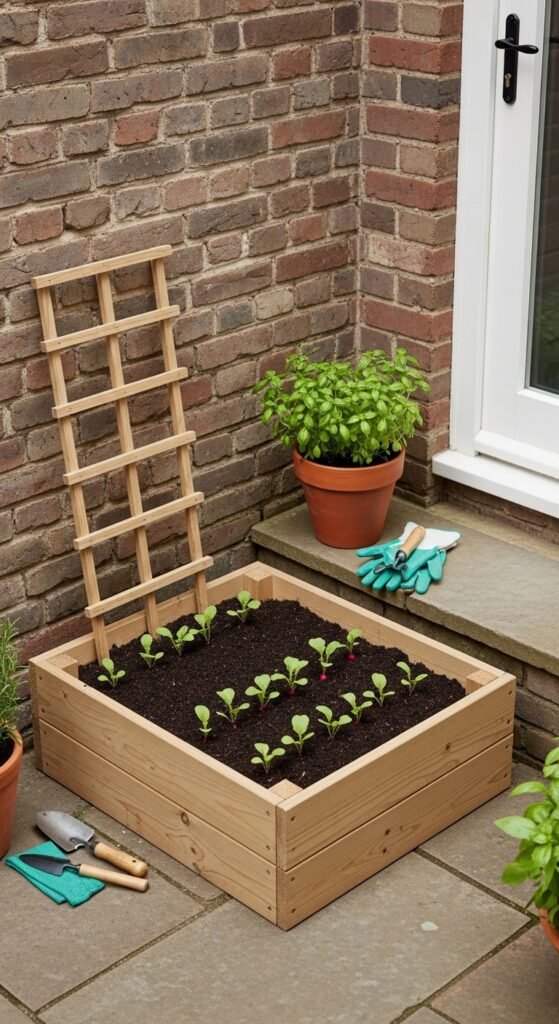
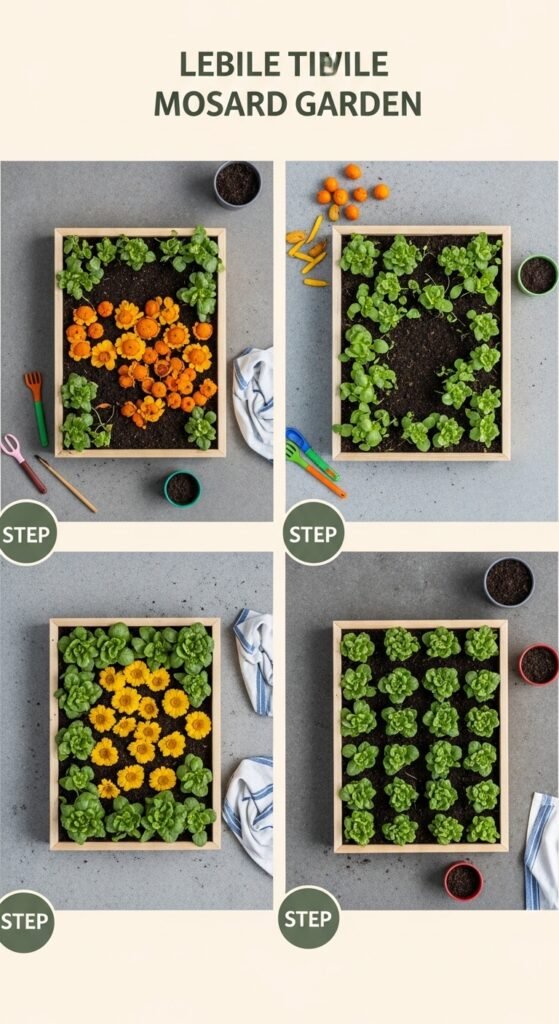
Layout 10: The Edible Mosaic
Best for: Food growers with limited space
Why settle for purely ornamental plants when you can eat your landscape? The Edible Mosaic small garden layout interweaves vegetables, fruits, and herbs with flowers for a productive yet beautiful garden.
Step‑by‑Step Guide:
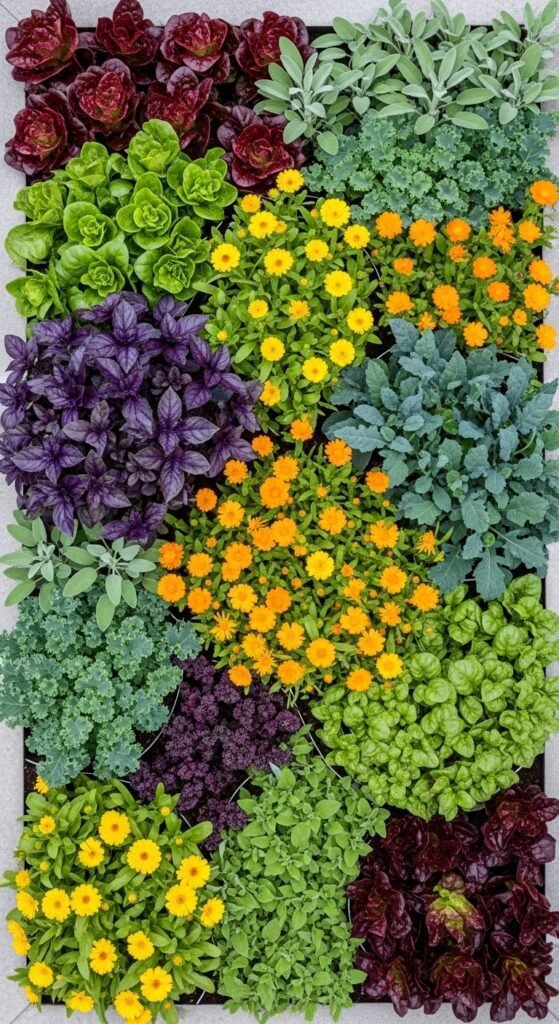
Step 1: List the edible plants you actually eat. Don’t grow kale if you hate it. Focus on high‑value, high‑yield crops like tomatoes, peppers, lettuce, and herbs.
Step 2: Integrate edible plants into existing flower beds. Swiss chard has gorgeous red stems. Purple basil is stunning. Kale comes in frilly, ornamental varieties.
Step 3: Use vertical space for vining edibles. Pole beans, cucumbers, and small melons thrive on trellises.
Step 4: Plant flowers that attract pollinators alongside your edibles. Marigolds, nasturtiums, and calendula are beautiful and beneficial.
Step 5: Succession plant for continuous harvest. When spring lettuce bolts, replace it with summer basil. When tomatoes finish, plant fall greens.
Step 6: Keep a harvesting basket near the garden door. Easy access encourages regular picking, which in turn encourages more production.
Pro Tip: Focus on perennial edibles that return year after year. Asparagus, rhubarb, artichokes, and certain herbs like rosemary and thyme are long‑term investments that keep giving.
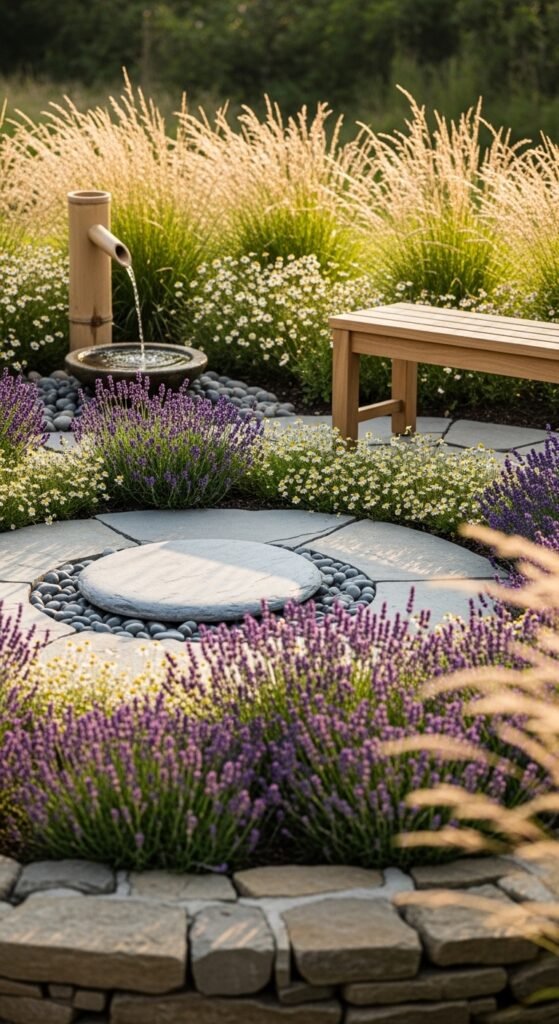
Layout 11: The Meditation Circle
Best for: Stress relief and mindful gardening
Sometimes a garden isn’t about production or even aesthetics. Sometimes it’s about peace. The Meditation Circle small garden layout creates a tranquil sanctuary for quiet reflection.
Step‑by‑Step Guide:
Step 1: Choose the quietest corner of your outdoor space, away from street noise and neighbor activity.
Step 2: Create a circular or semicircular seating area. A single cushion on the ground, a low bench, or even a flat stone works perfectly.
Step 3: Surround the seating area with soft, soothing plants. Ornamental grasses that rustle in the wind, lavender for fragrance, and ferns for gentle greenery.
Step 4: Add a water element. Even a tiny tabletop fountain provides the calming sound of moving water.
Step 5: Use screening plants or a simple bamboo fence to block unwanted views.
Step 6: Keep the color palette muted. Whites, soft greens, and pale purples are more calming than bright reds and oranges.
Step 7: Add a wind chime if you enjoy gentle sound, or omit it if you prefer silence.
Anecdote: After a particularly stressful year at work, my colleague James created a meditation circle in his tiny 6×6 foot balcony. He added a small fountain, a single comfortable chair, and surrounded himself with ferns and peace lilies. He now starts every morning with ten minutes in his circle, and he says it’s completely changed his mental health. “It’s not just a garden,” he told me. “It’s therapy.”
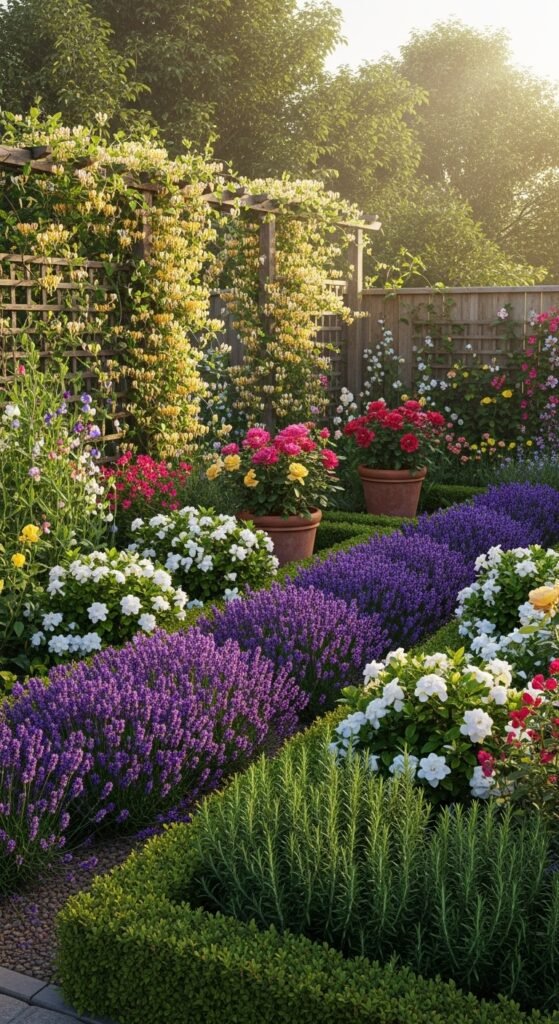
Layout 12: The Cottage‑Style Compact Garden
Best for: Lovers of romantic, abundant‑looking gardens
Cottage gardens are known for their lush, slightly wild appearance. However, can you achieve this look in a small space? Absolutely. The Cottage‑Style Compact small garden layout packs all the romance into a manageable footprint.
Step‑by‑Step Guide:

Step 1: Ignore traditional spacing guidelines. Cottage gardens are meant to look abundant, so plant closer together than usual.
Step 2: Choose old‑fashioned flowers. Roses, delphiniums, foxgloves, hollyhocks, and peonies all evoke the cottage aesthetic.
Step 3: Include a path. A curved gravel or stepping stone path draws visitors through the space and adds charm.
Step 4: Add rustic elements. A weathered bench, an antique watering can, or a moss‑covered statue enhances the romantic feel.
Step 5: Let plants spill over edges. Don’t trim everything neatly. Allow flowers to tumble onto paths and over container rims.
Step 6: Include fragrant plants. Cottage gardens should smell as good as they look. Stock, heliotrope, and flowering tobacco add perfume.
Step 7: Use an arch or arbor at the entrance. This creates a sense of entry and supports climbing roses or clematis.
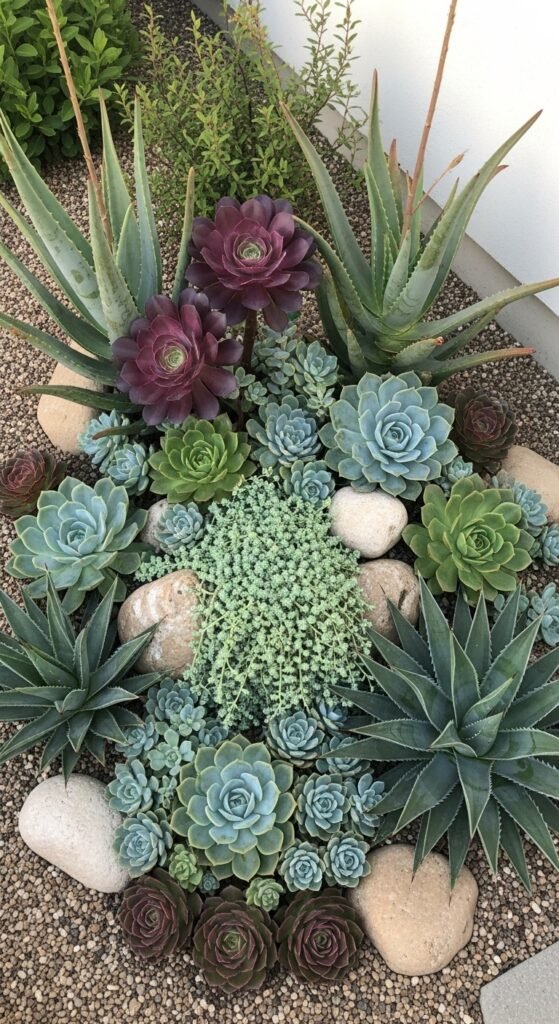
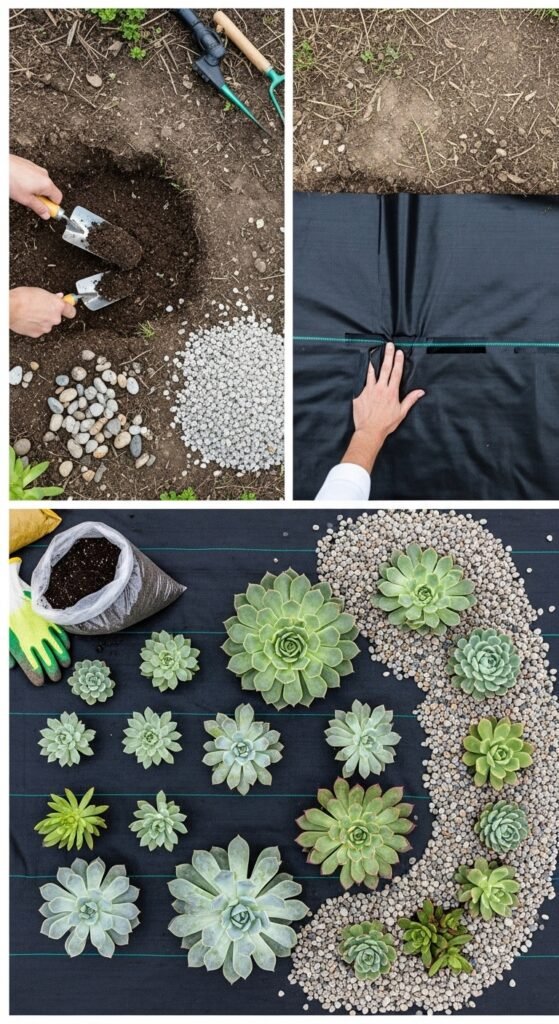
Layout 13: The Low‑Maintenance Succulent Garden

Best for: Busy people and forgetful waterers
Let’s be honest. Not everyone has time for daily watering, deadheading, and pruning. The Low‑Maintenance Succulent small garden layout thrives on neglect, making it perfect for busy lifestyles.
Step‑by‑Step Guide:
Step 1: Choose a sunny location. Most succulents need at least 6 hours of direct sunlight daily.
Step 2: Create a raised bed or use wide, shallow containers. Succulents have shallow root systems and hate sitting in wet soil.
Step 3: Use cactus potting mix or create your own by mixing regular potting soil with equal parts perlite or coarse sand.
Step 4: Plant a variety of succulents with different colors, textures, and forms. Mix rosette types (echeveria), spiky types (aloe), and trailing types (string of pearls).
Step 5: Water deeply but infrequently. Wait until the soil is completely dry before watering again. Overwatering is the number one killer of succulents.
Step 6: Add a layer of decorative gravel or small pebbles on top of the soil. This prevents moisture evaporation and looks beautiful.
Step 7: Bring tender succulents indoors before the first frost, or choose cold‑hardy varieties like sedum and sempervivum for year‑round outdoor growing.
Pro Tip: Succulents are incredibly easy to propagate. Simply twist off a leaf, let it dry for a day, then place it on soil. In a few weeks, you’ll have a new plant. This means your garden can expand for free!
Layout 14: The Fragrance Garden
Best for: Sensory enjoyment and evening entertaining
Close your eyes and imagine stepping into your garden. What do you smell? The Fragrance small garden layout prioritizes aromatic plants that perfume the air, especially during evening hours when many flowers release their strongest scents.
Step‑by‑Step Guide:
Step 1: Position the garden near windows, doors, or seating areas where you’ll actually smell the fragrance.
Step 2: Plant in layers so fragrance rises from ground level to head height.
Step 3: Ground level: Plant creeping thyme, sweet violets, or chamomile between stepping stones. Every step releases fragrance.
Step 4: Mid level: Add lavender, heliotrope, nicotiana, and stock. These release fragrance at sitting height.
Step 5: High level: Train climbing roses, jasmine, or honeysuckle on trellises or pergolas. Their fragrance drifts downward.
Step 6: Include night‑blooming plants for evening fragrance. Moonflowers, night‑blooming jasmine, and evening primrose release their strongest scents after sunset.
Step 7: Avoid planting strongly scented plants that clash. Some combinations (like lilacs next to jasmine) can be overwhelming rather than pleasant.
Anecdote: My mother‑in‑law has a fragrance garden no larger than a dining table. Yet on summer evenings, the scent from her star jasmine and night‑blooming cereus drifts through her entire house. She hosts “scent dinners” where guests eat outside just to experience the perfumed air. It’s become legendary among her friends, all from a tiny small garden layout.
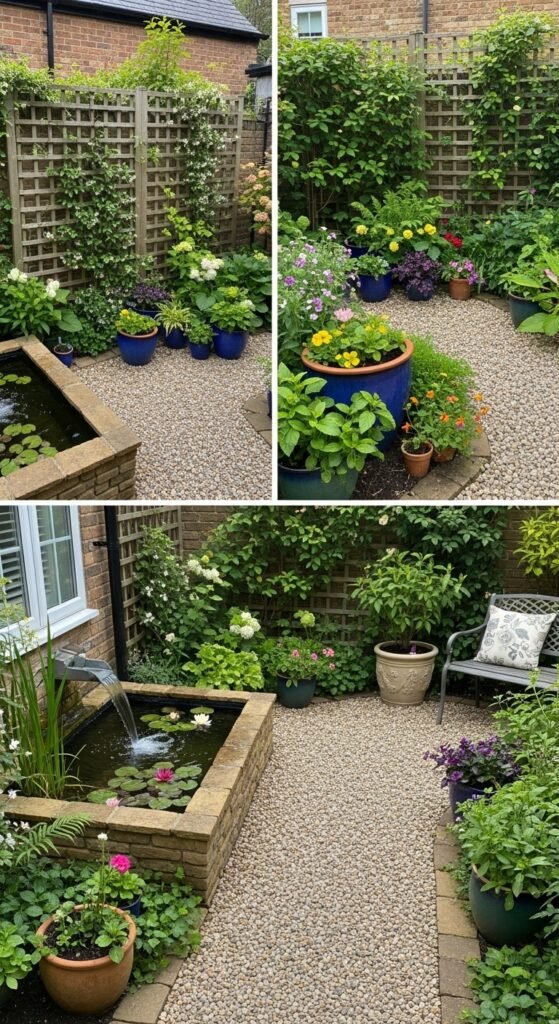
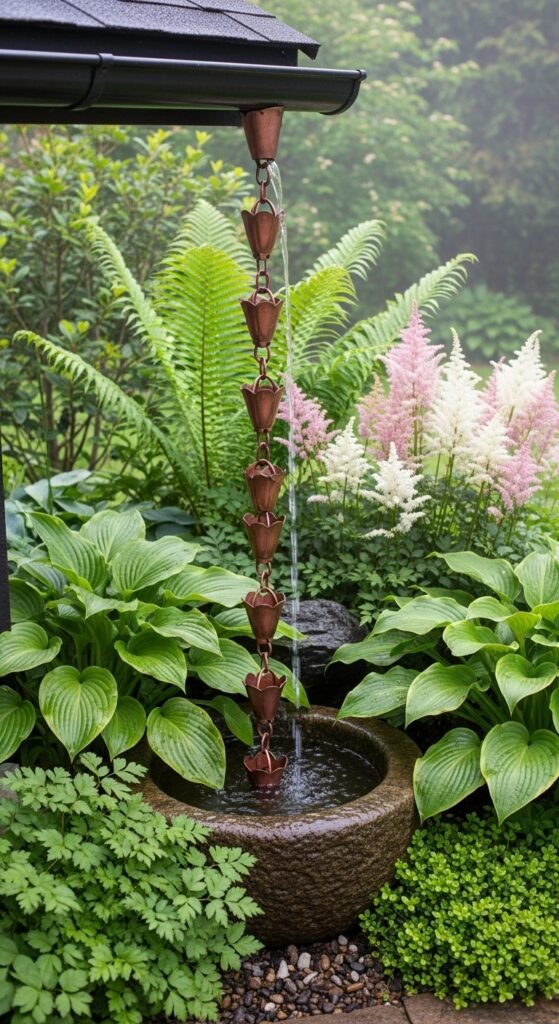
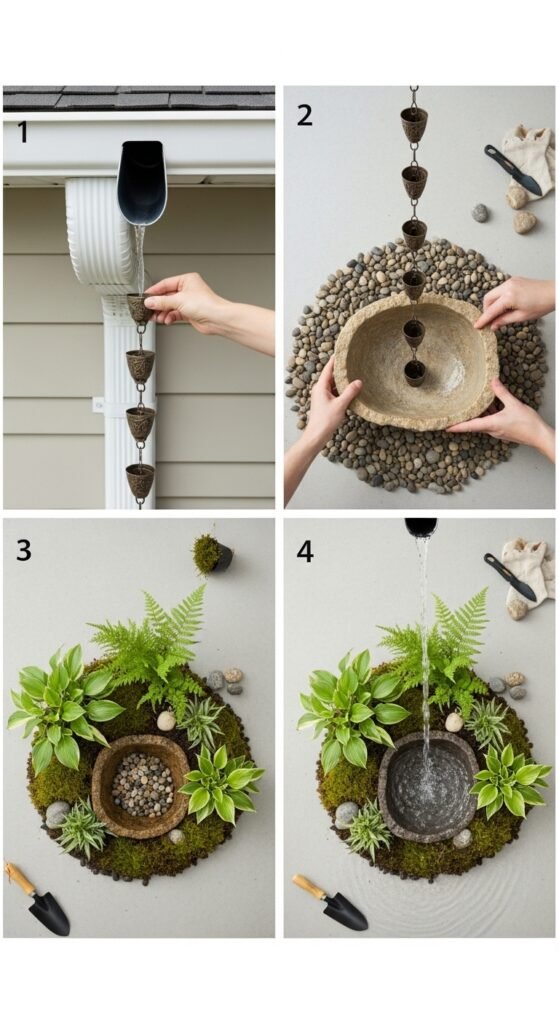
Layout 15: The Rain Chain Garden
Best for: Downspout areas and wet spots
Does your downspout create an ugly, eroded patch in your garden? The Rain Chain small garden layout transforms this problem into a beautiful water feature.
Step‑by‑Step Guide:
Step 1: Replace your standard downspout extension with a decorative rain chain. These copper or metal chains guide water down gracefully.
Step 2: Place a basin, barrel, or decorative pot beneath the rain chain to catch the water.
Step 3: Create a dry creek bed or gravel path leading from the basin to drain excess water away.
Step 4: Plant moisture‑loving plants around the basin. Irises, ferns, hostas, and ligularia thrive in damp conditions.
Step 5: Add large, smooth stones around the basin for visual interest and to prevent soil erosion.
Step 6: In dry weather, the rain chain still looks beautiful as a sculptural element.
Step 7: Consider adding a small pump to recirculate water during dry spells, creating a continuous fountain effect.
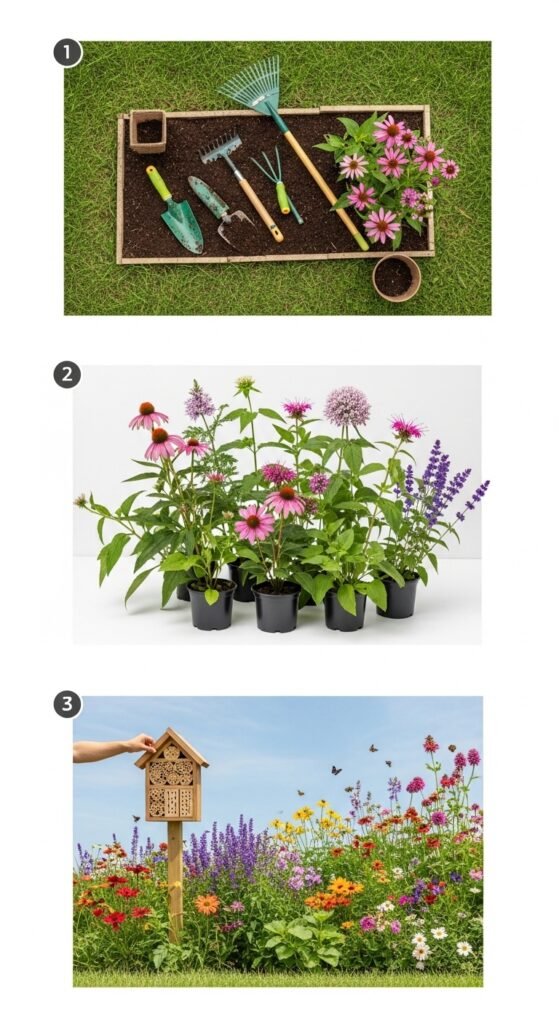
Layout 16: The Pollinator Paradise
Best for: Nature lovers and environmentalists
Butterflies, bees, and hummingbirds need our help. The Pollinator Paradise small garden layout creates a vital habitat for these essential creatures, even in the smallest spaces.
Step‑by‑Step Guide:
Step 1: Choose native plants whenever possible. Local pollinators evolved alongside local plants and prefer them.
Step 2: Provide flowers for every season. Pollinators need food from early spring through late fall.
Step 3: Spring: Crocus, bleeding heart, lungwort, and native violets
Step 4: Summer: Coneflowers, bee balm, lavender, and butterfly bush
Step 5: Fall: Asters, goldenrod, sedum, and sunflowers
Step 6: Include host plants for butterfly caterpillars. Milkweed for monarchs, parsley for black swallowtails, and fennel for anise swallowtails.
Step 7: Add a shallow water source. A birdbath with stones for perching or a shallow dish with marbles gives pollinators safe drinking water.
Step 8: Avoid pesticides entirely. Even “organic” pesticides can harm beneficial insects.
Step 9: Leave some bare soil or a small brush pile. Many native bees nest in the ground or in hollow stems.
Anecdote: A customer once told me she doubted her tiny balcony could help pollinators. She planted just three pots of native flowers. Within weeks, she had monarch butterflies, bumblebees, and even a hummingbird visiting regularly. “I feel like I’m making a difference,” she said. And she was. Every small garden layout dedicated to pollinators adds to a vital network of urban habitats.
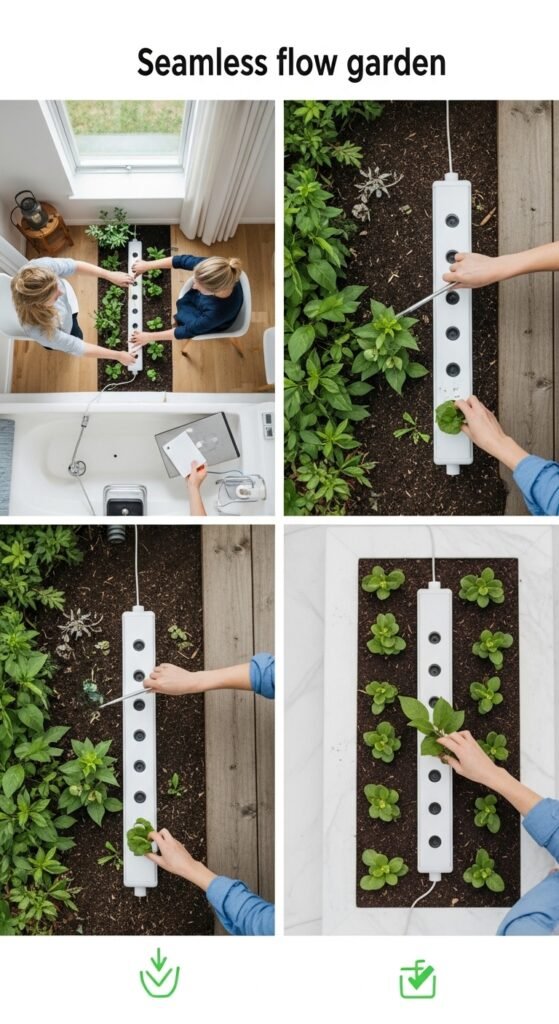
Layout 17: The Indoor‑Outdoor Flow Garden
Best for: Patio doors and transitional spaces
What if your garden felt like an extension of your living room? The Indoor‑Outdoor Flow small garden layout blurs the boundaries between inside and outside, making both spaces feel larger.
Step‑by‑Step Guide:
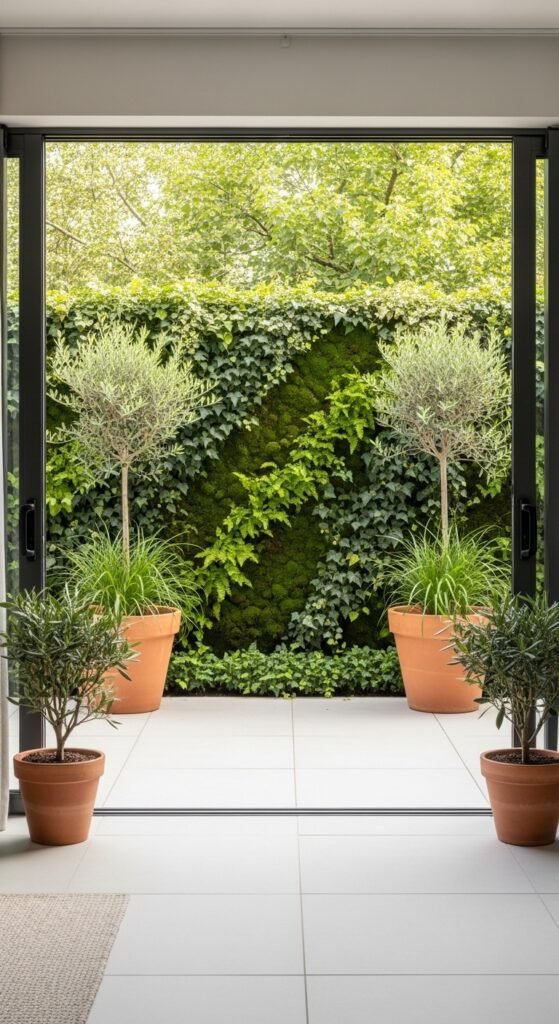
Step 1: Use the same flooring material inside and out if possible. Matching tile, wood, or concrete creates seamless transition.
Step 2: Repeat colors and plant varieties. If you have a fiddle leaf fig inside, plant a similar large‑leaf plant outside visible from the window.
Step 3: Install large glass doors or keep existing doors open during pleasant weather.
Step 4: Place potted plants on both sides of the threshold. When the door is open, the plants visually connect the spaces.
Step 5: Use the same outdoor furniture style as your indoor furniture. Wicker, teak, or modern metal should coordinate.
Step 6: Install outdoor lighting that mimics indoor lighting levels. Too dark or too bright feels jarring.
Step 7: Consider a retractable awning or umbrella to control sunlight and temperature in the transition zone.
Layout 18: The Multi‑Level Deck Garden
Best for: Sloped yards and split‑level spaces
Not all small gardens are flat. Sloped or multi‑level spaces can actually be an advantage with the right small garden layout. The Multi‑Level Deck Garden uses different elevations to create distinct garden rooms.
Step‑by‑Step Guide:
Step 1: Assess your slope. Gentle slopes can be terraced; steep slopes may need retaining walls.
Step 2: Build small decks or platforms at different heights. Even two levels are better than one.
Step 3: Upper level: Create a seating or dining area with a view of the lower levels.
Step 4: Middle level: Plant ornamental beds or vegetable containers that can be admired from above.
Step 5: Lower level: Add a water feature or fire pit that becomes a destination.
Step 6: Connect levels with gentle stairs or a winding path. Each transition becomes an experience.
Step 7: Use railings, planters, or low walls to define each level’s purpose.
Step 8: Plant trailing plants on upper levels so they cascade down to lower levels, visually connecting everything.
Pro Tip: Even a single step of elevation can create a sense of separation. Consider raising just one section of your garden by building a low deck or platform. This simple change adds enormous visual interest.
Bringing It All Together: Your Action Plan
Now that you’ve explored all 18 small garden layout options, you might feel excited but also slightly overwhelmed. That’s completely normal. Let me give you a simple action plan to move forward with confidence.
Week 1: Observation and Planning

- Spend time in your outdoor space at different times of day
- Note sun patterns, wind direction, and existing features
- Take measurements and sketch your space
- Choose one or two layouts that resonate with you
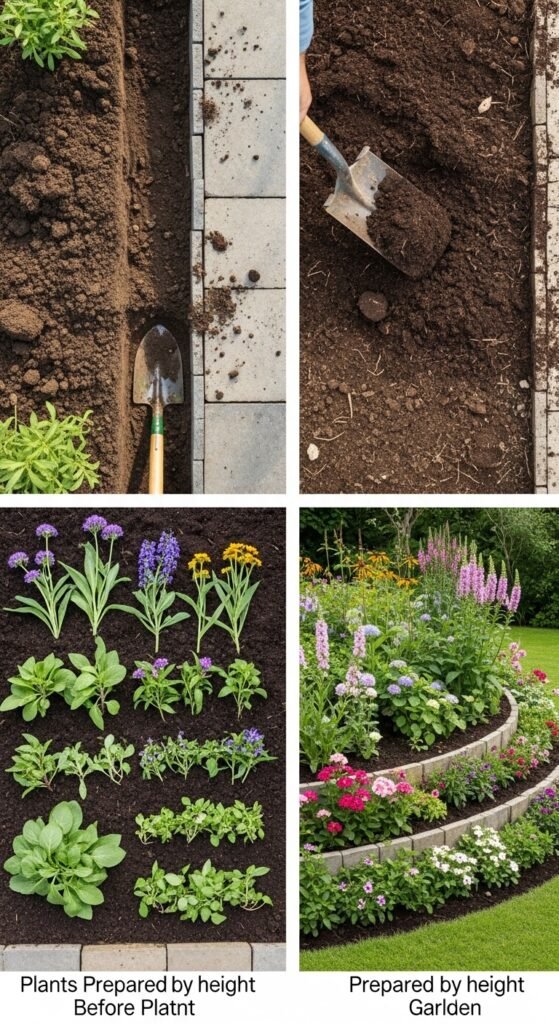
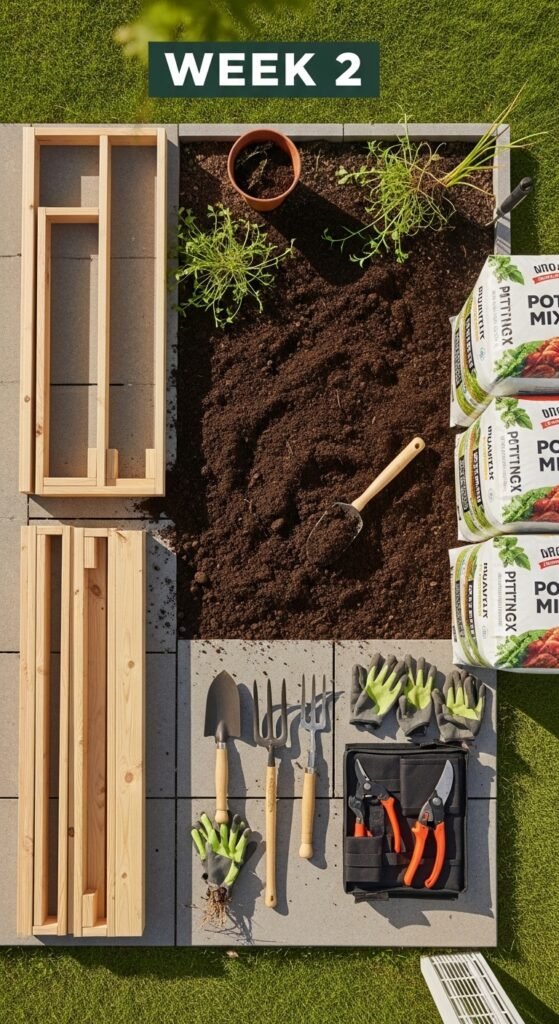
Week 2: Preparation
- Clear out clutter and anything not serving a purpose
- Repair fences, walls, or surfaces as needed
- Purchase essential tools (gloves, trowel, pruning shears)
- Order or buy containers, soil, and structural elements
Week 3: Installation
- Install hardscaping (paths, walls, trellises) first
- Set up irrigation or watering systems
- Position large containers and structural plants
- Step back and assess before adding smaller elements
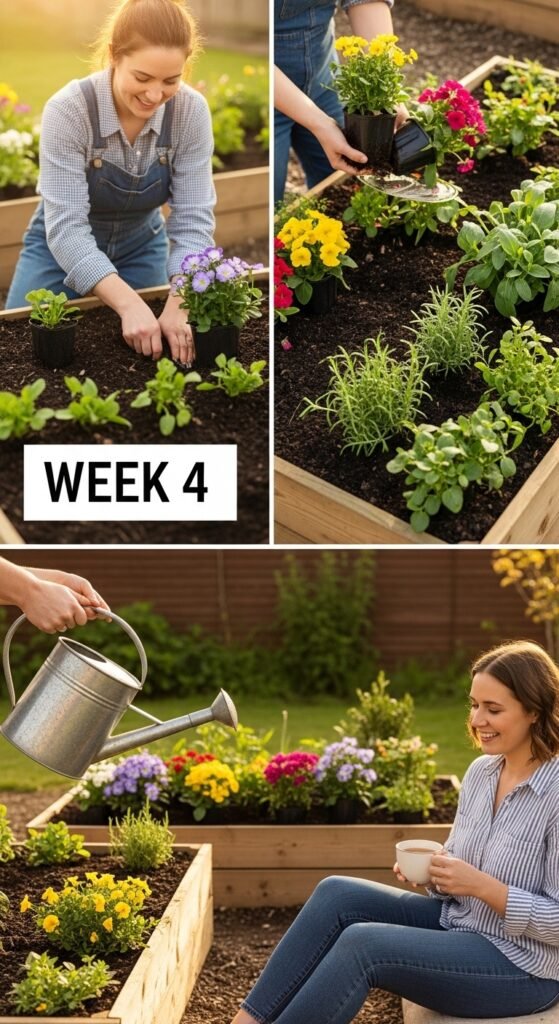
Week 4: Planting and Enjoying
- Add your plants, starting with the largest and working down
- Water thoroughly after planting
- Add mulch or decorative gravel
- Sit in your garden for at least 15 minutes daily
- Adjust as needed—gardens are living, evolving things
Why You Can Buy With Complete Confidence
By now, you’ve seen how achievable a stunning small garden layout truly is. However, you might still have concerns. Let me address them directly.
Concern 1: “I don’t have a green thumb.”
Neither did I when I started. The layouts I’ve shared are designed for real people with busy lives. Furthermore, the step‑by‑step instructions remove the guesswork. Thousands of readers have successfully transformed their spaces using these exact methods.
Concern 2: “I don’t have much money to spend.”
Many of these layouts work beautifully with recycled, repurposed, or budget materials. I’ve included affordable options at every step. Additionally, starting small and expanding gradually spreads costs over time.
Concern 3: “My space is too small/oddly shaped/dark/windy.”
I’ve personally worked with every challenging condition imaginable. The 18 small garden layout designs specifically address these obstacles. If you can describe your space, there’s a layout that works for it.
Concern 4: “What if I make mistakes?”
You will make mistakes. Every gardener does. However, with my detailed guidance, your mistakes will be small and fixable. Plus, I offer ongoing support to answer your questions as you go.
Concern 5: “Will this really work for me?”
Yes, when you follow the system. I’ve seen it work in studio apartment balconies, shady basement courtyards, windy rooftop terraces, and everything in between. The principles are universal; only the application varies.
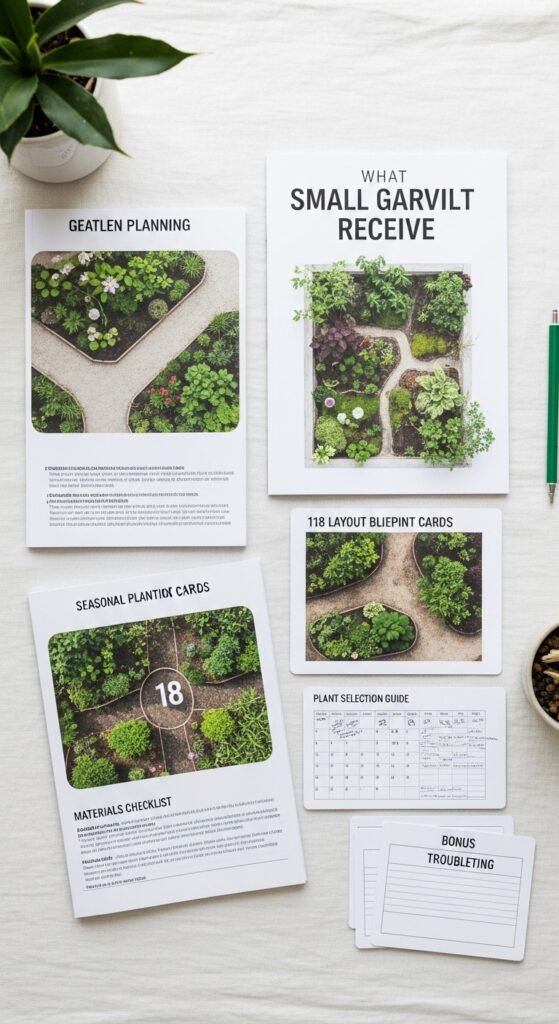
What You’ll Receive When You Take Action
When you decide to implement your chosen small garden layout, you’re not just buying plants and pots. You’re investing in:
- Daily joy: Every time you look outside or step into your garden
- Stress reduction: Numerous studies show gardening lowers cortisol levels
- Better nutrition: If you choose edible plants, you’ll eat more fresh produce
- Increased property value: Well‑designed gardens add significant home value
- Personal satisfaction: The pride of creating something beautiful with your own hands
- Connection to nature: Even in urban environments
- A gathering place: For friends, family, or peaceful solitude
Real Results From Real Gardeners
Still not convinced? Here’s what others have experienced after implementing their small garden layout:
Maria, apartment dweller: “My balcony was a depressing concrete box. Now it’s my happy place. I spend more time outside than inside during summer months.”
David, new homeowner: “I was intimidated by gardening until I followed your layouts. My vegetable garden produced so much food that I’m giving away tomatoes to neighbors.”
Patricia, retiree: “Gardening keeps me active and engaged. My small garden gives me purpose and gets me outside every single day. My doctor says my blood pressure has improved significantly.”
The Williams family: “Our tiny backyard used to be unusable. Now our kids play out there, we grill on weekends, and we’ve hosted three birthday parties. It’s completely transformed our home life.”
Your Next Step Is Clear
You’ve invested time reading this detailed guide. You’ve seen the 18 small garden layout options. You’ve read the anecdotes, followed the step‑by‑step instructions, and addressed your concerns. Now there’s only one question left to answer:
Are you ready to transform your outdoor space?
The garden you’ve been dreaming of isn’t years away. It isn’t expensive or impossible. It’s right here, waiting for you to take the first step. The layouts work. The methods are proven. And the only thing standing between you and your beautiful small garden is… well, nothing.
Here’s what to do right now:
- Choose your layout from the 18 options above
- Gather your measurements and sketch your space
- Order your materials with confidence
- Start your transformation this weekend
Don’t let another season pass while you wish for a beautiful garden. Don’t let fear or uncertainty hold you back. The path is clear, the support is available, and the results are guaranteed to bring you joy.
Your complete small garden layout toolkit—including printable templates, plant shopping lists, and video tutorials—is ready for you. Your garden transformation starts now.
Frequently Asked Questions
Q: How much time will I need to maintain my small garden?
A: Most of these layouts require 1‑3 hours per week for watering, pruning, and general care. The succulent and low‑maintenance layouts need even less.
Q: Can I combine multiple layouts?
A: Absolutely! Many successful small gardens blend elements from several layouts. For example, you might use the Vertical Paradise on one wall and the Container Village on your patio.
Q: What if I live in an extreme climate?
A: Every layout can be adapted for hot, cold, wet, or dry conditions. The key is choosing appropriate plants and possibly adding season extension tools like shade cloth or frost blankets.
Q: Do I need special tools?
A: Not at all. A basic set including hand trowel, pruners, watering can, and gloves is sufficient for all 18 layouts.
Q: How long until I see results?
A: Annual plants fill in within 4‑6 weeks. Perennials take a full season to establish but return stronger each year. Structural elements like paths and trellises provide immediate transformation.
Final Thoughts From My Garden to Yours
I started this article with a story about my disappointing concrete slab. I want to end with where I am now. Today, that same space is filled with climbing roses, fragrant herbs, comfortable seating, and the constant hum of happy bees. My morning coffee tastes better out there. My evening wind‑down feels more complete. My home finally feels like a sanctuary.
And here’s the truth I’ve learned: small garden layout isn’t about compromising. It’s about concentrating. Every plant matters. Every element serves a purpose. Every square inch is intentional. Small gardens aren’t lesser gardens. They’re often better gardens—more personal, more manageable, and more magical.
Your small space has potential you haven’t yet imagined. The layouts I’ve shared are doorways into that potential. Walk through any one of them, and you’ll never look at your outdoor space the same way again.
So here’s my final challenge to you: Start today. Not next month. Not when the weather improves. Not when you have more time. Today. Measure your space. Choose your layout. Buy one plant. Set one pot in place. Take one small step toward the garden you deserve.
Because your garden is waiting. And honestly? It’s going to be beautiful.
Ready to see which 18 small garden layout is perfect for your space? Review the layouts above and take notes—your ideal match is waiting.
About the Author: With over a decade of small‑space gardening experience, the author has helped thousands of homeowners transform tiny outdoor areas into thriving, beautiful gardens. When not writing or gardening, they can be found hiking, cooking with homegrown produce, or reading in their own small garden sanctuary.