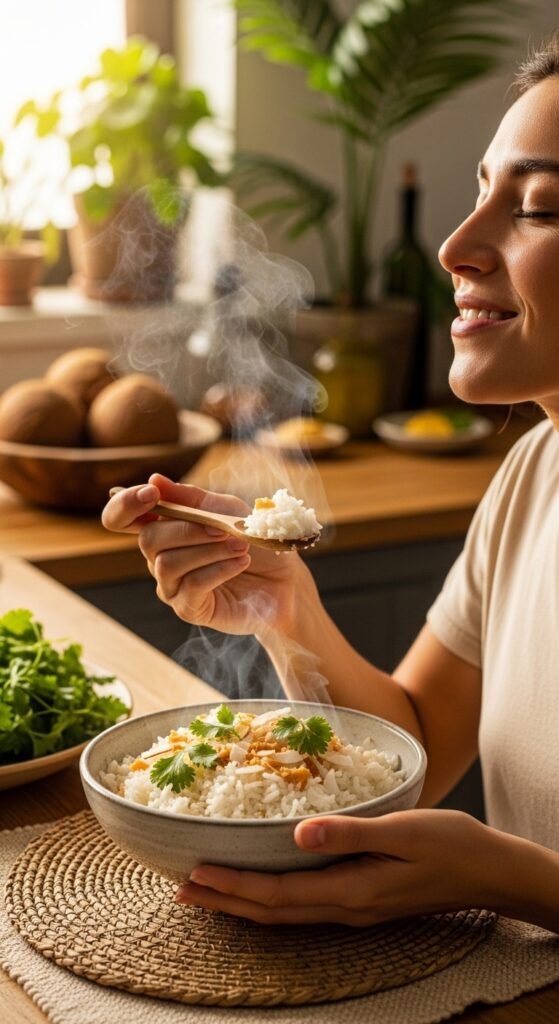
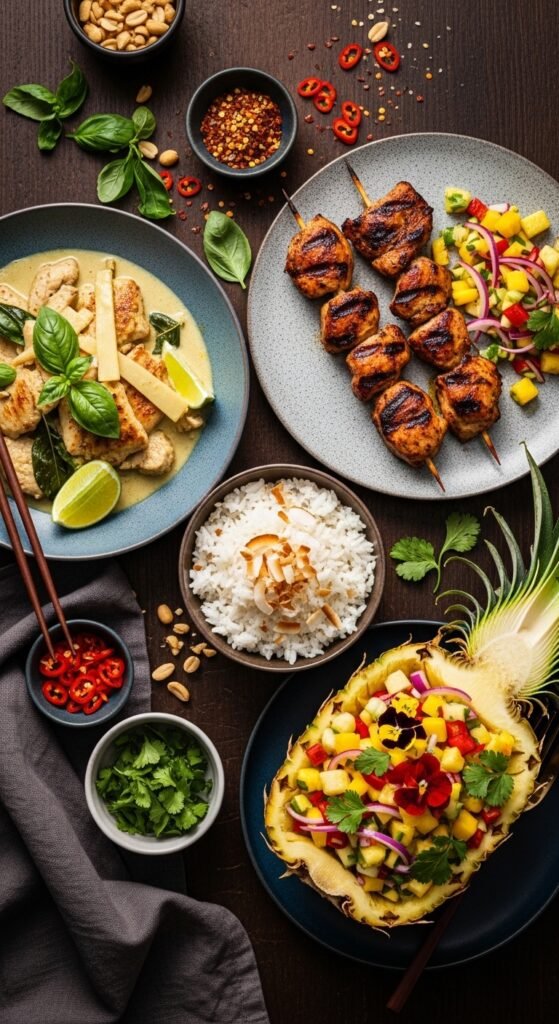
Coconut rice recipe – just hearing those words probably transports you to a tropical paradise, doesn’t it? The gentle sway of palm trees, the salty ocean breeze, and the unmistakable aroma of creamy coconut mingling with perfectly steamed rice. I still remember the first time I truly fell in love with this dish. It was a rainy Tuesday evening in my tiny apartment, and I had just returned from a disastrous day at work. My laptop had crashed, my coffee had spilled all over my white shirt, and frankly, I was ready to order greasy takeout for the third time that week. But then I spotted the can of coconut milk sitting in my pantry, leftover from a curry experiment gone wrong. On a whim, I decided to try making coconut rice. Little did I know that this simple decision would completely transform my relationship with cooking – and quite possibly save my sanity.
That first attempt wasn’t perfect, mind you. I used too much water, forgot to add salt, and ended up with something closer to coconut porridge than the fluffy, fragrant rice I had dreamed of. But even that imperfect version was magical. The sweetness of the coconut, the subtle richness, the way it made my entire kitchen smell like a Caribbean beach resort – I was hooked. Over the following months, I experimented, failed, learned, and eventually perfected what I now consider the best coconut rice recipe in my cooking arsenal. Today, I’m going to share every single secret with you.
Why This Coconut Rice Recipe Will Change Your Life
Before we dive into the step-by-step instructions, let me tell you why you should care about mastering this particular dish. Coconut rice isn’t just another side dish – it’s a versatile, comforting, and incredibly forgiving recipe that pairs beautifully with everything from spicy curries to simple grilled vegetables. Whether you’re a busy parent looking for quick weeknight meals, a college student surviving on ramen, or a seasoned home cook wanting to expand your repertoire, this coconut rice recipe belongs in your permanent rotation.
Furthermore, this dish is naturally gluten-free, dairy-free, and can easily be made vegan (spoiler alert: it already is!). Consequently, it accommodates virtually every dietary restriction without sacrificing an ounce of flavor. Additionally, the ingredients are inexpensive and widely available – no need to visit specialty stores or break your grocery budget.
The Fascinating History Behind Coconut Rice

You might be surprised to learn that coconut rice isn’t a newfangled food trend or an Instagram fad. In fact, variations of this dish have been enjoyed for centuries across Asia, Africa, the Caribbean, and Latin America. Each culture has developed its own unique spin, using local ingredients and traditional techniques. In Thailand, you’ll find coconut sticky rice served alongside ripe mangoes. In Jamaica, coconut rice and peas (where “peas” actually means kidney beans) is a Sunday dinner staple. South Indian households prepare coconut rice with tempering of mustard seeds, curry leaves, and dried red chilies. Nigerian coconut rice often includes tomatoes, peppers, and protein like shrimp or chicken.
What connects所有这些 diverse preparations? The universal appeal of coconut milk – that luscious, creamy liquid extracted from grated coconut flesh. When combined with rice, it creates something truly greater than the sum of its parts. The natural fats in coconut milk coat each grain of rice, preventing clumping while imparting a subtle sweetness and richness that water simply cannot achieve.
Gathering Your Ingredients: The Foundation of Great Coconut Rice

Let me walk you through everything you’ll need. Remember, using quality ingredients makes a noticeable difference, so don’t skimp where it matters.
Also Read:The Ultimate Guide to Homemade Strawberry Syrup: Why You’ll Never Buy Store-Bought Again
Essential Ingredients:
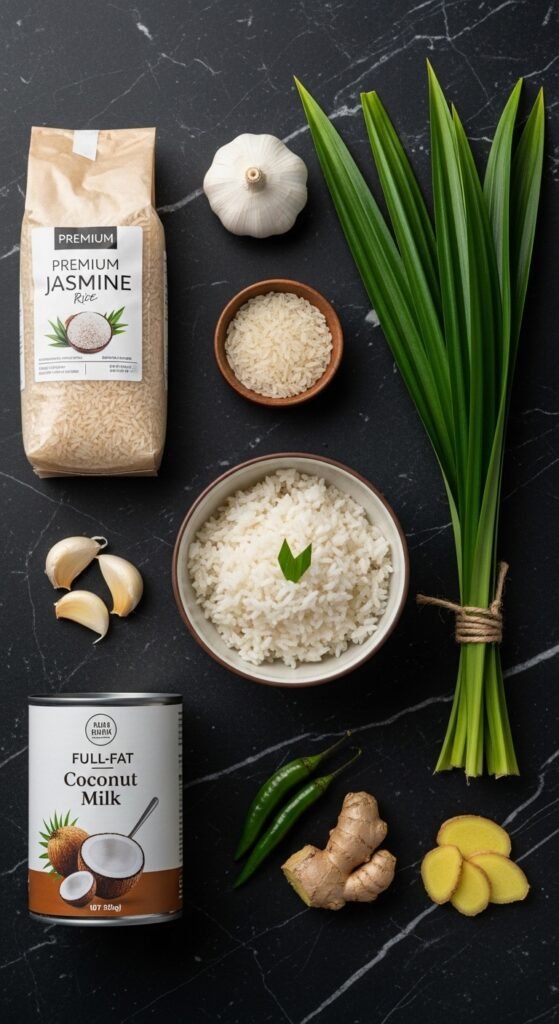
- 2 cups of long-grain white rice – I strongly recommend jasmine rice for its floral aroma and fluffy texture, but basmati rice works beautifully too. Avoid short-grain varieties like sushi rice unless you specifically want a stickier result.
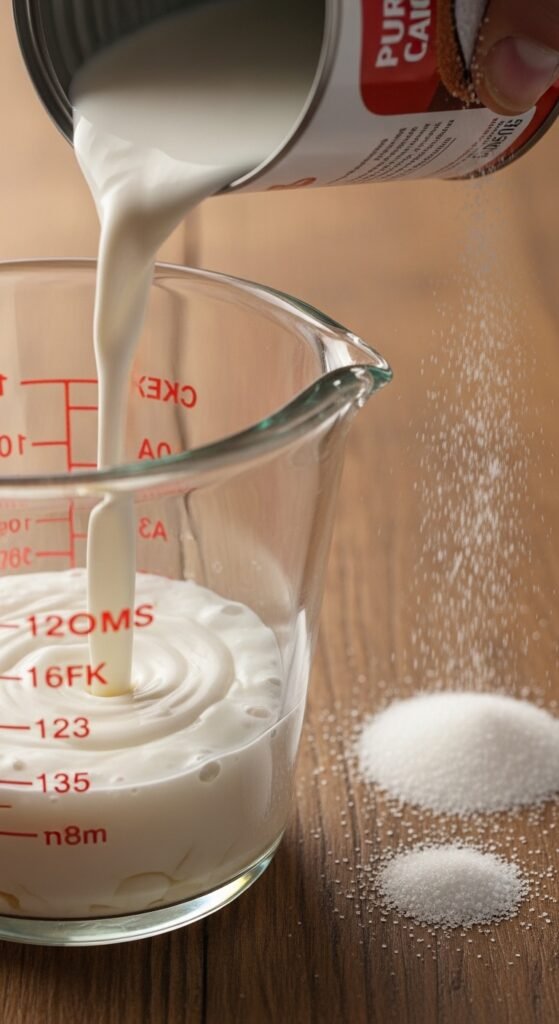
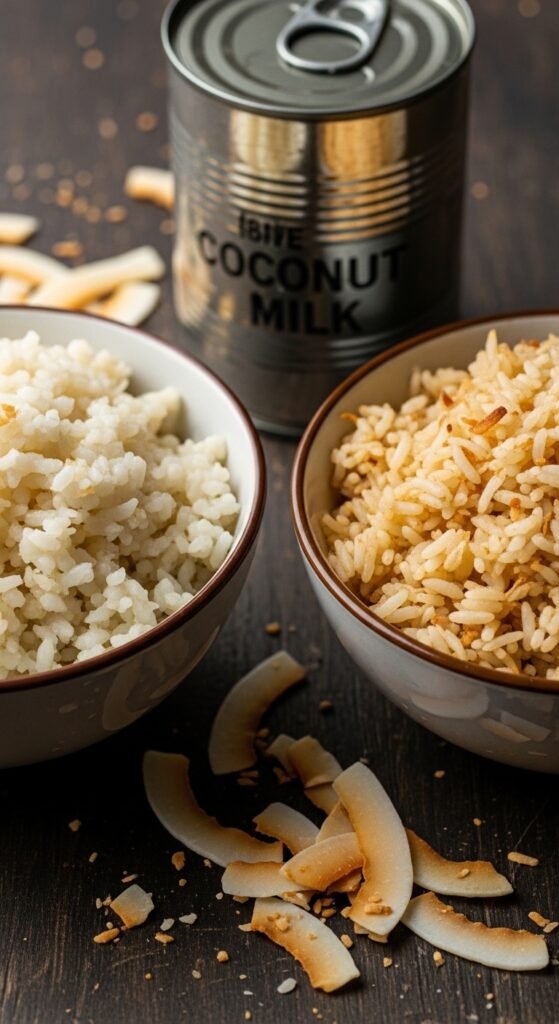
- 1 can (13.5 oz or 400 ml) of full-fat coconut milk – This is non-negotiable. Full-fat coconut milk provides the creaminess that makes this dish special. Light coconut milk contains more water and less fat, resulting in thinner, less flavorful rice. Please trust me on this – I learned the hard way.
- 1 ½ cups of water – The exact ratio varies depending on your rice type, but we’ll fine-tune this together.
- 1 teaspoon of salt – Enhances all the flavors and balances the coconut’s natural sweetness.
- 1 tablespoon of sugar – Optional but recommended. A tiny bit of sugar brings out the coconut’s sweetness without making the rice taste dessert-like.
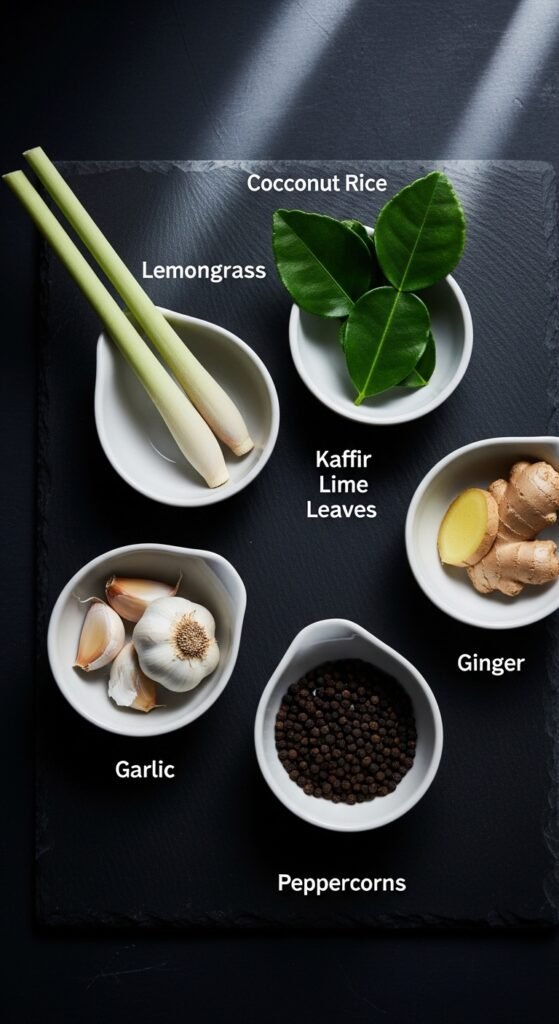
- 2-3 kaffir lime leaves OR 1 teaspoon of lime zest – This adds a bright, citrusy note that cuts through the richness.
- 2-3 pandan leaves (if available) – Often called “vanilla of the East,” pandan infuses the rice with an incredible nutty, vanilla-like aroma. Not essential but absolutely wonderful.
Optional Aromatics:
- 1-inch piece of fresh ginger, sliced
- 2 cloves of garlic, whole
- 1 stalk of lemongrass, bruised
- ½ teaspoon of turmeric powder (for golden color)
- Cinnamon stick or star anise (for warmth)
For Serving (Choose Your Adventure):
- Fresh cilantro or Thai basil
- Toasted coconut flakes
- Chopped peanuts or cashews
- Lime wedges
- Sliced green onions
Step-by-Step Guide: Mastering the Coconut Rice Recipe
Now comes the fun part. I’ve broken this down into manageable steps, and I’ll share the mistakes to avoid at each stage. Take a deep breath, put on some music you love, and let’s cook together.
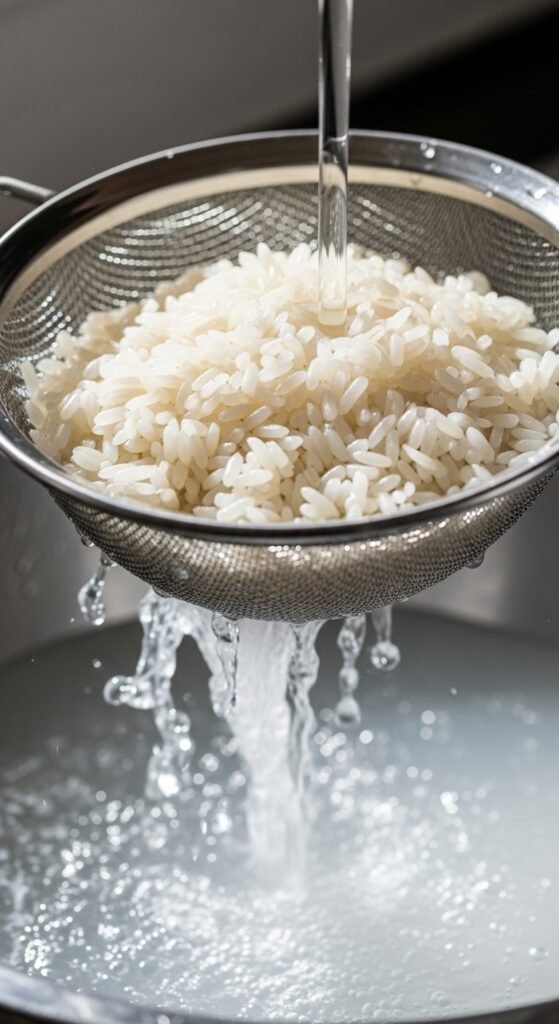
Step 1: Rinse Your Rice (Don’t Skip This!)
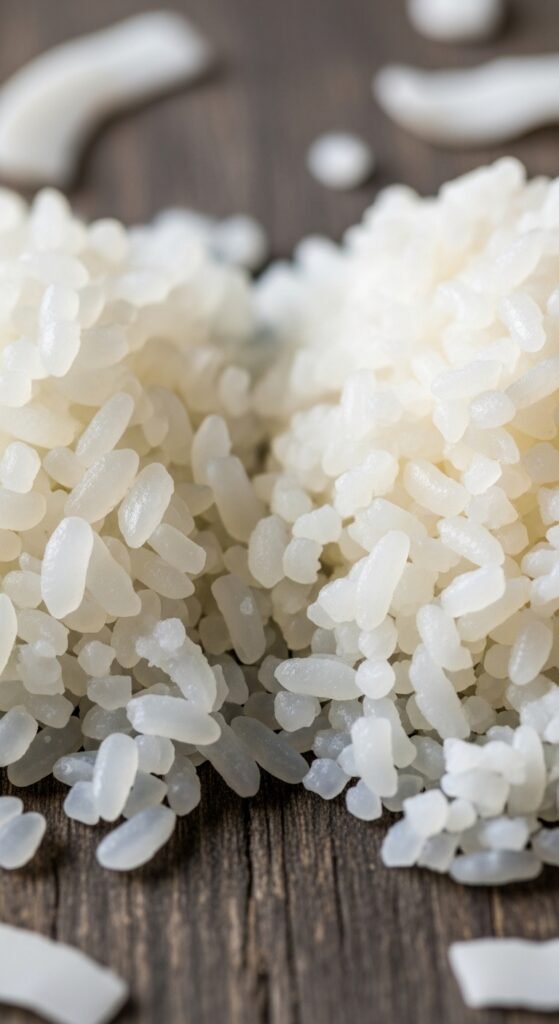
Place your 2 cups of jasmine rice in a fine-mesh strainer and rinse under cool running water. Use your fingers to gently swish the rice around. The water will initially appear cloudy – that’s excess starch being washed away. Continue rinsing until the water runs relatively clear, which usually takes 2-3 minutes.
Why this matters: Rinsing removes surface starch that would otherwise make your coconut rice gummy or mushy. Furthermore, it prevents the grains from sticking together in an unappealing clump. I once forgot to rinse when I was in a hurry, and the result was a sticky, porridge-like mess that disappointed everyone at dinner.
Pro tip: After rinsing, let the rice drain thoroughly for 5-10 minutes. Excess water clinging to the grains will throw off your liquid ratios.
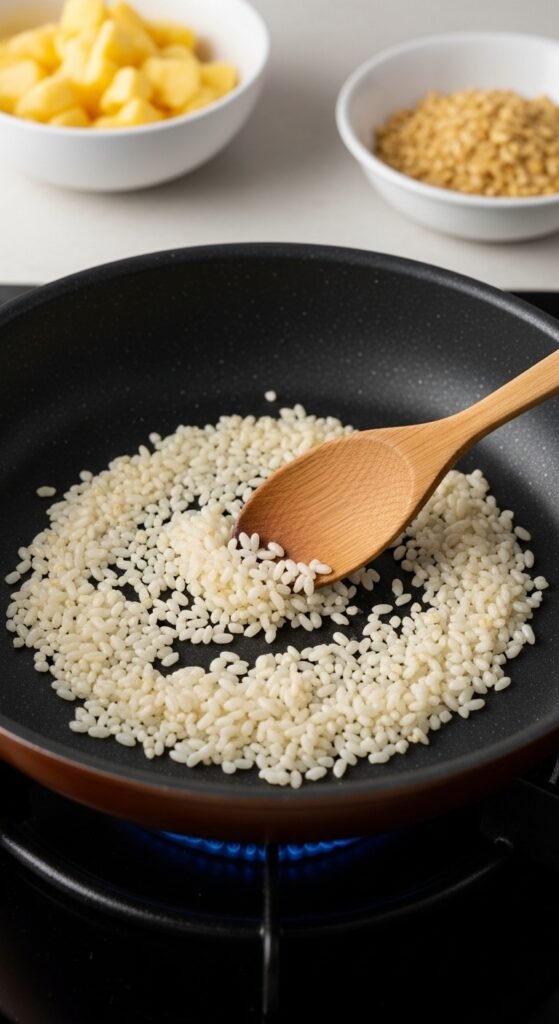
Step 2: Toast the Rice (Optional But Game-Changing)

Heat a heavy-bottomed pot or Dutch oven over medium heat. Add 1 tablespoon of coconut oil (or any neutral oil). Once the oil shimmers, add your drained rice. Toast for 2-3 minutes, stirring constantly, until the rice becomes slightly opaque and fragrant.
What this does: Toasting creates a nuttier flavor and helps each grain stay separate during cooking. Additionally, it reduces the chance of your rice becoming mushy. This technique comes from pilaf traditions and works brilliantly for coconut rice.
A quick story: The first time I tried toasting rice, I got distracted by my phone ringing and let it burn slightly. The result had a bitter, unpleasant taste. So please, stay attentive during this step – it only takes a few minutes.
Step 3: Prepare Your Aromatics
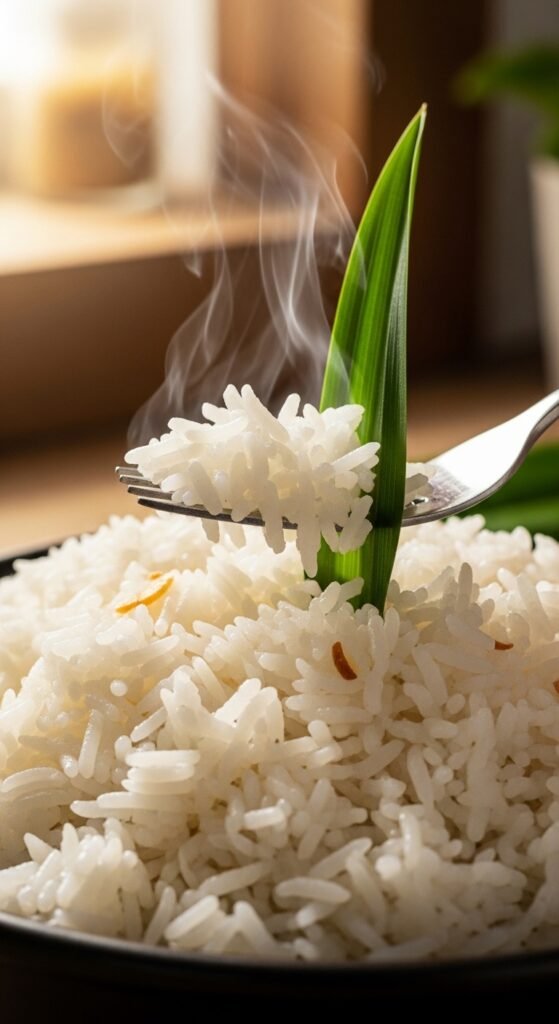
While your rice toasts (or after rinsing if you’re skipping toasting), prepare your aromatics. If using fresh ginger, slice it into thin coins. Bruise your lemongrass by hitting it with the back of your knife – this releases its oils. Tie pandan leaves into a simple knot. Keep kaffir lime leaves whole.
Why whole aromatics work: Unlike minced garlic or grated ginger, whole aromatics infuse the rice with flavor without becoming intrusive textural elements. You can easily remove them before serving, leaving behind only their essence.
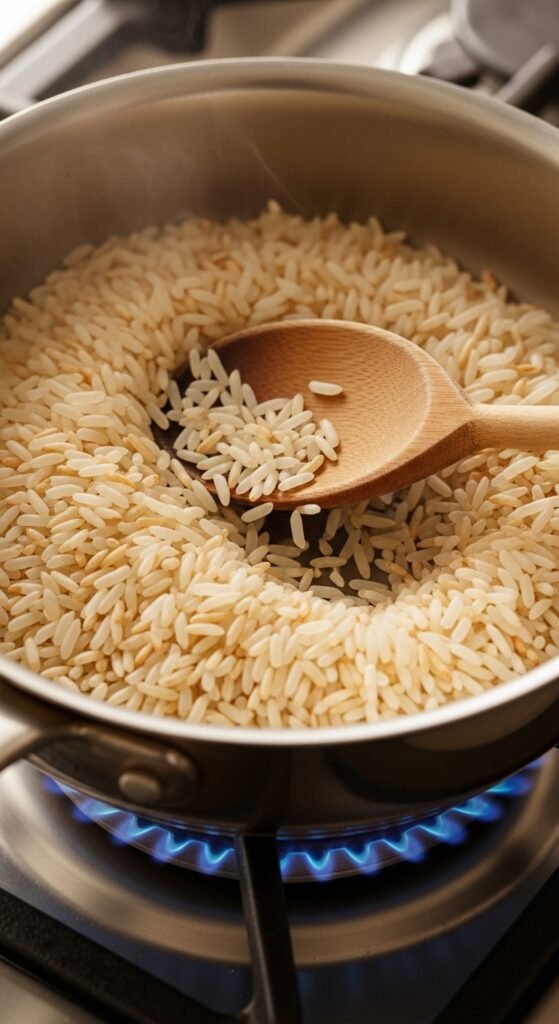
Step 4: Combine Liquids and Seasonings
Open your can of full-fat coconut milk. Here’s something crucial: coconut milk naturally separates in the can, with thick cream rising to the top. Before measuring, shake the can vigorously or stir the contents with a spoon to recombine. Otherwise, you might end up with uneven distribution.
In your pot with the toasted rice, add:
- The entire can of coconut milk (13.5 oz)
- 1 ½ cups of water
- 1 teaspoon salt
- 1 tablespoon sugar (if using)
- Your prepared aromatics (lime leaves, pandan, ginger, etc.)
Give everything a gentle stir to combine. Don’t overmix – you don’t want to bruise the rice grains.
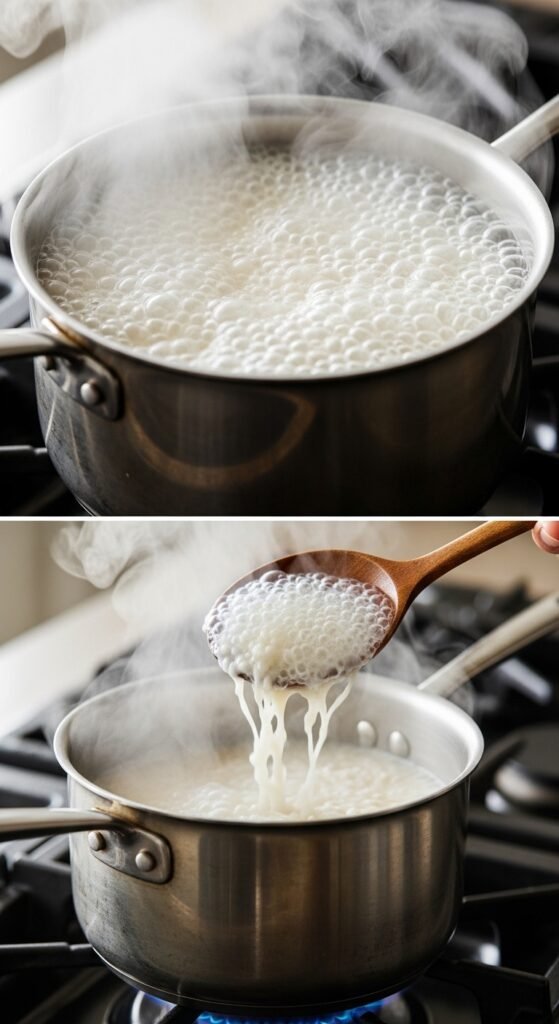
Step 5: Bring to a Boil, Then Simmer

Turn the heat to high and bring the liquid to a full boil. You’ll see bubbles breaking across the entire surface. This usually takes 3-5 minutes depending on your stove.
Once boiling, immediately reduce the heat to the lowest possible setting (low simmer). Cover the pot with a tight-fitting lid. Do not lift the lid for at least 15 minutes – every time you peek, you release precious steam that should be cooking your rice.
Set a timer for 18 minutes for jasmine rice, or 20 minutes for basmati or other long-grain varieties.
What’s happening inside: The rice absorbs the coconut-infused liquid while steam gently cooks the grains from above. The fat from the coconut milk helps conduct heat evenly while preventing the rice from sticking to the bottom.
Step 6: The Crucial Resting Period
When your timer goes off, resist the overwhelming urge to immediately open the pot. Instead, turn off the heat completely but leave the covered pot on the warm burner. Let it rest for 10 minutes, undisturbed.
Why this matters: During cooking, steam builds up inside each grain of rice. If you uncover too soon, that steam escapes rapidly, and your rice can become dry or uneven. The resting period allows the moisture to redistribute evenly throughout the pot.
I know this waiting is difficult. The smell wafting from your kitchen is intoxicating – creamy, nutty, slightly sweet. But patience here separates good coconut rice from great coconut rice.
Step 7: Fluff and Remove Aromatics
After the 10-minute rest, remove the lid. Use a fork (not a spoon – spoons can smash the grains) to gently fluff the rice. You’ll see steam rise, and the grains should separate easily while remaining tender.
Fish out and discard the aromatics – the lime leaves, pandan knots, ginger slices, lemongrass stalks, and any whole spices. They’ve done their job of infusing flavor.
Taste test: Take a small bite. Is it perfectly cooked? The grains should be tender but still distinct, with no hard centers. Does it need more salt? Adjust now before serving.
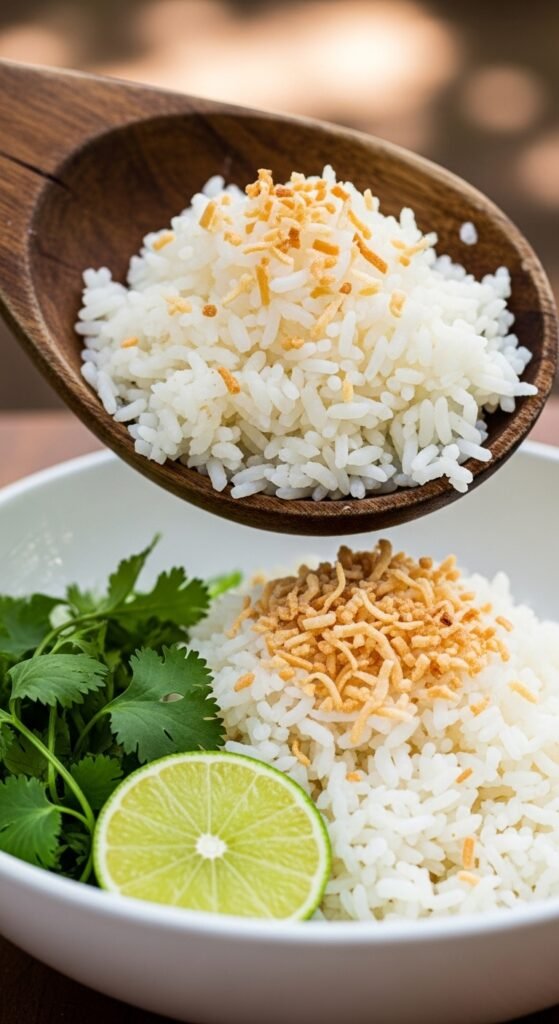
Step 8: Serve and Garnish

Transfer your beautiful coconut rice to a serving bowl or individual plates. Garnish according to your mood and main dish:
- For Thai-inspired meals: Fresh cilantro, lime wedges, and toasted coconut flakes
- For Caribbean dishes: Sprinkle with fresh thyme and black pepper
- For Indian curries: Add chopped cashews and fresh curry leaves
- For simple enjoyment: Just a pat of vegan butter or a drizzle of coconut cream
Troubleshooting Common Coconut Rice Problems
Even experienced cooks encounter issues sometimes. Here’s how to fix the most common problems:
Problem 1: My rice is too mushy or sticky
Cause: Too much liquid, insufficient rinsing, or overcooking.
Solution: Next time, reduce water by ¼ cup and rinse more thoroughly. For this batch, spread the rice on a baking sheet in a thin layer and let it dry slightly in a warm oven (200°F) for 10-15 minutes. The excess moisture will evaporate.
Problem 2: My rice is undercooked with hard centers

Cause: Not enough liquid, heat too high, or insufficient cooking time.
Solution: Add 2-3 tablespoons of hot water, stir gently, cover, and cook on low heat for another 5 minutes. Let rest for 5 minutes before checking again.
Problem 3: The bottom layer is burned
Cause: Heat too high or pot too thin.
Solution: Carefully scoop the unburned rice from the top into a new container, avoiding the scorched layer. Don’t scrape the bottom. For future attempts, use a heavier pot and ensure your heat is genuinely low – many stoves run hot even on the “low” setting.
Problem 4: My coconut rice lacks coconut flavor
Cause: Using light coconut milk or a low-quality brand.
Solution: Switch to full-fat coconut milk from a reputable brand like Chaokoh, Aroy-D, or Native Forest. Additionally, you can stir in 2 tablespoons of coconut cream right before serving for an extra boost.
Delicious Variations to Keep Things Exciting
Once you’ve mastered the basic coconut rice recipe, the possibilities are endless. Here are some of my favorite variations:
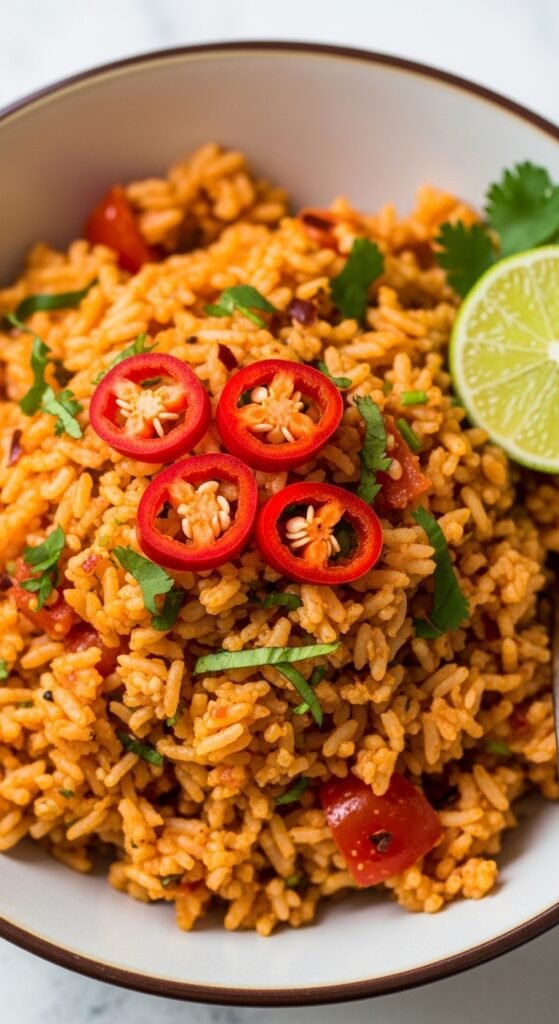
Spicy Coconut Rice

Add 1-2 chopped Thai bird chilies or ½ teaspoon of red pepper flakes along with the liquids. The heat cuts through the coconut richness beautifully, especially when served with cooling cucumber salad.
Golden Turmeric Coconut Rice

Stir 1 teaspoon of ground turmeric into the coconut milk before adding to the pot. This creates a stunning golden-yellow rice that’s as beautiful as it is healthy. Turmeric’s earthy notes complement coconut perfectly.
Coconut Rice with Peas and Corn

After the resting period, fold in ½ cup of thawed frozen peas and ½ cup of corn kernels. The residual heat warms them through without overcooking. This turns your side dish into a nearly complete meal.
Coconut Cilantro Lime Rice

After fluffing, stir in ¼ cup of finely chopped fresh cilantro and the juice of 1 lime. This bright, fresh version is incredible with black beans, grilled vegetables, or fish tacos.
Sweet Coconut Dessert Rice

Double the sugar to 2 tablespoons, add a cinnamon stick during cooking, and serve warm with fresh mango slices, toasted coconut, and a drizzle of sweetened condensed coconut milk. This transforms our savory coconut rice recipe into an incredible dessert.
What to Serve With Coconut Rice
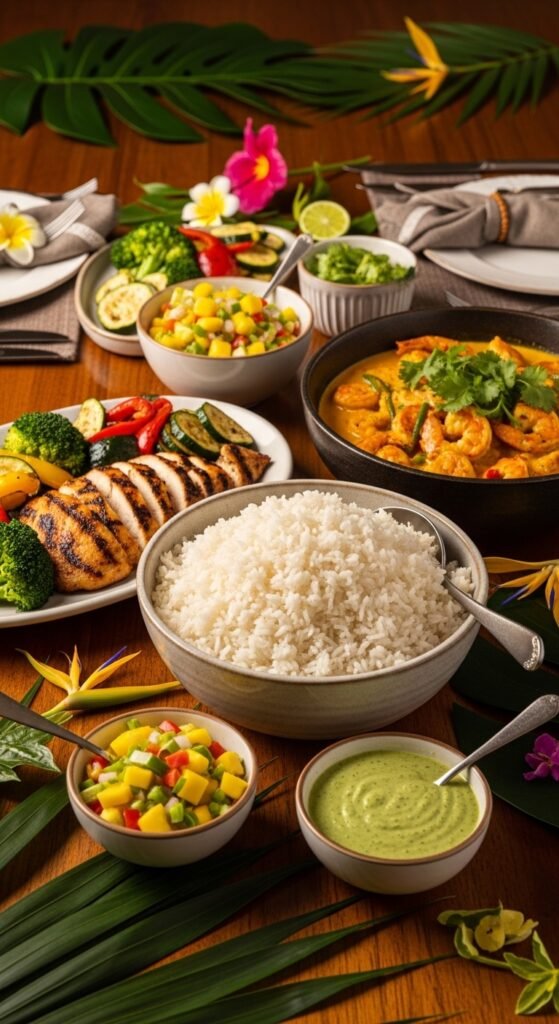
The beauty of this dish lies in its versatility. Here are foolproof pairings:
Protein Pairings:
- Thai Green Curry with tofu or chicken
- Jamaican Jerk tofu or jackfruit
- Butter Chickpeas (vegan butter chicken)
- Grilled Shrimp with lime and garlic
- Teriyaki Tofu or tempeh
Vegetable Sides:
- Roasted Broccoli with lemon
- Garlic Sautéed Spinach
- Quick Pickled Cucumbers with rice vinegar
- Charred Bok Choy with sesame oil
- Mango Salsa for brightness
Sauce Suggestions:

- Peanut Sauce (divine with coconut rice)
- Sweet Chili Sauce
- Cilantro Chutney
- Mango Habanero for heat lovers
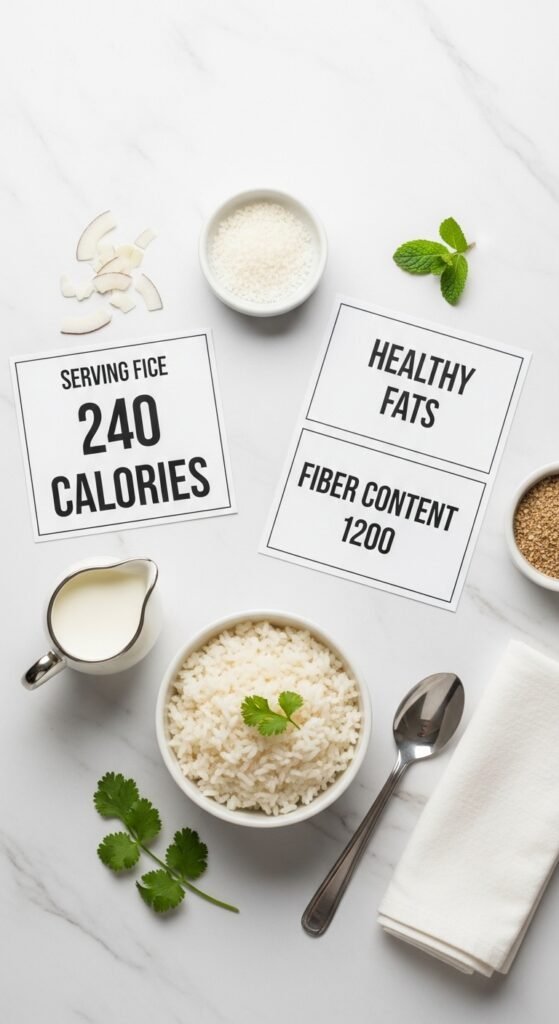
Nutritional Information (Per Serving, Approximate)
Based on 6 servings from this coconut rice recipe:
- Calories: 380
- Total Fat: 18g (mostly healthy medium-chain triglycerides from coconut)
- Carbohydrates: 52g
- Fiber: 2g
- Protein: 6g
- Sodium: 400mg
Health benefits worth noting: Coconut milk contains lauric acid, which supports immune function and heart health. Furthermore, when paired with rice, this dish provides sustained energy without blood sugar spikes when eaten as part of a balanced meal.
Why You Should Buy Quality Ingredients (And Where to Find Them)
Now let me address something important. You might be tempted to grab the cheapest coconut milk on the shelf or use whatever rice is languishing in your pantry. I’m here to gently convince you otherwise.
Premium coconut milk makes an astonishing difference. Cheap brands often contain thickeners, preservatives, and significantly less coconut extract. They produce thin, watery rice with an artificial aftertaste. Conversely, quality brands list only “coconut extract” and water as ingredients. The difference in your finished dish is night and day.
Where I buy my ingredients:
- For coconut milk: Asian grocery stores offer the best selection and prices. Online retailers like Amazon also carry premium Thai brands. Expect to pay $2-4 per can – worth every penny.
- For jasmine rice: Look for imported Thai jasmine rice in 5-10 pound bags. The aroma alone will tell you it’s authentic. My favorite brand is Three Ladies or Golden Phoenix.
- For aromatics: Fresh pandan leaves and kaffir lime leaves freeze beautifully. I buy them in bulk from my local Vietnamese market and store them in my freezer for months.
A final pitch: Investing in a quality non-stick or enameled Dutch oven specifically for rice cooking will elevate every batch you make. My 20-year-old Le Creuset has produced thousands of perfect rice dishes. You don’t need to spend that much – a $40 enameled pot from Lodge works wonderfully.
Storing and Reheating Leftover Coconut Rice
If you have leftovers (though I doubt you will), here’s how to handle them:
Refrigeration: Store in an airtight container for up to 4 days. The coconut oil will solidify when cold – this is normal.
Freezing: Portion into freezer-safe bags or containers. Press out excess air. Freezes well for up to 3 months. Thaw overnight in the refrigerator before reheating.
Reheating methods:
- Microwave: Sprinkle with water, cover, and heat in 30-second intervals, fluffing between.
- Stovetop: Place in a saucepan with 2 tablespoons of water per cup of rice. Cover and warm over low heat, stirring occasionally.
- Steamer: The absolute best method. Place rice in a heatproof bowl over simmering water for 5-7 minutes.
What not to do: Never reheat coconut rice more than once. Additionally, don’t leave it at room temperature for more than 2 hours – coconut milk is perishable.
Frequently Asked Questions About Coconut Rice Recipe
Can I make this in a rice cooker? Absolutely! Use the same ingredient ratios. Add everything to your rice cooker, select the white rice setting, and let it work its magic. The result is consistently perfect.
Can I use brown rice instead? Yes, but you’ll need to adjust. Increase water to 2 cups and cooking time to 40-45 minutes. The texture will be chewier but delicious.
Why did my coconut milk curdle? This rarely happens with full-fat coconut milk, but acidic ingredients can cause separation. If it happens, don’t panic – it still tastes fine, though the appearance suffers. Stir vigorously to re-emulsify.
**Is this *coconut rice recipe* vegan?** Yes! As written, it contains no animal products whatsoever. It’s also dairy-free, egg-free, and naturally vegan.
Can I halve or double this recipe? Yes, the ratios scale perfectly. For half recipe, use 1 cup rice, ⅔ can coconut milk, ¾ cup water. For double, use 4 cups rice, 2 cans coconut milk, 3 cups water. Cooking time remains approximately the same.
My Final Tips for Coconut Rice Perfection
After making this dish hundreds of times across countless dinner parties, quiet family meals, and even camping trips (yes, it works in a Dutch oven over coals), here’s what I’ve learned:
Trust your senses. Every stove, every pot, every bag of rice behaves slightly differently. Your nose knows – when the rice smells deeply aromatic and slightly nutty, it’s nearly done.
Don’t rush the rest. I’ve said it before, but it bears repeating: that 10-minute rest period transforms good rice into great rice. Use this time to prepare your serving platter, set the table, or pour yourself something refreshing to drink.
Embrace imperfection. Your first batch might not be magazine-cover beautiful. That’s perfectly okay. My first attempts were laughable. But with practice comes intuition, and soon you’ll be making coconut rice without measuring anything.
Share it with someone you love. Food tastes better when shared. Invite a friend over, serve this alongside your favorite curry, and watch their eyes light up with that first bite.
Ready to Create Your Own Coconut Rice Masterpiece?
You now have everything you need – the complete recipe, the troubleshooting guide, the variations, and the confidence. The only thing missing is your action.
Here’s what I recommend you do right now:
- Add the ingredients to your shopping list – quality coconut milk, jasmine rice, and fresh aromatics.
- Clear 45 minutes in your schedule – cooking time plus that crucial resting period.
- Invite someone to share the meal – or save it all for yourself (no judgment here).
- Tag me in your creations – I genuinely love seeing your successes.
Remember that rainy Tuesday evening I mentioned at the beginning? The one where everything went wrong until I discovered coconut rice? Well, that imperfect first attempt led to something beautiful. It led to countless wonderful meals shared with people I love. It led to a skill I’ll carry for life. And now, it leads to you.
So go ahead. Open that can of coconut milk. Rinse that rice. Fill your kitchen with tropical aromas. You’re not just making dinner – you’re creating a memory, building a skill, and treating yourself to something genuinely delicious.
**Your perfect *coconut rice* awaits. Happy cooking!**