Easy key lime pie recipe – just four simple words, but they hold the power to transform an ordinary evening into a tropical escape. Before we dive into the buttery, tangy, sweet perfection that awaits, let me share a quick story.
Last summer, my family and I took a road trip down to the Florida Keys. After hours of driving across those iconic ocean bridges, we stopped at a tiny roadside stand run by an 80-year-old woman named Mabel. She sold nothing but key lime pie – no souvenirs, no drinks, just pie. One bite of her creation, and I understood why. That creamy, tart, perfectly sweet filling nestled in a golden graham cracker crust was nothing short of life-changing. I begged her for the recipe, and she laughed, saying, “Honey, it’s so simple you’ll kick yourself for not figuring it out sooner.”
She was right. After years of experimenting in my own kitchen, I’ve perfected what I proudly call the most easy key lime pie recipe you’ll ever encounter. No fancy techniques, no hard-to-find equipment, and absolutely no stress. Just pure, unadulterated dessert magic.
In this comprehensive guide, I’ll walk you through everything you need to know – from understanding the ingredients to mastering the technique, troubleshooting common problems, and even exploring delicious variations. By the time you finish reading, you’ll not only know how to make this spectacular dessert, but you’ll feel confident enough to buy the ingredients, gather your tools, and create a key lime pie that will have your friends and family begging for seconds.
Why This Easy Key Lime Pie Recipe Will Become Your Go-To Dessert
Let me paint you a picture. It’s a sweltering Tuesday afternoon. The kids are home from school. You’ve got thirty minutes before the PTA meeting, and you promised to bring dessert to book club tonight. Sound familiar?
Here’s the beautiful truth about this easy key lime pie recipe: from start to finish, you can have it chilling in the refrigerator in under 20 minutes of active work. That’s right – no baking required (unless you prefer a baked version, which I’ll also cover). No double boilers. No temperamental egg whites. Just mixing, pouring, and waiting for the magic to happen.
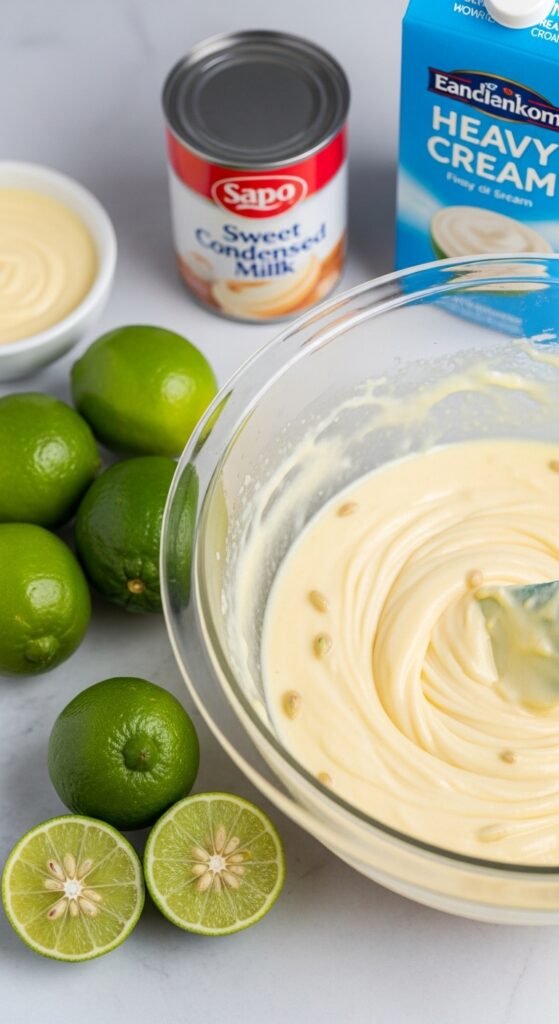
Furthermore, this recipe requires only six ingredients. Count them – six. Most of them are probably already sitting in your pantry: sweetened condensed milk, key lime juice, egg yolks, graham cracker crumbs, sugar, and butter. That’s it. No obscure specialty items, no trips to three different grocery stores.
Consequently, this accessibility makes it perfect for beginner bakers, busy parents, college students, or anyone who simply wants a spectacular dessert without the headache. However, don’t let the simplicity fool you – this pie tastes like it came from a high-end bakery. The secret lies in the quality of your ingredients and the technique, which I’ll teach you step by step.
A Brief History of Key Lime Pie (Because Every Great Dessert Has a Story)

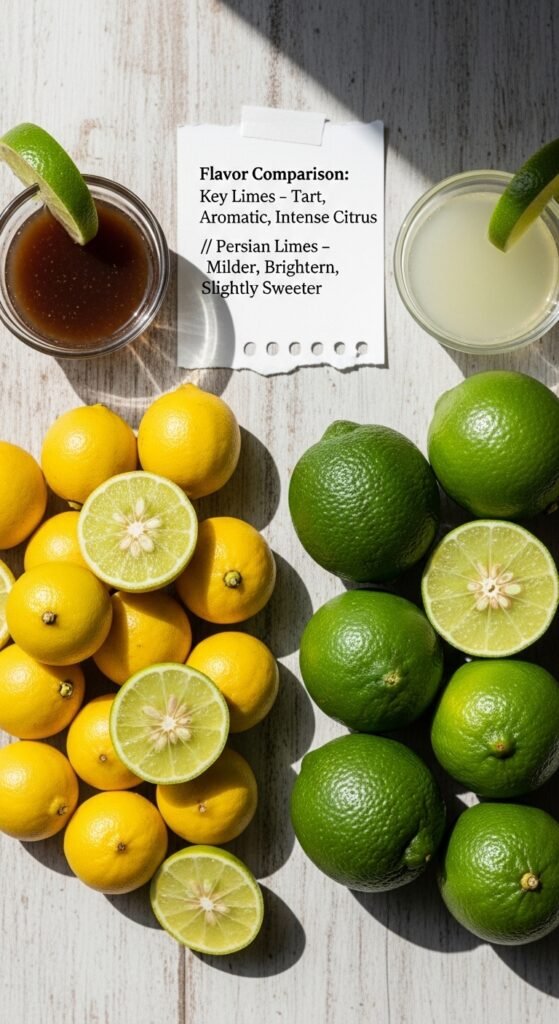
Before we get our hands dirty, let’s appreciate where this iconic dessert comes from. Key lime pie originated in the Florida Keys during the late 19th century. According to culinary historians, the recipe emerged naturally from what was available to local residents. The Keys had an abundance of Key limes (Citrus aurantifolia), which are smaller, seedier, and more aromatic than the Persian limes we typically find in supermarkets.
Moreover, before refrigeration became common, sweetened condensed milk was a pantry staple because it didn’t spoil quickly. Fishermen and spongers would spend days at sea, and canned milk provided reliable sustenance. Local cooks combined these ingredients with fresh eggs from backyard chickens, poured the mixture into a simple crust made from crushed crackers or biscuits, and let the natural acidity of the limes “cook” the eggs without heat. This no-bake method was pure genius born of necessity.
Interestingly, the original key lime pie had a meringue topping made from the leftover egg whites. Only later did whipped cream become popular as a simpler alternative. Today, you’ll find passionate debates about which topping reigns supreme, but I’ll teach you both methods so you can decide for yourself.
The Key lime itself deserves special mention. These little green orbs are more acidic, more fragrant, and more intensely floral than regular limes. Their unique flavor profile – sharp, bright, and slightly bitter – creates a perfect counterpoint to the cloying sweetness of condensed milk. Unfortunately, true Key limes can be difficult to find outside of Florida. Therefore, I’ll also explain how to achieve authentic flavor using bottled Key lime juice or even regular Persian limes in a pinch.
Gathering Your Ingredients for This Easy Key Lime Pie Recipe
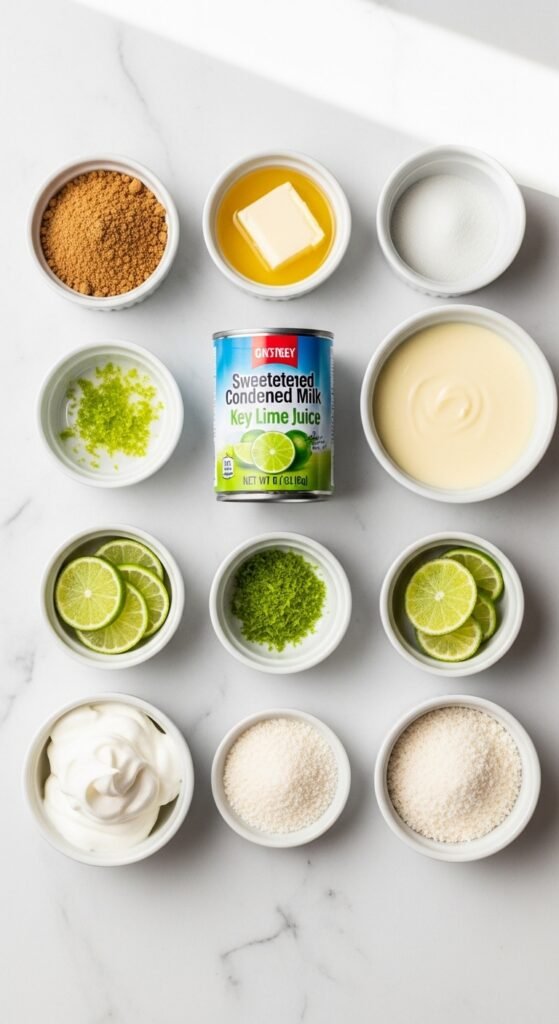
Now comes the exciting part – shopping! One of the beauties of this easy key lime pie recipe is that you won’t need to remortgage your house for exotic ingredients. Let’s break down exactly what you need, why each component matters, and how to choose the best options.
For the Graham Cracker Crust:
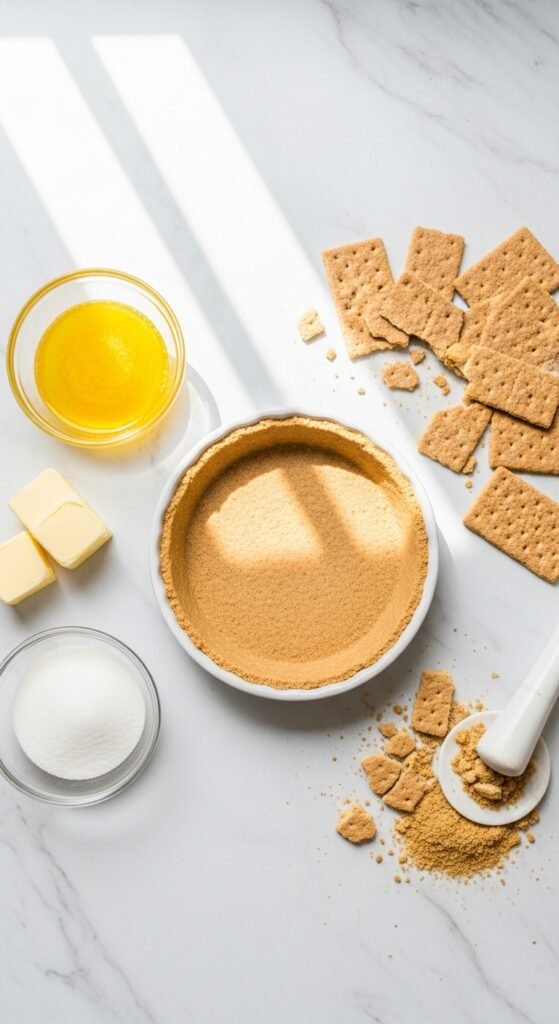
- 1 ½ cups graham cracker crumbs (about 12 full graham cracker sheets)
- ¼ cup granulated sugar
- 6 tablespoons unsalted butter, melted
Why these ingredients matter: The crust provides structural support and a honeyed, toasty contrast to the tangy filling. Graham crackers have a naturally sweet, nutty flavor that complements the limes perfectly. The sugar adds a touch of extra sweetness, while melted butter binds everything together and contributes richness. I strongly recommend using unsalted butter so you control the salt level – salted butter can make the crust taste slightly savory, which isn’t ideal here.
For the Key Lime Filling:

- 1 can (14 ounces) sweetened condensed milk
- ½ cup key lime juice (freshly squeezed or bottled)
- 4 large egg yolks
- 1 tablespoon key lime zest (optional but highly recommended)
Why these ingredients matter: Sweetened condensed milk is the backbone of this dessert. It’s thick, sticky, and intensely sweet – the perfect canvas for the sharp lime flavor. The key lime juice provides acidity that reacts with the proteins in the condensed milk and egg yolks, creating a thickening effect similar to baking. Egg yolks add richness, stability, and a beautiful pale yellow color. Finally, key lime zest contains aromatic oils that intensify the lime flavor exponentially – don’t skip it if you can help it.
For the Topping (Choose Your Adventure):
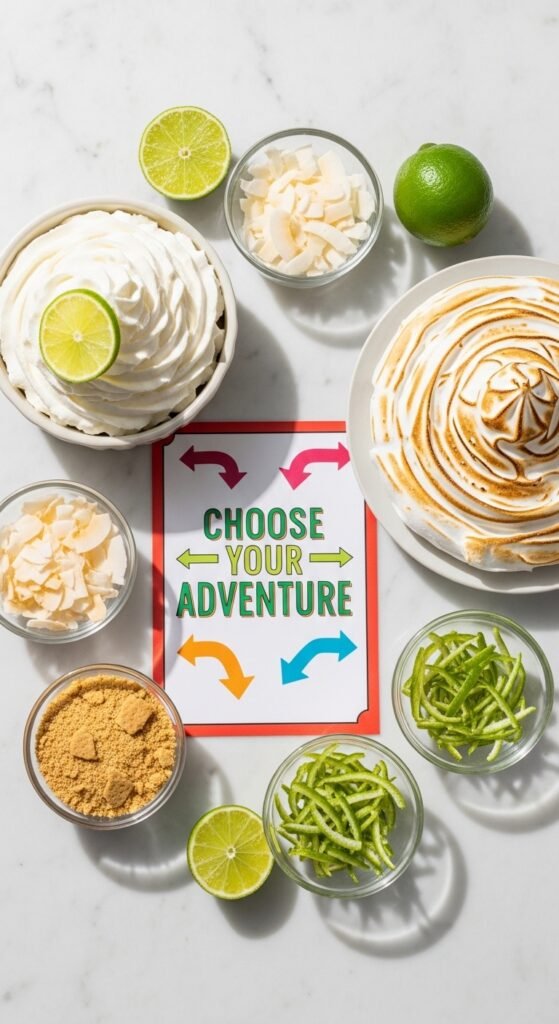
Option A: Whipped Cream Topping
- 1 cup heavy whipping cream
- 2 tablespoons powdered sugar
- ½ teaspoon vanilla extract
Option B: Meringue Topping
- 4 large egg whites (leftover from the filling)
- ¼ teaspoon cream of tartar
- 6 tablespoons granulated sugar
Equipment Checklist:
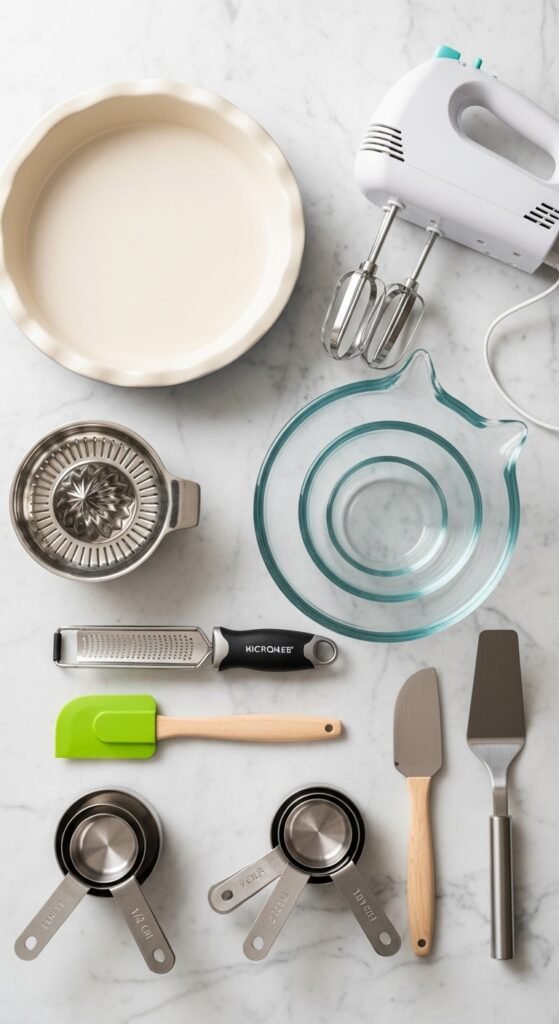
- 9-inch pie dish (glass or ceramic works best)
- Mixing bowls (medium and large)
- Whisk or electric hand mixer
- Measuring cups and spoons
- Citrus juicer (if using fresh limes)
- Microplane or fine grater (for zest)
- Rubber spatula
- Plastic wrap or aluminum foil
Where to Buy the Best Ingredients for Your Easy Key Lime Pie Recipe

Now, let’s address the elephant in the room – finding Key limes or key lime juice. I want you to buy these ingredients with complete confidence, knowing you’re getting the best possible product for your pie.
Fresh Key Limes:
If you live in Florida, Texas, California, or Hawaii, you might find fresh Key limes in well-stocked grocery stores, particularly during their peak season (summer through early fall). Look for small, yellowish-green fruits that feel heavy for their size. Avoid any with soft spots or shriveled skin.
For everyone else, finding fresh Key limes can be challenging. Don’t despair! Bottled key lime juice is an excellent alternative that many professional bakers actually prefer for consistency. The most reliable brand is Nellie & Joe’s Key West Lime Juice, which is widely available online and in many grocery stores. This product captures the authentic flavor beautifully and saves you from squeezing dozens of tiny limes.
Sweetened Condensed Milk:
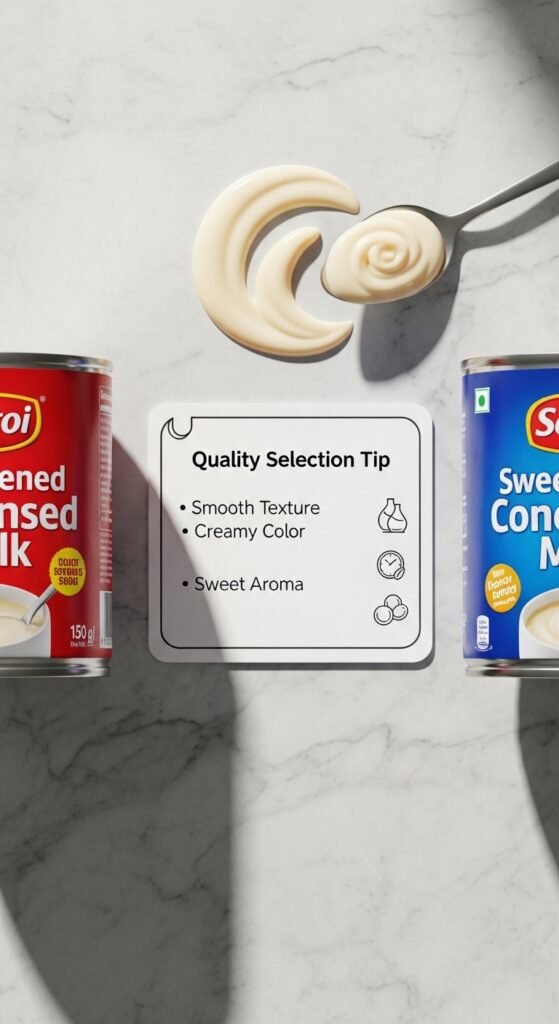
This is non-negotiable – do not substitute evaporated milk or any other product. Sweetened condensed milk has had most of its water removed and significant sugar added, resulting in a thick, syrupy consistency. The best-known brand is Eagle Brand, but store brands work perfectly well too. Just ensure the can says “sweetened condensed milk” clearly on the label.
Graham Crackers:

Any brand works, but I personally prefer Honey Maid or Keebler for their consistent texture and flavor. Avoid “reduced fat” or “low sugar” varieties – they don’t crush or taste the same.
Eggs:
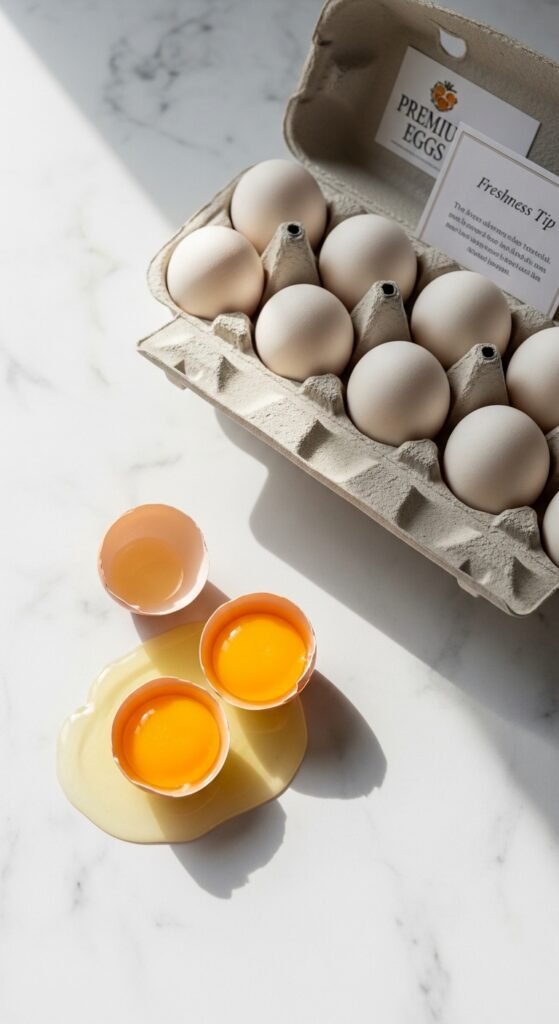
Fresh, large eggs are ideal. Since we’re only using the yolks for the filling (and possibly whites for meringue), you can save any leftover yolks or whites for other recipes. If you’re concerned about raw eggs, know that the acidity of the lime juice effectively “cooks” the yolks through a chemical process called denaturation – the same principle behind ceviche.
Heavy Cream:
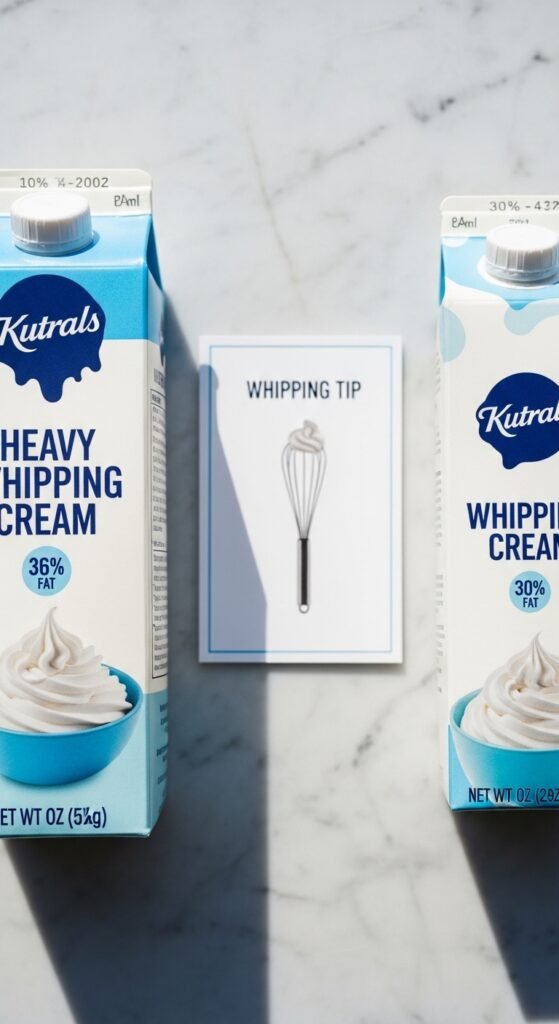
For whipped cream topping, look for heavy cream or heavy whipping cream with at least 36% milk fat. This ensures it whips up thick and stable. Avoid “light cream” or “half-and-half” – they won’t work.
Step-by-Step Guide to This Easy Key Lime Pie Recipe
Alright, friends – apron on, ingredients gathered, and optimism high. Let’s make this key lime pie! I’ve broken this down into manageable stages, complete with tips and tricks I’ve learned through my own trial and error.
Stage 1: Prepare Your Graham Cracker Crust
First, preheat your oven to 350°F (175°C) if you plan to bake the crust. Some people prefer a no-bake crust, but baking it briefly creates a firmer, more flavorful base. I’ll give you both options.
For a baked crust (recommended):
- Crush the graham crackers. You can do this by placing them in a sealed ziplock bag and rolling over them with a rolling pin, or by pulsing them in a food processor. You want fine, uniform crumbs – no large chunks.
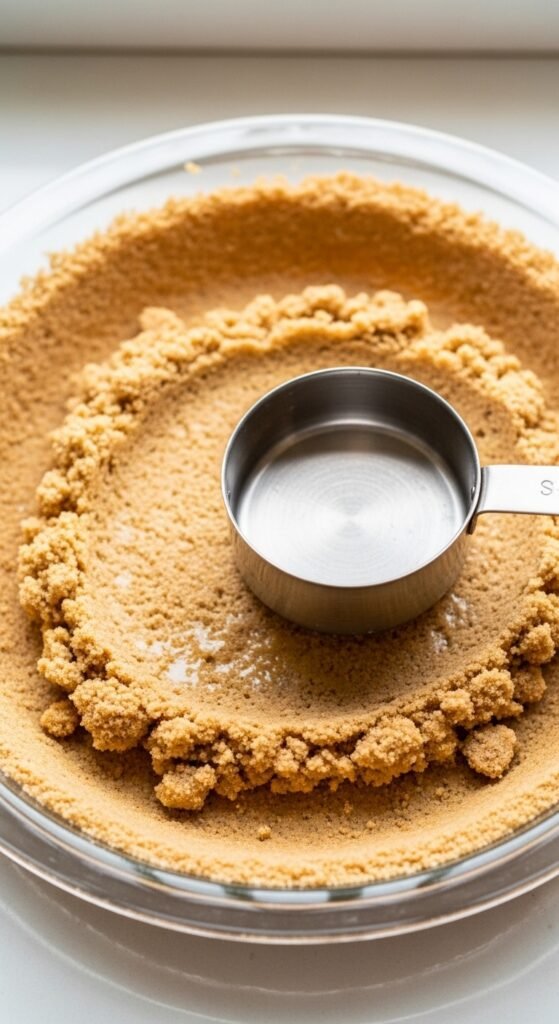
- Combine the ingredients. In a medium bowl, mix the graham cracker crumbs with the sugar until well combined. Pour in the melted butter and stir with a fork until all crumbs are moistened. The mixture should feel like wet sand and hold together when squeezed.
- Press into the pie dish. Transfer the mixture to your 9-inch pie dish. Using the bottom of a measuring cup or a flat glass, press the crumbs firmly and evenly across the bottom and up the sides. Pay special attention to the corners where the bottom meets the sides – thin spots here can lead to crust collapse.
- Bake (optional but recommended). Bake at 350°F for 8-10 minutes, until the crust is fragrant and slightly darker around the edges. Remove and let cool completely on a wire rack before adding the filling. If you’re skipping the bake, simply refrigerate the pressed crust for 30 minutes to firm it up.
Pro tip from my kitchen: I once skipped the pre-baking step to save time, and my crust turned out soft and crumbly. Now I always bake it for 10 minutes, and the difference is night and day. Trust me on this one.
Stage 2: Make the Key Lime Filling
While your crust cools, let’s create that glorious filling. This part is almost embarrassingly simple.
- Zest your limes first. If using fresh Key limes, zest them before juicing – it’s much easier. You’ll need about 1 tablespoon of zest, which requires roughly 10-12 Key limes or 2-3 regular Persian limes.
- Juice your limes. Roll each lime firmly on the counter before cutting to release maximum juice. Cut them in half and squeeze using a citrus juicer. For Key limes, you’ll need approximately 20-24 fruits to get ½ cup of juice. For Persian limes, 3-4 fruits should suffice. If using bottled juice, simply measure ½ cup.
- Separate the eggs. Crack each egg, transferring the yolk back and forth between shell halves to let the white fall into a separate bowl. Place the yolks in a medium mixing bowl. Save the whites for meringue topping or another recipe.
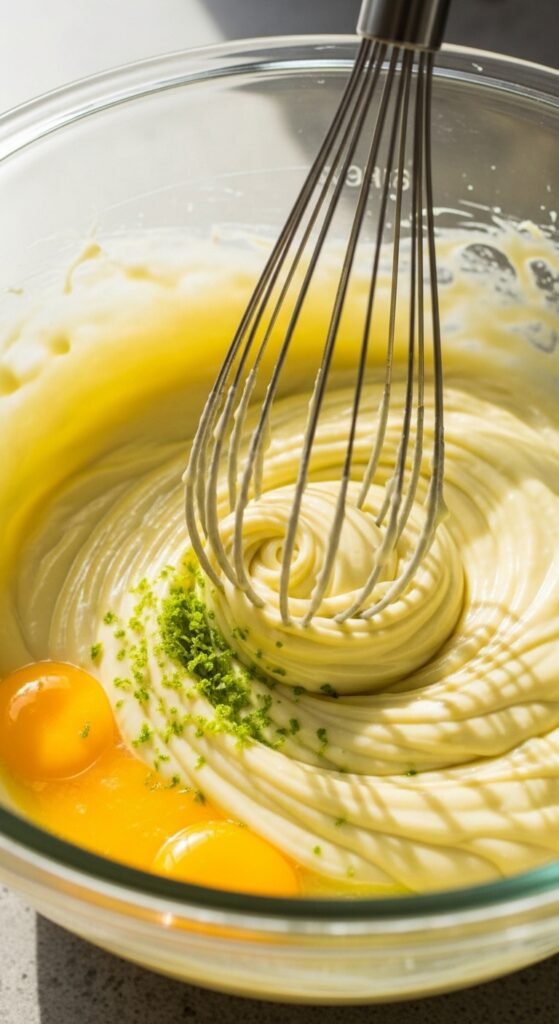
- Whisk the egg yolks briefly. Just until they’re broken up and slightly lighter in color – about 30 seconds.
- Add the sweetened condensed milk. Pour the entire 14-ounce can into the bowl with the yolks. Whisk until completely smooth and well combined. The mixture will be thick and pale yellow.
- Add the lime juice and zest. Pour in the key lime juice and add the zest. Whisk gently but thoroughly until everything is incorporated. You’ll notice the mixture beginning to thicken almost immediately – this is the acid reacting with the proteins, exactly what we want.
- Pour into the cooled crust. Use your rubber spatula to scrape every last drop of that beautiful filling into your prepared crust. Spread it evenly with the spatula.
A word of warning: Do not overmix the filling once you add the juice. Overworking it can incorporate too many air bubbles, which might cause cracking as the pie sets. Gentle, thorough mixing is all you need.
Stage 3: Set the Pie
This stage requires the most patience – but it’s also the most hands-off.
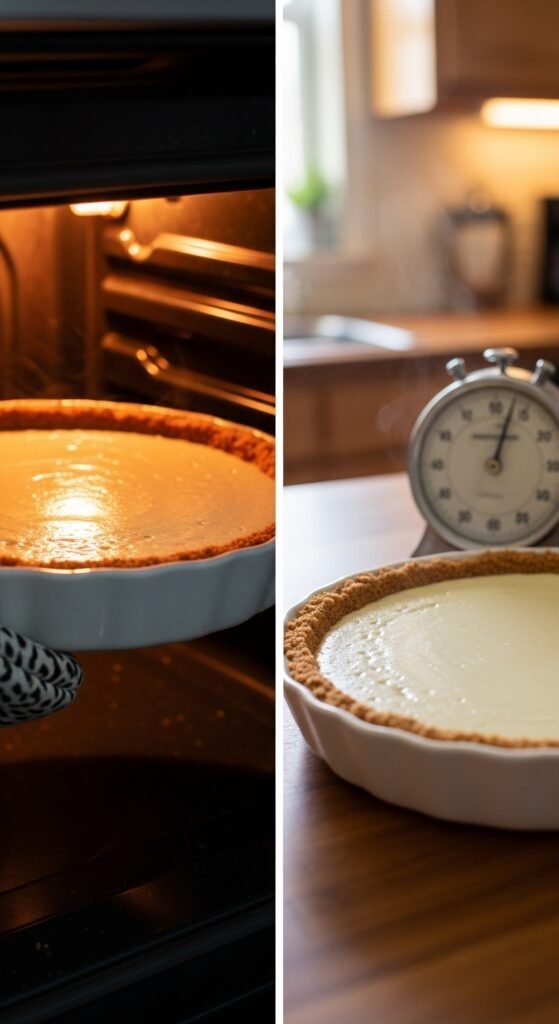
- For a no-bake pie: Cover the pie loosely with plastic wrap and refrigerate for at least 4 hours, but overnight is even better. The filling will firm up beautifully without any heat.
- For a baked pie: Some traditionalists insist on baking the filled pie for 10-12 minutes at 350°F to ensure food safety and create a slightly firmer texture. If you choose this route, watch carefully – the filling should be just set around the edges but still slightly jiggly in the center. Overbaking can cause cracks and a rubbery texture.
Personally, I prefer the no-bake method for this easy key lime pie recipe. It preserves the bright, fresh lime flavor and produces a silkier texture. As long as you’re using fresh, high-quality eggs, the acidity of the lime juice makes the pie perfectly safe.
Stage 4: Add the Topping
Your pie has been chilling for at least 4 hours – congratulations, you’re in the home stretch! Now for the crowning glory.
For whipped cream topping:
- Chill your mixing bowl and whisk attachment in the freezer for 15 minutes. Cold equipment whips cream faster and more successfully.
- Pour the cold heavy cream into the chilled bowl. Add the powdered sugar and vanilla extract.
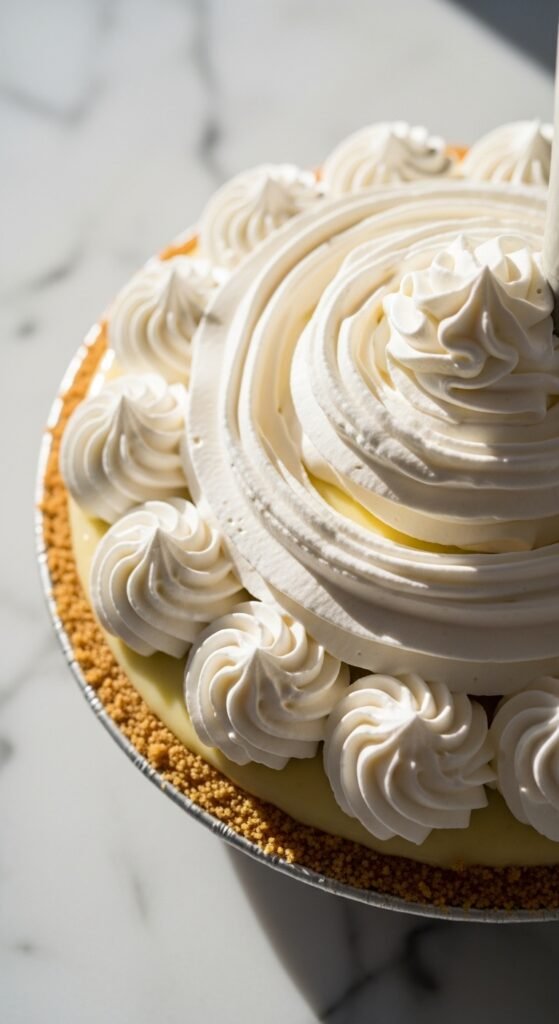
- Whip on medium-high speed until soft peaks form – this means the cream holds its shape but the peaks flop over slightly when you lift the whisk. For stiffer peaks (better for piping), continue whipping another 30-60 seconds.
- Spread or pipe the whipped cream over the chilled pie. You can cover the entire surface or create decorative rosettes around the edges.
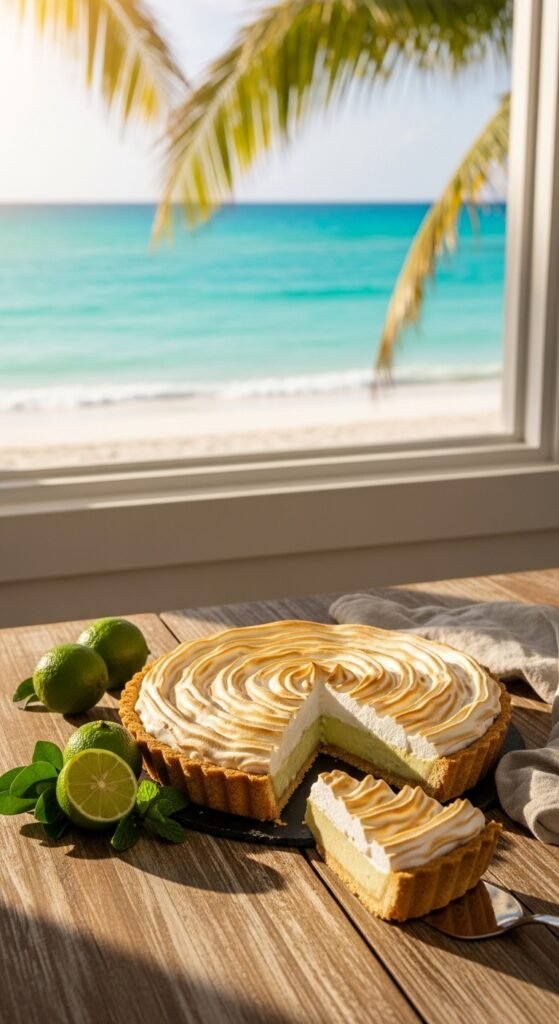
For meringue topping:
- Place the reserved egg whites and cream of tartar in a completely clean, grease-free bowl. Any trace of fat will prevent the whites from whipping properly.
- Whip on medium speed until frothy and soft peaks begin to form.
- Gradually add the sugar, about 1 tablespoon at a time, while continuing to whip.
- Increase speed to high and whip until stiff, glossy peaks form – about 3-5 minutes total.
- Spread the meringue over the pie, making sure to seal it all the way to the crust edges to prevent shrinking.
- If desired, use a kitchen torch to brown the meringue lightly, or place under the broiler for 30-60 seconds (watch carefully!).
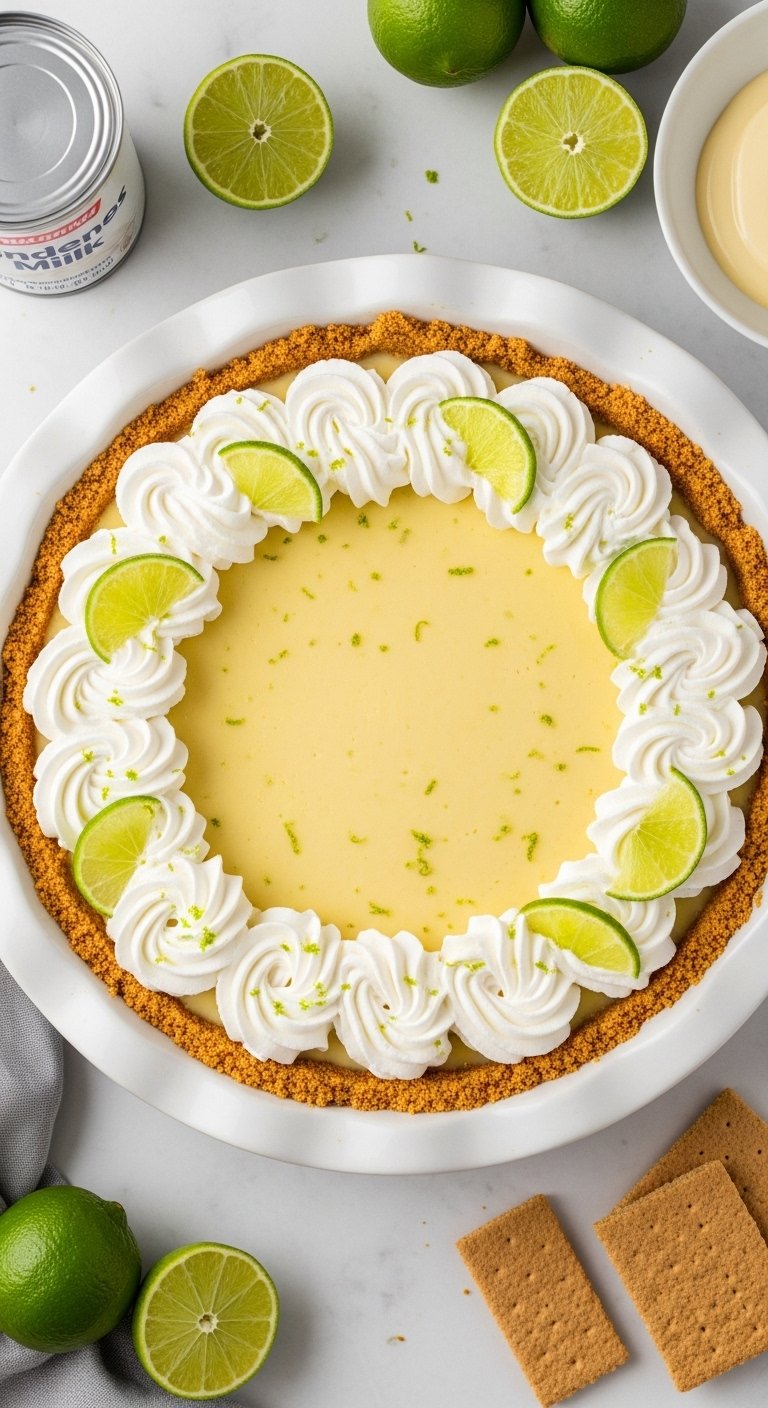
Stage 5: Garnish and Serve
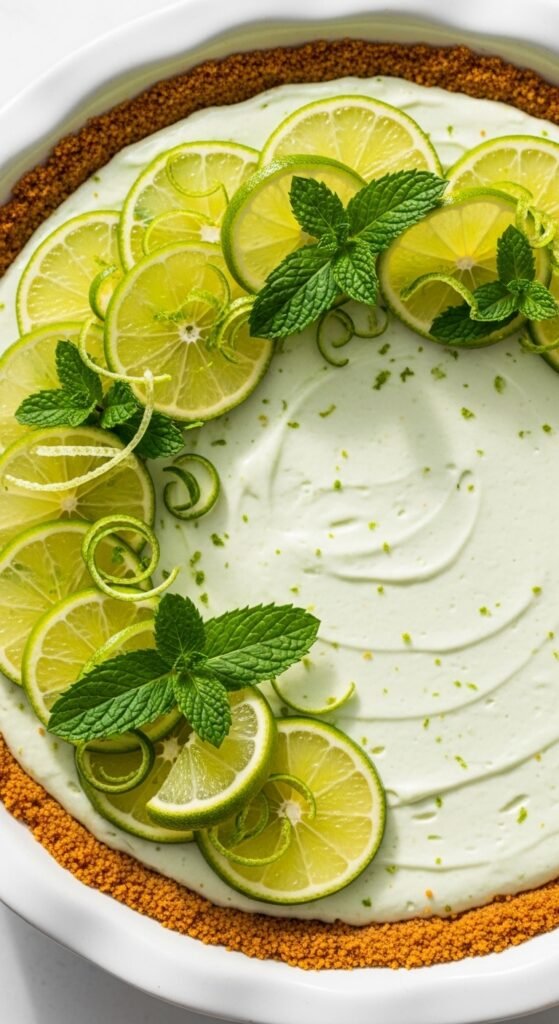
The final flourish! Garnish your key lime pie with:
- Thin lime slices or key lime halves
- Additional lime zest sprinkled over the whipped cream
- A few graham cracker crumbs for texture contrast
To serve, use a sharp knife dipped in hot water and wiped clean between slices. This ensures clean, professional-looking cuts. Store any leftovers in the refrigerator, tightly covered, for up to 3 days.
Troubleshooting Common Problems with Key Lime Pie
Even the simplest recipes can sometimes go awry. Don’t worry – I’ve made every mistake possible so you don’t have to. Here are the most common issues and exactly how to fix them.
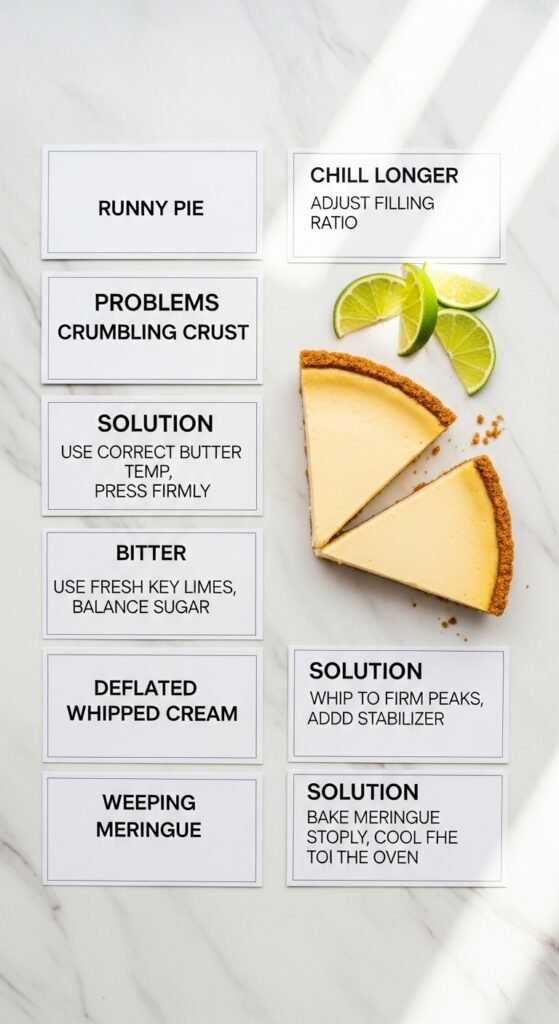
Problem #1: My Pie Didn’t Set – It’s Runny
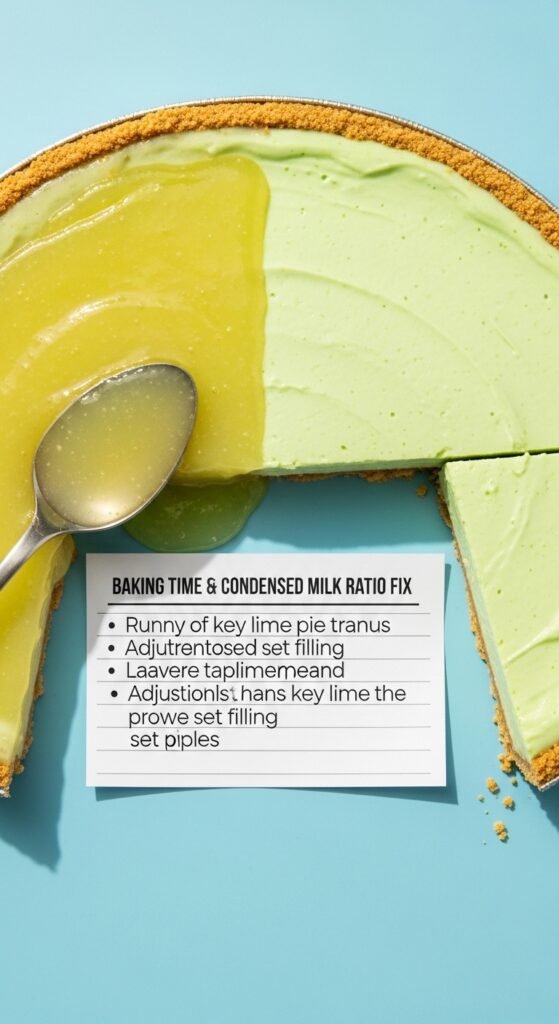
Causes and solutions: This usually happens from insufficient lime juice or inaccurate measuring. The acid in the juice is essential for thickening. Always measure your key lime juice precisely – ½ cup is non-negotiable. Additionally, using low-fat or “light” sweetened condensed milk can prevent proper setting. Stick with full-fat varieties.
If your pie is already made and runny, you can sometimes salvage it by freezing it for 2-3 hours and serving it as a frozen pie. The texture changes, but the flavor remains delicious.
Problem #2: My Crust is Crumbling Apart
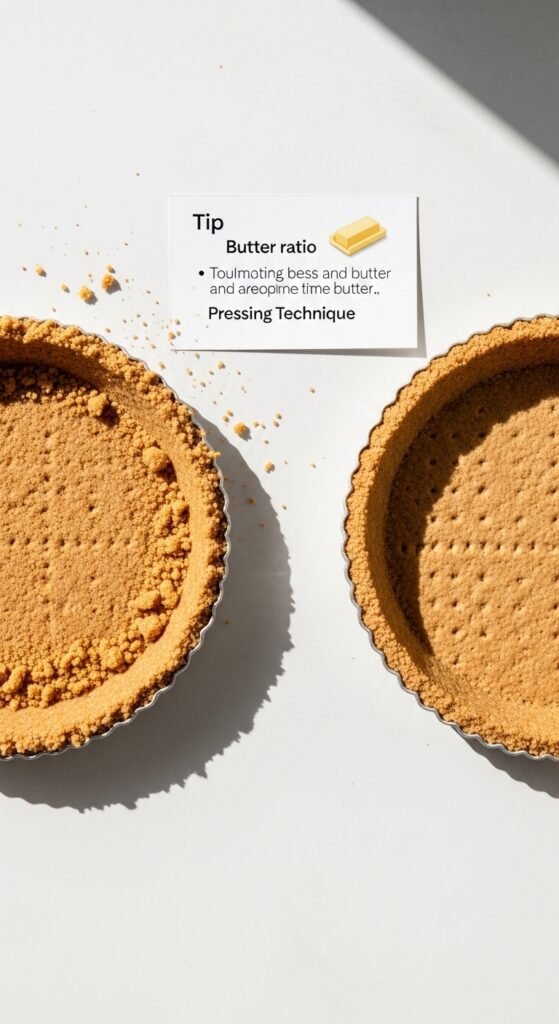
Causes and solutions: You likely didn’t use enough butter or didn’t press firmly enough. The ratio should be about 1.5 cups crumbs to 6 tablespoons melted butter. Press with authority – use the bottom of a measuring cup and really lean into it. For future pies, try adding 1-2 tablespoons more butter if you prefer a sturdier crust.
Problem #3: My Pie Has a Bitter Aftertaste

Causes and solutions: This almost always comes from including too much lime pith (the white part) when zesting. The pith is intensely bitter. When zesting, only take the green outer layer. If you see white, you’ve gone too deep. If using bottled juice, some brands add bittering agents – switch to Nellie & Joe’s for the most authentic flavor.
Problem #4: My Whipped Cream Deflated
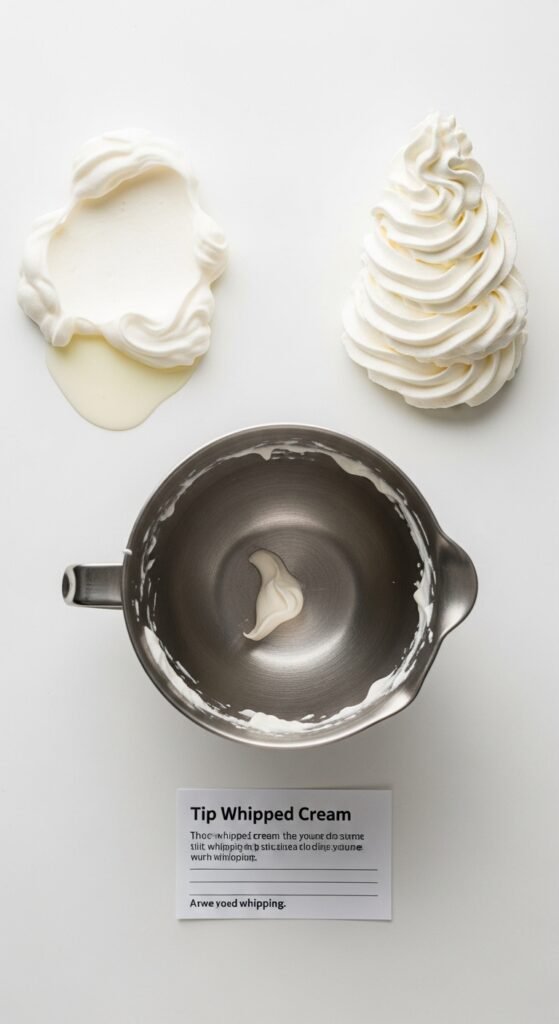
Causes and solutions: Either your cream wasn’t cold enough, you over-whipped it (turning it into butter), or you added the sugar too early. Always start with very cold cream, add sugar only after soft peaks form, and stop whipping the moment stiff peaks appear. If using an electric mixer, watch carefully – the transition from perfect to over-whipped happens in seconds.
Problem #5: My Meringue Weeps (Releases Liquid)
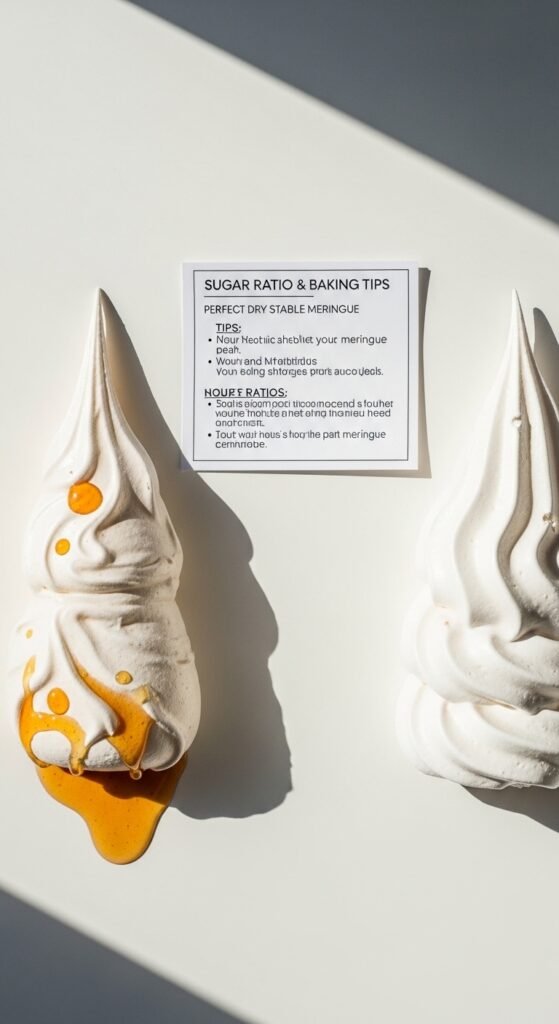
Causes and solutions: Weeping occurs when the meringue isn’t properly sealed to the crust or when it’s undercooked. Make sure your meringue touches the crust all around the edge. Additionally, adding the sugar too quickly or not beating the whites enough can cause weeping. Finally, never refrigerate a meringue-topped pie for more than a few hours – it’s best served the same day.
Delicious Variations on This Easy Key Lime Pie Recipe

Once you’ve mastered the classic, why not experiment? These variations keep the easy key lime pie recipe framework while adding exciting new dimensions.
Key Lime Coconut Pie
Add ½ cup sweetened shredded coconut to your graham cracker crust mixture before pressing. Additionally, substitute ¼ cup of the sweetened condensed milk with cream of coconut (like Coco López). Garnish with toasted coconut flakes. The result tastes like a tropical vacation in pie form.
Chocolate Key Lime Pie
Create a chocolate crust by substituting chocolate wafer cookies or Oreos (remove the cream filling) for the graham crackers. Use 1 ½ cups chocolate cookie crumbs with 5 tablespoons melted butter. The dark chocolate bitterness pairs surprisingly well with the bright lime filling.
Spicy Key Lime Pie
Add ¼ teaspoon cayenne pepper and ½ teaspoon ground ginger to the filling mixture. The subtle heat builds slowly, creating a fascinating contrast with the cool, tart lime. This version always surprises and delights dinner guests.
Vegan Key Lime Pie
Believe it or not, a vegan version works beautifully. Substitute sweetened condensed coconut milk (available at most health food stores) for the dairy version. Use aquafaba (the liquid from a can of chickpeas) instead of egg yolks – 3 tablespoons whisked until frothy replaces 4 egg yolks. The texture is slightly softer, but the flavor remains excellent.
Key Lime Bars
Press the crust into an 8×8 square baking pan instead of a pie dish. Double the filling recipe. After chilling, cut into 16 squares. These portable treats are perfect for parties, picnics, or lunchboxes.
Frequently Asked Questions About Key Lime Pie
Can I use regular limes instead of Key limes?
Absolutely. While the flavor won’t be identical – Key limes are more floral and less acidic – regular Persian limes make a perfectly delicious pie. Use the same amount of juice (½ cup) and consider adding 1 teaspoon of regular lime zest plus ½ teaspoon of lemon zest to approximate that complex flavor profile.
How far in advance can I make this easy key lime pie recipe?
You can prepare the pie completely (without topping) up to 2 days ahead. Keep it covered in the refrigerator. Add the whipped cream or meringue no more than 6 hours before serving for best results. The pie also freezes beautifully for up to 1 month – wrap it tightly in plastic wrap then foil.
Is key lime pie safe to eat without baking?
Yes, when made properly. The high acidity of the lime juice (pH around 2.0-2.4) creates an environment where harmful bacteria cannot thrive. This is the same principle behind ceviche. However, if you’re serving immunocompromised individuals, pregnant women, or young children, baking the pie for 10-12 minutes provides extra peace of mind.
Why is my key lime pie yellow instead of green?
Authentic key lime pie is naturally pale yellow from the egg yolks and condensed milk. The bright green pies you see in restaurants contain food coloring. If you prefer a greener appearance, add 2-3 drops of green food coloring to the filling mixture – completely optional but visually appealing.
Can I make mini key lime pies?
Yes! Press the crust mixture into muffin tins lined with paper liners (about 2 tablespoons per cup). Bake at 350°F for 5-7 minutes. Fill each with about 3 tablespoons of filling. Chill for 2 hours. These individual portions are adorable and perfect for parties.
Why You Should Buy the Ingredients Today and Make This Easy Key Lime Pie Recipe
By now, you’ve learned the history, gathered your shopping list, mastered the technique, and discovered exciting variations. So what’s stopping you? Let me give you five compelling reasons to buy the ingredients for this easy key lime pie recipe right now.
Reason #1: It’s Foolproof
Unlike finicky cakes that collapse or cookies that spread unpredictably, this recipe delivers consistent results every single time. Even if you’ve never baked anything more complicated than toast, you can succeed with this pie. The chemical reaction between lime juice and condensed milk is virtually idiot-proof – it wants to set.
Reason #2: It’s Incredibly Economical
For approximately $10-12 in ingredients, you’ll create a dessert that serves 8-10 people. That’s around $1 per serving. Compare that to the $4-6 per slice you’d pay at a restaurant or bakery. Over the course of a year, making key lime pie at home could save you hundreds of dollars while providing superior quality.
Reason #3: It’s a Showstopper
Despite its simplicity, this pie looks and tastes spectacular. The vibrant filling, the golden crust, the billowy whipped cream – it’s Instagram-worthy without requiring any special skills. Bring this to a potluck, holiday dinner, or summer barbecue, and watch people’s eyes light up. You’ll become famous as “the one who makes that incredible key lime pie.”
Reason #4: It’s Versatile Year-Round
Sure, key lime pie screams summer. But its bright, sunny flavor provides the perfect antidote to gray winter days too. Serve it after a heavy holiday meal to cleanse the palate. Bring it to spring celebrations as a lighter alternative to chocolate. Enjoy it on a random Tuesday just because you deserve something wonderful.
Reason #5: It Creates Memories
Remember my story about Mabel and her roadside pie stand? Food has an extraordinary power to create lasting memories. When you make this easy key lime pie recipe, you’re not just producing dessert – you’re creating an experience. Maybe your children will remember helping you zest the limes. Maybe your partner will recall how you surprised them on their birthday. Maybe you’ll simply remember the satisfaction of creating something beautiful with your own two hands.
Final Tips for Key Lime Pie Success
Before you head to the kitchen, let me leave you with a few final pearls of wisdom:
- Room temperature ingredients matter. Take your eggs out of the refrigerator about 30 minutes before starting. Cold eggs don’t incorporate as smoothly.
- Taste as you go. Before pouring the filling into the crust, taste it. Want it tarter? Add another tablespoon of lime juice. Sweeter? A teaspoon of sugar. This is your pie – make it yours.
- Invest in a good citrus juicer. A simple handheld reamer costs $5-10 and makes juicing infinitely easier. Your wrists will thank me.
- Don’t skip the zest. I know I’ve said this before, but it bears repeating. The zest contains essential oils that provide depth and complexity. Without it, your pie tastes one-dimensional.
- Be patient with chilling. The hardest part of this recipe is waiting. But rushing leads to a runny pie. Find something to occupy yourself for those 4 hours – read a book, watch a movie, take a walk. The reward will be worth it.
- Serve slightly chilled, not ice cold. Take the pie out of the refrigerator about 15 minutes before serving. The flavors become more pronounced as it warms slightly.
Conclusion: Your Journey to Key Lime Pie Perfection Starts Now
We’ve covered an enormous amount of ground together. From the sun-drenched history of the Florida Keys to the precise measurements of graham cracker crumbs. From troubleshooting runny fillings to experimenting with chocolate crusts. From the chemistry of acid denaturation to the art of the perfect whipped cream peak.
But here’s what it all boils down to: this easy key lime pie recipe is waiting for you. The ingredients are affordable. The technique is simple. The result is extraordinary.
So take a deep breath. Head to the grocery store with confidence. Buy that can of sweetened condensed milk and that bottle of key lime juice. Grab some graham crackers, butter, eggs, and cream. When you get home, preheat your oven (or don’t – the choice is yours). Crush those crackers. Squeeze those limes (or open that bottle). Whisk that filling. Pour it into that buttery crust.
Then, when you pull that perfect, pale yellow, tart-sweet miracle out of the refrigerator and take your first bite, I want you to smile. Because you did that. You created something beautiful, delicious, and memorable. And the best part? You can do it again anytime you want.
Now go make some key lime pie. Mabel would be proud.
Happy baking, friends – and remember, life is short. Eat dessert first.
Prep Time: 20 minutes
Chill Time: 4 hours (minimum)
Total Time: 4 hours 20 minutes
Servings: 8-10 slices
Difficulty: Easy