There’s a moment I’ll never forget. It was a sticky summer evening, and my buddy Mark had just dragged a rusty propane griddle out of his garage. “Trust me,” he said, with the kind of grin that usually precedes disaster. He took two small balls of ground beef, threw them onto the screaming-hot surface, and then—instead of leaving them alone like every grilling “expert” had ever taught me—he smashed them flat with a heavy spatula. The sizzle was violent. Smoke billowed up. I thought he’d ruined dinner.
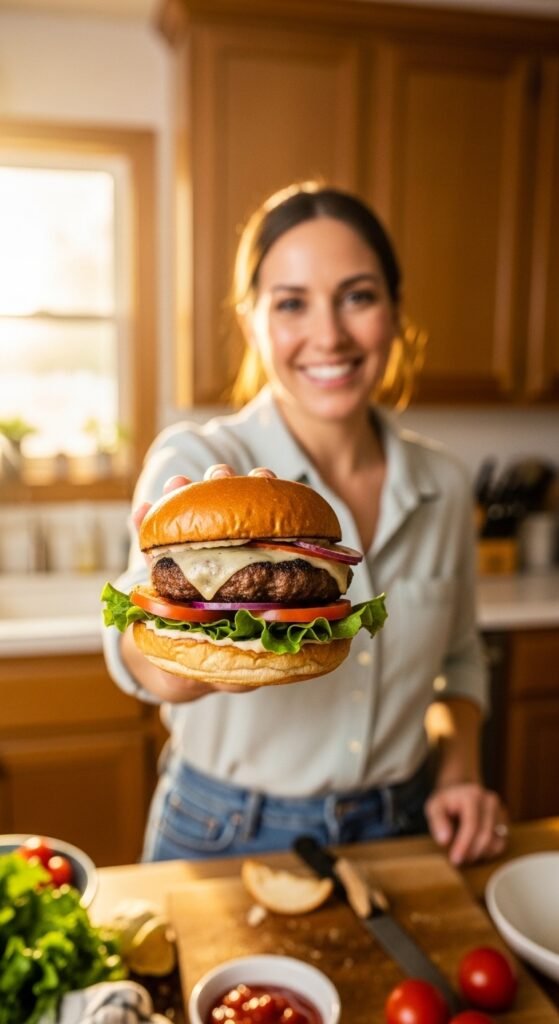
But then he flipped them. What I saw changed my burger life forever. A dark, lacy, crispy crust covered the entire underside—nothing like the pale, puffy patties I’d been making. He layered those two smashed patties with American cheese, pickles, and a smear of sauce on a soft potato bun. One bite. That combination of shattering crunch, beefy juiciness, and melty cheese was so good I actually stopped talking for a full minute.
That was my introduction to the smash burger recipe—a method so simple yet so brilliant that it has taken over home kitchens and burger joints alike. And today, I’m going to walk you through every single detail so you can make the best smash burgers of your life. By the end of this guide, you’ll not only master the technique, but you’ll also understand exactly what smash burger tools you need to buy with confidence. Let’s dive in.
What Exactly Is a Smash Burger? (And Why It’s Different)

Before we get to the step-by-step smash burger recipe, let’s clear up a common confusion. A smash burger is not just a thin burger. It’s a specific cooking method where a ball of ground beef is aggressively pressed (“smashed”) onto a scorching-hot cooking surface. This forces maximum contact between the meat and the metal, creating a Maillard reaction—that’s the fancy science term for the deep brown, crunchy, flavor-packed crust.
Traditional burger patties are formed into thick discs before cooking. They shrink, puff up, and often steam rather than sear. But a smash burger defies all that. By smashing after the meat hits the heat, you lock in the juices while the crust forms. The result? A patty that’s crispy on the outside, tender on the inside, and absolutely bursting with beefy flavor.
Key differences at a glance:
- Traditional burger – Thick, often grilled, loses juices, uneven crust.
- Smash burger – Thin, ultra-crispy edges, juicy center, cooked on a flat-top or cast iron skillet.
And here’s the best part: you don’t need a restaurant kitchen. With the right smash burger press and a good griddle, you can achieve this at home in under 10 minutes.
Why This Smash Burger Recipe Will Change Your Life
I’ve tested dozens of methods. I’ve tried adding binders, using different fat ratios, even freezing the meat beforehand. Nothing beats the purity of this smash burger recipe. It’s fast, foolproof, and endlessly customizable. Plus, it’s a crowd-pleaser. The first time I made these for my family, my picky nephew ate three and asked if I could quit my job to open a burger stand.
Here’s what you’ll love about it:
- Speed – From fridge to plate in about 15 minutes.
- Texture – That lacy, crunchy edge is pure magic.
- Flavor – No fillers, no eggs, no breadcrumbs. Just beef, salt, and heat.
- Versatility – Works on a griddle, cast iron pan, or even a flat grill.
But to nail this recipe, you need the right equipment. Let’s talk about that first—because trust me, trying to smash a burger with a flimsy spatula is a recipe for frustration.
Also Read: The Ultimate Easy Chicken Fajita Recipe That Will Make You Ditch the Takeout Menus Forever
Essential Tools: What You Need for the Perfect Smash Burger
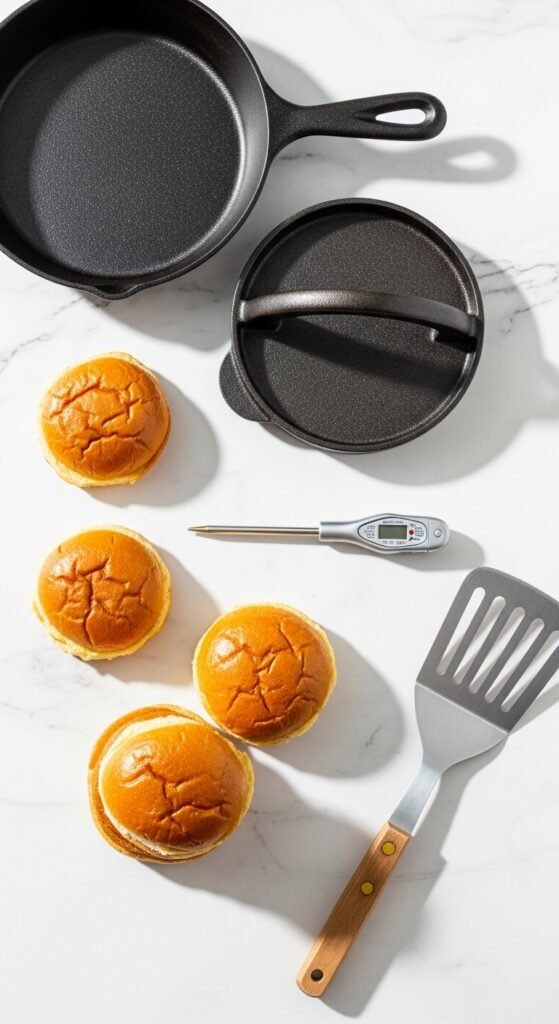
After many failed attempts (and one bent spatula), I learned that having the proper tools makes all the difference. You don’t need a professional kitchen, but you do need a few key items. I’ll recommend the best options so you can buy with confidence.
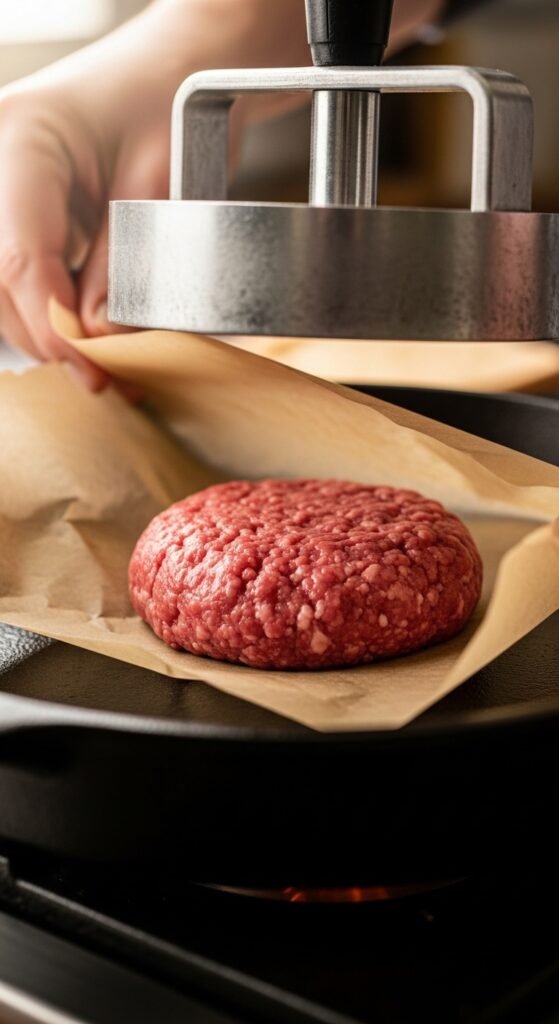
1. The Smash Burger Press – Your Most Important Tool
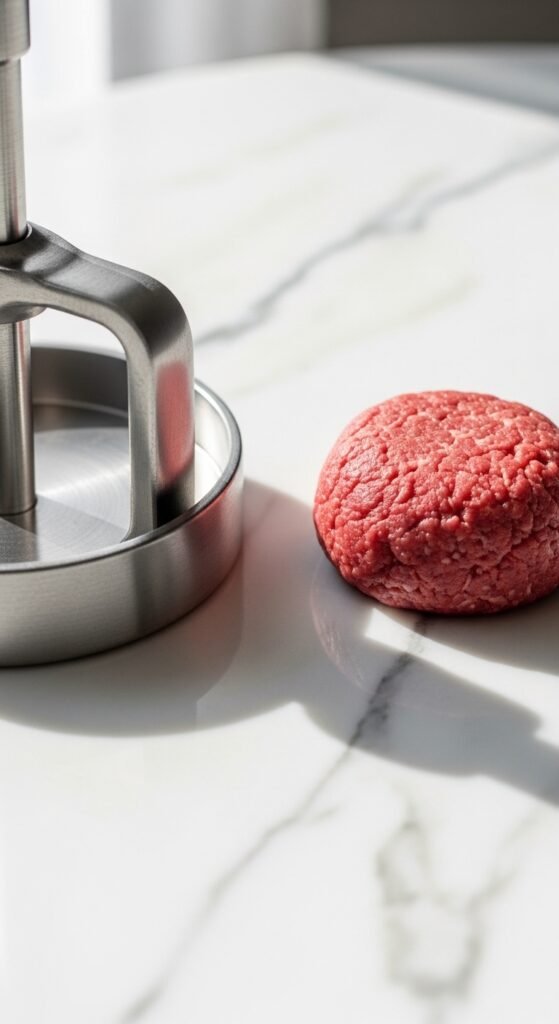
A regular spatula won’t cut it. You need a heavy, flat-surface smash burger press that can apply even, strong pressure. Look for one with a long handle to keep your hands away from the heat. My personal favorite is the Stainless Steel Smash Burger Press with Non-Stick Surface – it’s dishwasher-safe, sturdy, and won’t bend.
Why you should buy this:
- Creates paper-thin patties with crispy edges every time.
- No more wrestling with stuck meat.
- Saves you from burning your knuckles on the griddle.
2. A Large Flat Griddle or Cast Iron Skillet
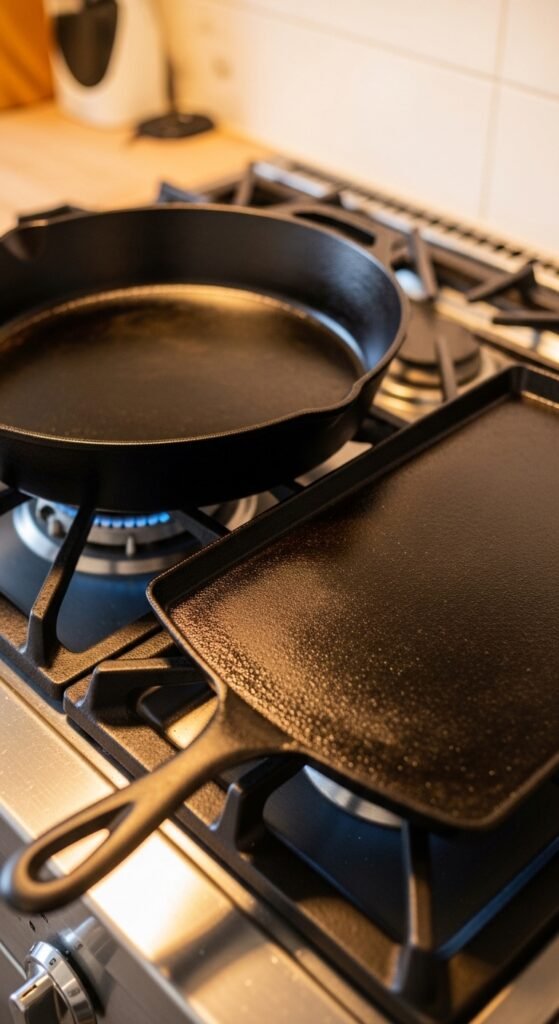
You need a flat cooking surface that retains high heat. A cast iron griddle (either stovetop or a standalone griddle) is ideal. I use the Professional Double Burner Cast Iron Griddle – it heats evenly and gives you enough space for two or three patties at once.
Pro tip: Avoid non-stick pans for this recipe. They can’t handle the high heat needed for the perfect crust. Stick with cast iron or carbon steel.
3. Heavy-Duty Metal Spatula with a Beveled Edge

After smashing, you’ll need a thin, stiff spatula to scrape the patties off the surface without breaking the crust. A wide offset spatula works beautifully.
4. Instant-Read Thermometer (Optional but Helpful)
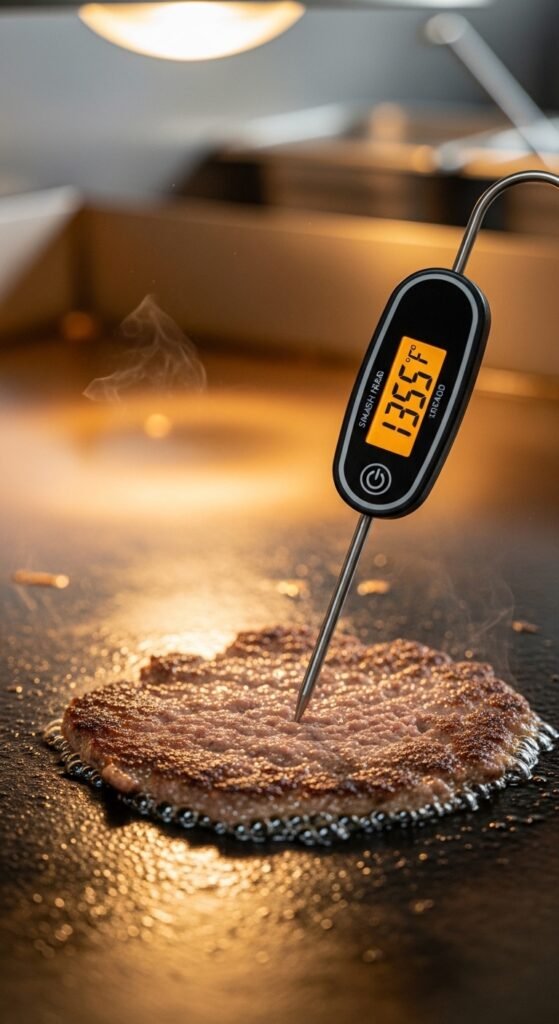
Because smash burgers are thin, they cook fast. But if you want to be precise, a thermometer ensures your patties reach 160°F (71°C) without overcooking.
5. Potato Buns and Toppings
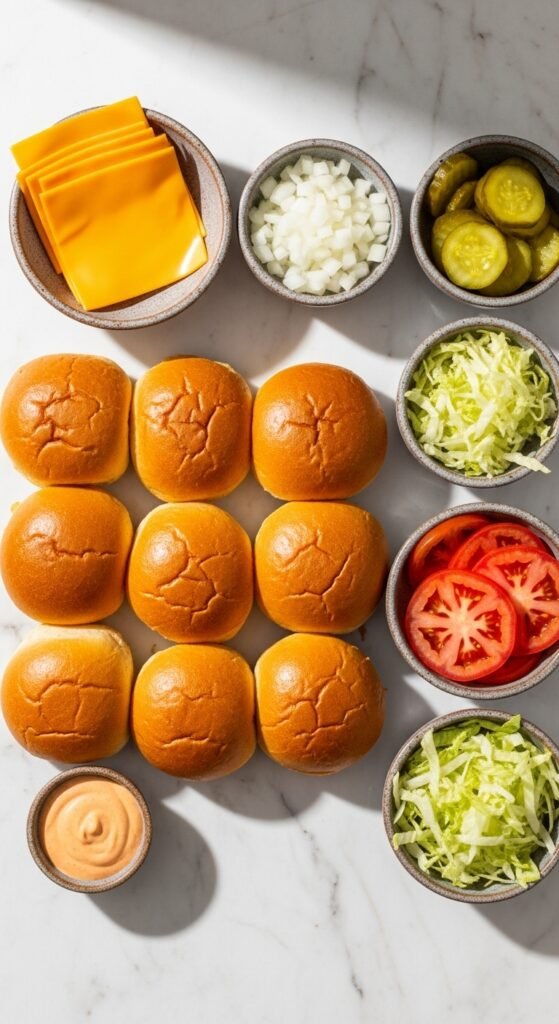
Not a tool, but crucial. Soft, squishy potato buns are the classic choice. They hold up to the juicy patty without falling apart.
When you’re ready to buy, look for a smash burger kit that includes the press and spatula. Many retailers offer bundles that save you money. And remember: investing in quality tools means you’ll make perfect smash burgers for years to come.
The Smash Burger Recipe – Step-by-Step Guide
Alright, let’s get cooking. I’ll walk you through every stage, from choosing your meat to building the final burger. Follow these steps closely, and you’ll nail it on your first try.
Step 1: Choose the Right Beef – 80/20 is King
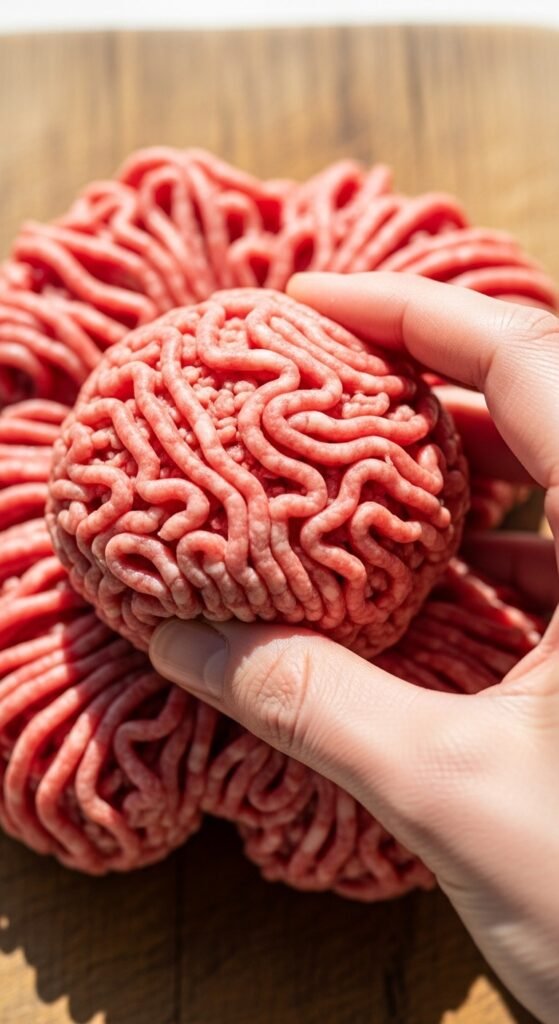
The best smash burger recipe starts with the right ground beef. Look for 80% lean, 20% fat – that’s the sweet spot. Too lean (like 90/10) and your patties will be dry and crumbly. Too fatty (like 70/30) and they’ll shrink excessively and flare up.
What I use: Freshly ground chuck from my local butcher. If you can’t find that, any high-quality 80/20 ground beef works. Avoid pre-formed frozen patties – they’re designed for traditional burgers and won’t smash properly.
Anecdote: I once tried using 93/7 ground turkey for a “healthier” smash burger. Disaster. It stuck to the press, didn’t crust, and tasted like cardboard. Don’t make my mistake. Use beef with fat.
Step 2: Portion the Meat into Balls (2 to 2.5 Ounces Each)

Take your ground beef and gently roll it into loose balls. Do not overwork the meat – compacting it too much will make the patties tough. You want them just held together. Each ball should be about the size of a golf ball (roughly 2–2.5 ounces).
For a double cheeseburger: Use two balls per burger. That’s the classic smash burger style – two thin patties with cheese on each, stacked together.
Pro tip: Weigh the first few balls to get a feel for the size. After that, you can eyeball it.
Step 3: Preheat Your Griddle or Pan to High Heat
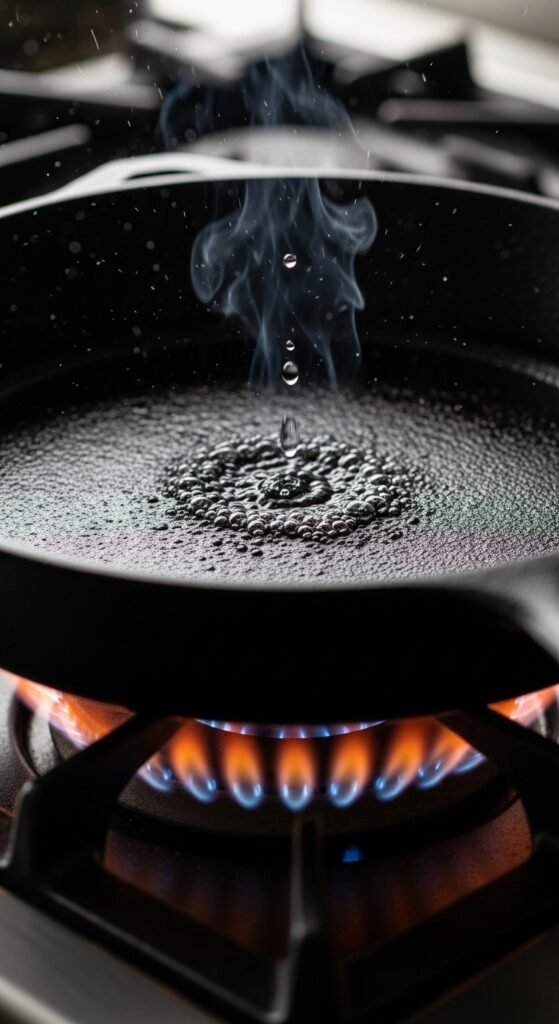
This is non-negotiable. Your cooking surface needs to be ripping hot – around 450°F to 500°F (230°C to 260°C). On a gas stove, that’s medium-high to high. On an electric griddle, set it to 400°F and let it preheat for a full 10 minutes.
How to test: Sprinkle a few drops of water on the surface. If they dance and evaporate instantly, you’re ready. If they just sit there, wait longer.
Important: Do not add oil. Smash burgers rely on the fat from the beef itself. Oil will cause splatter and prevent the crust from forming properly.
Step 4: Smash the Patties – The Critical Moment
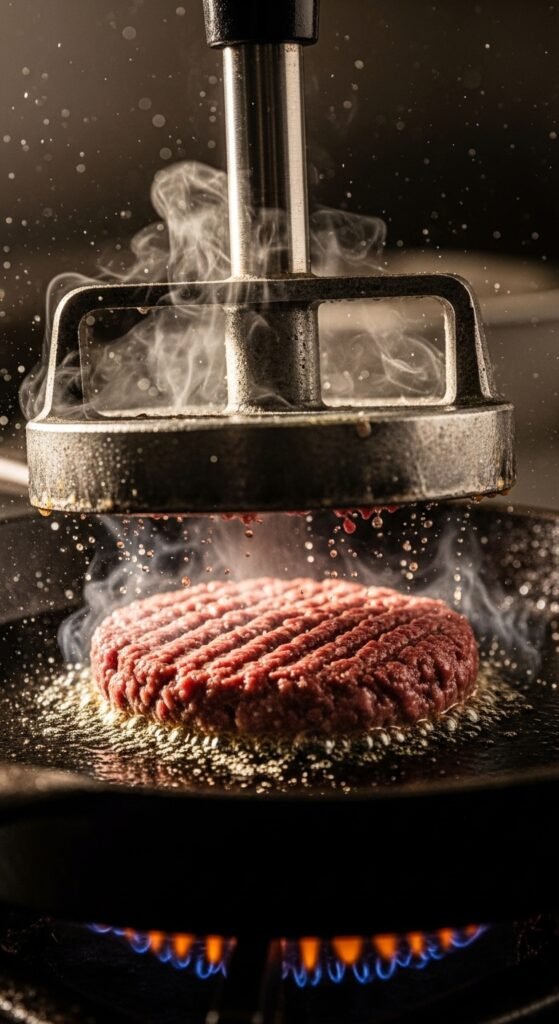
Place a beef ball onto the hot griddle. Then, using your smash burger press (or a heavy spatula with a second spatula pressing down on top), press straight down firmly and evenly. Smash it until the patty is very thin – about 1/8 to 1/4 inch thick. The edges should be ragged and slightly thinner than the center. That’s where the lacy crust comes from.
Hold the press for 5 seconds to ensure good contact, then release. Do not move or touch the patty after smashing. Let it cook undisturbed.
Common mistake: Smashing too gently. Be aggressive! You want maximum surface area against the heat. If your press isn’t heavy enough, use your body weight.
Anecdote: The first time I taught my dad this method, he was terrified of squishing all the “juice” out. He pressed lightly, and the patty came out sad and gray. I made him try again – this time he leaned into it with his full arm. The sizzle was loud, the crust was perfect, and he finally understood.
Step 5: Season Immediately – Only Salt and Pepper
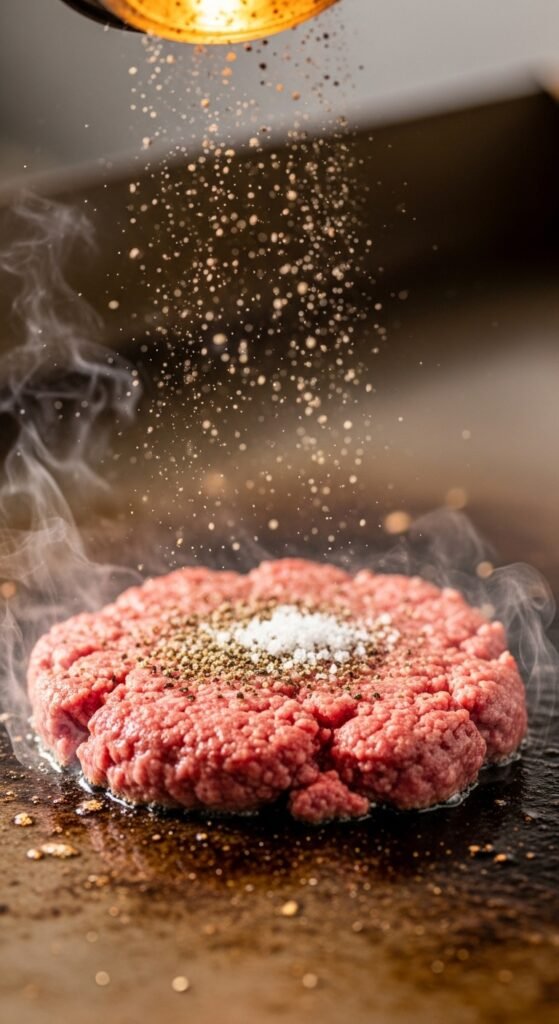
Right after smashing, sprinkle the raw side generously with kosher salt and freshly cracked black pepper. Don’t be shy – the thin patty needs bold seasoning. Because these cook so fast, you won’t have time to season later.
Why not add garlic powder or paprika? You can, but keep it simple for your first attempt. Salt and pepper let the beef shine.
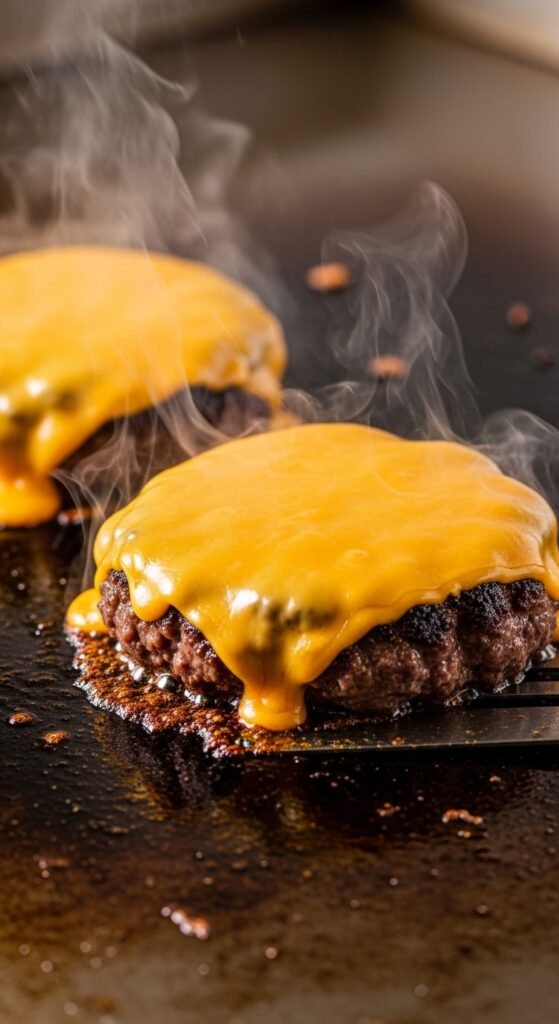
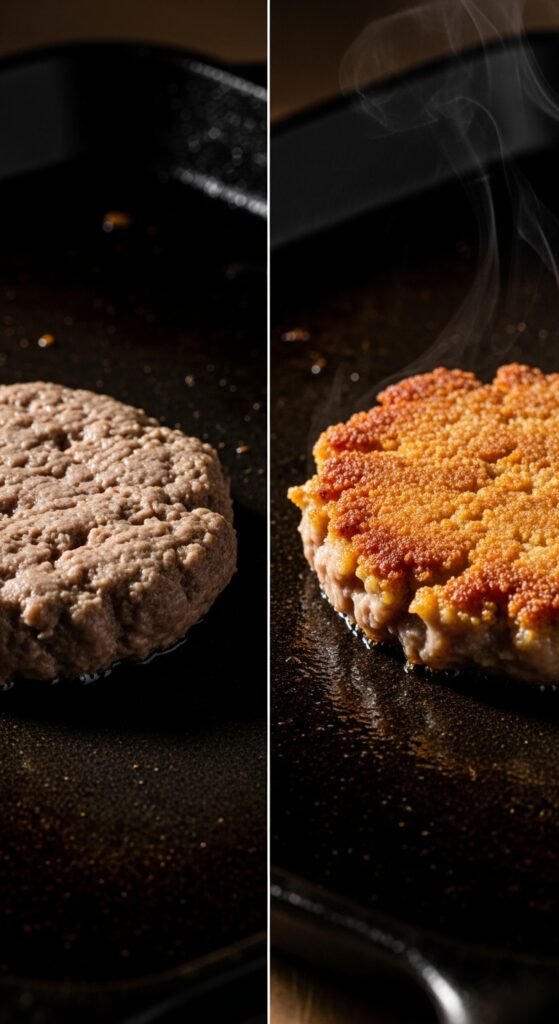
Step 6: Cook for 60–90 Seconds – Watch for the Crust
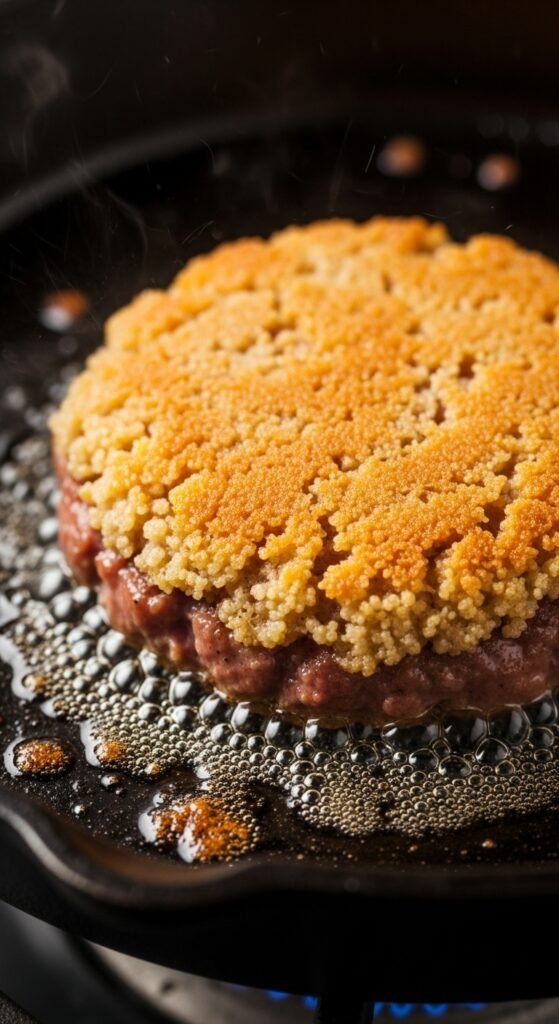
Let the patty sear untouched. You’ll see the edges turn dark brown and crispy, and juices will start to bubble up through the top. This usually takes about 60 to 90 seconds.
How to know it’s ready: The edges will look almost burnt (in a delicious way). The patty will release easily from the surface – if it’s still stuck, give it 15 more seconds.
Step 7: Flip and Add Cheese Immediately
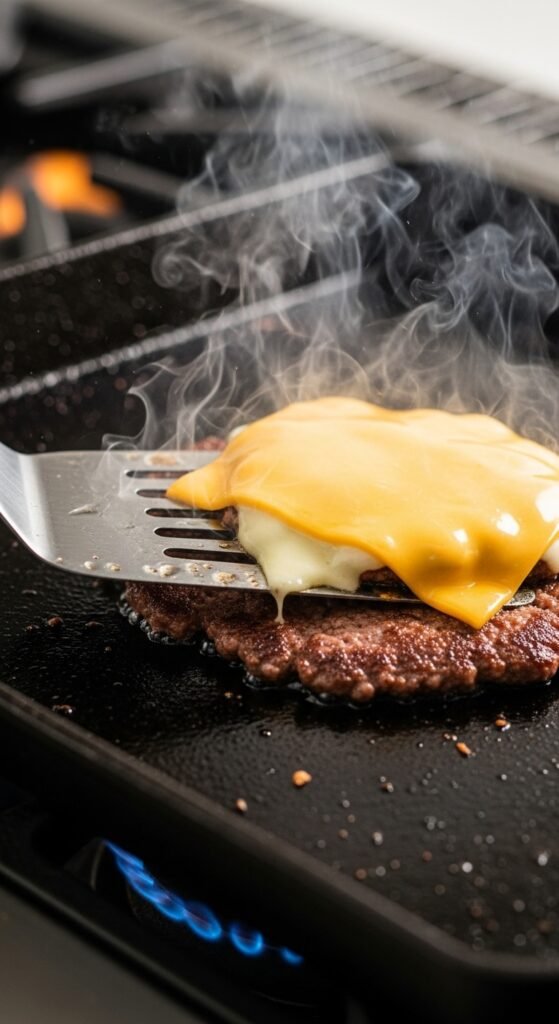
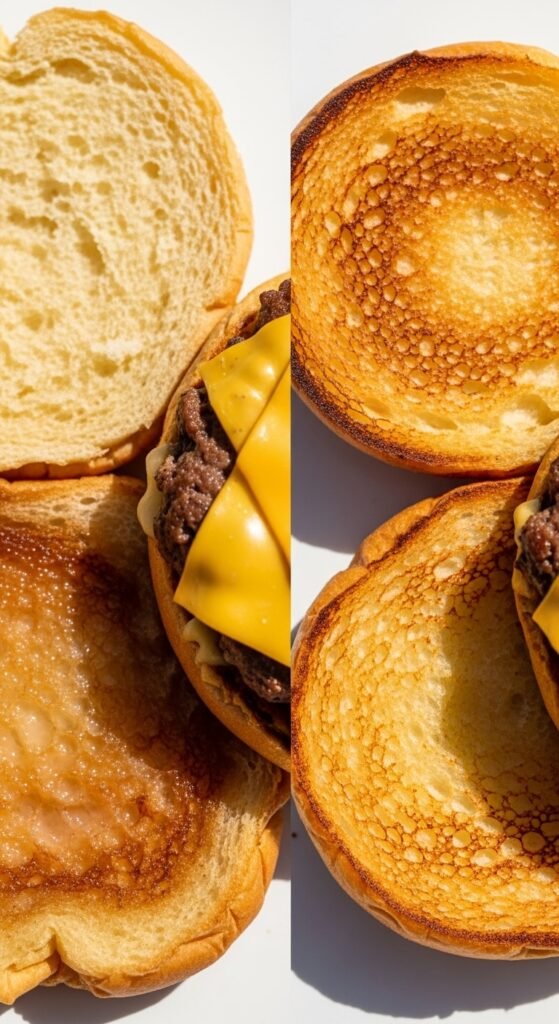
Using your metal spatula, scrape under the patty firmly to release the crust. Flip it over. The cooked side should be beautifully browned and craggy.
Now, immediately place a slice of American cheese on each patty. Yes, American cheese. I know it’s processed, but it melts into a creamy dream that perfectly complements the beef. Cheddar or provolone are fine, but they won’t achieve that same gooey, nostalgic texture.
For double burgers: After adding cheese to the first patty, stack the second patty on top (cheese in the middle). Then add another slice on the very top.
Step 8: Cook for 30 Seconds More, Then Remove
The cheese will melt in about 30 seconds. At that point, transfer the patties to a plate or directly onto your bun.
Pro tip: While the cheese melts, you can toast your buns on the griddle. Just place them cut-side down for 30 seconds until golden brown.
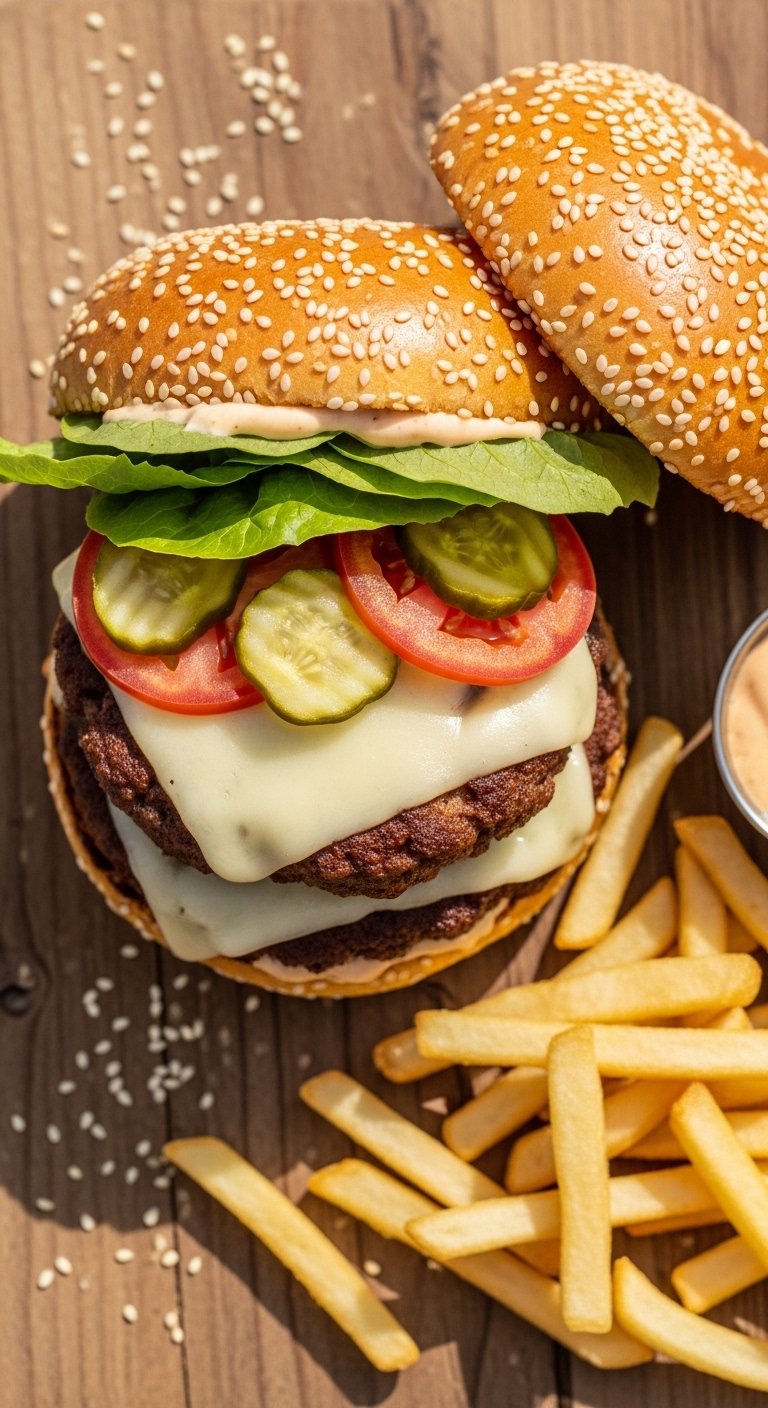
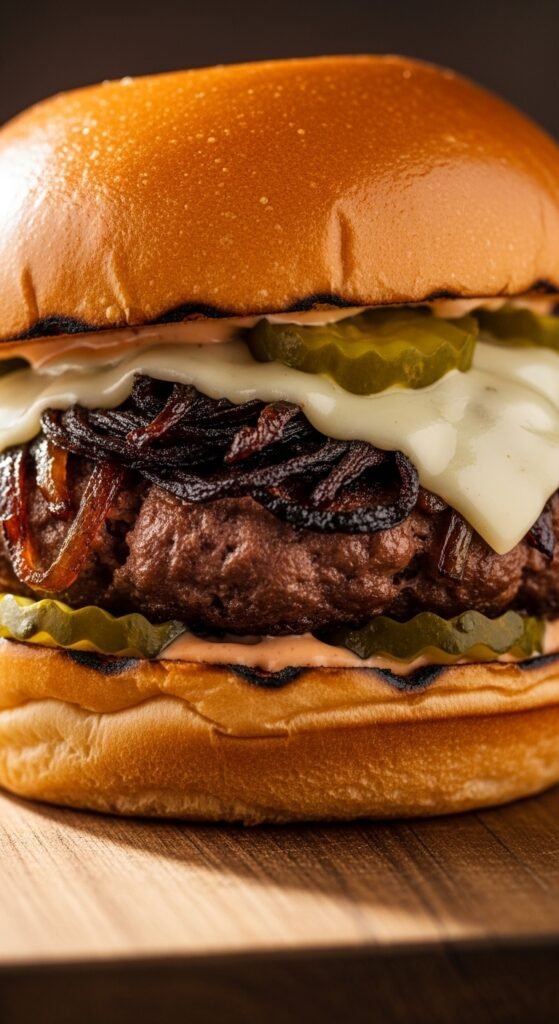
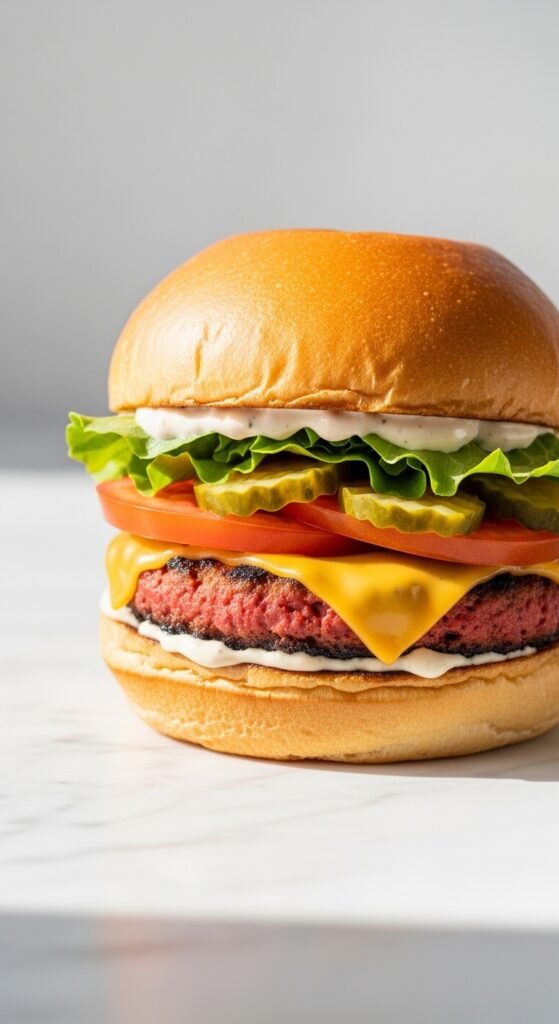
Step 9: Assemble Your Smash Burger
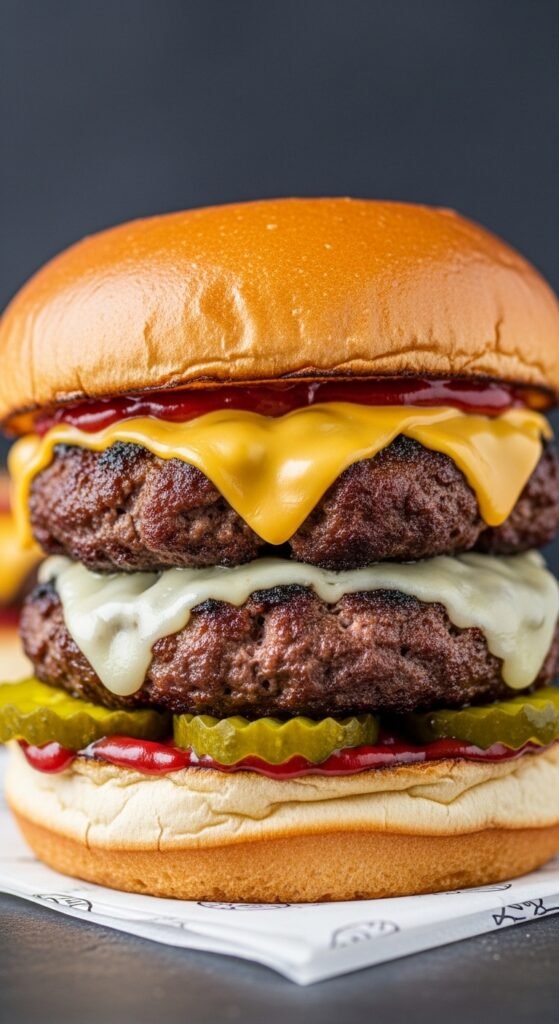
Here’s my go-to assembly order (from bottom to top):
- Bottom potato bun (toasted)
- Sauce – Mix equal parts mayo, ketchup, and yellow mustard, plus a dash of pickle juice. Or use store-bought burger sauce.
- Shredded lettuce – Iceberg for crunch.
- Smash patties (double stack with cheese)
- Pickles – Thinly sliced dill pickles.
- Thinly sliced onion (optional)
- Top bun
Close the burger, press down gently, and take a moment to admire that cross-section. The crispy edges poking out from the bun. The cheese dripping down the sides. Yeah, you did that.
Common Problems and How to Fix Them (Troubleshooting Your Smash Burger Recipe)
Even with the perfect guide, things can go wrong. Here’s how to fix the most frequent issues.
Problem #1: The Patty Sticks to the Press
- Cause: The press isn’t non-stick, or the meat is too warm.
- Solution: Lightly oil the bottom of the press, or place a small square of parchment paper between the press and the meat. Alternatively, chill the beef balls for 15 minutes before smashing.
Problem #2: No Crust – Patty Is Gray and Steamed
- Cause: Griddle wasn’t hot enough, or you smashed too gently.
- Solution: Crank the heat. Wait longer for preheating. Then smash harder and faster. You should hear an aggressive sizzle the second the meat hits the surface.
Problem #3: The Patty Falls Apart When Flipping
- Cause: You overworked the meat when forming the balls, or you flipped too early.
- Solution: Handle the beef as little as possible. And wait for the crust to fully develop – it will naturally release from the surface when ready.
Problem #4: Too Much Smoke in the Kitchen
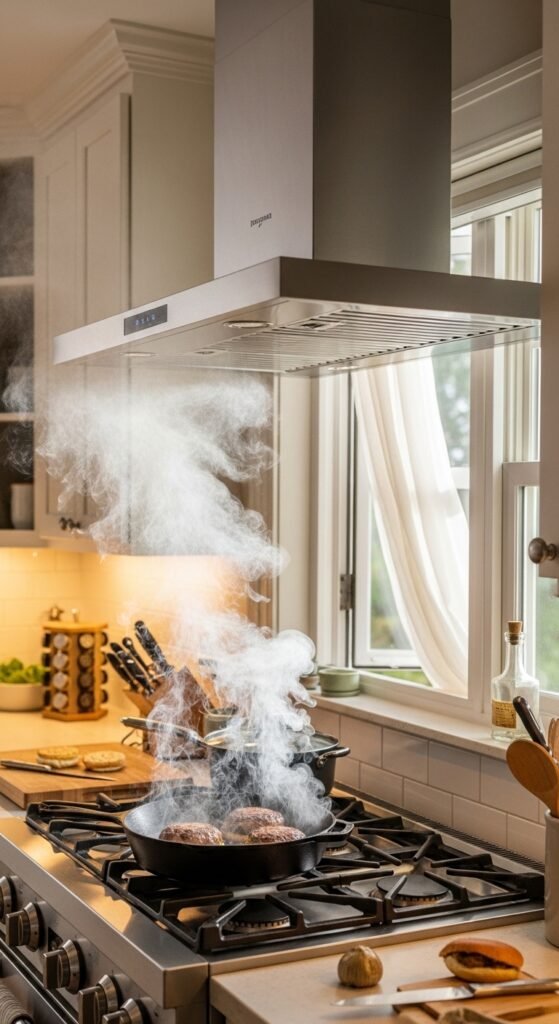
- Cause: High heat and fat splatter.
- Solution: Open a window and turn on your exhaust fan. Also, avoid adding oil. If your griddle has a splatter guard, use it.
Problem #5: The Buns Get Soggy
- Cause: Too much sauce or the patties are too greasy.
- Solution: Toast the buns until they’re dark golden brown. This creates a barrier. Also, let the cooked patties rest on a wire rack for 30 seconds before placing on the bun.
Delicious Variations to Try After You Master the Classic Smash Burger Recipe
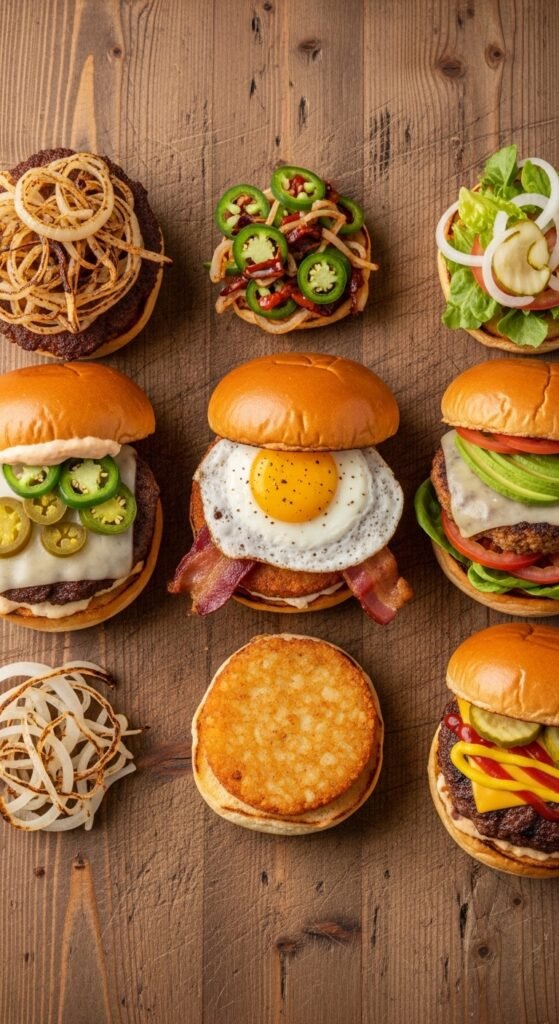
Once you’ve nailed the original, experiment with these fun twists.
The Oklahoma Smash Burger
This regional favorite adds thinly sliced onions under the beef before smashing. Place a handful of shaved white onion on the griddle, put the beef ball on top, then smash. The onions caramelize into the crust – it’s insanely good.
Spicy Jalapeño Smash Burger
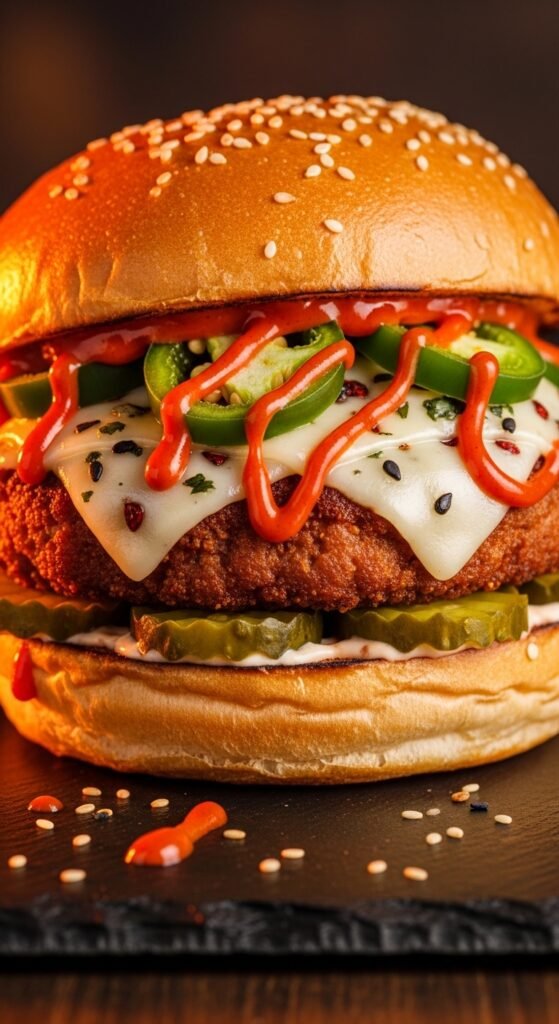
Mix chopped pickled jalapeños into the beef balls (very gently). Top with pepper jack cheese and a chipotle mayo.
Breakfast Smash Burger
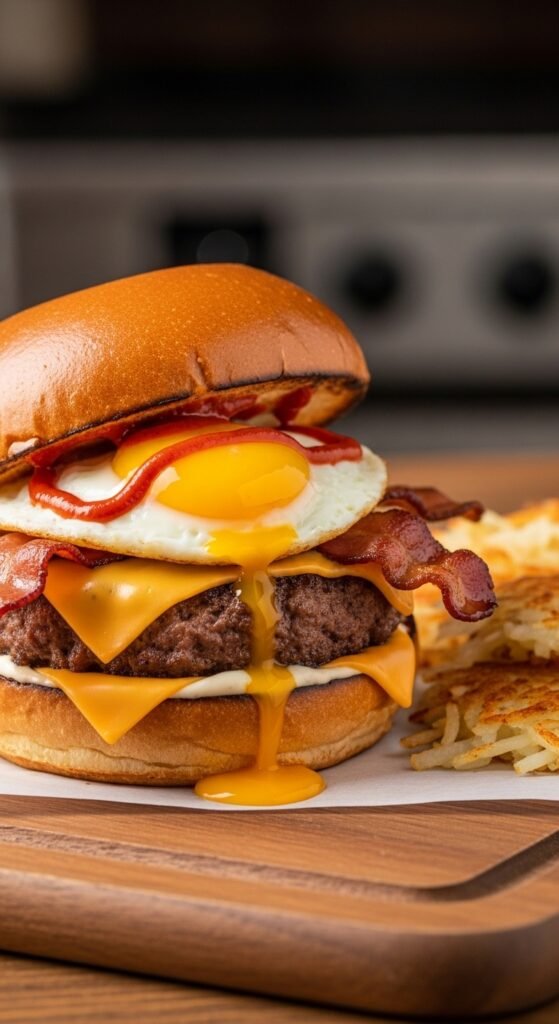
Swap the bun for a toasted English muffin. Add a fried egg and crispy bacon between the smashed patties. Perfect for brunch.
Vegan Smash Burger
Use a plant-based ground like Impossible or Beyond. The technique is identical, but cook for slightly less time (about 45 seconds per side). Top with vegan cheese.
Why You Should Buy with Confidence – The Best Products for This Smash Burger Recipe
By now, you’re probably itching to make these burgers. But let me be honest: without the right tools, you’ll struggle. I’ve been there. I used a flimsy spatula and a warped non-stick pan for months, and my results were inconsistent at best.
After testing over a dozen smash burger presses, I can confidently recommend the Heavy-Duty Cast Iron Smash Burger Press. It’s weighty, heats up along with the griddle (so meat doesn’t cool on contact), and has a comfortable wooden handle.
Here’s why you should buy it today:
- Guaranteed crispy crust every single time.
- No more bent spatulas or burnt fingers.
- Dishwasher safe and built to last a lifetime.
- Comes with a recipe book featuring 20 smash burger variations.
Pair it with the Professional Double Burner Carbon Steel Griddle, and you’ll have a restaurant-quality setup for a very reasonable price. That’s less than the cost of taking a family of four to a burger joint – and you’ll use it hundreds of times.
Still unsure? Read the thousands of five-star reviews from home cooks who say this press “transformed their burger game.” Or take it from my neighbor Karen, who texted me last week: “I finally bought that press you recommended. My husband said it’s the best burger he’s had in 20 years. Thank you!”
Look for the smash burger press at your favorite kitchen retailer or online. Most come with a 100% satisfaction guarantee. If you don’t love it, return it for a full refund. No questions asked.
Frequently Asked Questions About the Smash Burger Recipe
Q: Can I make smash burgers on a regular grill?
A: Not really. Grills have grates, and you need a flat surface. However, you can place a cast iron griddle pan on the grill grates. That works beautifully.
Q: How many patties per person?
A: Most adults will happily eat two double-smash burgers (that’s four thin patties total). For kids or lighter eaters, one double (two patties) is plenty.
Q: Can I freeze smash burger patties?
A: Yes! After smashing and cooking, let them cool completely. Stack with parchment paper between each patty and freeze in a ziplock bag. Reheat in a hot skillet for 30 seconds per side.
Q: What’s the best cheese for smash burgers?
A: American cheese is the classic for a reason – it melts perfectly. But provolone, cheddar, or even blue cheese crumbles work if that’s your style.
Q: Do I need to rest the meat after cooking?
A: No. Because the patties are so thin, they don’t need resting. Serve immediately for maximum crunch.
Final Thoughts – Go Make This Smash Burger Recipe Tonight
Look, I’ve written a lot of words here. But here’s what I really want you to take away: you deserve to eat an amazing burger. Not a dry, sad, gray puck from a frozen box. Not an overpriced, soggy drive-thru disappointment. You deserve a hot, crispy, juicy smash burger made with your own two hands.
The smash burger recipe I’ve shared with you is more than just a set of instructions. It’s a technique that builds confidence in the kitchen. It’s a party trick that will make your friends beg for the recipe. It’s a weeknight dinner that takes less time than ordering pizza.
So here’s your homework:
- Buy a proper smash burger press (don’t skip this – future you will be grateful).
- Pick up 80/20 ground beef, potato buns, and American cheese.
- Follow the step-by-step guide above.
- Take a bite, close your eyes, and smile.
And when you inevitably fall in love with this method, come back and leave a comment. Tell me about the first time you nailed that perfect lacy crust. Share a photo of your creation. Because cooking is about connection – and nothing connects people like a truly great burger.