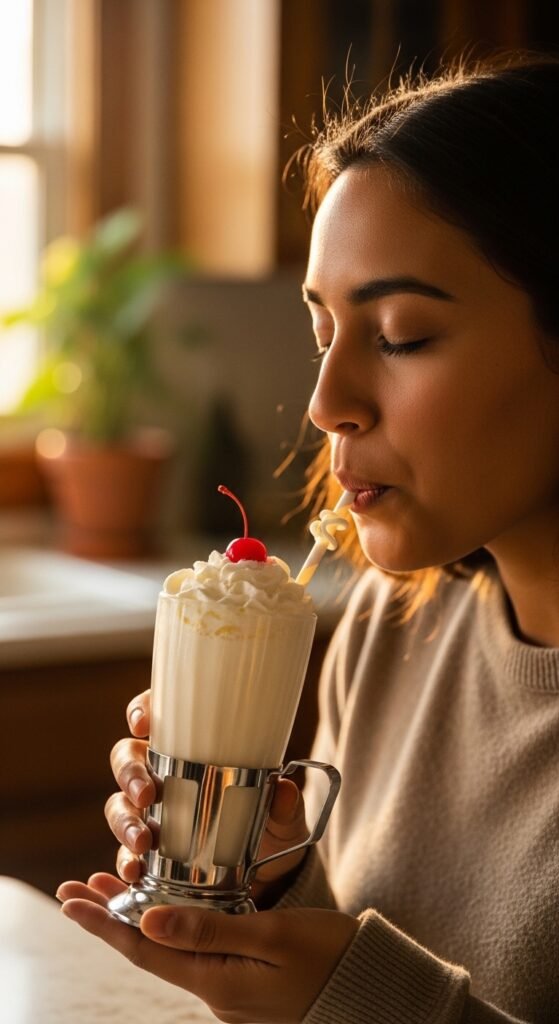
There’s a memory that has stayed with me for over twenty years. I was maybe eight years old, sitting on a sticky red vinyl stool at a roadside diner with my grandfather. The summer heat had wrapped itself around everything—the asphalt shimmered, the cicadas screamed, and my small legs swung back and forth, unable to touch the floor. My grandfather, a quiet man who spoke more with his eyes than his words, ordered two things: a black coffee for himself and a vanilla milkshake for me.
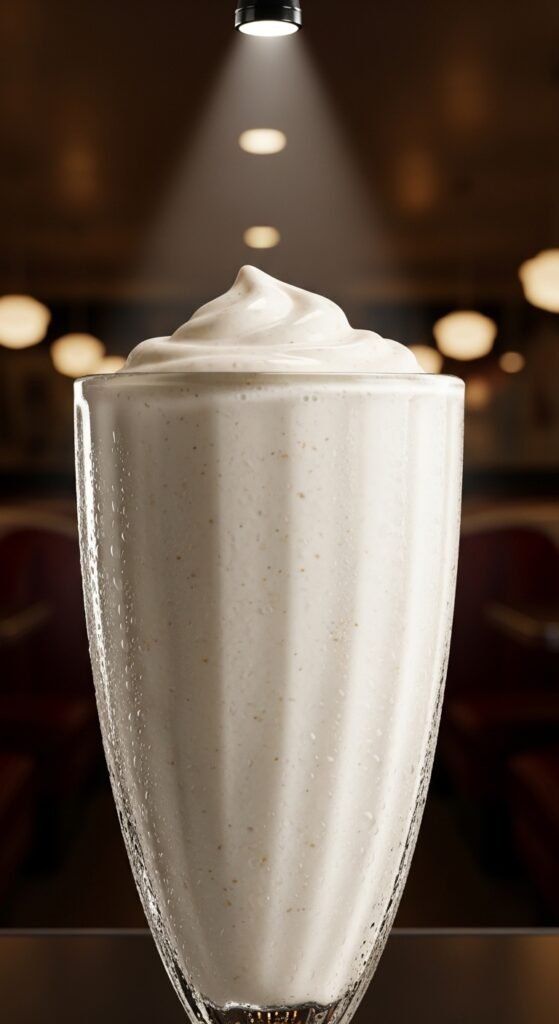
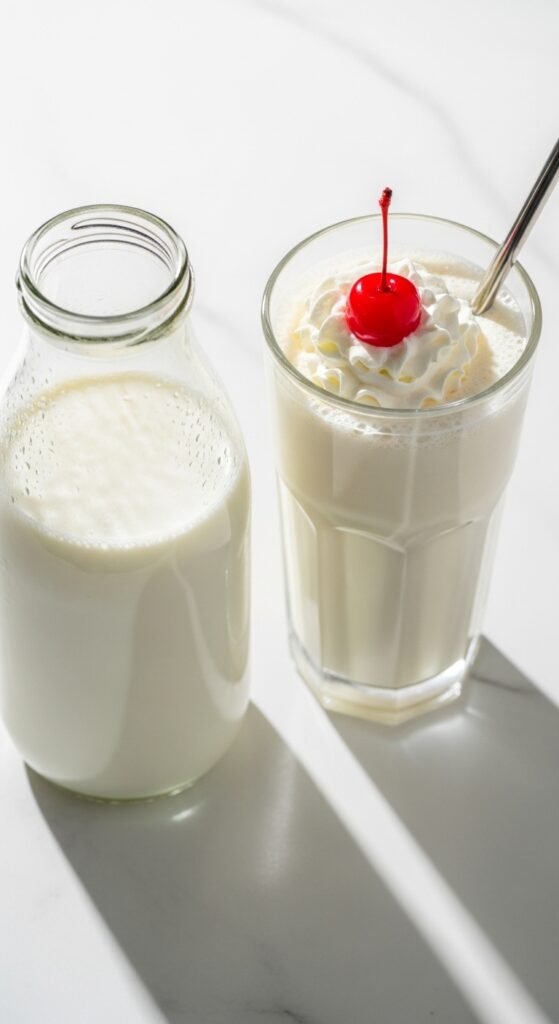
When that tall, frosty glass arrived, crowned with a dollop of whipped cream and a single maraschino cherry, I remember thinking that someone had captured a cloud and turned it into a drink. That first sip was pure magic—sweet, cold, silky, and so comforting that the entire world seemed to pause. From that day on, the vanilla milkshake became more than just a beverage. It became a symbol of love, simplicity, and the kind of happiness that doesn’t need fireworks or fanfare.
Now, as an adult, I’ve chased that same feeling countless times. I’ve tried fancy milkshakes with candy bars blended in, outrageous creations topped with donuts and drizzled with caramel, and even “gourmet” versions that cost as much as a lunch entrée. Yet time and again, I return to the classic. The humble, beautiful, utterly perfect vanilla milkshake. Why? Because when done right, it’s a masterpiece of balance—a harmony of cream, sweetness, and that unmistakable aroma of real vanilla.
In this article, I’ll take you on a deep dive into everything you’ve ever wanted to know about this iconic drink. You’ll find personal stories, a foolproof step-by-step guide, secrets from professional soda fountains, and—most importantly—a compelling reason to invest in high-quality ingredients. By the end, you’ll be convinced that buying the right products transforms your milkshake experience forever. So grab a tall glass, put on your favorite playlist, and let’s get started.
What Exactly Is a Vanilla Milkshake? (And Why It’s So Much More Than Milk and Ice Cream)
At its core, a vanilla milkshake is a blended beverage made from vanilla ice cream, milk, and often a touch of vanilla extract or vanilla syrup. But reducing it to that list of ingredients is like saying a symphony is just a bunch of musicians playing notes. The magic lies in the proportions, the quality, the technique, and the love you pour into it.
Historically, milkshakes date back to the late 19th century, when they were actually alcoholic, eggnog‑like drinks served in bars. By the early 1900s, however, they evolved into the malted, ice‑cream‑based treats we know today, thanks to the electric blender and the rise of soda fountains. And while chocolate and strawberry have their devoted fans, vanilla has always been the quiet champion—the blank canvas that allows every other flavor to shine, yet stands brilliantly on its own.
Think about it: vanilla is the most popular ice cream flavor in the United States and many other countries. It’s not boring; it’s versatile. It’s the little black dress of the dessert world. A well‑made vanilla milkshake tastes like nostalgia, like summer birthdays, like the first time you realized that something simple could be profoundly satisfying. And because vanilla pairs beautifully with everything from fresh fruit to cookies to a shot of espresso, mastering the basic vanilla milkshake is like learning a fundamental chord on the piano—once you know it, you can play any song.
The Psychology of the Vanilla Milkshake: Why We Crave It
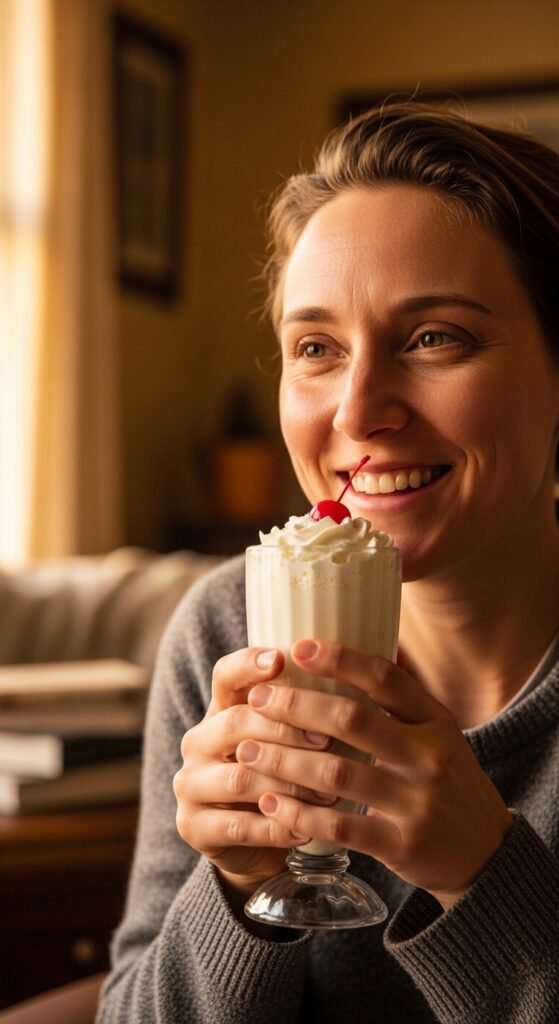
Before we dive into recipes and techniques, let’s talk about why this drink holds such a special place in our hearts. I remember a friend of mine, Sarah, who went through a brutal breakup in her twenties. She called me one rainy evening, voice shaky, and said, “I don’t know what to do. I just want to feel okay for five minutes.” I showed up at her door with two vanilla milkshakes from a local drive‑in. We sat on her couch in silence, sipping slowly, and by the time the glasses were empty, she was smiling.
That’s the power of a vanilla milkshake. It’s a hug in a cup. It’s a childhood friend who doesn’t judge. It’s a reliable source of comfort and joy. From a scientific standpoint, the combination of cold temperature, smooth texture, fat content, and sugar triggers a release of dopamine and endorphins in our brains. The creamy consistency coats your mouth, while the vanilla aroma—which contains over 200 different flavor compounds—stimulates the olfactory system in a uniquely pleasant way.
In other words, your brain is hardwired to love this stuff. But beyond biology, there’s also the emotional weight. For many of us, a vanilla milkshake is associated with family outings, first dates at diners, or late‑night study sessions where a milkshake was the reward for finishing a tough chapter. It’s no wonder that when life gets chaotic, we crave something that tastes like simpler times.
The Anatomy of the Perfect Vanilla Milkshake: Ingredients That Matter
Now, let’s get down to business. You want to make the best vanilla milkshake of your life. Or perhaps you’re standing in a grocery store aisle, trying to decide which vanilla ice cream or milkshake mix to buy. I’ll walk you through each component, explain why quality matters, and ultimately convince you that spending a little extra on premium ingredients is absolutely worth it. A great vanilla milkshake doesn’t happen by accident—it happens by choice.
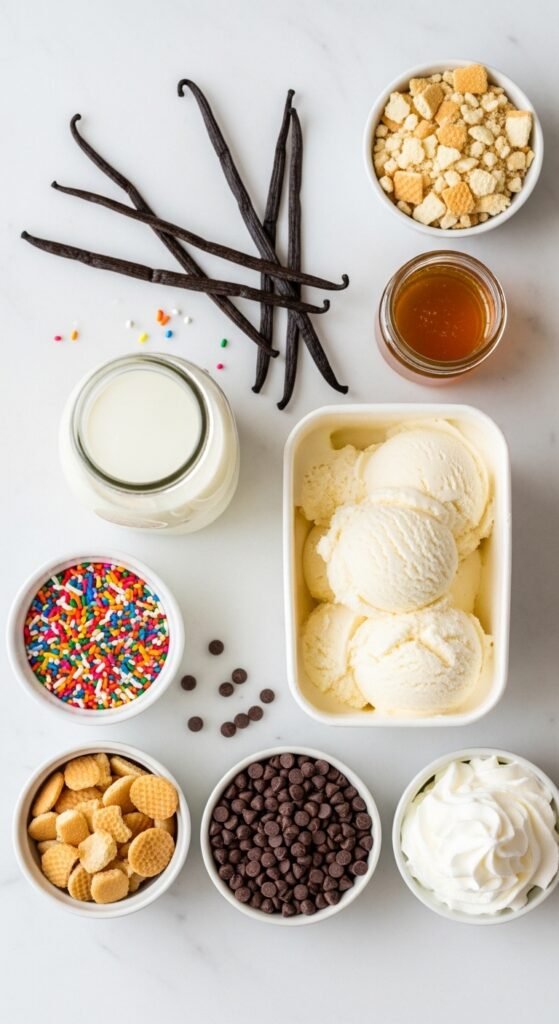
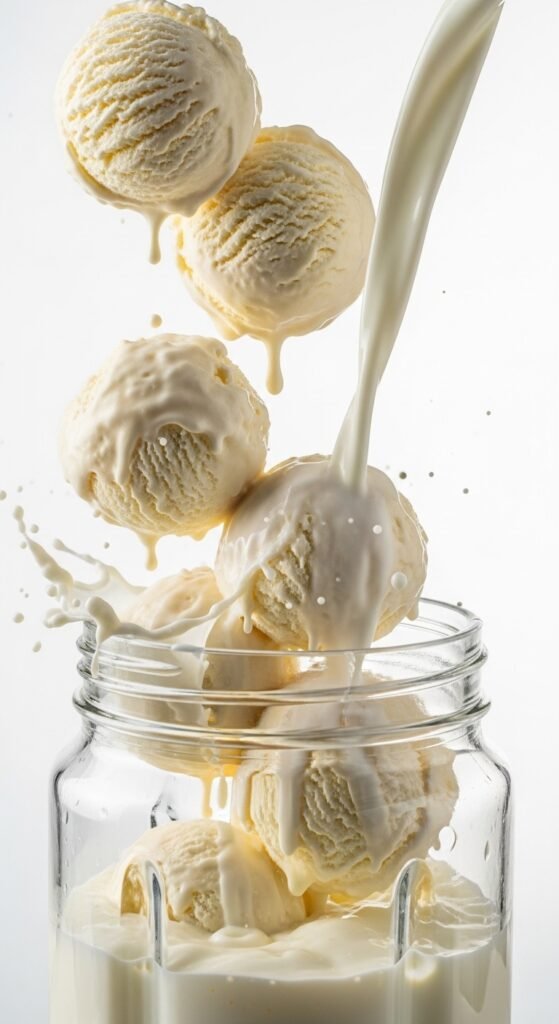
1. Vanilla Ice Cream – The Soul of the Shake
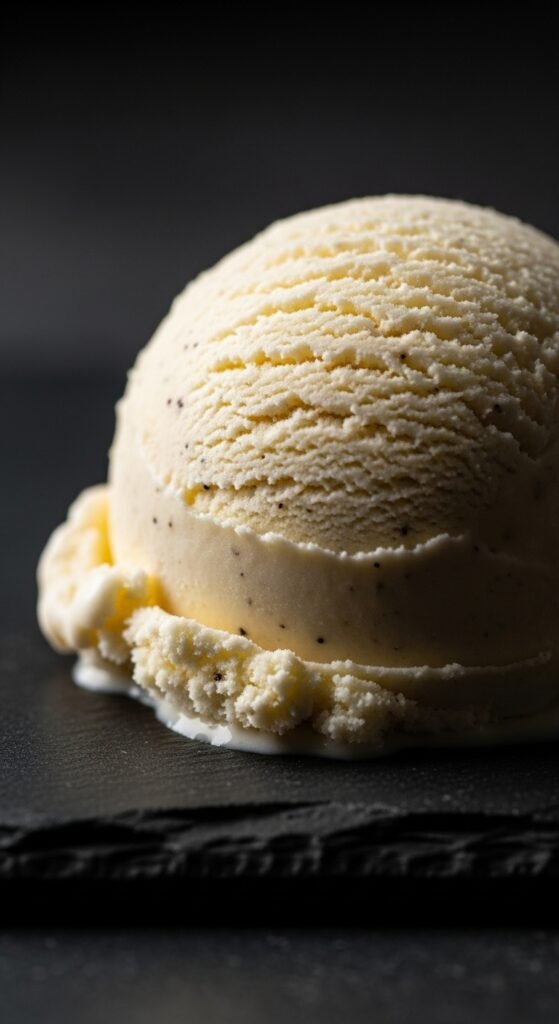
This is non‑negotiable: the ice cream you use will determine 80% of your milkshake’s success. You can have the best milk and the fanciest blender, but if your ice cream is icy, artificially flavored, or lacking in butterfat, your shake will be a disappointment. Here’s what to look for when buying vanilla ice cream for your milkshake:
- Real vanilla: Check the ingredients list. You want to see “vanilla extract,” “vanilla bean specks,” or “ground vanilla beans.” Avoid “vanillin” or “artificial flavor” – those are synthetic imposters that taste flat and chemical.
- High butterfat content: Premium ice creams usually have 14–18% milkfat. This gives your shake that luxuriously thick texture and rich mouthfeel. Cheap ice creams have more air and less fat, resulting in a watery shake.
- Minimal stabilizers: Some gums and emulsifiers are fine, but too many make the ice cream gummy. Look for short, recognizable ingredient lists.
- My personal recommendation: Brands like Häagen‑Dazs, Ben & Jerry’s, or a local creamery that uses real vanilla beans. If you’re feeling adventurous, make your own custard‑style vanilla ice cream – but that’s a topic for another day.
Anecdote: I once tried to save money by buying a store‑brand “vanilla flavored frozen dairy dessert” (they can’t even legally call it ice cream). I followed my usual recipe, blended it up, and took a hopeful sip. It tasted like frozen sugar water with a hint of plastic. My kids refused to drink it. I ended up throwing the whole batch away. That was the day I learned that cheap ice cream ruins a vanilla milkshake. Don’t make my mistake. Invest in the good stuff.
2. Milk – The Balancer
Milk thins out the ice cream just enough to make the shake drinkable through a straw. But too much milk, and you’ll have a sad, watery mess. Too little, and you’ll be eating ice cream with a spoon. The type of milk also matters:
- Whole milk (3.25% fat) is the gold standard. It adds extra creaminess without diluting flavor.
- 2% milk works in a pinch, but the shake will be slightly less rich.
- Skim or plant‑based milks (almond, oat, soy) can be used, but expect a thinner, icier result. If you go non‑dairy, choose a barista‑style oat milk for better texture.
- Half‑and‑half creates an ultra‑decadent, almost thick‑shake consistency. Use sparingly – it’s very rich.
Pro tip: For the creamiest vanilla milkshake, use a 3:1 ratio of ice cream to milk by volume. For a standard 16‑ounce shake, that’s about 2 cups (roughly 3 generous scoops) of ice cream and 2/3 cup of whole milk.
3. Vanilla Extract or Vanilla Bean Paste – The Flavor Booster
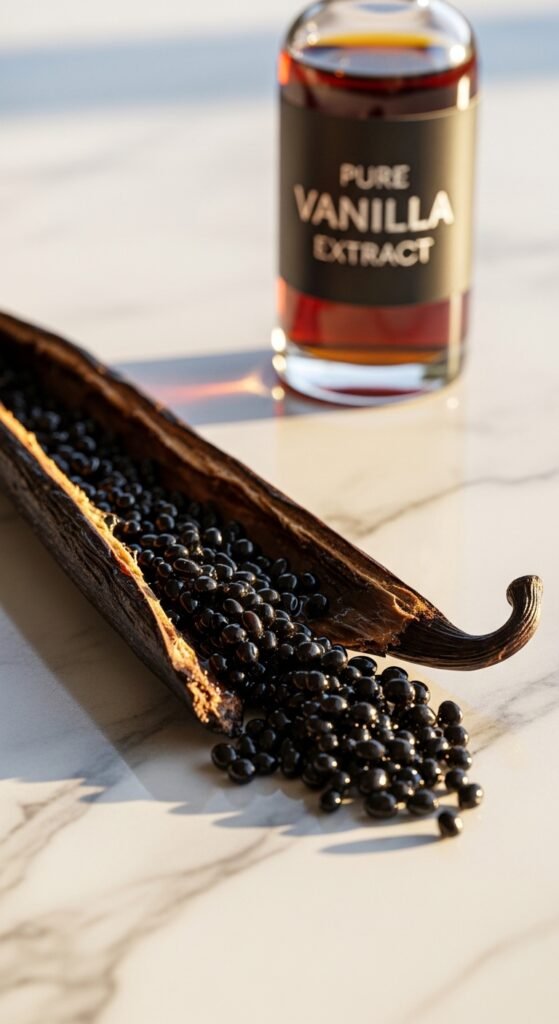
Even if your ice cream contains real vanilla, adding a little extra vanilla extract or vanilla bean paste elevates the shake from good to unforgettable. The heat of blending and the cold temperature can mute some of the delicate vanilla notes, so a small boost makes a big difference. Here’s what to buy:
- Pure vanilla extract (not imitation). Look for “vanilla planifolia” or “Madagascar vanilla” on the label. A good extract has a deep, floral, slightly woody aroma.
- Vanilla bean paste is even better – it contains those lovely black specks and an intense flavor. It’s more expensive but worth it for special occasions.
- How much to add: 1/2 teaspoon per 2 cups of ice cream. Don’t overdo it, or the shake will taste bitter or alcoholic.
Story: My grandmother used to make vanilla milkshakes with a secret ingredient – a tiny splash of homemade vanilla extract that she’d been aging in a dark cabinet for over a decade. She would never tell me the exact recipe, but I remember the way that extract smelled like warm sugar and exotic flowers. When she passed away, I found the bottle hidden behind her cookbooks. I still use a drop of it on special occasions. That’s the power of premium vanilla – it carries memories.
4. Sweetener (Optional but Nice)
Most commercial vanilla ice creams are already quite sweet, so additional sugar is rarely necessary. However, if you like your shakes extra sweet, or if you’re using a less‑sweet artisanal ice cream, a small amount of simple syrup, honey, or condensed milk can help. I personally avoid granulated sugar because it may not dissolve fully in the cold mixture. A tablespoon of vanilla syrup (the kind used for coffee) works beautifully and adds another layer of vanilla flavor.
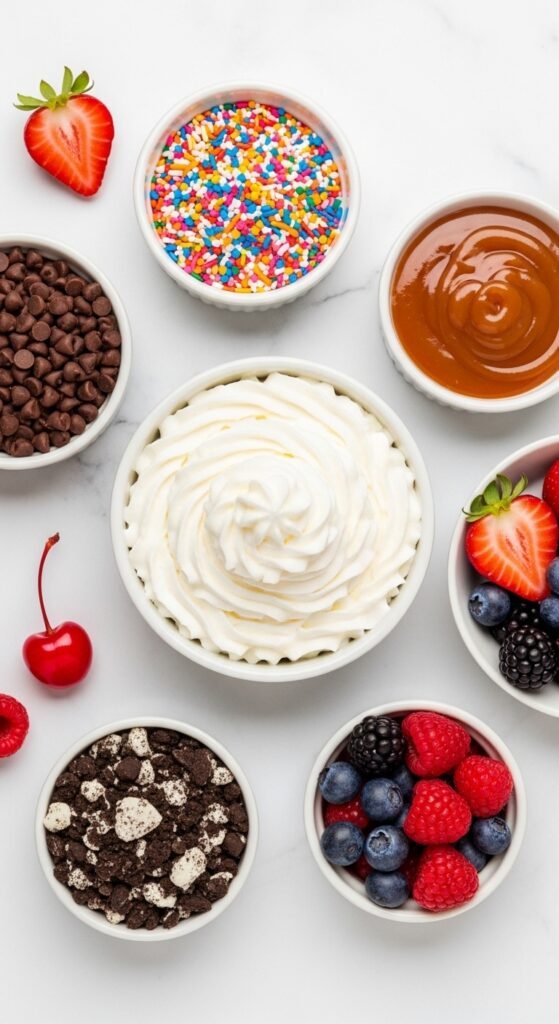
5. Toppings & Mix‑Ins – The Fun Part
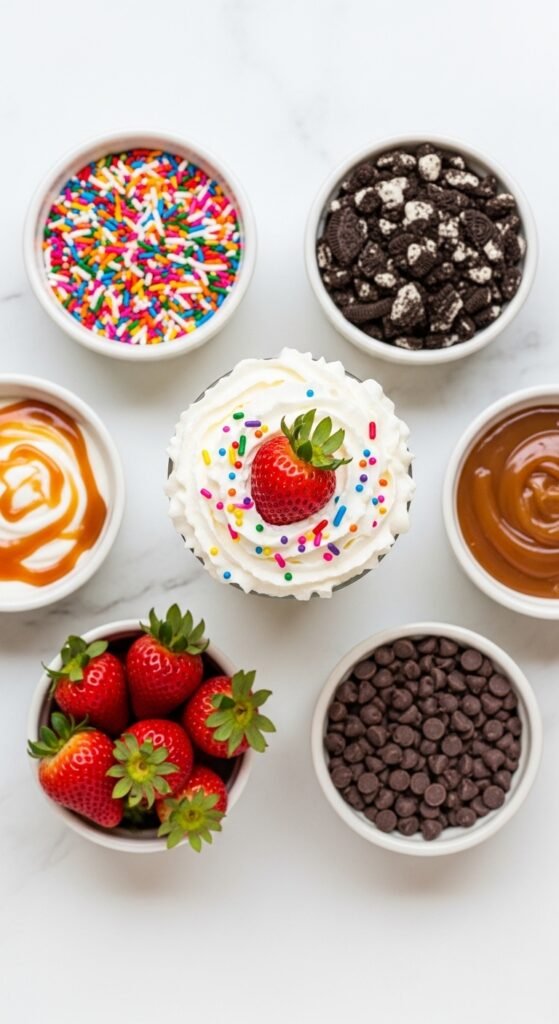
While a pure vanilla milkshake is a minimalist’s dream, there’s no rule against dressing it up. Here are some beloved additions:
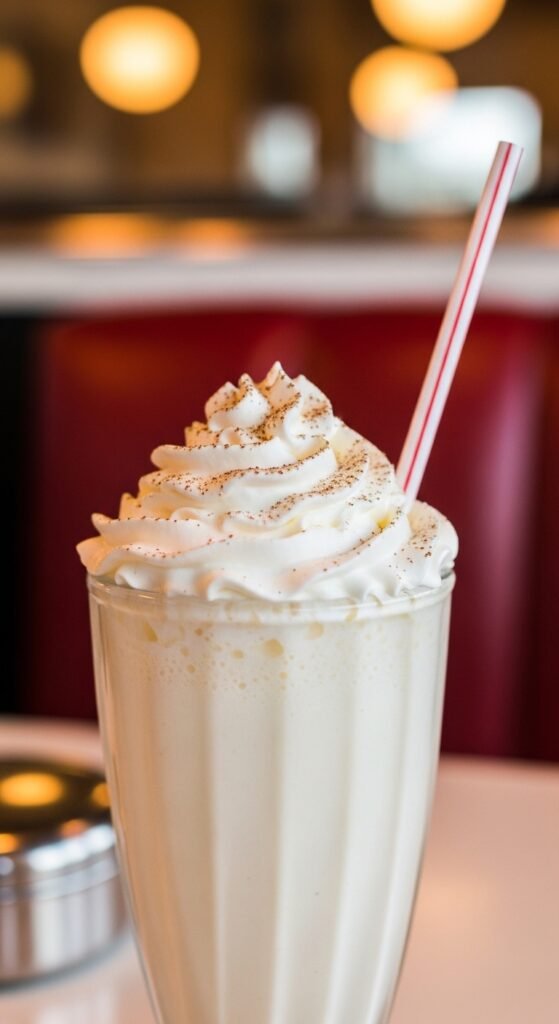
- Whipped cream (real, from a can or homemade – skip the aerosol stuff if you can)
- Maraschino cherry (the classic red one, but amarena cherries are divine)
- Crushed cookies (Oreos, vanilla wafers, or shortbread)
- Chocolate shavings or a drizzle of hot fudge
- Cinnamon or nutmeg for a warm spice note
- Malted milk powder for a vanilla malted milkshake (add 2 tablespoons per shake)
Remember: Toppings are the jewelry, not the dress. Don’t let them overpower the beautiful vanilla flavor underneath.
Step‑by‑Step Guide: How to Make the Best Vanilla Milkshake at Home
Enough theory – let’s make a shake. I’m giving you a foolproof method refined over hundreds of batches. Follow these steps, and you’ll produce a vanilla milkshake that rivals any diner or ice cream parlor. Ready? Let’s blend.
Step 1: Chill Your Glass (Seriously, Don’t Skip This)
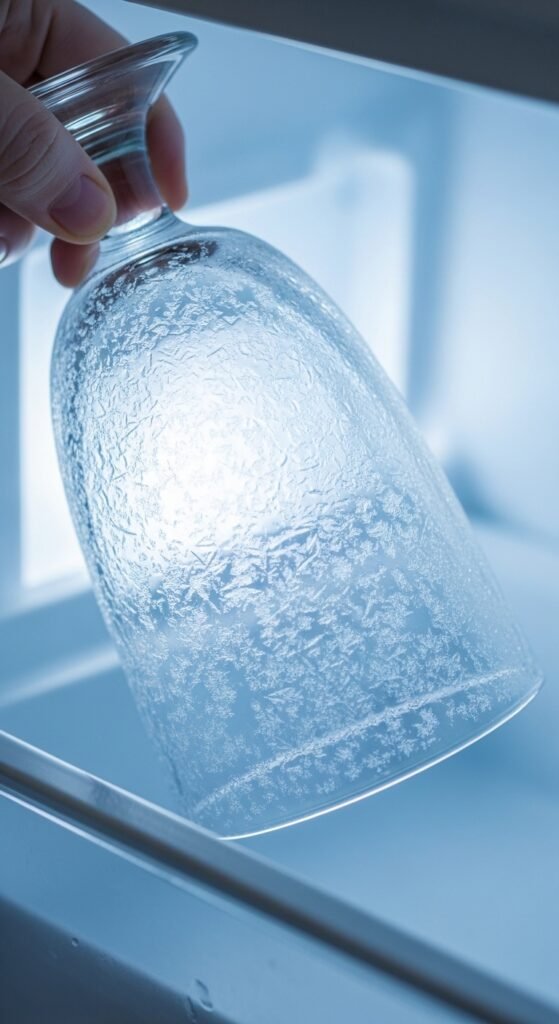
A warm glass will instantly melt your shake, creating a watery layer at the bottom. Place your serving glass (preferably a tall, thick‑walled one) in the freezer for at least 15 minutes before you start. For extra flair, you can also chill a metal milkshake cup or a mason jar.
Step 2: Gather Your Ingredients and Tools
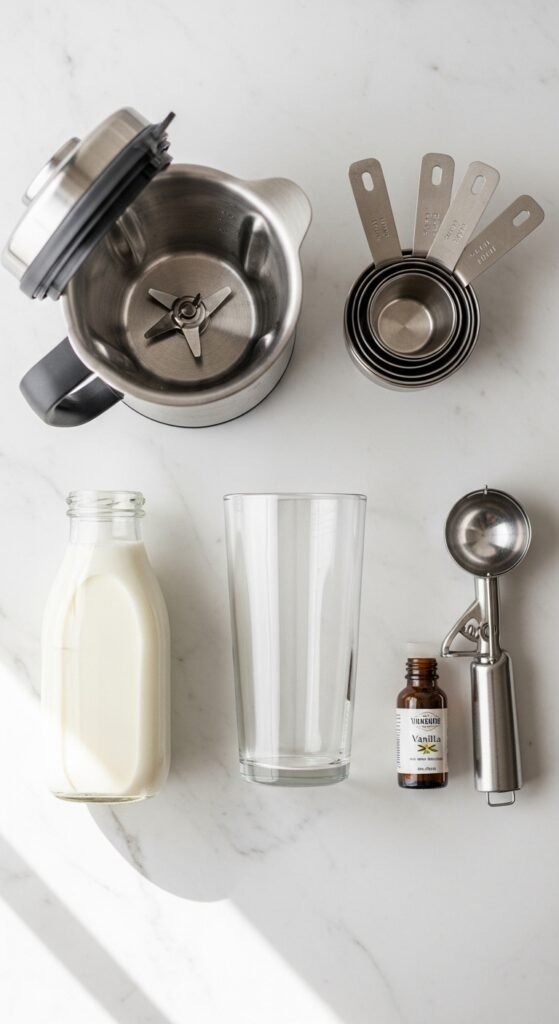
You’ll need:
- 2 cups (about 3 large scoops) of premium vanilla ice cream (slightly softened – let it sit on the counter for 5 minutes)
- 2/3 cup whole milk (cold)
- 1/2 teaspoon pure vanilla extract or 1 teaspoon vanilla bean paste
- Optional sweetener: 1 tablespoon vanilla syrup or honey
- Blender (a high‑speed blender is ideal, but any blender works – even an immersion blender with a tall cup)
- Long spoon (for stirring)
- Wide straw (paper or reusable – the wider the better for that thick shake)
- Toppings of your choice
Step 3: Add Ingredients to the Blender in the Right Order
Here’s a trick that most people get wrong: add the milk first, then the vanilla extract, then the ice cream. Why? Because the liquid helps the blender blades move freely and prevents the ice cream from getting stuck at the bottom. Pour in the milk and vanilla, then gently scoop in the ice cream. Don’t pack it down – just let it sit loosely.
Step 4: Blend on Low Speed – Patience Is Key
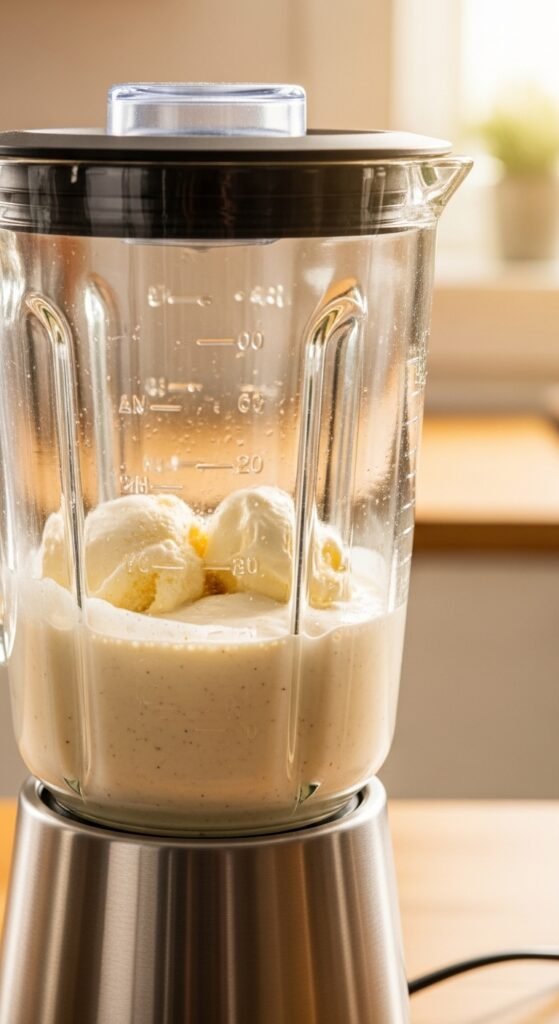
Start your blender on the lowest setting. Pulse a few times to break up the ice cream, then increase to medium‑low. Never blend on high speed for more than a few seconds – high speeds generate heat, which melts the ice cream and ruins the thick texture. You want to blend just until the mixture is smooth and uniform, with no ice cream chunks visible. This usually takes 20–30 seconds. If you see a vortex forming and the shake looks too thin, you’ve over‑blended. Stop immediately.
Pro tip: If your shake is too thick to pour, add a tablespoon of milk at a time and pulse briefly. If it’s too thin, add another scoop of ice cream and pulse.
Step 5: Taste and Adjust
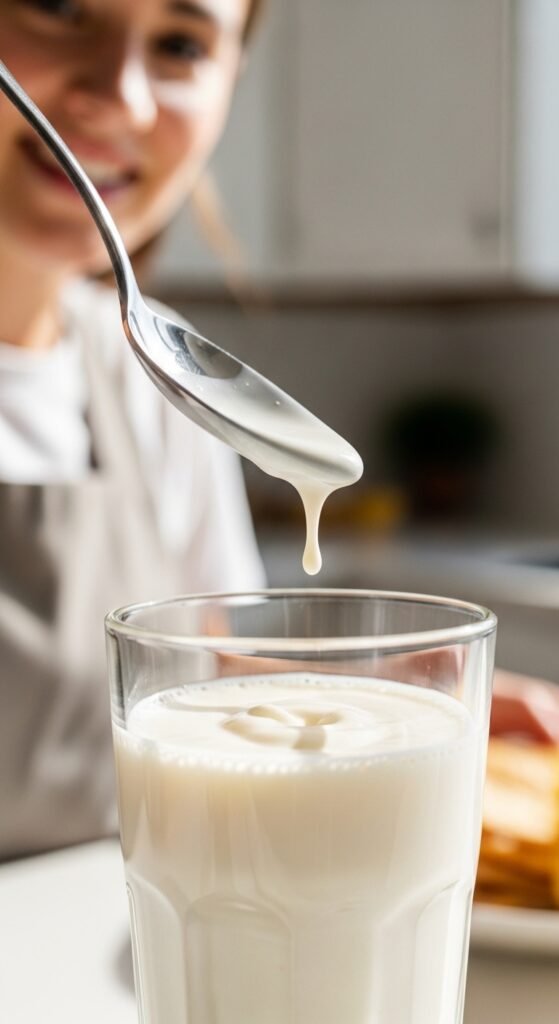
Dip a clean spoon into the shake and taste. Is the vanilla flavor prominent? Does it need a touch more sweetness? A tiny pinch of salt (yes, salt!) can actually enhance the vanilla and dairy notes. Add a pinch of fine sea salt and blend for two seconds. You’ll be amazed.
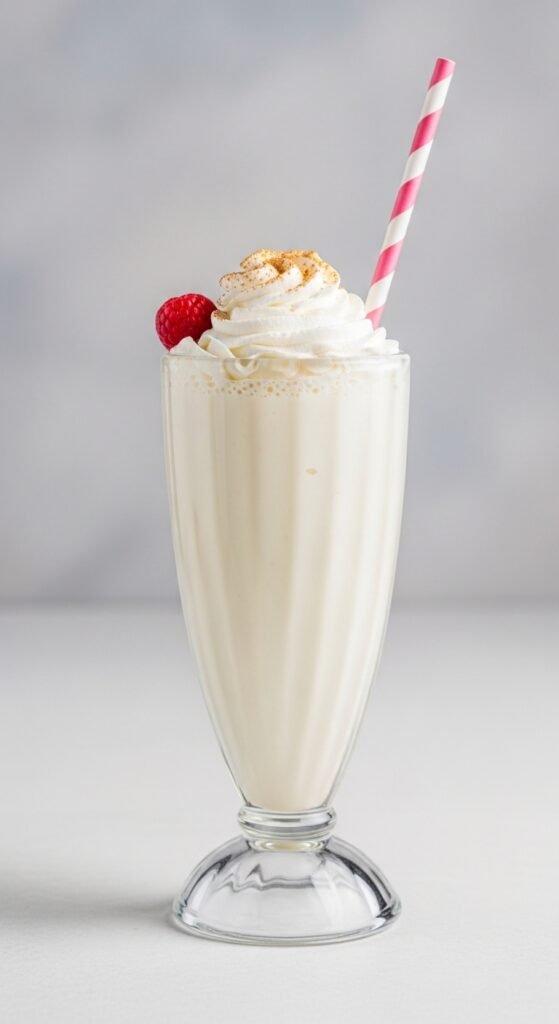
Step 6: Pour and Top with Love
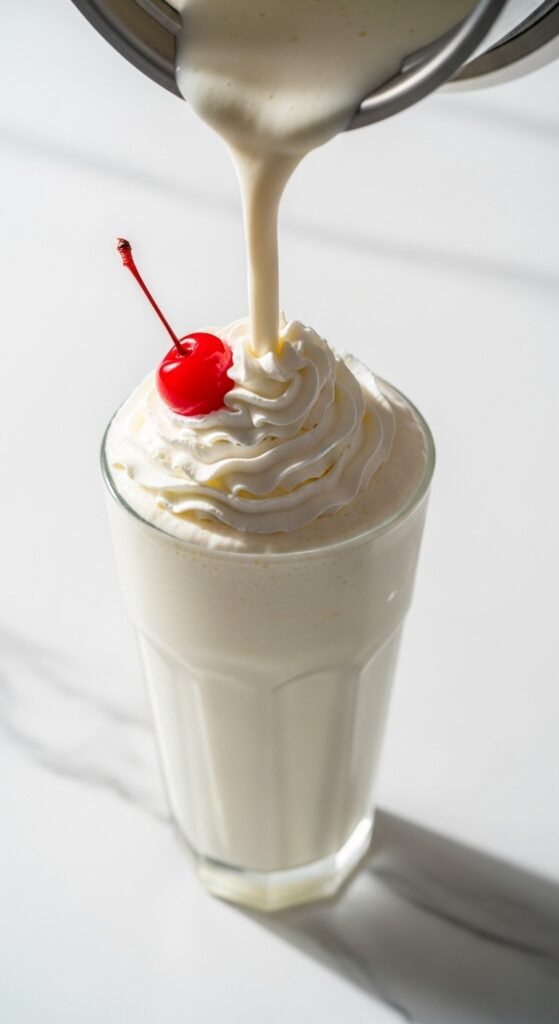
Remove your chilled glass from the freezer. Pour the shake directly into the glass – don’t scrape the blender too aggressively, or you’ll get melted residue. Use a spoon to help it flow if needed. Then, unleash your creativity:
- Spray a generous swirl of whipped cream on top.
- Add a cherry.
- Drizzle with vanilla syrup or caramel.
- Sprinkle crushed vanilla wafers or rainbow sprinkles.
Step 7: Serve Immediately and Savor
A vanilla milkshake waits for no one. Insert a wide straw, take a photo if you must (but don’t let it melt), and take that first, glorious sip. Let it linger on your tongue. Notice the creamy texture, the way the vanilla unfolds in layers, the cold sweetness that feels like a celebration. Now you’ve done it. You’ve made the perfect vanilla milkshake.
Common Mistakes (And How to Avoid Them)
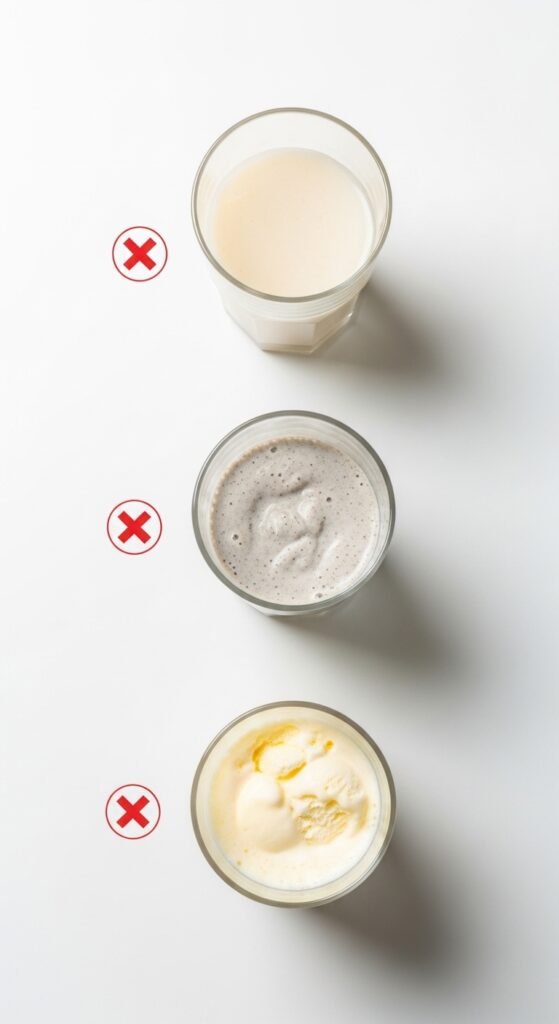
Over the years, I’ve seen (and made) plenty of milkshake mishaps. Here are the biggest pitfalls and how to steer clear:
| Mistake | Why It Happens | Fix |
|---|---|---|
| Watery shake | Too much milk, or ice cream was too soft | Use less milk; freeze your ice cream until firm but scoopable |
| Icy, grainy texture | Cheap ice cream with low butterfat or ice crystals | Buy premium ice cream; don’t let ice cream melt and refreeze |
| Weak vanilla flavor | Imitation vanilla or not enough extract | Use real vanilla bean paste or double the extract |
| Shake separates after sitting | Over‑blending or using skim milk | Blend less; use whole milk or half‑and‑half |
| Blender gets stuck | Too much ice cream, not enough liquid | Add milk first, then ice cream; use pulse setting |
Anecdote: I once made a vanilla milkshake for a dinner party, feeling very confident. I used a new “healthy” ice cream that was low‑fat and sweetened with monk fruit. I blended it, poured it into beautiful glasses, and presented them with a flourish. My guests took polite sips and then quietly set their glasses down. Later, my best friend pulled me aside and whispered, “That tasted like frozen chalk.” Lesson learned: never compromise on ice cream quality when you’re trying to impress. Save the low‑fat stuff for smoothies.
Beyond the Basic Shake: Exciting Variations on Vanilla Milkshake
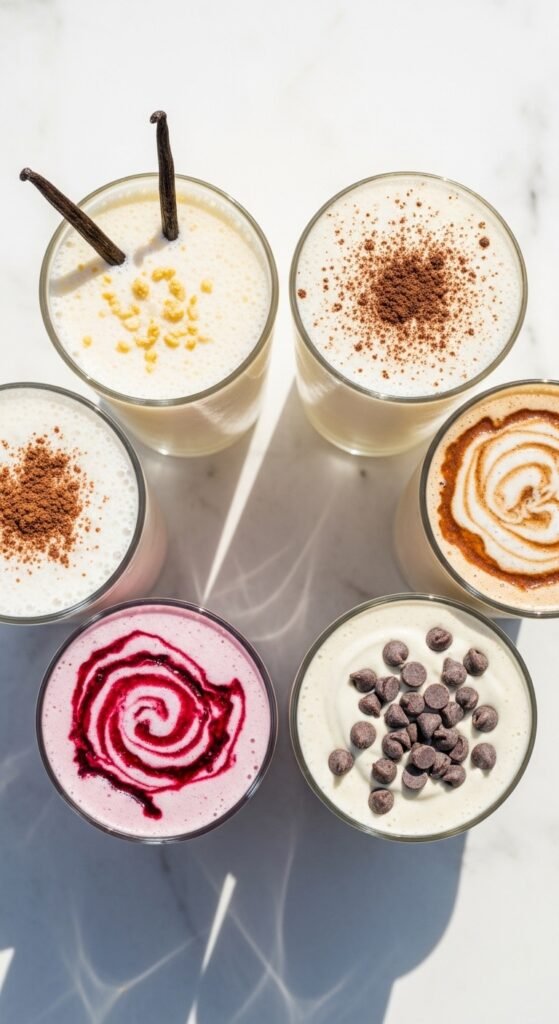
Once you’ve mastered the classic, use it as a springboard for endless creativity. The vanilla milkshake is the ultimate base because it pairs beautifully with almost any flavor. Here are some of my favorite riffs:
Vanilla Bean Milkshake
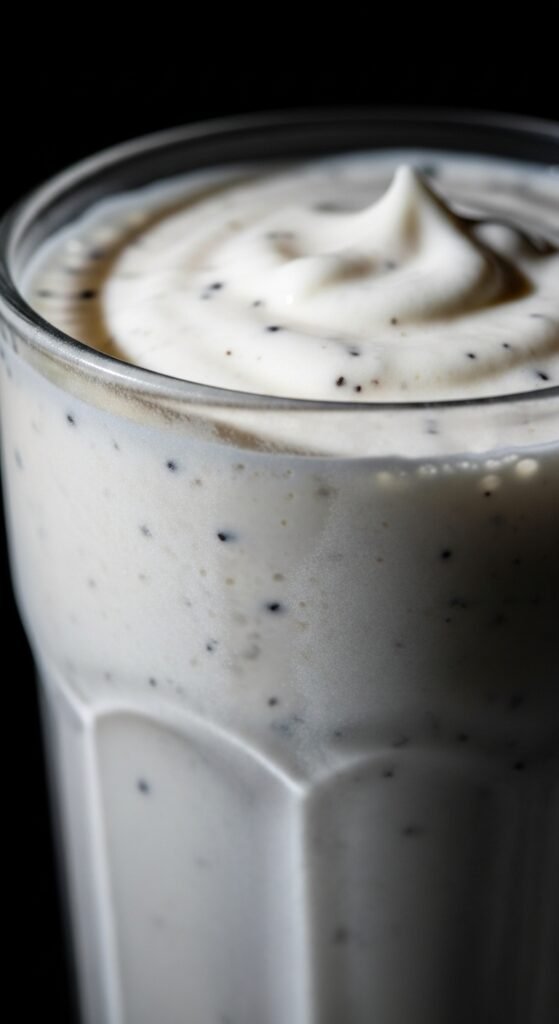
Use vanilla bean paste instead of extract, and add the seeds from half a fresh vanilla bean. The black specks look beautiful and taste intensely aromatic.
Vanilla Malted Milkshake
Add 2 tablespoons of malted milk powder (like Carnation or Horlick’s) before blending. The malty, toasty flavor adds a nostalgic diner taste.
Vanilla Coffee Milkshake
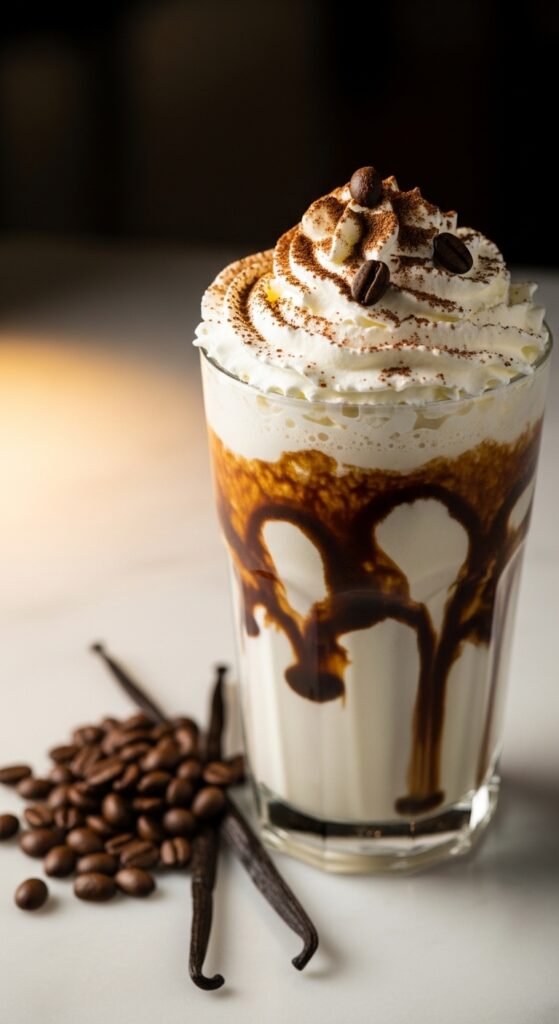
Add 1 shot of cooled espresso or 2 tablespoons of instant coffee granules dissolved in a little warm water. It’s like an affogato in shake form – perfect for afternoon slumps.
Vanilla Berry Swirl

After blending the base, gently fold in 1/4 cup of strawberry, raspberry, or blueberry jam. Don’t blend it completely – you want ribbons of fruit.
Vanilla Chocolate Chip

Blend in 1/4 cup of mini chocolate chips after the shake is smooth. The chips stay crunchy and provide little bursts of chocolate.
Vegan Vanilla Milkshake
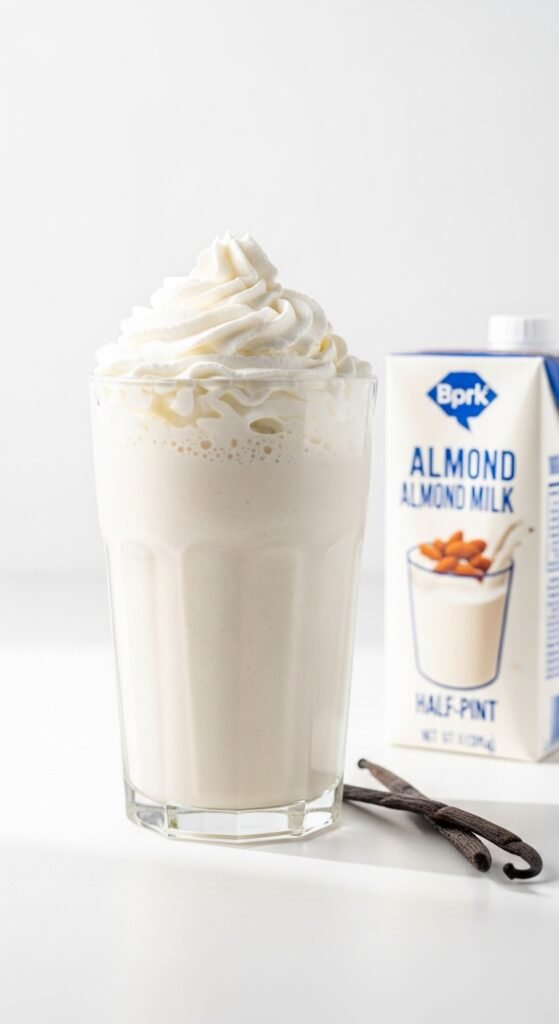
Use oat milk and a high‑quality vegan vanilla ice cream (like Oatly or So Delicious). Add 1/4 cup of raw cashews soaked in hot water for extra creaminess. It won’t be exactly the same, but it can be delicious in its own right.
Why You Should Buy Premium Vanilla Milkshake Products (And What to Look For)
At this point, you might be thinking, “Okay, I’m convinced that homemade is great, but what if I want to buy a vanilla milkshake from a store or a mix?” That’s a fair question. Sometimes you don’t have the time or the ingredients on hand, and you just want to grab something reliable. Let me guide you toward smart purchases.
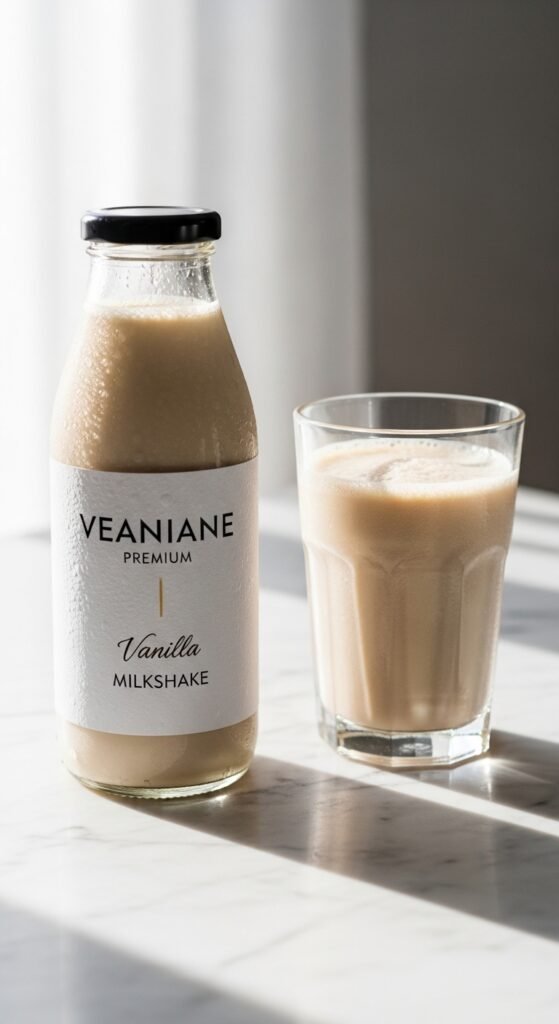
When Buying a Pre‑Made Vanilla Milkshake (Bottled or Carton)
Many grocery stores sell bottled milkshakes in the dairy aisle. Be careful – most are filled with thickeners, artificial flavors, and high‑fructose corn syrup. They taste nothing like the real thing. However, a few brands do it right:
- Fairlife Vanilla Milkshake: Higher in protein, lower in sugar, uses real vanilla. Not as decadent as homemade but acceptable.
- Organic Valley Vanilla Milkshake: Uses organic milk and cream, real vanilla. Good for kids.
- Local dairies: Check your region’s creameries. Many sell glass‑bottled milkshakes that are phenomenal.
My advice: Read the ingredient label. If you see “natural flavors” without specifying vanilla, or if sugar is the first ingredient, put it back. Look for milk, cream, sugar, vanilla extract – that’s it.
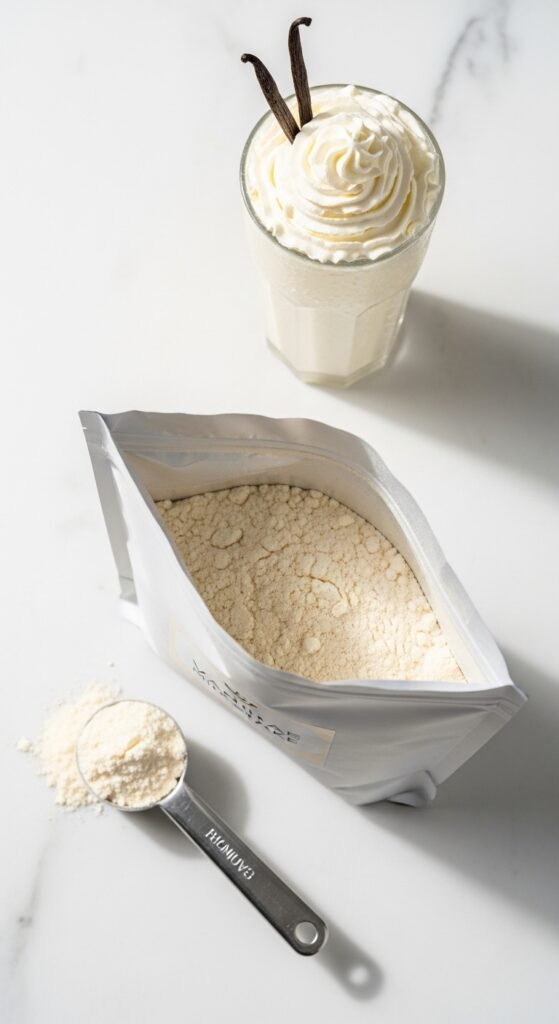
When Buying Vanilla Milkshake Mix (Powdered)
Powdered mixes are convenient for camping trips, offices, or dorm rooms. You just add milk and shake or blend. But quality varies wildly. Here’s what to look for:
- Real vanilla powder (not vanillin)
- Cane sugar instead of artificial sweeteners
- Milk powder or buttermilk powder for creaminess
- Avoid: Maltodextrin, hydrogenated oils, and long chemical names.
Top picks:
- Torani Vanilla Milkshake Powder – widely available, decent flavor.
- Hershey’s Vanilla Shake Mix – nostalgic but a little artificial.
- King Arthur Flour Vanilla Milkshake Mix – cleaner ingredients, excellent for baking too.
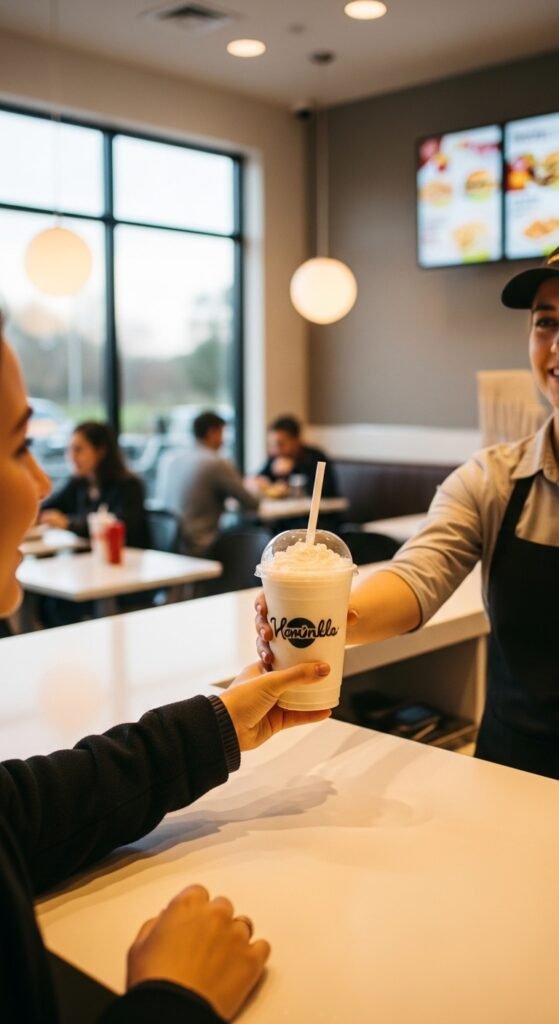
When Ordering a Vanilla Milkshake at a Restaurant or Fast‑Food Chain
Let’s be honest – most fast‑food milkshakes are disappointing. They’re often made from soft‑serve mix that’s more air than cream, and the “vanilla” flavor is usually synthetic. That said, there are exceptions:
- Chick‑fil‑A Vanilla Milkshake: Made with real ice cream and hand‑spun. Pretty good for fast food.
- Shake Shack Vanilla Shake: Uses custard‑style ice cream; rich and thick.
- Five Guys Vanilla Milkshake: Customizable, real ice cream, but pricey.
- Local ice cream parlors: Always your best bet. Look for places that make their own ice cream or use a premium brand like Graeter’s or Tillamook.
My recommendation: Instead of ordering a generic vanilla milkshake from a chain, save your money and make one at home. Or visit a small‑business soda fountain – they still exist in some towns – and experience a shake made with real vanilla syrup and scooped ice cream. It’s worth the drive.
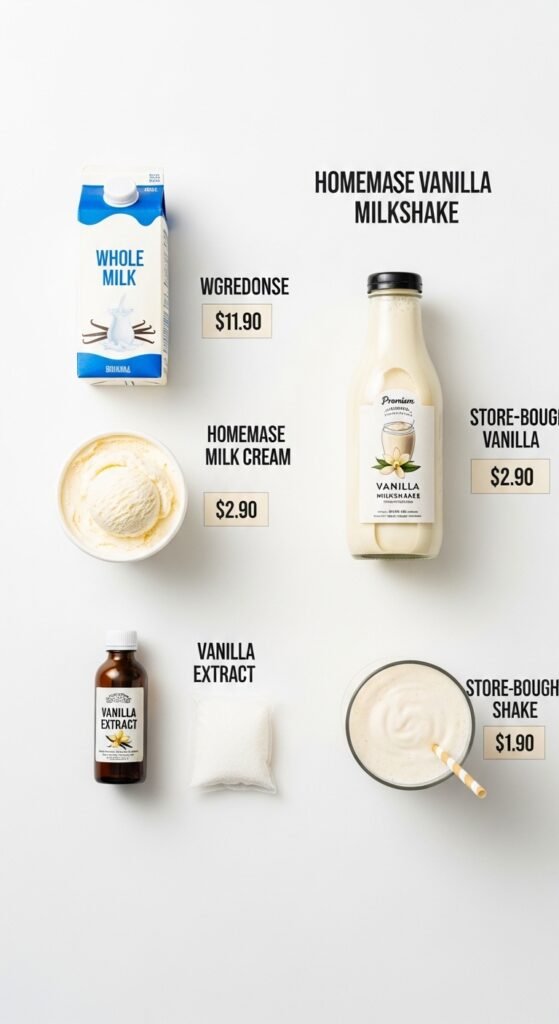
The Economics of Vanilla Milkshake: Why Quality Pays Off
Some of you might be thinking, “But a gallon of cheap vanilla ice cream is only $4, and a bottle of imitation vanilla is $2. Why should I spend $8 on a pint of premium ice cream and $15 on real vanilla extract?” I get it. Budgets are real. But let me break down the cost‑per‑joy ratio.
A single vanilla milkshake from a diner or ice cream shop typically costs $5 to $8. For that price, you get a medium‑sized shake made with decent (but rarely exceptional) ingredients. If you make a premium vanilla milkshake at home:
- Premium vanilla ice cream (1 pint, $6–8) – makes 2 large shakes.
- Whole milk (1 cup, about $0.20)
- Real vanilla extract ($0.50 per shake)
- Whipped cream & cherry ($0.50)
Total per shake: around $3.50 to $4.50. That’s cheaper than a diner shake, and vastly superior in taste. The initial investment in a good bottle of vanilla extract might feel steep, but that bottle will last you through dozens of shakes, cookies, and cakes. Similarly, a pint of premium ice cream might cost twice as much as a bargain tub, but you’ll use less of it because the flavor is so much more intense. You won’t need to add extra sugar or flavorings.
More importantly: The experience matters. A mediocre vanilla milkshake is forgettable. You drink it, shrug, and move on. A great one becomes a memory. It’s the shake you’ll crave on a bad day. It’s the shake your kids will remember making with you. That’s worth the extra dollar or two.
Frequently Asked Questions About Vanilla Milkshake
Can I make a vanilla milkshake without a blender?
Absolutely. Soften your ice cream for 10–15 minutes, then put it in a large bowl with the milk and vanilla extract. Mash vigorously with a fork or a potato masher until combined. Then whisk like crazy. It won’t be as smooth as a blended shake, but it’s a fun arm workout and still tastes great.
How do I make a thick vanilla milkshake without it being too icy?
Use a higher ratio of ice cream to milk (4:1 instead of 3:1). Also, use ice cream that has a denser texture – look for “premium” or “French vanilla” styles. And never add ice cubes – that just waters it down and makes it icy.
Is there a low‑sugar or keto vanilla milkshake?
Yes. Use keto vanilla ice cream (like Rebel or Enlightened), unsweetened almond milk, a sugar‑free vanilla syrup (like Torani), and a pinch of xanthan gum for thickness. It won’t be exactly like the real thing, but it can satisfy a craving.
Why does my vanilla milkshake taste like nothing?
Two likely culprits: (1) Your ice cream has fake vanilla flavor, which is weak and flat. (2) You didn’t add enough vanilla extract. Try doubling the extract next time, or switch to vanilla bean paste.
Can I use vanilla yogurt instead of ice cream?
That would be a vanilla smoothie, not a milkshake. It will be tangy and thinner. If you’re looking for a healthier option, go for it – but don’t expect the same creamy, indulgent experience.
A Final Anecdote: The Vanilla Milkshake That Saved a Birthday
Last year, my daughter turned ten. She had her heart set on a big party with a magician and a bounce house, but a week before the date, a storm knocked out our power for two days. The magician canceled, the bounce house company wouldn’t refund us, and my daughter was heartbroken. I watched her sit on the couch, chin in her hands, looking like the world had ended.
I went to the kitchen and realized we had no way to cook anything – but we did have a half‑gallon of vanilla ice cream in the freezer (still cold, thanks to the ice packs I’d thrown in), a carton of milk, and a bottle of real vanilla extract. I lit a few candles, grabbed a hand‑crank blender (yes, the old‑fashioned kind), and called her over. “We’re going to make milkshakes by hand,” I said. She looked at me like I was crazy.
For the next ten minutes, we took turns cranking that blender. It was hard work – our arms ached – but slowly, the mixture turned into a thick, glorious vanilla milkshake. We poured it into mismatched cups, found some stale cookies to crumble on top, and sat on the floor by candlelight. She took a sip, then another, and then she laughed. “This is the best birthday ever,” she said. And she meant it.
That’s the thing about a vanilla milkshake. It doesn’t need electricity, perfection, or a big budget. It just needs good ingredients and a little bit of love. And when you have those two things, you can turn any ordinary moment into something special.
Conclusion: Your Invitation to the Perfect Vanilla Milkshake
We’ve traveled a long road together – from my grandfather’s diner to my daughter’s birthday, from the science of vanilla to the art of blending. I’ve shared my mistakes, my secrets, and my most heartfelt recommendations. Now, it’s your turn.
I want you to do something today. Go to your local grocery store or ice cream parlor and buy the best vanilla ice cream you can find. Not the cheapest tub, not the “frozen dessert” – the real thing. While you’re there, pick up a bottle of pure vanilla extract or vanilla bean paste. Spend the extra few dollars. Trust me.
Then, follow my step‑by‑step guide. Chill your glass, measure your milk, blend with patience, and pour that beautiful vanilla milkshake into a glass. Top it with whipped cream and a cherry if you like – or don’t. Drink it slowly. Let it take you back to a happy memory, or let it create a new one.
And if you’re feeling generous, make one for someone else. A partner, a child, a friend, or a neighbor who could use a little sweetness. Hand it to them with a smile. Watch their face light up. That’s the real magic of the vanilla milkshake – it’s a simple, affordable, and delicious way to say, “I care about you.”
So go ahead. Buy the ingredients with confidence. You are not wasting money; you are investing in joy. And in a world that often feels complicated and rushed, a perfect vanilla milkshake is a reminder that the best things in life are still wonderfully, beautifully simple.