Let me start with a quick story. Last summer, my friend Sarah finally decided to renovate her rental apartment’s kitchen. She was on a tight budget, but she desperately wanted to cover those ugly, stained drywall patches behind her stove. After weeks of scrolling through expensive tile options, she almost gave up. Then, on a whim, she bought a few sheets of bead board backsplash from a local hardware store. Within one weekend, her dull kitchen looked like a cozy farmhouse café. She spent less than $80. That, right there, is the magic we are about to explore.
You see, a bead board backsplash is not just another trend. It is a practical, beautiful, and surprisingly durable solution for anyone who wants to upgrade their kitchen without breaking the bank or hiring a professional. Whether you love the classic cottage look or prefer a sleek modern farmhouse vibe, bead board backsplash kitchen ideas can fit your style perfectly.
In this detailed guide, we will walk through 19 unique ideas, a step-by-step installation guide, and powerful reasons why you should confidently choose bead board backsplash for your next project. Furthermore, we will use real-life examples and simple language to ensure you feel inspired and ready to act. So, grab a cup of coffee, and let us dive in.
Why Choose a Bead Board Backsplash? (The Practical Benefits)
Before we explore the 19 design ideas, let us quickly understand why so many homeowners are switching to bead board backsplash instead of ceramic tile, glass, or stone.
First of all, bead board backsplash is incredibly lightweight. Unlike heavy tiles, you can carry several sheets by yourself. Secondly, it is cost-effective. On average, a bead board backsplash costs 60 to 70 percent less than subway tile. Thirdly, installation requires only basic tools: a saw, measuring tape, adhesive, and finishing nails. Consequently, even a beginner DIYer can complete the job in a single afternoon.
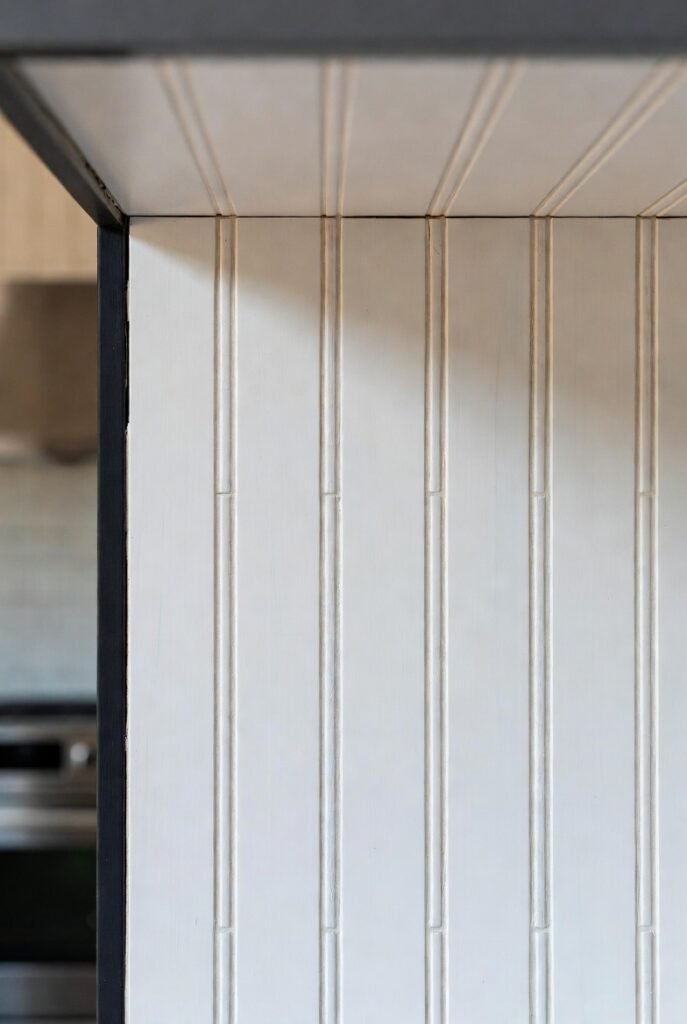
Moreover, bead board backsplash adds texture and warmth. Kitchens with all-white tiles can sometimes feel cold and clinical. However, the subtle vertical grooves of beadboard create shadow lines that make the space feel inviting. Lastly, you can paint it any color. That means if you get bored with white next year, you can simply roll on a new shade. No demolition needed.
Now, let us get to the exciting part: the 19 brilliant bead board backsplash kitchen ideas.
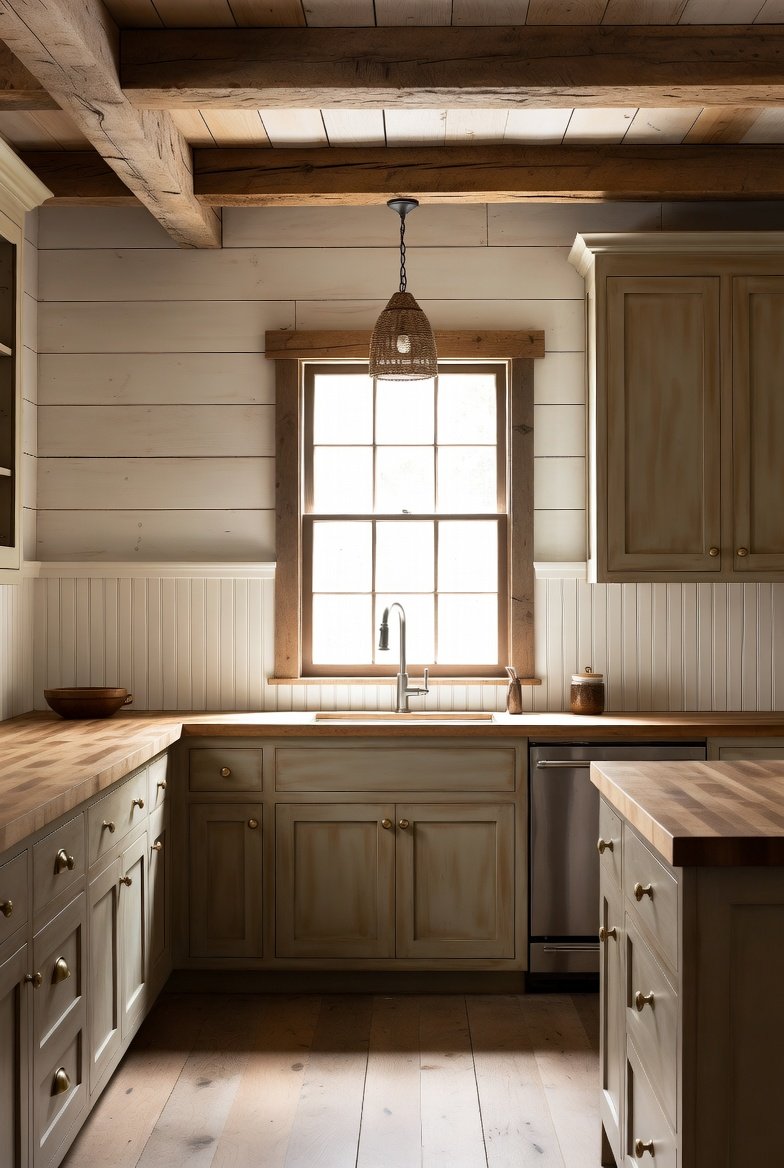
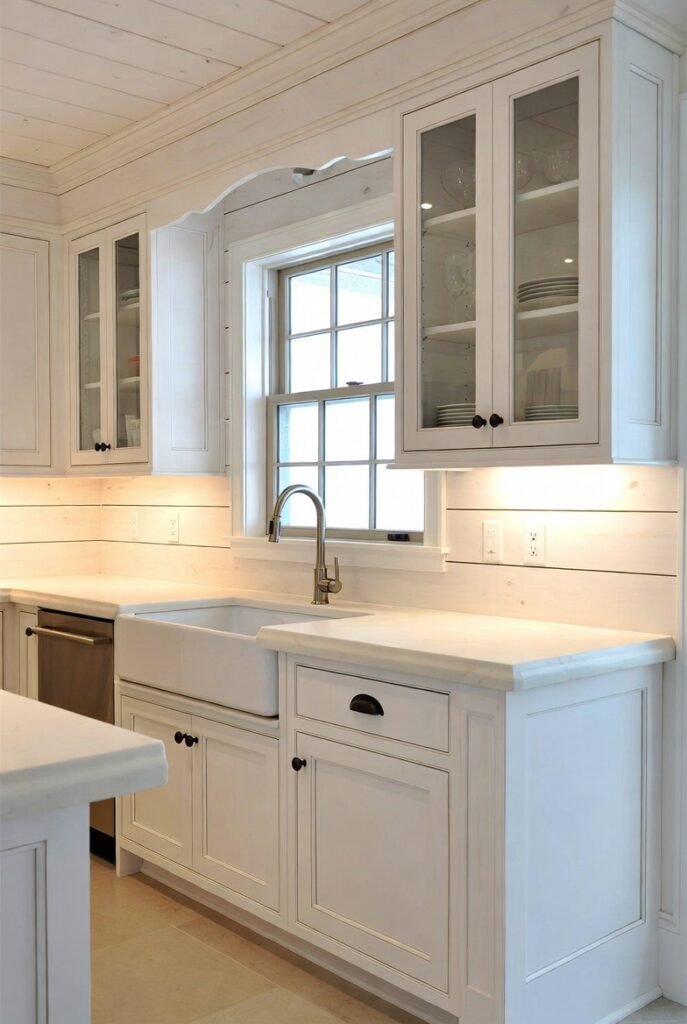
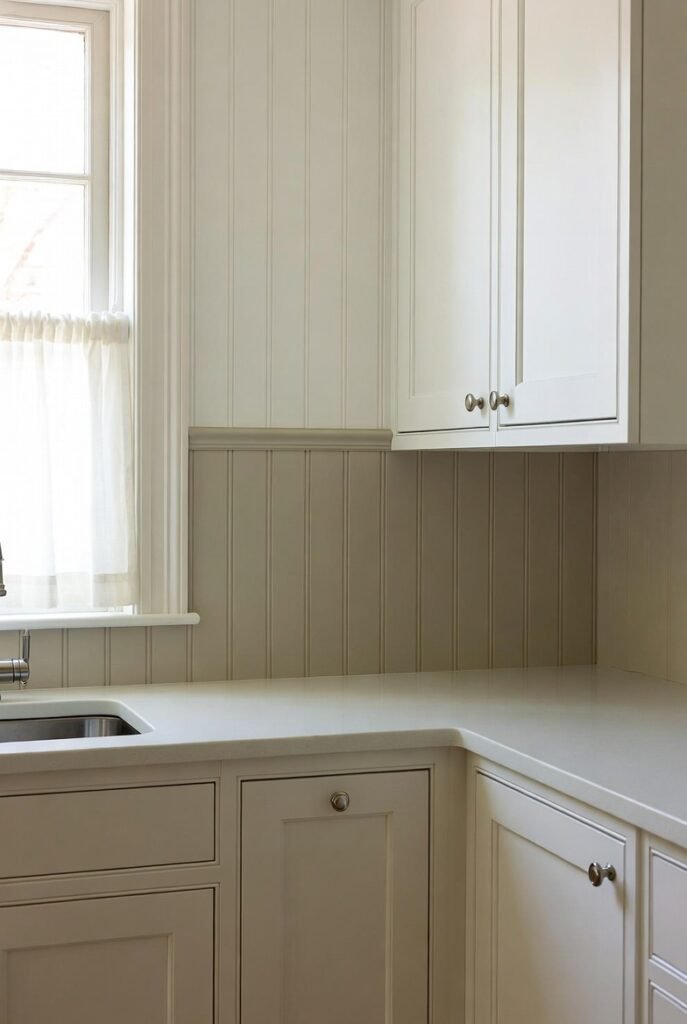
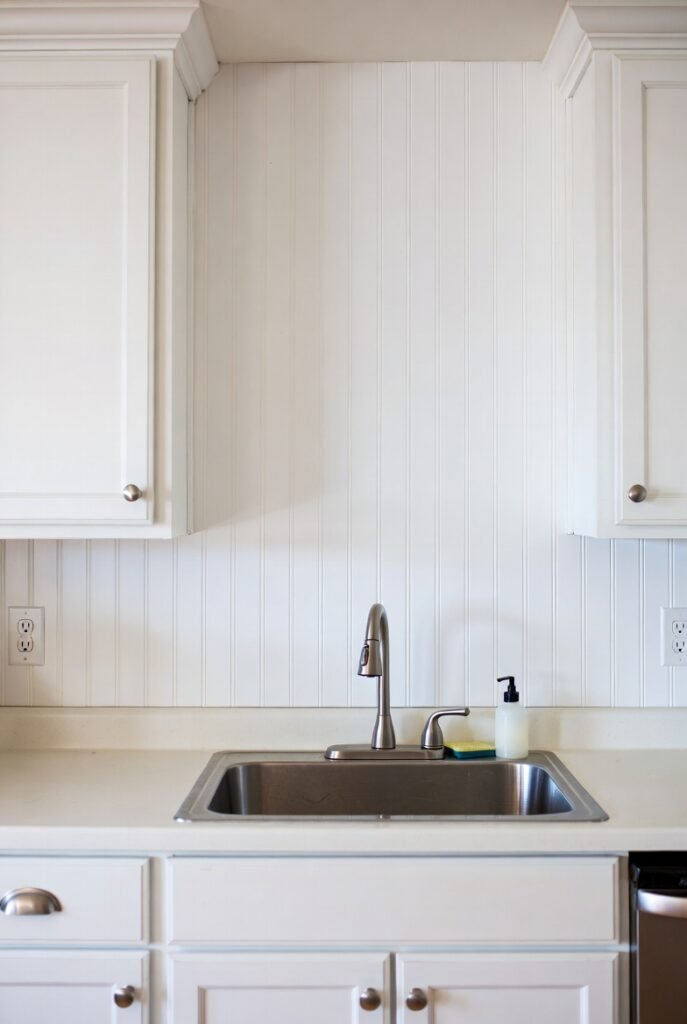
1. Classic White Bead Board Backsplash for a Farmhouse Feel
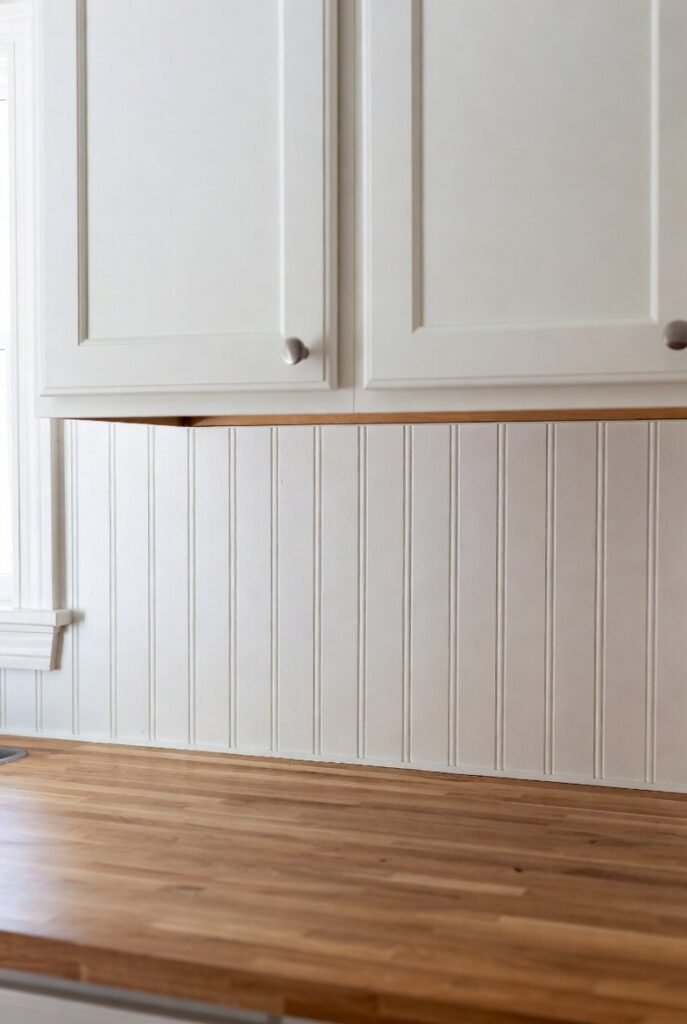
You can never go wrong with white. In fact, the classic white bead board backsplash is the most popular choice for a reason. It reflects light, makes small kitchens appear larger, and pairs beautifully with open shelving.
Anecdote time: My neighbor, Lisa, has a tiny galley kitchen. She installed a white bead board backsplash between her counter and upper cabinets. Then, she added a few rustic floating shelves. Now, her kitchen looks like it belongs in a Joanna Gaines magazine. She told me, “I finally do not hate cooking dinner.”
Pro tip: Use semi-gloss or high-gloss paint on your bead board backsplash. This makes wiping off grease and sauce splatters effortless.
2. Bead Board Backsplash with a Chair Rail Molding
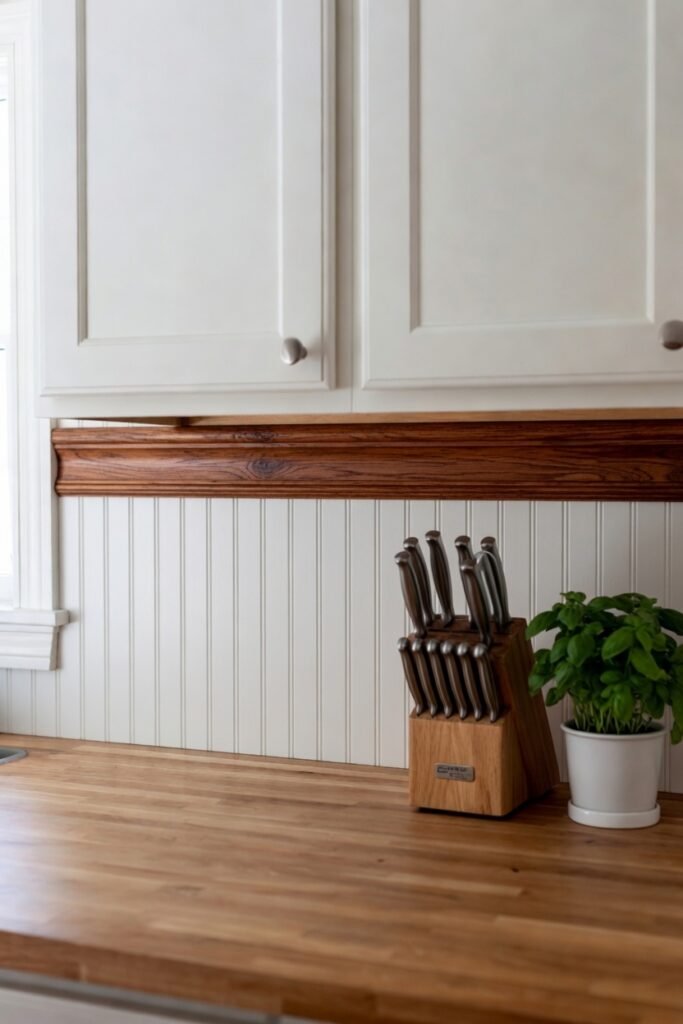
To elevate the look, add a chair rail molding at the top edge of your bead board backsplash. This creates a clean, finished transition to the drywall above. Additionally, the chair rail protects the beadboard from chipping when you lean pots or pans against it.
Step-by-step guide for adding chair rail:
Read Also: What is the 19 Papasan Chair? The Ultimate Guide to the Compact, Cozy Nest Chair
- Measure the length of your countertop.
- Cut your beadboard panels to fit between the counter and the bottom of your wall cabinets (usually 18 inches high).
- Install the beadboard using adhesive and nails.
- Cut a piece of chair rail molding to the same length.
- Nail the chair rail on top of the beadboard, flush with the upper edge.
- Caulk the seams and paint everything together.
3. High Gloss Bead Board Backsplash for Easy Cleaning
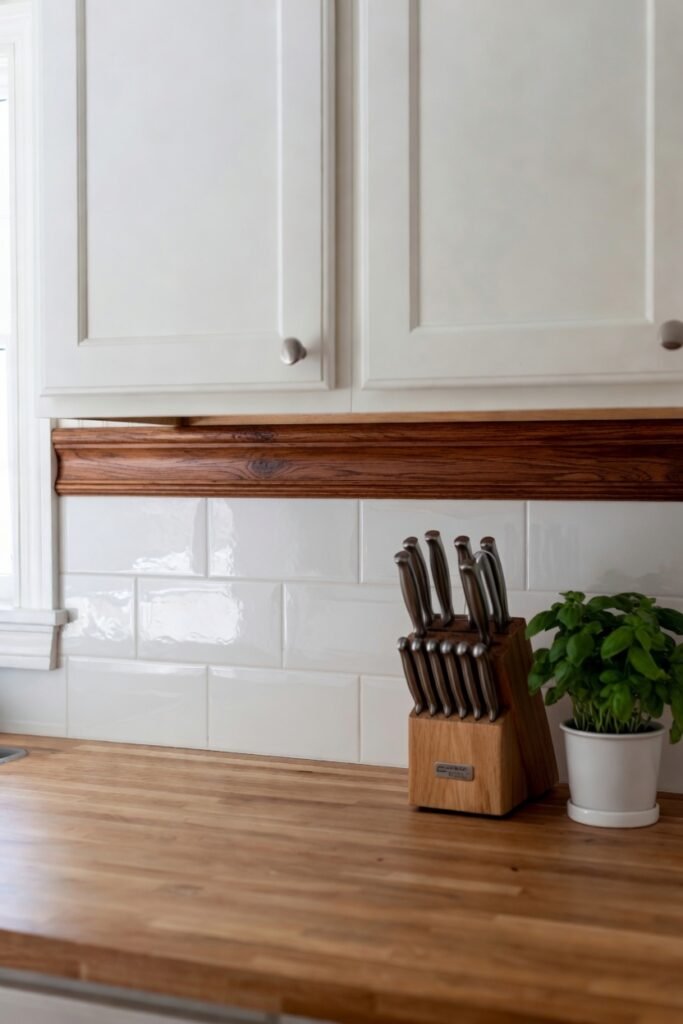
One common concern about bead board backsplash is cleaning. However, if you use a high-gloss enamel paint, the surface becomes almost as wipeable as tile. The gloss creates a non-porous layer, so tomato sauce and coffee stains will not soak into the wood grain.
For busy families, a high-gloss bead board backsplash is a game-changer. Just use a damp sponge and mild soap. That is it.
4. Bead Board Backsplash Behind Open Shelving
Imagine this: open wooden shelves holding white dishes, with a bead board backsplash running behind them. The vertical lines of the beadboard draw your eye upward, making the shelf display look intentional and curated.
This bead board backsplash behind open shelving idea works best when you match the beadboard color to the shelf brackets. For instance, paint both in matte black for a dramatic contrast.
5. Two-Tone Bead Board Backsplash (Upper and Lower)
Why settle for one color? A two-tone bead board backsplash can define different zones in your kitchen. For example, paint the lower half (near the counter) a deep navy or charcoal, and the upper half (near the cabinets) a soft cream. Use a small piece of trim to separate the two colors.
This technique is especially effective in large kitchens with long stretches of wall. Moreover, the darker lower section hides fingerprints and spills better.
6. Bead Board Backsplash with Shiplap Accents

People often confuse beadboard and shiplap. Beadboard has narrow vertical grooves, while shiplap has horizontal overlaps. But you can combine them. Install bead board backsplash on the main wall, and add a shiplap accent strip behind the range hood. This mixed-texture look is trendy but timeless.
7. Colored Bead Board Backsplash (Sage Green, Navy, or Charcoal)
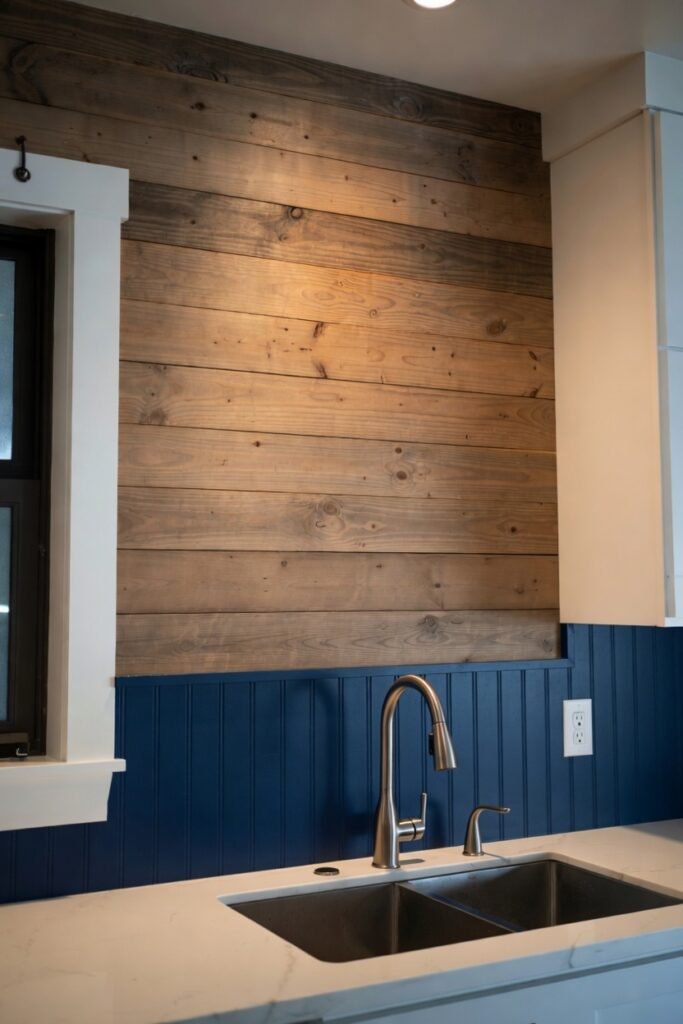
Who says beadboard has to be white? A colored bead board backsplash can add serious personality. Sage green beadboard looks stunning with brass fixtures. Navy blue beadboard creates a dramatic, moody kitchen. Charcoal gray feels modern and sophisticated.
Anecdote: My cousin Mark painted his bead board backsplash in a deep forest green. He paired it with butcher block counters and matte black hardware. Everyone who visits asks if he hired a designer. He did not. He just used a $20 can of premium paint.
8. Bead Board Backsplash on a Diagonal (Herringbone Pattern)
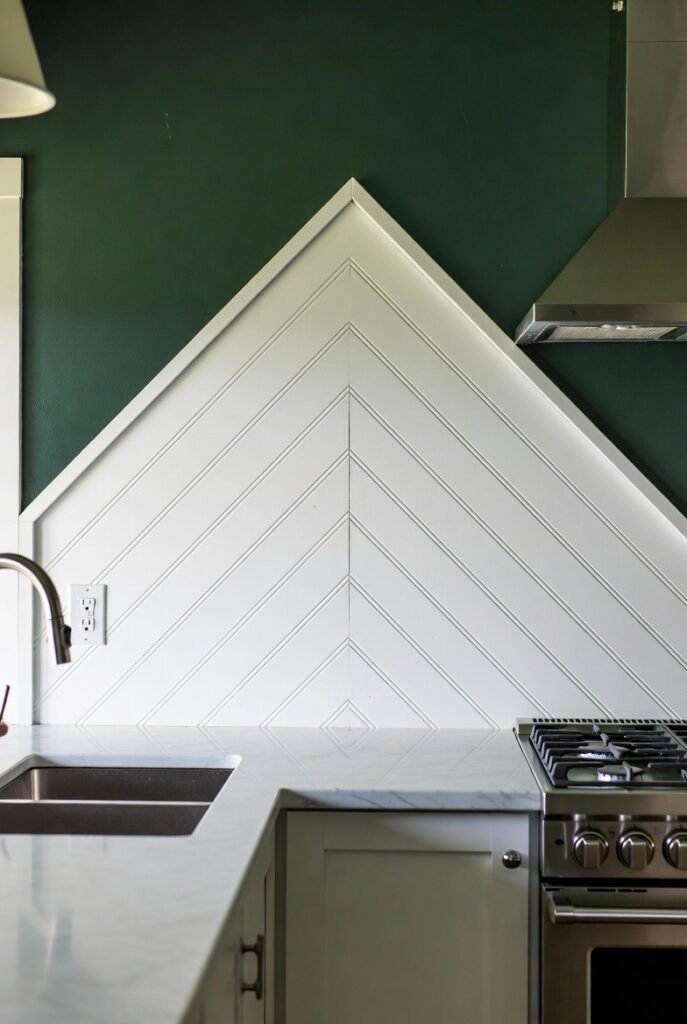
For the adventurous DIYer, install bead board backsplash panels diagonally. This creates a herringbone-like effect that mimics expensive parquet floors. Although this requires more cutting and waste, the visual impact is unforgettable.
Important: Use a circular saw with a fine-tooth blade to cut diagonal edges. Also, practice on a scrap piece first.
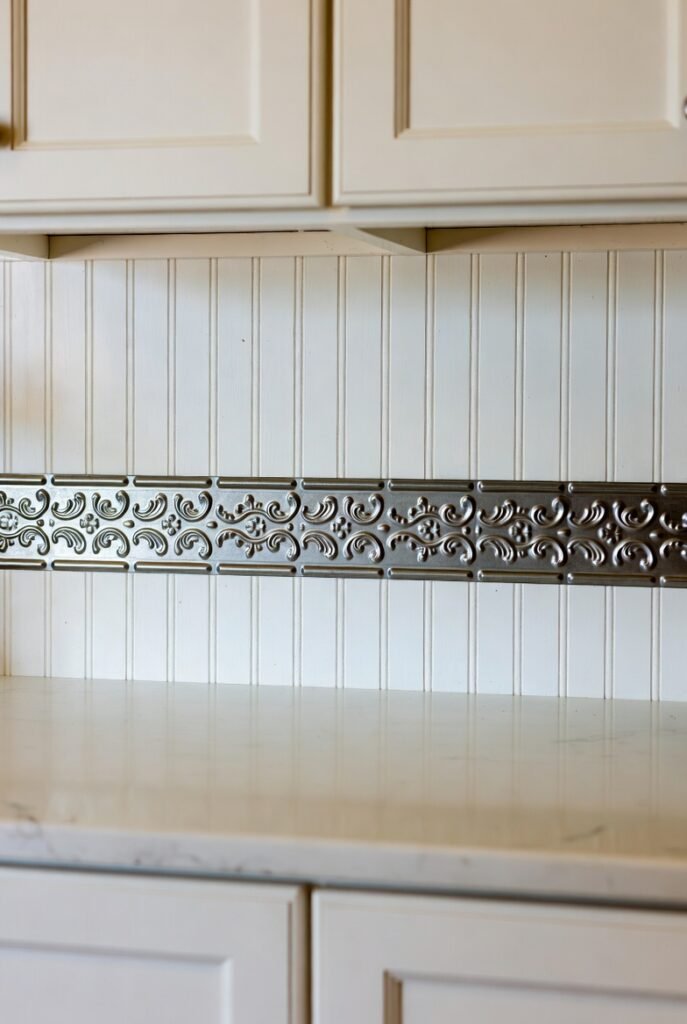
9. Bead Board Backsplash with Faux Tin Ceiling Trim
Add a vintage touch by topping your bead board backsplash with a strip of faux tin ceiling trim. The metallic sheen against the painted wood looks like something from an old Parisian bakery. You can find peel-and-stick faux tin tiles at most craft stores. Cut them into 4-inch strips and attach them above the beadboard.
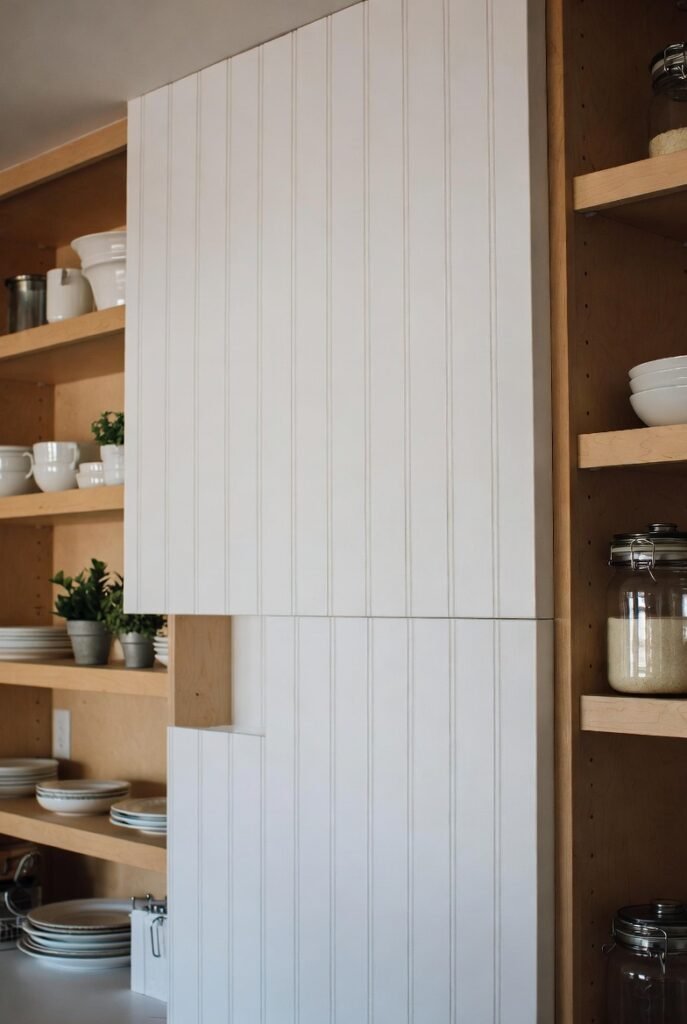
10. Bead Board Backsplash for the Entire Wall (Floor to Ceiling)
Why limit the bead board backsplash to just the space between the counter and cabinets? Take it all the way to the ceiling. This creates a cozy, enclosed feel similar to a butler’s pantry. Floor-to-ceiling beadboard also makes a small kitchen feel taller because the eye follows the continuous vertical lines.
Step-by-step for full-wall installation:
- Remove outlet covers and switch plates.
- Mark stud locations on the wall.
- Apply construction adhesive to the back of the first beadboard panel.
- Press it against the wall, aligning with the floor.
- Nail into studs every 12 inches.
- Continue with adjacent panels, matching the tongue-and-groove edges.
- Cut holes for outlets using a jigsaw.
- Install corner trim and baseboard.
- Caulk, fill nail holes, and paint.
11. Bead Board Backsplash with a Contrasting Grout Line (Yes, Grout!)

Here is a clever trick: install individual beadboard planks (not full sheets) and leave a 1/8-inch gap between each plank. Then, fill those gaps with white or dark grout. The result looks like a hybrid between tile and wood. A bead board backsplash with grout lines offers the texture of beadboard and the durability of tiled joints.
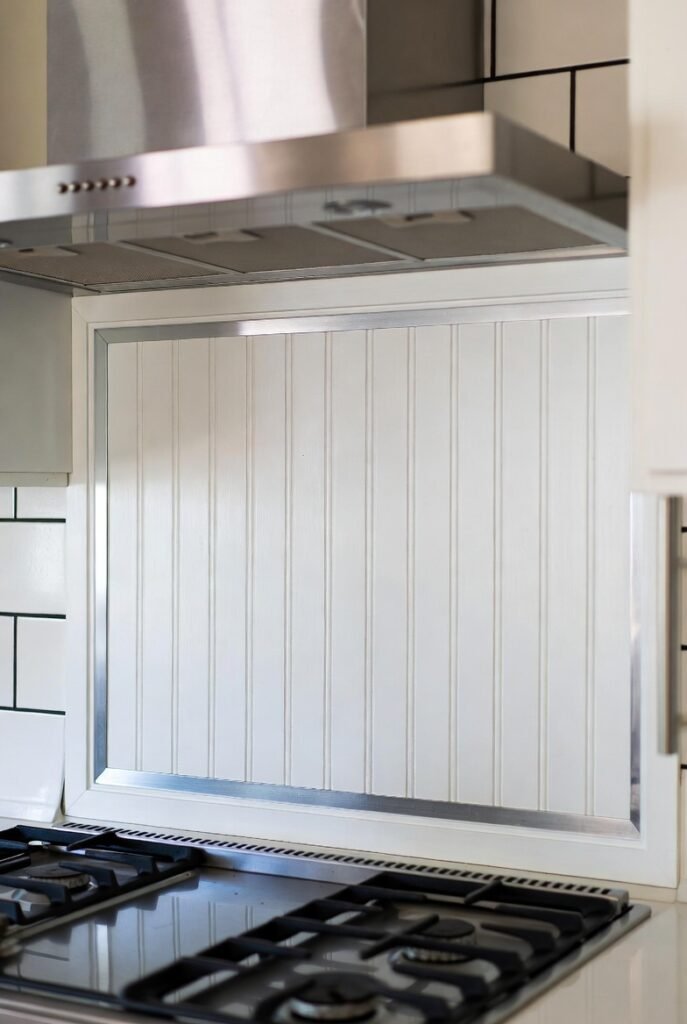
12. Bead Board Backsplash Behind the Range with a Metal Strip
The area behind your stove gets the most grease and heat. To protect your bead board backsplash, install a thin stainless steel or copper strip directly behind the burners. This splash guard is easy to wipe down, and it adds an industrial accent. You can buy pre-cut metal backsplash strips at home improvement stores.
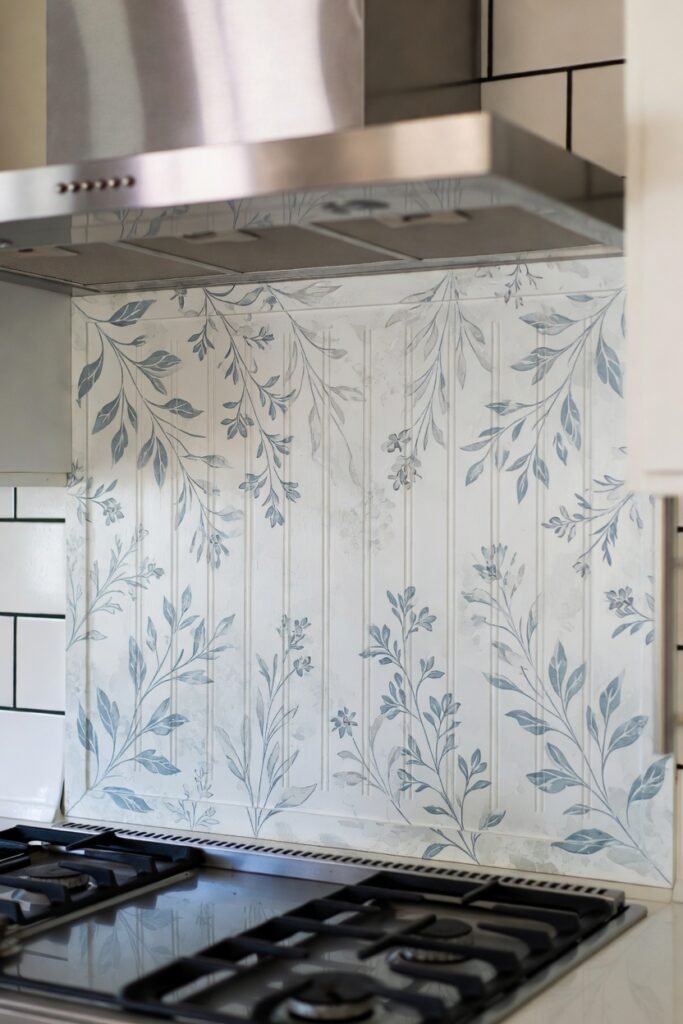
13. Bead Board Backsplash with Stenciled Patterns
For a boho or eclectic kitchen, paint a stenciled pattern over your bead board backsplash. Use a Moroccan tile stencil or a simple floral design. Because beadboard has grooves, use a foam roller and dab the paint rather than rolling aggressively. This prevents paint from pooling in the grooves.
A stenciled bead board backsplash gives you the look of expensive encaustic tiles for a fraction of the cost.
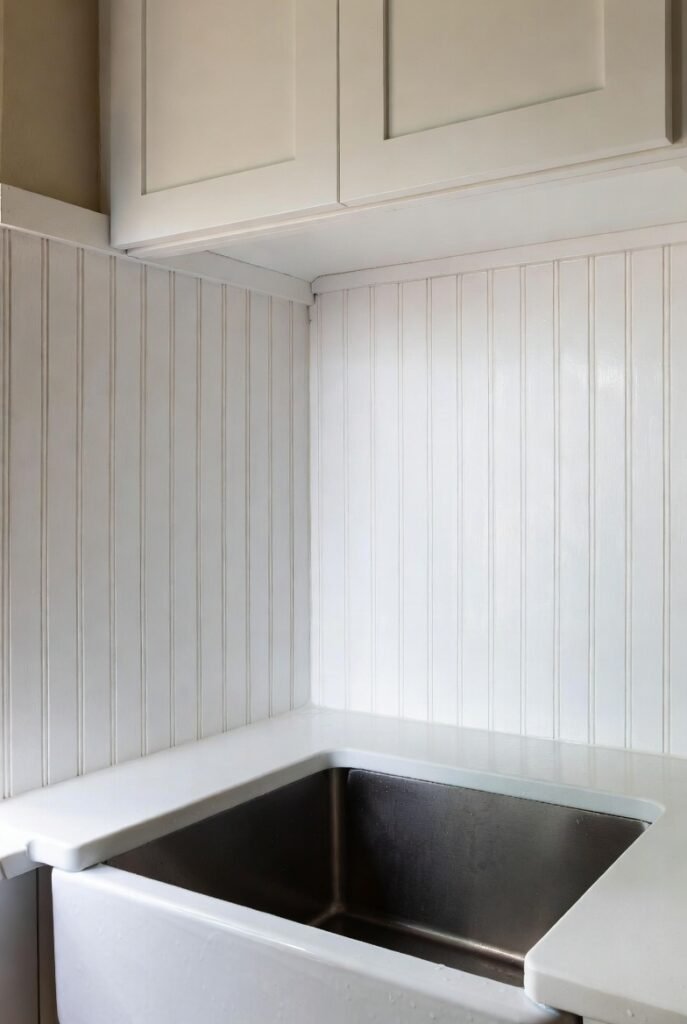
14. Bead Board Backsplash as a Waterproof Wainscoting (For Sink Areas)
Many people worry about water damage near the sink. However, modern bead board backsplash materials include moisture-resistant MDF and even PVC beadboard. PVC beadboard is 100 percent waterproof, making it perfect for behind the faucet. It never warps, rots, or peels.
Recommendation: If you have a busy family that splashes water everywhere, choose PVC bead board backsplash. It costs a bit more than wood, but it lasts forever.
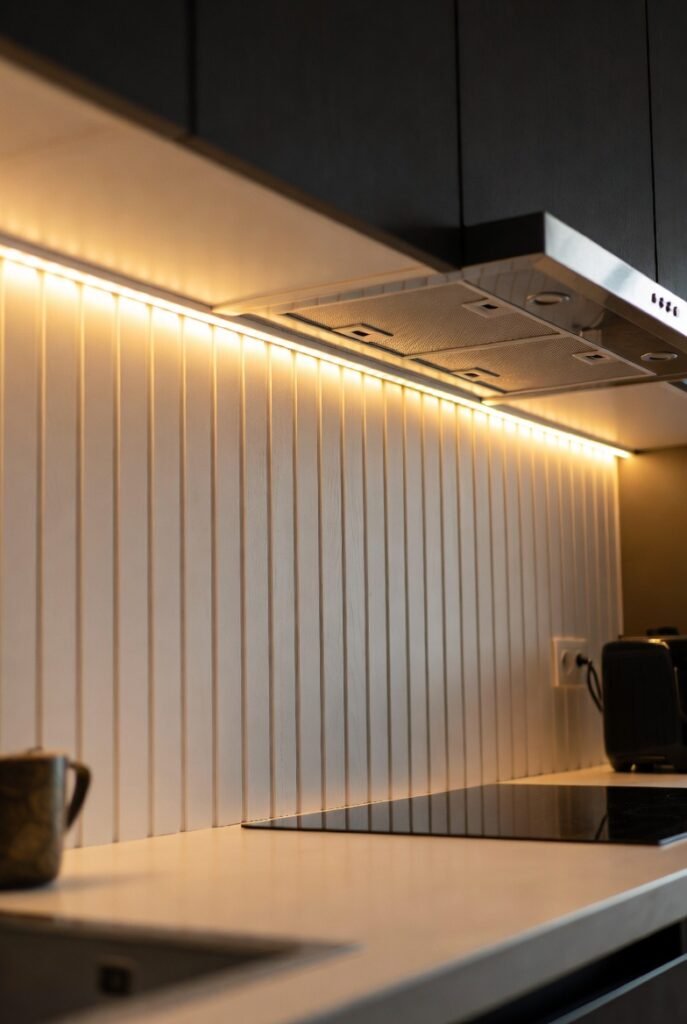
15. Bead Board Backsplash with LED Strip Lighting
Add under-cabinet LED lighting to highlight the texture of your bead board backsplash. The light casts tiny shadows in each groove, creating a stunning 3D effect. Warm white LEDs (2700K) work best because they enhance the cozy feel. Cool white LEDs can make the beadboard look flat.
Step-by-step for adding LED strips:
- Clean the underside of your upper cabinets.
- Measure and cut LED strip lights to size.
- Peel the adhesive backing and stick the strip near the front edge of the cabinet.
- Connect the strips to a driver and a dimmer switch.
- Turn on the lights and admire how your bead board backsplash glows.
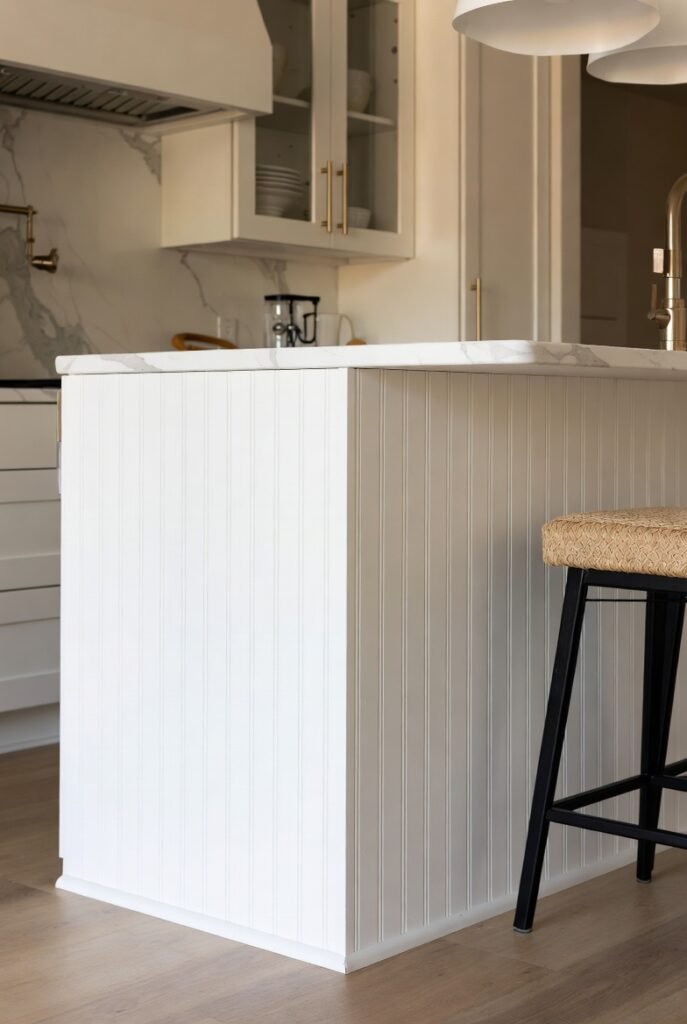
16. Bead Board Backsplash on an Island or Peninsula
Do not forget your kitchen island. If your island has a raised bar or a short backsplash panel, cover it with bead board backsplash. This ties the whole kitchen together. For instance, if your main wall has white beadboard, repeat the same material on the island’s side panels.
Anecdote: A client of mine had a huge, boring laminate island. We added bead board backsplash panels to the front and sides, then painted everything charcoal gray. Suddenly, the island became the focal point of the room. She later told me that guests always compliment “that beautiful wainscoting.”
17. Bead Board Backsplash in a Rental (Removable Version)
Renters, listen up. You can enjoy bead board backsplash without losing your security deposit. Use removable double-sided tape or Command strips to attach lightweight beadboard panels to the existing wall. Furthermore, use caulk that peels off easily (look for “removable caulk” online). When you move out, simply peel everything off. No holes, no damage.
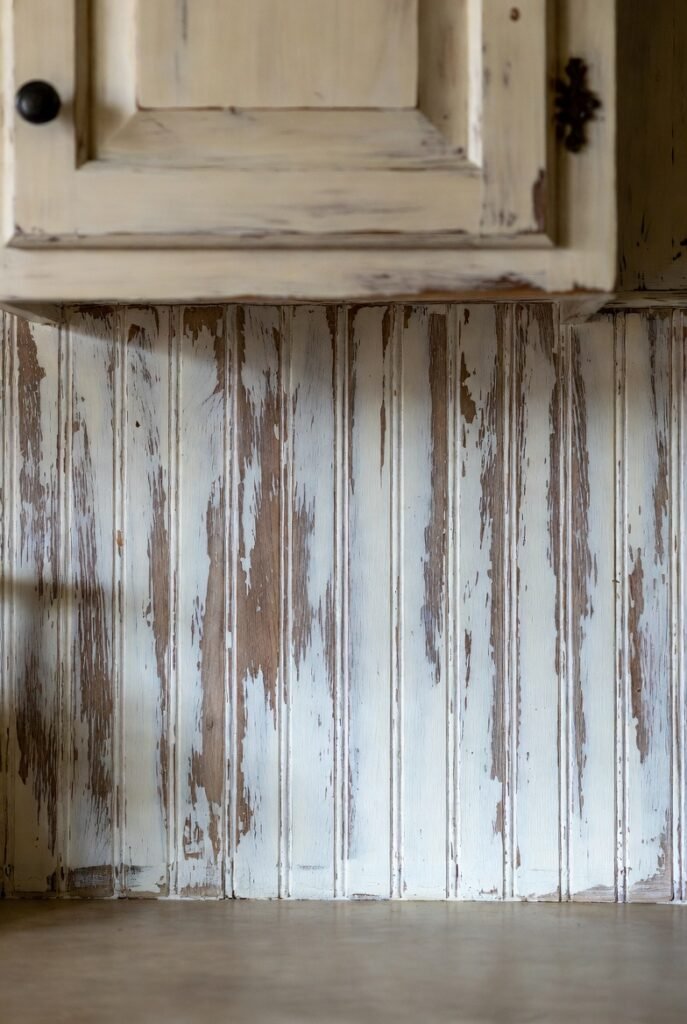
18. Bead Board Backsplash with Distressed Paint Finish
Love the shabby chic or French country style? Then try a distressed bead board backsplash. Paint the beadboard with a base color (e.g., light blue). After it dries, brush on a layer of petroleum jelly in random spots. Then paint over with a top color (e.g., white). Finally, sand the top layer lightly. The petroleum jelly areas will chip away, revealing the blue underneath. This aged look is impossible to replicate with tile.
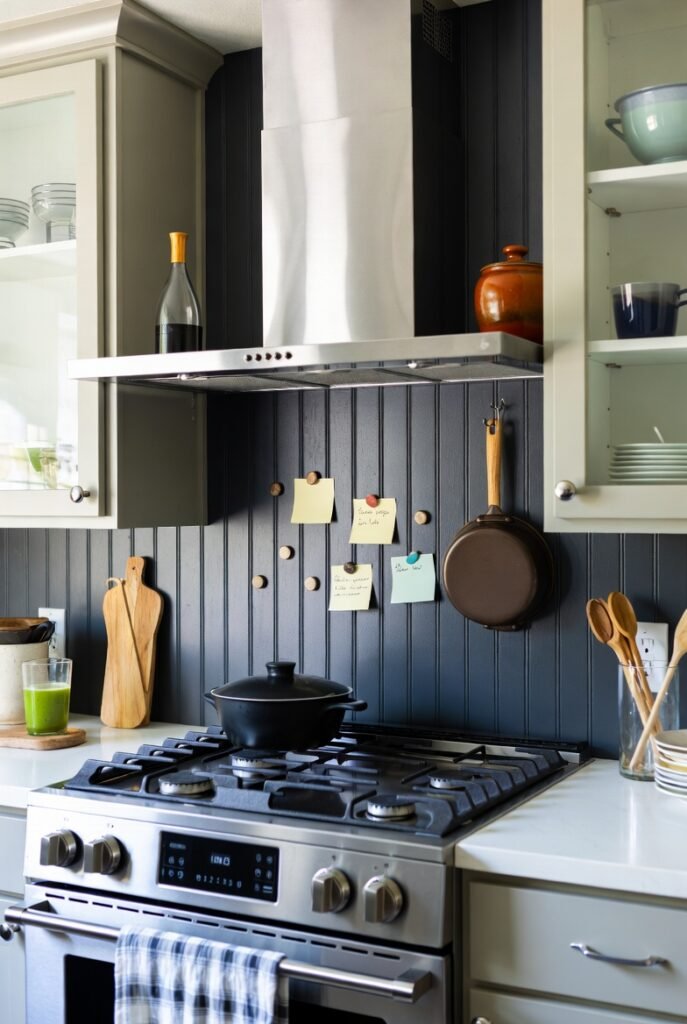
19. Bead Board Backsplash as a Magnetic Board (Use Metal Paint)
Here is a brilliant idea for small kitchens: turn your bead board backsplash into a magnetic notice board. First, apply two coats of magnetic primer (available at hardware stores) over the beadboard. Then paint with your desired color. Now you can hang spice tins, knife holders, or even your kids’ artwork using magnets. This saves counter space and adds functionality.
Step-by-Step Guide: How to Install Your Own Bead Board Backsplash in One Weekend
Now that you have 19 inspiring ideas, let us talk about the actual installation. Do not be intimidated. I have broken this down into seven simple steps. Follow them carefully, and you will have a professional-looking bead board backsplash by Sunday evening.
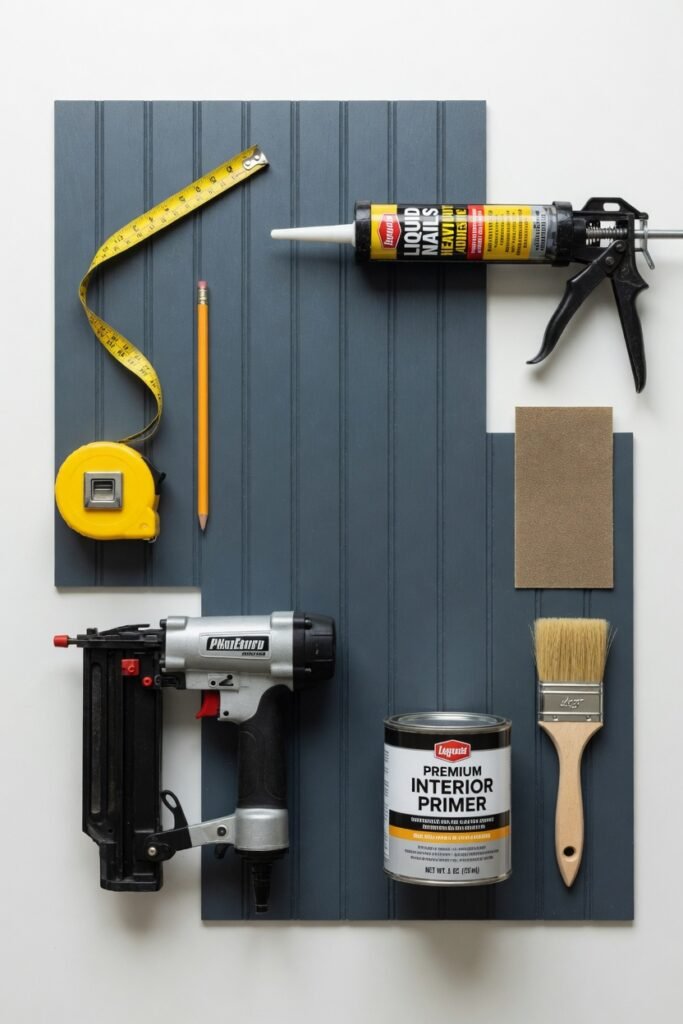
Step 1: Gather Your Materials and Tools
Here is your shopping list:
- Bead board backsplash panels (measure your square footage and add 10 percent for waste)
- Construction adhesive (Liquid Nails for paneling)
- 1-inch finishing nails
- Hammer or nail gun
- Measuring tape
- Pencil
- Circular saw or hand saw
- Jigsaw (for cutting around outlets)
- Level
- Caulk and caulk gun
- Painter’s caulk (white or clear)
- Sandpaper (120-grit)
- Primer and paint (semi-gloss or high-gloss)
- Paint roller and brush
- Safety glasses and dust mask
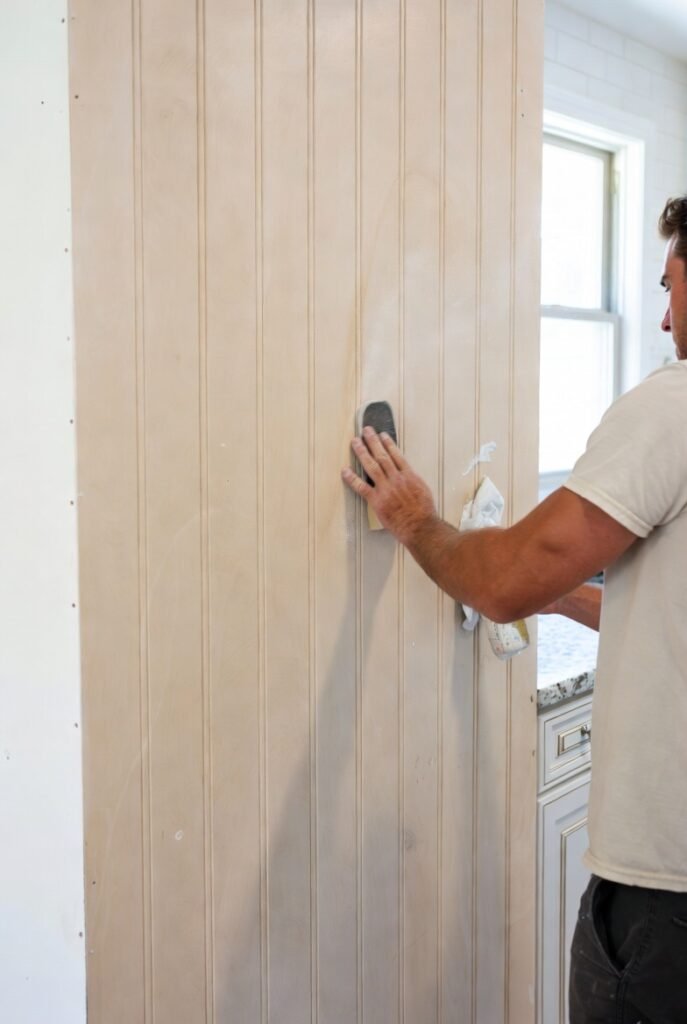
Step 2: Prepare the Wall Surface
First, clear your countertops and cover them with drop cloths. Then, remove all outlet covers and switch plates. Wash the wall with a degreaser (especially near the stove). If your wall has peeling paint or holes, patch them with spackle. Sand smooth. A flat surface ensures your bead board backsplash adheres properly.
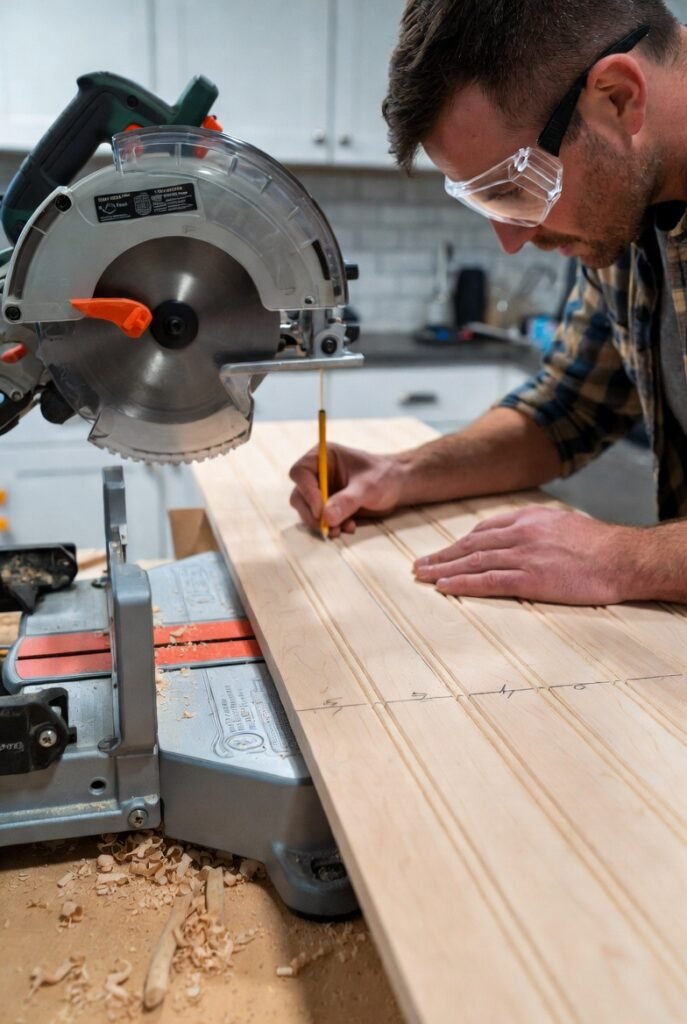
Step 3: Measure and Cut the Beadboard Panels
Measure the height from your countertop to the bottom of your upper cabinets. Most standard backsplashes are 18 inches high. Transfer that measurement to your beadboard panel. Use a straightedge to draw a cutting line. Cut carefully with a circular saw. For cuts around outlets, drill a starter hole, then use a jigsaw to follow the outline of the outlet box.
Pro tip: Cut on the backside of the beadboard to prevent splintering on the finished front.
Step 4: Dry Fit the Panels
Before applying any adhesive, hold each cut panel against the wall. Check that edges meet squarely and that outlet holes align. Make adjustments with sandpaper or additional cuts. This dry fit step saves you from costly mistakes.
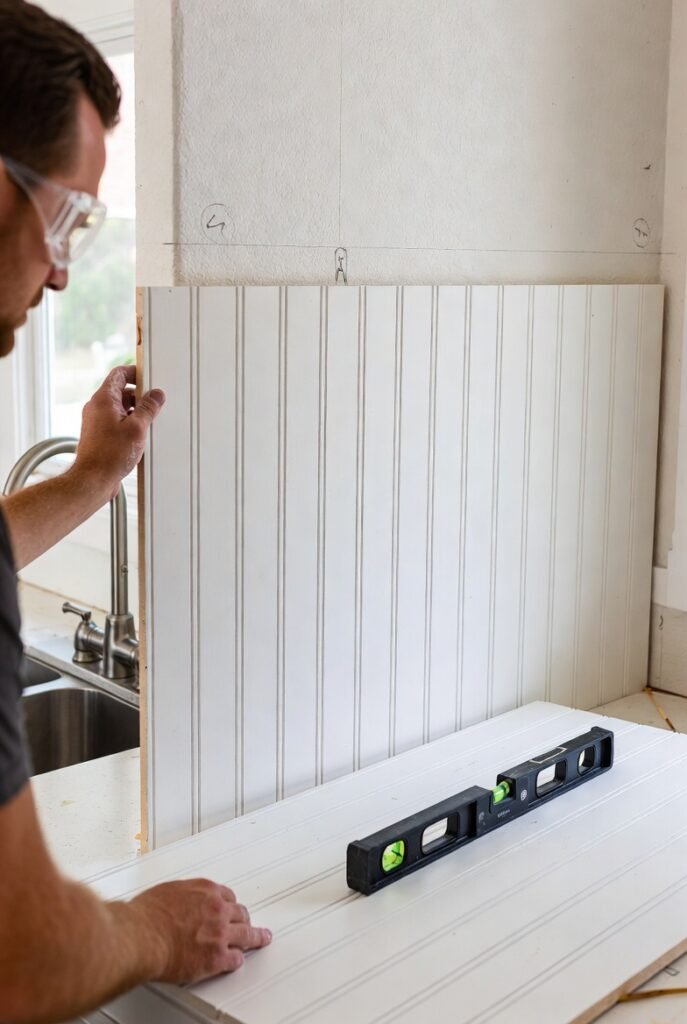
Step 5: Apply Adhesive and Attach the Panels
Run a zigzag bead of construction adhesive on the back of the first panel. Press it firmly against the wall. Then, drive finishing nails through the beadboard into the wall studs. Use a level to ensure the panel is perfectly vertical. Continue with adjacent panels, locking the tongue-and-groove edges together. Wipe off any adhesive that squeezes out.
Step 6: Fill Gaps and Nail Holes
Use white painter’s caulk to fill the tiny gaps at the top, bottom, and corners. Smooth the caulk with a wet finger. For nail holes, use wood filler or spackle. Let everything dry for at least two hours. Then sand the filled holes lightly.
Step 7: Prime and Paint
Apply a high-quality primer to your bead board backsplash. This prevents the wood grain from bleeding through. After the primer dries (about one hour), apply your first coat of paint. Use a foam roller for the flat areas and a brush for the grooves. Wait two hours, then apply a second coat. For high-gloss finishes, a third coat gives the best durability.
Congratulations! You have just transformed your kitchen with a stunning bead board backsplash.
Frequently Asked Questions About Bead Board Backsplash
Let me address some common concerns so you can buy with confidence.
Is bead board backsplash heat resistant?
Yes, to a degree. Standard wood or MDF beadboard can handle the heat from a toaster or coffee maker. However, do not place a hot pan directly against it. Use a metal strip behind the stove as mentioned in idea number 12. For gas ranges, maintain a 2-inch gap between the flame and the beadboard.
Can I use bead board backsplash near a sink?
Absolutely, if you use PVC bead board backsplash or seal the wood properly. Water-resistant primers and high-gloss marine paint can protect wood beadboard for years. Just wipe up standing water promptly.
How long does bead board backsplash last?
With proper installation and paint, a bead board backsplash can last 10 to 15 years. Many homeowners keep it even longer because they can repaint it to match changing trends. Compare that to tile, which requires expensive removal to update.
Is bead board backsplash cheaper than tile?
Yes, significantly. Expect to pay $1.50 to $3 per square foot for beadboard sheets. Subway tile runs $10 to $20 per square foot, plus the cost of mortar, grout, and backer board. Additionally, professional tile installation can cost $500 to $1,000. DIY bead board backsplash often costs under $150 for a medium kitchen.
Why You Should Buy Bead Board Backsplash Today (Persuasive Closing)

Still on the fence? Let me summarize why choosing bead board backsplash is one of the smartest kitchen upgrades you can make.
First, affordability: You will not find a cheaper way to cover ugly walls. Second, simplicity: A weekend warrior with zero experience can install it successfully. Third, beauty: The classic grooves add warmth and character that plain drywall or even some tiles cannot match. Fourth, flexibility: Paint it any color, stencil it, distress it, or add lighting. The options are endless. Fifth, durability: Modern primers and paints make beadboard easy to clean and resistant to moisture.
Moreover, consider the confidence you will feel every time you cook in a kitchen that looks like it belongs in a magazine. Imagine your friends asking, “Who did your backsplash?” and you proudly saying, “I did it myself.”
Finally, think about the return on investment. A bead board backsplash instantly increases your home’s perceived value. Future buyers love the farmhouse aesthetic. You will recoup your small investment many times over when you sell.
So, what are you waiting for? Head to your local hardware store or order online today. Buy the bead board backsplash panels, the adhesive, and the paint. Set aside this coming Saturday. Follow our step-by-step guide. By Sunday night, you will be standing in a transformed kitchen, smiling at your reflection in the glossy, grooved walls.
Final Checklist Before You Buy
To make absolutely sure you get the right product, use this checklist:
- Measure your backsplash area (length x height in inches, then divide by 144 for square feet).
- Add 10 percent extra for mistakes and cuts.
- Decide between wood, MDF, or PVC bead board backsplash (PVC for wet areas).
- Choose your paint color and sheen (semi-gloss or high-gloss for kitchens).
- Buy construction adhesive, finishing nails, caulk, primer, and paint.
- Watch one or two online installation videos for visual reference.
- Set a weekend date and invite a helper (optional but helpful).
Conclusion: Your Dream Kitchen Awaits
We have covered 19 distinct bead board backsplash kitchen ideas, from classic white to magnetic boards, from herringbone patterns to two-tone designs. We have also walked through a detailed, beginner-friendly installation guide. And we have answered your biggest questions about heat, water, cost, and longevity.
Now, the only thing missing is your action. Do not let another month go by while you stare at those boring or damaged walls. Bead board backsplash is affordable, beautiful, and achievable for anyone. Whether you are a renter, a first-time homeowner, or a seasoned DIY expert, there is a beadboard idea here for you.
Take the leap. Buy the materials. Start your project. And soon, you will be sharing your own “before and after” photos with friends, just like Sarah and Lisa and Mark did. Trust me, you will not regret it.
Happy renovating, and here is to the coziest, most stylish kitchen on your block.