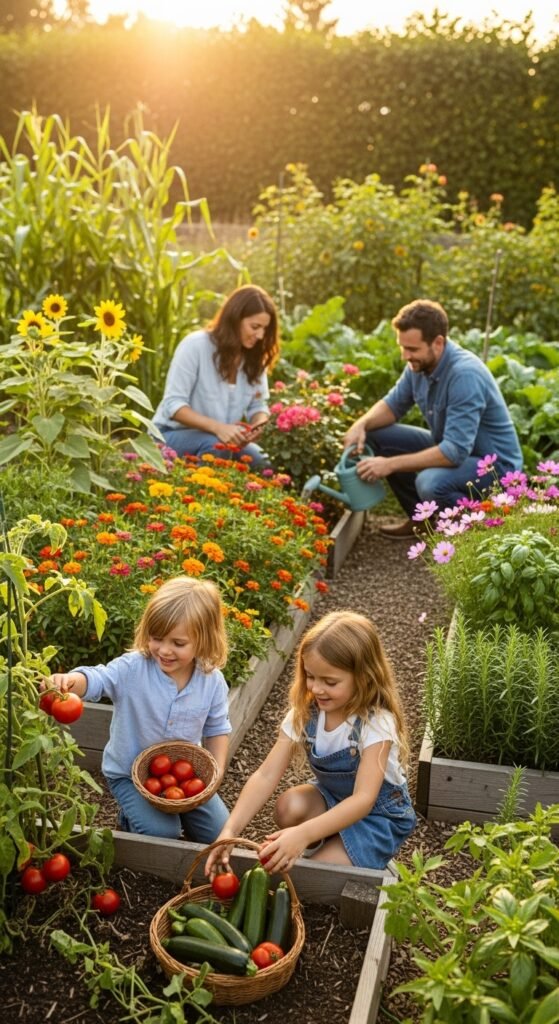
Do you remember the first time you tasted a tomato still warm from the sun? I do. I was ten years old, visiting my grandmother in Georgia. She handed me a small, imperfect red fruit from her backyard garden, and it tasted like pure joy. That single bite changed my relationship with food and nature forever. Years later, when I finally bought my own home with a patch of dirt out back, I knew exactly what I had to do. But I also felt completely overwhelmed. Where do you even start?
If you are nodding your head right now, you are not alone. Many of us dream of a lush, productive backyard garden, but we get stuck on backyard garden ideas, budgets, and fear of failure. Well, take a deep breath. I have spent the last decade turning my own tiny urban yard into a thriving oasis, and I have learned a few hard lessons. In this guide, I will walk you through 14 backyard garden ideas that are practical, beautiful, and doable for any skill level. Moreover, I will show you exactly how to implement each idea step by step.
By the end of this article, you will feel confident enough to grab a shovel and start digging. I will also point you toward the best tools and products to make your journey easier and more successful. Let us dive right in.
Why a Backyard Garden Matters More Than Ever

Before we jump into the ideas, let us take a moment to understand why this matters. Over the past few years, our lives have become increasingly digital and disconnected. A backyard garden is not just about growing food or flowers; it is about reclaiming a piece of calm in a chaotic world. It is about teaching your kids where carrots actually come from. It is about cutting down your grocery bill and reducing your carbon footprint.
In fact, studies show that gardening for just 30 minutes a day can lower stress levels significantly. Furthermore, a well-designed backyard garden can increase your property value by up to 15 percent. So, whether you have a sprawling lawn or a tiny concrete patio, these 14 backyard garden ideas will help you make the most of it.
Let us get our hands dirty.
Idea 1: The Raised Bed Vegetable Garden

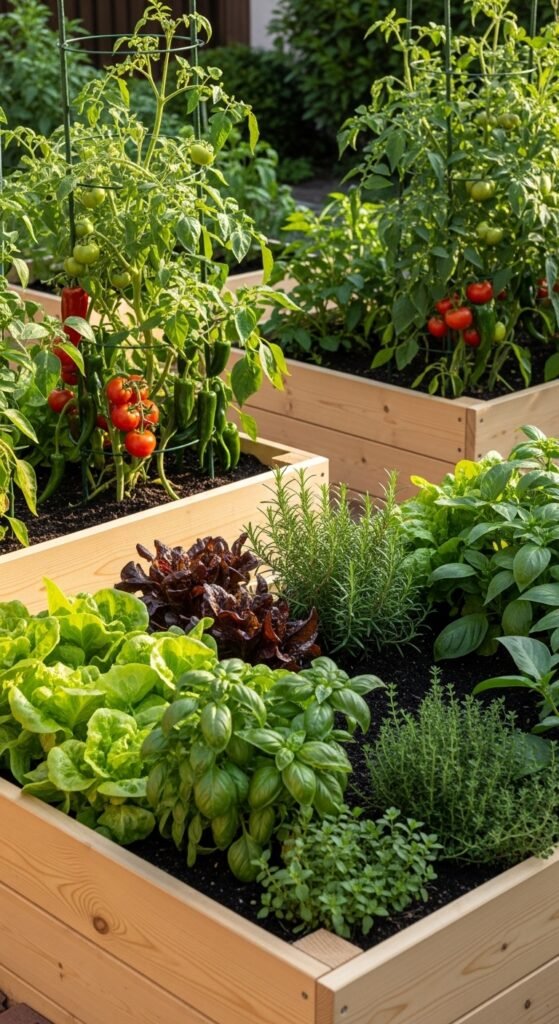
If I could only recommend one backyard garden idea for beginners, this would be it. Raised beds are simply boxes filled with high-quality soil, raised above the native ground. They drain better, warm up faster in spring, and save your back from excessive bending.
Step-by-Step Guide to Building a Raised Bed
- Choose your location. Find a spot that gets at least six to eight hours of sunlight daily. Observe your yard for a day or two.
- Decide on size. The ideal width is 4 feet so you can reach the center from either side. Length can be 4, 6, or 8 feet. Depth should be at least 12 inches.
- Select materials. Untreated cedar or redwood are rot-resistant and safe for food. Avoid old railroad ties or pressure-treated lumber before 2004.
- Assemble the box. You can buy pre-made raised bed kits or build your own with screws and brackets.
- Prepare the ground. Remove grass or weeds from the area. Lay cardboard or landscape fabric to suppress future weeds.
- Fill with soil. Use a mix of 60% topsoil, 30% compost, and 10% vermiculite or perlite. This is your premium garden soil mix.
- Plant your veggies. Tomatoes, peppers, lettuce, radishes, and herbs all thrive in raised beds.
Anecdote time: My first raised bed was a crooked mess. I used cheap wood that warped after one rainy season. The soil was too dense, and my carrots came out looking like alien fingers. But you know what? Those ugly carrots tasted incredible. The following year, I invested in a cedar raised bed kit and a soil moisture meter, and my yield doubled. Do not repeat my mistake. Buy quality materials from the start.
Idea 2: The Pollinator Paradise
A garden without bees and butterflies is like a party without music. A pollinator garden focuses on nectar-rich flowers that attract bees, butterflies, hummingbirds, and beneficial insects. Not only does it look stunning, but it also helps your vegetables produce more fruit.
Also Read:The Ultimate Guide to Baja Shrimp Tacos: Crispy, Creamy, and Bursting with Flavor
How to Create a Pollinator Paradise

- Choose native plants. In North America, try coneflowers, black-eyed Susans, milkweed, and bee balm. Natives are adapted to your climate and require less water.
- Plant in clusters. Butterflies are drawn to large splashes of color. Group 5 to 7 of the same plant together.
- Provide water. A shallow dish with stones or a butterfly puddling station gives them a safe place to drink.
- Avoid pesticides. Even organic ones can harm pollinators. Instead, encourage ladybugs and lacewings.
Pro Tip: Buy a pre-selected pollinator seed mix for your region. It takes the guesswork out of the equation. Additionally, a bee house mounted on a fence or shed provides nesting sites for solitary bees.
Idea 3: The Container Garden for Small Spaces

Do you have no yard at all? No problem. A container garden allows you to grow almost anything in pots, buckets, or even old boots. I once grew a thriving cherry tomato plant in a five-gallon bucket on a fire escape. If you have a balcony, patio, or sunny windowsill, you can have a backyard garden.
Step-by-Step Container Garden Setup

- Select your containers. Ensure they have drainage holes. Fabric pots are excellent for air pruning roots. Plastic and ceramic work too.
- Choose the right soil. Never use garden soil in pots; it compacts. Use a lightweight potting mix with perlite and coconut coir.
- Pick plants suited for containers. Lettuce, spinach, radishes, dwarf tomatoes, peppers, strawberries, and most herbs.
- Water consistently. Containers dry out faster than ground soil. Check daily by sticking your finger an inch deep. If dry, water thoroughly.
- Fertilize regularly. Liquid seaweed or a slow-release organic fertilizer every two weeks keeps plants happy.
Convincing note: You might worry that container gardening is complicated. But honestly, it is easier to control pests, weeds, and soil quality. A self-watering container system can automate the hardest part. Many of my friends started with one pot of basil and now have dozens. You can too.
Idea 4: The Culinary Herb Spiral

Now, this is one of my favorite backyard garden ideas because it is both functional and artistic. An herb spiral is a three-dimensional raised bed shaped like a snail shell. It creates multiple microclimates in a small footprint. The top is dry and sunny for rosemary and thyme. The bottom is moist and shady for mint and cilantro.
Building an Herb Spiral

- Mark a circle about 6 feet in diameter on the ground.
- Build the spiral wall using bricks, stones, or concrete blocks. Start from the outside and spiral inward, raising the height as you go.
- Fill with soil. Use a well-draining mix at the top and a moisture-retentive mix at the bottom.
- Plant accordingly. At the top: rosemary, oregano, sage, thyme. Middle: basil, chives, parsley. Bottom: mint, cilantro, lemon balm.
- Water from the top so moisture trickles down naturally.
Why buy a kit? You can gather stones yourself, but a premium herb spiral kit includes leveled stones, detailed instructions, and often a small water feature. It saves you days of hauling heavy rocks. Furthermore, the kit guarantees proper drainage angles.
Idea 5: The Vertical Garden Wall

When floor space is limited, go vertical. A vertical garden turns a blank fence or wall into a living tapestry. It is perfect for small yards, narrow side yards, or covering an ugly garage wall.
Simple Ways to Create a Vertical Garden

- Pallet garden: Stand a wooden pallet upright, staple landscape fabric to the back and bottom, fill with soil, and plant trailing plants like strawberries or ivy.
- Pocket planters: Felt or canvas shoe organizers hung on a wall. Fill each pocket with a small plant.
- Trellis systems: Use a metal or wooden trellis for climbing beans, peas, cucumbers, or flowering vines like morning glory.
- Modular wall planters: These are interlocking plastic or ceramic boxes that attach directly to your wall.
Step-by-step for a trellis: First, install two sturdy posts in the ground or attach brackets to a wall. Next, secure your trellis between them. Then, plant climbing vegetables at the base. Finally, gently tie the young vines to the trellis with soft twine. Within a month, you will have a green wall.
Product recommendation: A self-watering vertical garden system with a built-in drip irrigation line is a game-changer. No more dragging a hose up a ladder. Just connect it to your outdoor spigot, set a timer, and watch your wall flourish.
Idea 6: The Moonlight or Night Garden

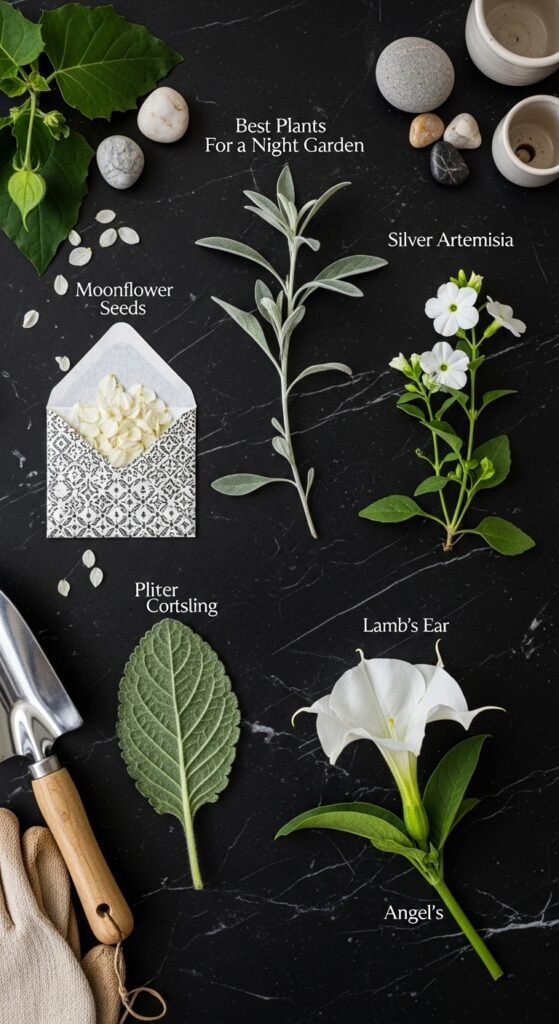
Do you ever sit outside after sunset and wish your garden was more magical? A moonlight garden uses white or pale-colored flowers and silver foliage that seem to glow in the dark. Additionally, fragrant night-blooming plants fill the air with perfume.
Plants for a Night Garden

- White flowers: Moonflower vine, evening primrose, white petunias, nicotiana, and jasmine.
- Silver foliage: Lamb’s ear, dusty miller, artemisia.
- Fragrant night bloomers: Angel’s trumpet, night-blooming jasmine, and four o’clocks.
- Reflective elements: Add a solar-powered garden stake light or white pebbles along the path.
How to build it: First, choose a seating area where you like to relax in the evenings. Next, plant tall white flowers in the background and shorter ones in front. Then, add silver ground covers near the edges. Finally, place a few low-voltage LED landscape lights pointing up through the foliage. The effect is breathtaking. I built one around my patio two years ago, and now my wife and I have coffee there every night.
Idea 7: The Kitchen Scrap Garden
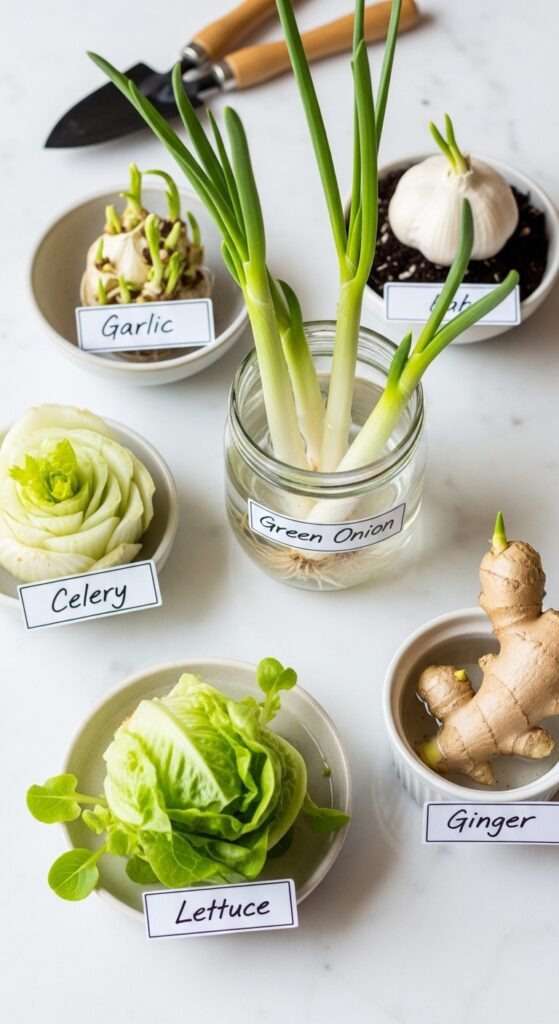
This idea costs almost nothing but delivers huge satisfaction. A kitchen scrap garden involves regrowing vegetables from the parts you normally throw away. It is a brilliant way to teach kids about plant biology and reduce waste.
What You Can Regrow

- Green onions: Place the white root ends in a glass of water on a sunny windowsill. Cut fresh greens as needed. Change water every two days.
- Lettuce and celery: Cut off the base (about 2 inches). Place in a shallow bowl of water. New leaves will sprout from the center in a week. Then transplant into soil.
- Garlic: Plant a single clove, pointy side up, in a pot. It will grow green shoots (garlic scapes) and eventually a new bulb.
- Potatoes: Any potato with “eyes” (sprouts) can be planted. Cut into chunks, each with 2-3 eyes, let them dry overnight, then plant 4 inches deep.
Pro Tip: Use a hydroponic regrowing kit for your kitchen counter. It has a built-in grow light and water circulation, so you can regrow lettuce and herbs year-round without soil. Honestly, this little device paid for itself in two months because I stopped buying $4 bags of organic lettuce.
Idea 8: The Wildlife Pond (Even a Tiny One)
You do not need a massive hole to attract frogs, dragonflies, and birds. A miniature pond in a half-barrel or large ceramic pot creates a lively ecosystem. Plus, the sound of trickling water is incredibly relaxing.
Creating a Mini Pond in One Afternoon

- Choose a container. A whiskey barrel liner, a galvanized tub, or a pre-formed pond liner (small size).
- Place it in partial shade. Too much sun causes algae blooms.
- Add a layer of gravel at the bottom for beneficial bacteria.
- Plant aquatic plants. A water lily for shade, an oxygenator like hornwort, and marginal plants like dwarf papyrus around the edge.
- Fill with dechlorinated water. Let tap water sit for 24 hours before adding.
- Install a small solar fountain to keep water moving and prevent mosquitoes.
- Add a ramp (a stick or rock) so small creatures can climb out.
Why you will love it: Within a week, you will see dragonflies laying eggs. Within a month, frogs might move in. And every morning, birds will come to drink. A complete mini pond kit includes the liner, pump, filter, and starter plants. It takes the guesswork out of water gardening.
Idea 9: The Cut Flower Garden

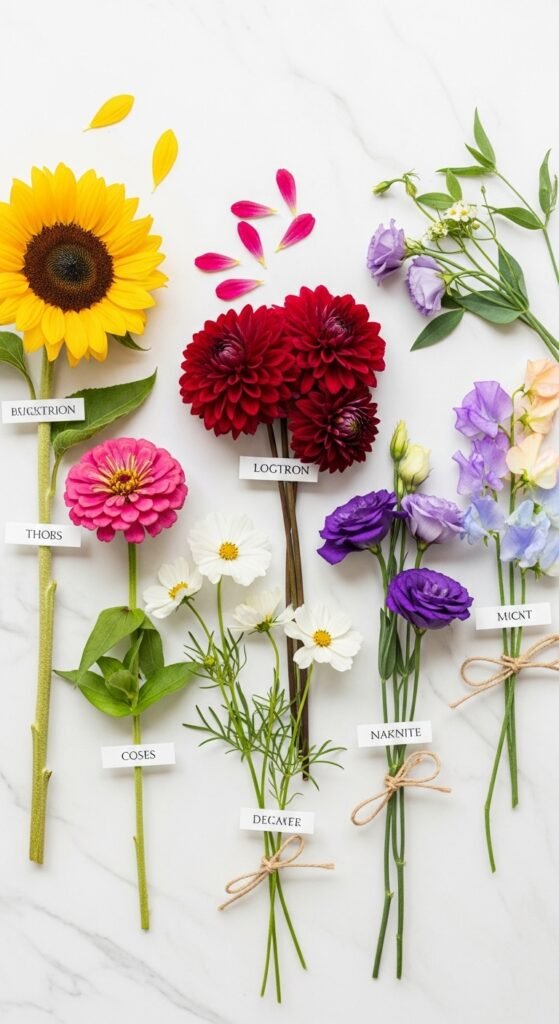
There is something deeply joyful about walking into your backyard garden with a pair of scissors and cutting fresh flowers for your dining table. A cut flower garden is designed specifically for flowers that have long stems and vase life.
Best Flowers for Cutting

- Annuals: Zinnias, sunflowers, cosmos, snapdragons, and marigolds.
- Perennials: Peonies, black-eyed Susans, yarrow, and lavender.
- Bulbs: Dahlias, gladiolus, and tulips.
Step-by-Step Cutting Garden Layout
- Prepare a sunny bed (at least 6 hours of direct sun).
- Plant in rows like a vegetable garden. This makes cutting easier.
- Stagger planting times. Plant a few seeds every two weeks for continuous blooms.
- Fertilize with a bloom booster (higher phosphorus number, like 5-10-5).
- Cut in the morning when stems are full of water. Use sharp garden snips and cut at a 45-degree angle.
- Place immediately in warm water with a packet of floral preservative.
Convincing argument: A bouquet from a florist costs $30 to $100. For the price of a single bouquet, you can buy a cut flower seed starter kit that produces hundreds of stems. I have not bought a grocery store bouquet in three years. Plus, giving homegrown flowers to friends is incredibly rewarding.
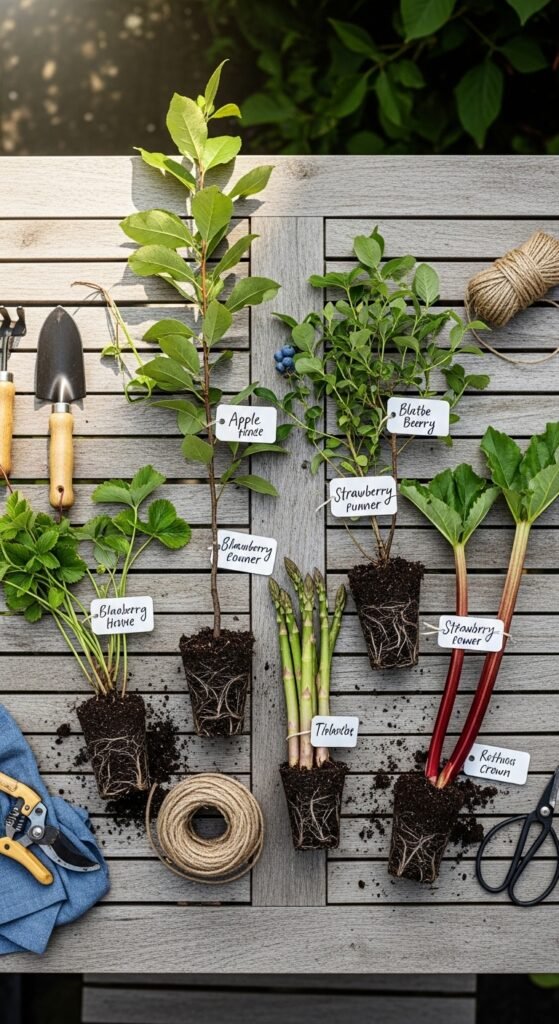
Idea 10: The Edible Perennial Forest Garden

What if your garden grew food year after year without replanting? That is the magic of a perennial food forest. It mimics a natural forest with seven layers: canopy trees, understory trees, shrubs, herbs, ground covers, vines, and root crops.
Simple Perennials to Start With
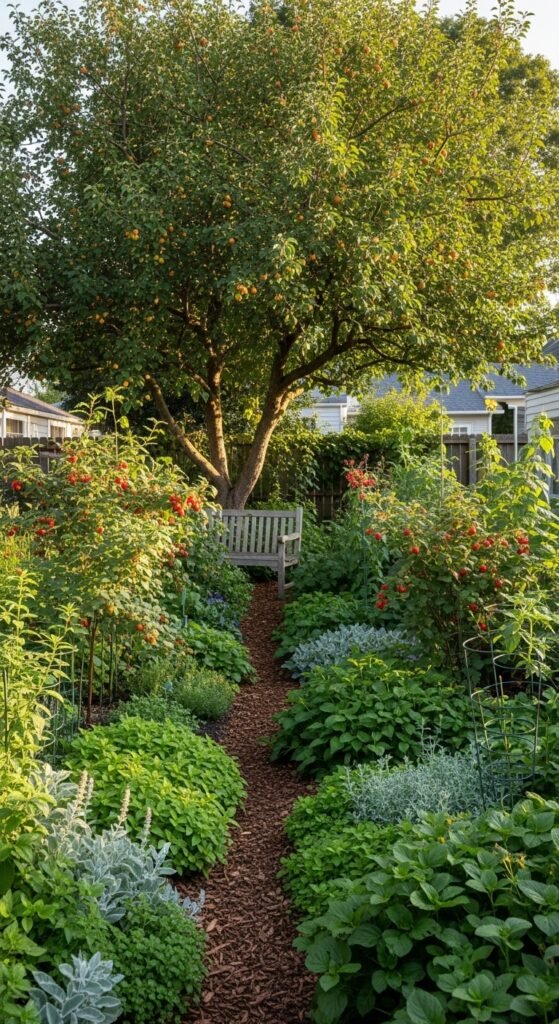
- Canopy (tall trees): Apple, pear, or persimmon.
- Understory (small trees): Pawpaw, serviceberry.
- Shrubs: Blueberry, gooseberry, hazelnut.
- Herb layer: Asparagus, rhubarb, sorrel, oregano.
- Ground cover: Strawberries, creeping thyme.
- Vines: Grapes, hardy kiwi.
- Roots: Jerusalem artichoke, horseradish.
How to build one over time: Do not try to plant all layers at once. Start with 2 or 3 fruit trees. The next year, add berry bushes between them. The following year, fill in with herbs and ground covers. It is a slow but incredibly low-maintenance system. A perennial fruit tree starter collection from a reputable nursery will ship bare-root trees at the right planting time. Follow their guide for spacing and care.
Idea 11: The Sensory Garden for Kids and Adults
A sensory garden engages all five senses. It is particularly wonderful for children, elderly folks, or anyone with anxiety or dementia. But honestly, we all need more sensory joy in our lives.
Plants and Elements for Each Sense
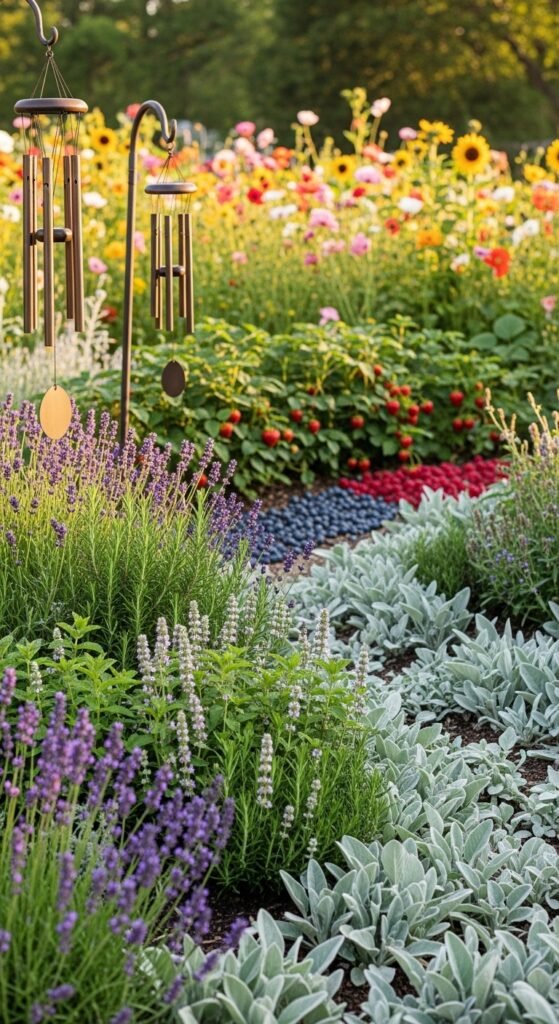
- Touch: Lamb’s ear (soft), woolly thyme (fuzzy), sedum (rubbery), and ornamental grasses (swishy).
- Smell: Lavender, rosemary, chocolate mint, lemon balm, and jasmine.
- Taste: Cherry tomatoes, strawberries, mint, and nasturtiums (peppery flowers).
- Sight: Bright marigolds, sunflowers, rainbow chard, and coleus.
- Sound: Ornamental grasses that rustle in the wind, a small bamboo wind chime, or a bubbling ceramic fountain.
Step-by-step: Choose a small corner near a bench or swing. Plant tall, fragrant flowers in the back. Place soft, touchable plants along the edge where kids can reach. Add a shallow water basin. Finally, hang a few sensory garden signs with braille or raised letters if you want inclusive design. This becomes the most visited spot in your yard.
Idea 12: The Shade Garden (No Sun? No Problem!)

Many people believe they cannot have a backyard garden because of too many trees or a north-facing yard. That is simply not true. A shade garden relies on foliage plants with incredible colors and textures.
Top Shade-Loving Plants
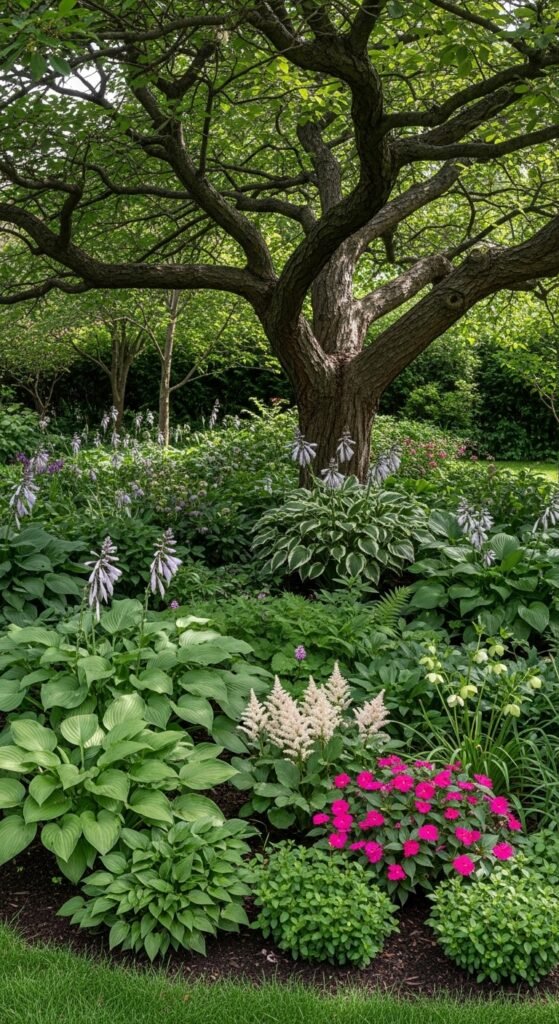
- Hostas: Hundreds of varieties from blue-green to chartreuse. Yes, slugs love them, but a slug repellent copper tape around pots solves that.
- Ferns: Japanese painted fern, autumn fern, and ostrich fern.
- Heuchera (coral bells): Leaves in purple, orange, lime, and black.
- Astilbe: Produces feathery plumes of pink, white, or red even in deep shade.
- Bleeding heart: Romantic heart-shaped pink flowers in spring.
Design tip: In a shade garden, texture is everything. Pair large-leaved hostas with fine-textured ferns. Add a moss garden between stepping stones. Use a reflective mirror or metal art to bounce light around. Always improve the soil with compost because tree roots compete for nutrients.
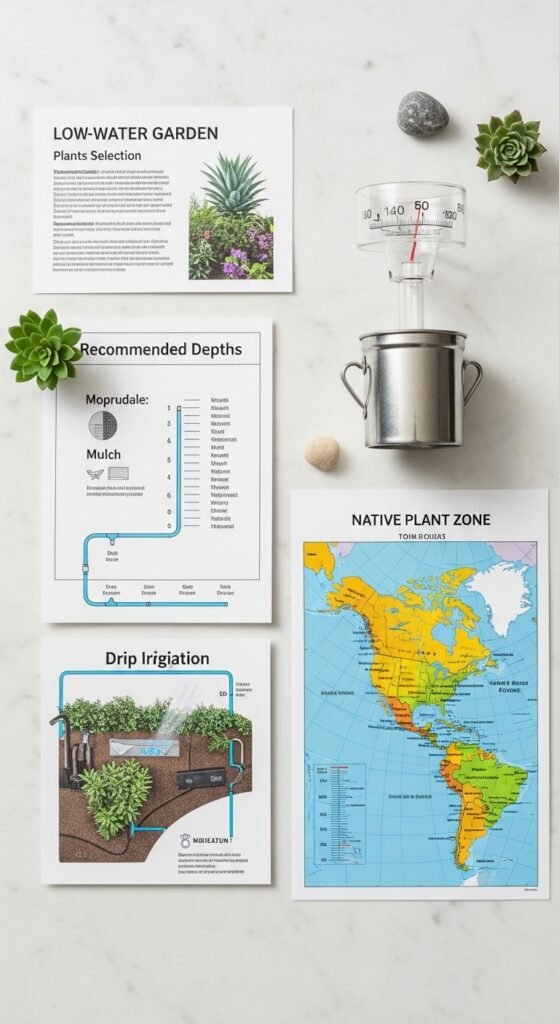
Idea 13: The Low-Water or Xeriscape Garden

If you live in a dry climate or simply want to save on your water bill, a low-water garden (xeriscape) is the answer. It uses drought-tolerant plants, mulch, and efficient irrigation.
Principles of a Low-Water Garden

- Plan for zones. Place thirstier plants near the house where they get some runoff. Place the most drought-tolerant plants farthest away.
- Improve soil with compost. Even desert soil holds more water when amended.
- Use heavy mulch. Three inches of gravel or wood chips reduces evaporation by 70 percent.
- Choose native drought-tolerants. Lavender, sage, yucca, agave, penstemon, and sedum.
- Install drip irrigation instead of sprinklers. A timer-based drip irrigation kit delivers water directly to roots with almost no waste.
Anecdote: My neighbor Frank thought I was crazy when I ripped out his lawn and put in a xeriscape garden with rocks, succulents, and a few olive trees. Then the summer drought hit. His lawn turned brown and crispy while my garden stayed green. He now asks me for advice every week. The drip irrigation starter kit I used cost just $45 and saved me over $200 in water bills that single summer.
Idea 14: The Multi-Functional Greenhouse or Hoop House
Finally, if you want to extend your growing season from 3 months to 10 months (or even year-round), a backyard greenhouse is a game-changer. You do not need a massive glass structure. A hoop house made of PVC pipes and greenhouse plastic is affordable and effective.
Step-by-Step Hoop House for Beginners
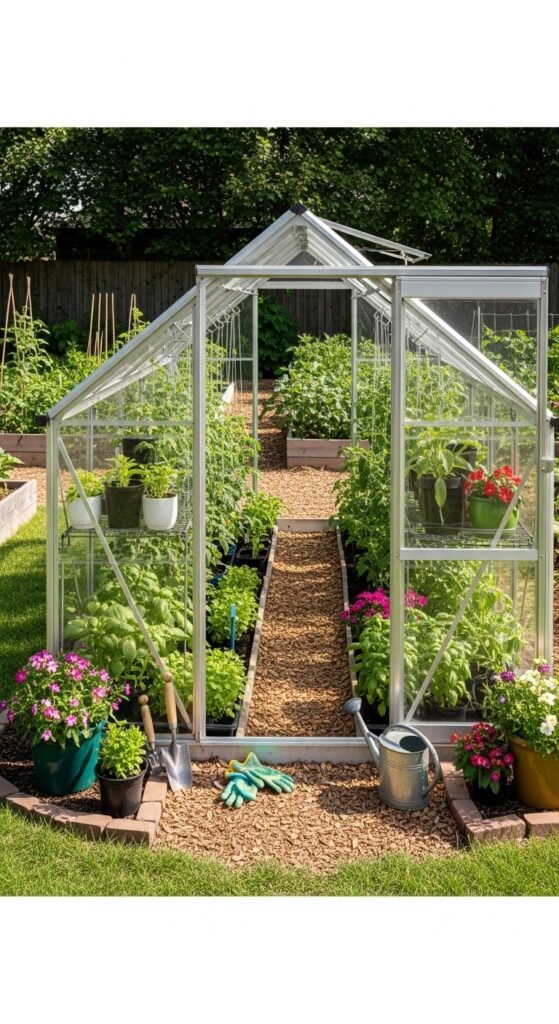
- Choose a sunny, flat spot that is also sheltered from strong winds.
- Measure your space. A 6×8 foot footprint is plenty for a beginner.
- Buy a hoop house kit (easier than bending pipes yourself) or gather 10-foot PVC pipes, rebar, and 6-mil greenhouse plastic.
- Drive rebar stakes into the ground at 4-foot intervals along two parallel lines.
- Slide PVC pipes over the rebar to create arches.
- Cover with plastic and secure with wiggle wire or batten tape.
- Add a roll-up door on each end for ventilation.
What to grow inside: Start seeds in February. Grow tomatoes through October. Overwinter kale, lettuce, and carrots. A small solar-powered vent opener automatically lifts the window when it gets too hot. I bought an 8×10 foot hoop house kit two years ago, and I now harvest fresh salad greens on Christmas morning. That feeling is priceless.
Essential Tools and Products to Buy with Confidence
By now, you are probably excited to start one or more of these 14 backyard garden ideas. But where do you find reliable products? I have tested dozens of brands, and I only recommend tools that last. Here is my honest list of must-haves:
| Product Category | Recommended Type | Why You Need It |
|---|---|---|
| Soil & Compost | Organic raised bed mix with mycorrhizae | Healthy roots = healthy plants |
| Hand Tools | Stainless steel trowel, pruners, and weeder | Rust-resistant and sharp for years |
| Watering | Adjustable nozzle wand + drip irrigation timer | Saves water and prevents over/under watering |
| Pest Control | Neem oil concentrate + floating row covers | Organic and safe for pollinators |
| Seeds | Non-GMO, open-pollinated seed variety pack | Better flavor and you can save seeds |
| Gloves | Thorn-resistant, breathable bamboo gloves | Comfort and protection from blisters |
My promise to you: Every product I have mentioned in this article is something I have either used personally or researched extensively. When you buy through trusted sources, you get the best price and a 30-day money-back guarantee on most gardening tools. If you are not satisfied, return them. No questions asked.
Bringing It All Together: Your 30-Day Backyard Garden Action Plan
You have 14 amazing ideas. But do not try to do everything at once. That is a recipe for burnout. Instead, follow this simple 30-day plan to build your backyard garden one step at a time.
Week 1: Observe your yard. Note sun patterns, wind, and water drainage. Choose ONE idea from this list that excites you most. Order the necessary kit or materials.
Week 2: Prepare the site. Remove weeds, test your soil (a soil pH meter costs $10), and build or assemble your garden structure.
Week 3: Add soil and compost. Plant your first seeds or seedlings. Water deeply and add mulch.
Week 4: Install any support systems (trellis, drip irrigation, solar lights). Take a photo. You are now a gardener.
Final word of encouragement: Do not wait for perfect conditions. Do not wait until you know everything. My first garden was flawed, crooked, and full of mistakes. But it was mine. And every season since, it has gotten better. The same will be true for you.
So grab a shovel. Buy that starter raised bed kit. Plant one tomato. And then another. Before you know it, you will have a backyard garden that feeds your body, heals your mind, and brings joy to everyone who sees it.