Let me tell you a quick story. A few years ago, I walked into a friend’s newly renovated home. The living room was stunning. The kitchen was a dream. But honestly? I barely noticed any of that. Why? Because I was still recovering from the entrance hall.
It was cramped, dark, and overflowing with shoes. A lone, flickering light bulb cast sad shadows on coats that were fighting for space on a single, overburdened hook. There was no place to sit, no mirror to check my hair, and definitely no “welcome” feeling. My friend saw my face and sighed, “Yeah, we call this the drop zone. Things just… drop here.”
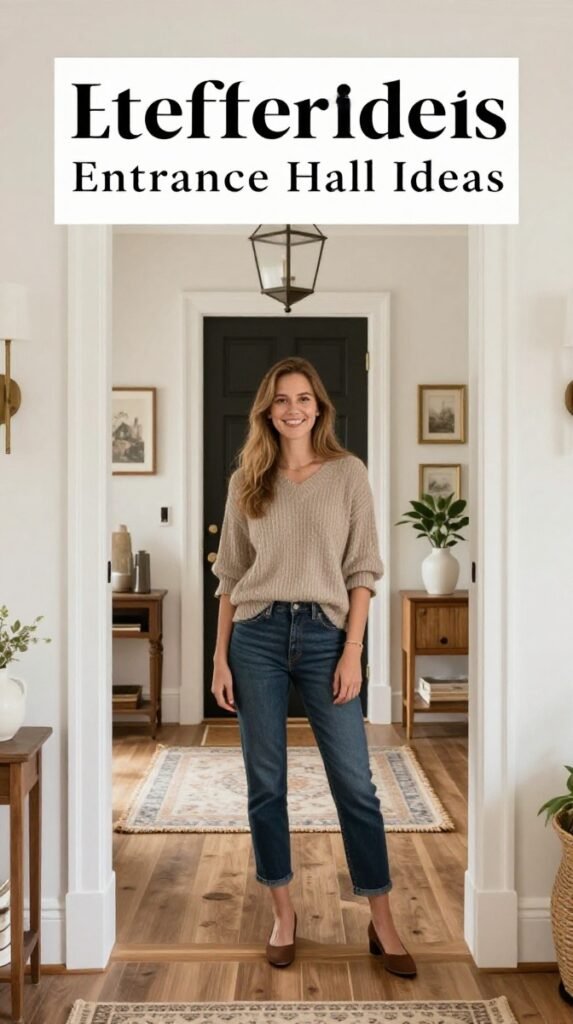
That moment stuck with me. Because your entrance hall isn’t just a hallway. It’s a handshake. It’s the first chapter of your home’s story. If that chapter is messy or confusing, the rest of the book has a lot of work to do.
Over the years, I’ve helped dozens of friends (and finally my own home) crack the code of the perfect entryway. After countless trials, errors, and “aha!” moments, I’ve gathered 22 entrance hall ideas that work for every size, style, and budget.
Whether you have a grand foyer or a tiny apartment nook, this step-by-step guide will walk you through transforming that forgotten space into something functional, beautiful, and welcoming. More importantly, I’ll show you exactly which products will make it happen—so you can shop with confidence and finally love the way you come home.
Ready? Let’s step inside.
Why Your Entrance Hall Deserves More Attention (A Quick Pep Talk)
Before we dive into the list, let’s get one thing straight. Your entrance hall is the most used (and most abused) space in your home. Think about it. Every single day, you enter and exit through here. You drop bags, kick off shoes, hang coats, and search for keys. It’s the bridge between the outside world and your private sanctuary.
Therefore, a well-designed entrance hall does three critical things:
- It saves you time (no more frantic key searches).
- It reduces stress (everything has a home).
- It sets the mood (you feel calm and organized the second you walk in).
Consequently, ignoring this space is like shaking hands with a wet fish. Not a great start. So, let’s fix it. Here are 22 actionable, exciting, and human-friendly ideas.
Part 1: The Foundation – Layout & First Impressions
These first five ideas are about the bones of your space. Before you buy a single decorative item, you need a plan.
1. Define Your “Landing Strip”
The single most important concept in any entrance hall is the landing strip. This is a dedicated surface—a table, a shelf, or a counter—where you instantly drop your daily essentials.
Step-by-step guide to create your landing strip:
- Step 1: Identify a wall within arm’s reach of your front door.
- Step 2: Measure the width. You need at least 18 inches of horizontal space.
- Step 3: Choose a slim entrance hall console table with a drawer or shelf below.
- Step 4: On top, place a catchall tray for keys, wallets, and sunglasses.
- Step 5: Add a small dish for loose change and a smart wireless charging pad for phones.
Why you’ll love it: No more “honey, where are my keys?” moments. Everything is right there.
Product confidence: I recommend looking for a solid wood console table with a scratch-resistant finish. Trust me, you’ll be dumping heavy bags on this daily. For the tray, choose a felt-lined valet tray—it protects your keys and keeps them silent.
2. Zone Your Floor Plan (Even in Small Spaces)
A common mistake is treating the entrance hall as one single blob of space. Instead, mentally divide it into three zones:
- Zone 1 (The Arrival Zone): Right by the door. This is for immediate drops (keys, mail).
- Zone 2 (The Storage Zone): 2-3 feet inside. For shoes, bags, and coats.
- Zone 3 (The Transition Zone): Deeper into the hall. For mirrors, art, and personal touches.
Anecdote time: My neighbor, Sarah, has a narrow hallway that’s barely 3 feet wide. She tried to put a shoe cabinet near the door, but it blocked the flow. Once we re-zoned her space—moving shoes to a vertical rack in the middle of the hall and keeping the door area completely clear—she said it felt twice as big. Zoning works like magic.
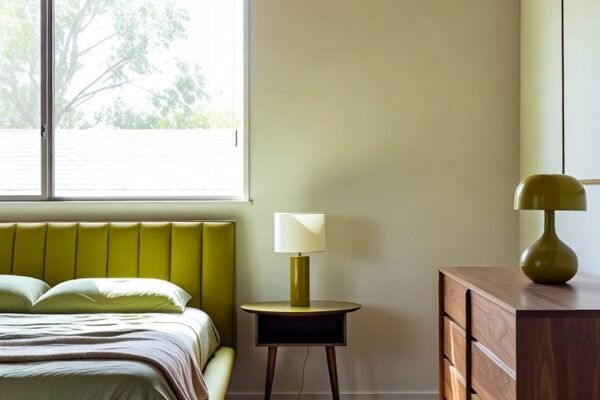
3. Let There Be (Layered) Light
A single overhead light is the enemy of a warm welcome. Your entrance hall needs at least two sources of layered lighting.
Here’s your shopping list for layered lighting:
- Ambient light: A ceiling fixture (flush mount for low ceilings, a small chandelier for tall ones).
- Task light: A small table lamp on your console table. This is crucial for evening arrivals.
- Accent light: A picture light over a piece of art or an LED strip under a floating shelf.
Step-by-step guide:
- Replace your builder-grade boob light with a statement flush-mount LED fixture.
- Plug a cordless rechargeable table lamp into your landing strip (no outlet needed!).
- Add a motion-sensor nightlight near the floor for late-night trips.
Why buy this? A layered lighting setup makes your entrance hall feel like a room, not a tunnel. Plus, that cordless lamp is a game-changer for renters.
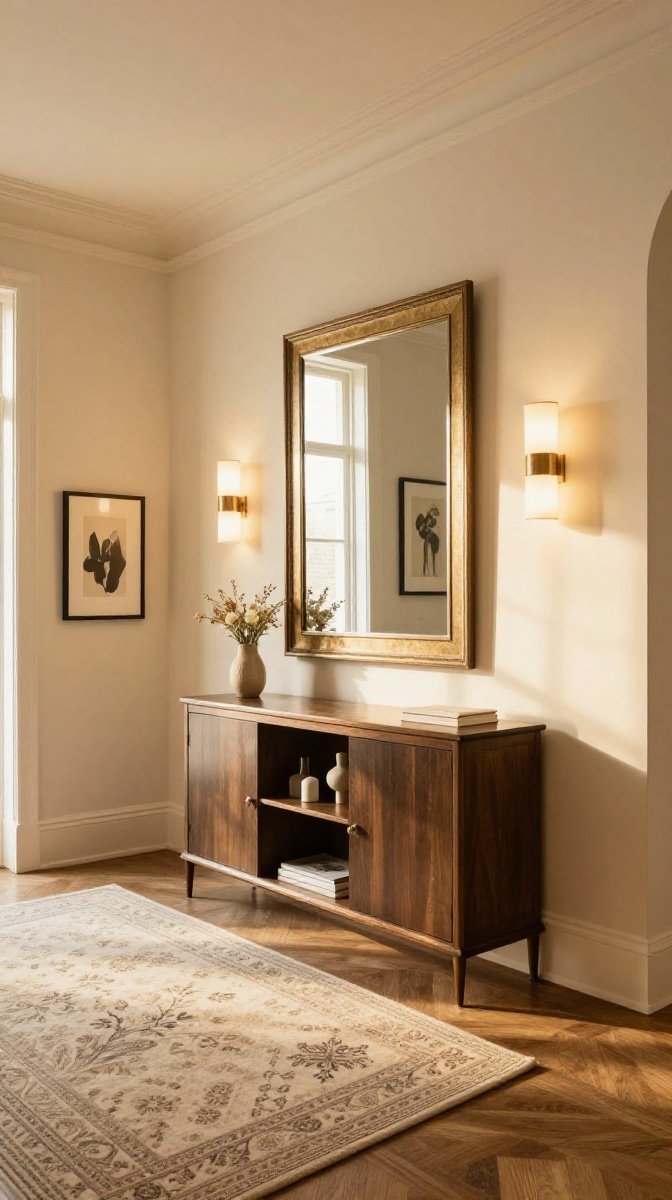
4. Create a Visual Anchor with a Mirror
Mirrors are the superheroes of small spaces. They bounce light, create depth, and offer a final glance before you head out. But a floating mirror looks lonely. You need to anchor it.
How to do it right:
- Place a large arched or round mirror above your console table.
- Ensure the mirror’s bottom edge is no higher than 6-8 inches above the table surface.
- Lean it against the wall for a casual, modern look.
Pro tip: Buy a mirror with a built-in shelf or hook. These genius products combine reflection with function. I have one in my own entrance hall, and it holds my daily face mask and sunglasses. Semantic keyword: entryway mirror with storage.
5. Don’t Forget the Floor
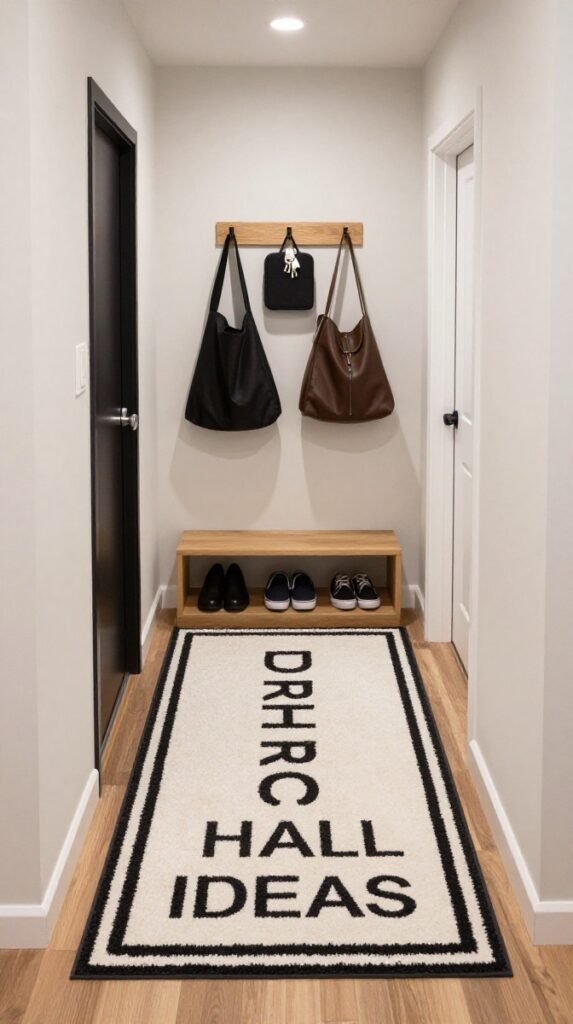
Your floor works harder than any other surface. Wet boots, muddy paws, gritty gravel—it all lands here. Therefore, the right entrance hall flooring is non-negotiable.
Best options to buy:
- A washable, non-slip runner rug: Look for indoor/outdoor polypropylene—it’s stain-resistant and can be hosed down.
- A heavy-duty coir mat: Perfect for outside your door to scrape off mud.
- Luxury vinyl plank (LVP): If you’re renovating, this is waterproof, durable, and looks like wood.
Step-by-step guide for rug placement:
- Measure your hallway length.
- Choose a runner that leaves 4-6 inches of bare floor on all sides.
- Buy a rug pad with a non-slip grip. This prevents dangerous bunching.
- Place a smaller, water-absorbent mat directly inside the door for shoes.
Confidence booster: I’ve bought cheap rugs before. They slide, stain, and look sad within a month. Invest in a flatweave wool or polypropylene runner—it will last a decade.
Also Read:The Ultimate Guide to Creamy Lemon Chicken – A Restaurant-Quality Dish You Can Master at Home
Part 2: Smart Storage – Conquering the Clutter
Now we get to the meat of the matter. Storage is where most entrance halls fail. These six ideas are battle-tested.
6. Install a Wall-Mounted Key Holder (But Make It Pretty)
Keys get lost in trays. They slide under papers. The solution? Vertical key storage.
Your best options:
- A magnetic wooden key holder: A sleek wooden bar with hidden magnets. Your keys “float” on it.
- A small set of decorative hooks: Arrange 3-5 hooks in a row or a cluster.
- A smart key finder: A Bluetooth tracker that beeps from your phone.
Anecdote: My dad spent 20 minutes every morning searching for his truck keys. I bought him a magnetic key holder for Christmas. He called me a week later, laughing. “I walked past it three times because I couldn’t believe my keys were just… there. Hanging. Like art.” Now he has one for his glasses, too.
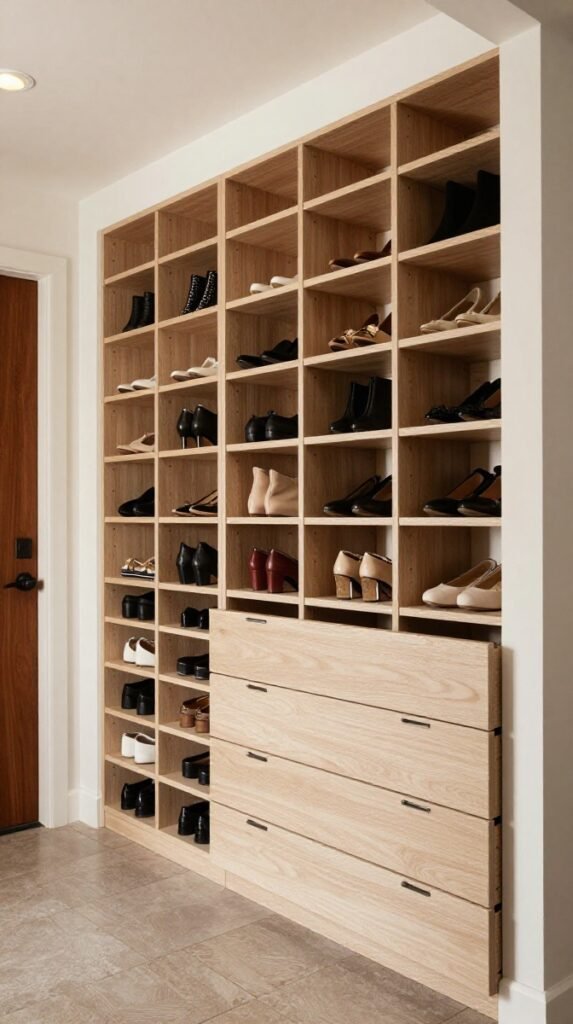
7. Embrace the “Shoe Library”
Shoes are the #1 source of entrance hall chaos. Piles by the door are a trip hazard and an eyesore. You need a shoe library system.
Products to buy (ranked by space efficiency):
- A slim, high-capacity shoe cabinet: These are 9-12 inches deep and hold 12-20 pairs. They often have flip-down fronts. (Best for narrow halls)
- A bench with shoe storage underneath: Lift the seat to reveal a hidden compartment.
- Over-the-door shoe pockets: Great for kids’ shoes or slippers.
- A tiered bamboo shoe rack: Open and airy, but can look messy if not organized.
Step-by-step guide:
- Count how many pairs of “daily wear” shoes your household uses.
- Add 20% for guests.
- Buy a cabinet that holds that number.
- Pro move: Place a small boot tray inside the cabinet for wet or muddy shoes.
- Label each shelf with a small tag (Mom’s, Dad’s, Kid 1, Kid 2).
Why you’ll love it: Imagine opening a cabinet and seeing every shoe neatly lined up. No more toe-stubbing. No more “where’s my left boot?” panic.
8. Use Vertical Wall Hooks for “In-Use” Items
Some items don’t belong in a cabinet. Your daily coat, your kid’s backpack, the dog’s leash—these need quick-grab hooks.
Buy these:
- A row of 5-6 heavy-duty brass or black metal hooks mounted on a wooden backboard.
- A “mudroom locker” system (a tall cabinet with individual cubbies and hooks).
- Over-the-door hook racks (for renters).
Design tip: Mount hooks at different heights. Put adult hooks at 60 inches, kid hooks at 36 inches, and a low hook at 12 inches for the leash. This creates a dynamic, functional wall.
Semantic keyword: heavy duty wall hooks for coats.
9. Install a Floating Shelf with Baskets
Open shelves look great on Pinterest, but in reality? They become dust magnets. The fix: baskets on floating shelves.
Step-by-step guide:
- Install 2-3 heavy-duty floating shelves on a blank wall.
- Buy water hyacinth or seagrass baskets that fit snugly on the shelves.
- Label the baskets: “Mail & Paper,” “Pet Supplies,” “Hats & Gloves,” “Chargers & Cords.”
- Place one or two “pretty” items between the baskets (a small plant, a framed photo).
Why this works: The baskets hide the chaos, while the shelf keeps everything off the floor. Plus, natural fiber baskets add warmth and texture.
10. Get a Narrow Console Table with Drawers
I mentioned console tables earlier, but let’s get specific. The best entrance hall console table has three features:
- Narrow depth (12-14 inches max)
- At least one drawer (for sunglasses, dog poop bags, hand sanitizer)
- Legs that allow airflow (so it doesn’t feel bulky)
What to buy:
- A solid acacia wood console table with a lower shelf and two drawers.
- A metal-and-glass console table (if your style is modern).
- A folding wall-mounted drop-leaf table (for the tiniest spaces).
Confidence tip: Don’t buy a table that’s deeper than 14 inches. I made this mistake. My 18-inch-deep table turned my 4-foot-wide hallway into a 2.5-foot obstacle course. Measure twice, buy once.
11. Use a Storage Ottoman for Seating + Hiding
Every entrance hall needs a place to sit while putting on shoes. But a regular bench wastes potential. Upgrade to a storage ottoman.
Why buy one?
- Inside: Store scarves, umbrellas, sports gear, or off-season shoes.
- Top: A cushioned seat (look for stain-resistant performance fabric).
- Bonus: Use the top as a temporary landing strip for grocery bags.
What size to get:
- For a narrow hall: A rectangular ottoman that’s 30-36 inches wide and 15-18 inches deep.
- For a square foyer: A large cube ottoman with a removable lid.
Anecdote: My friend Mark has three young kids. Their entrance hall was a war zone of tiny sneakers and lost mittens. He bought a 40-inch storage ottoman. Now, the kids sit on it to put on shoes, and all the seasonal gear lives inside. He told me, “It’s the best $150 I ever spent. I don’t even know where the chaos went.”
Part 3: Style & Personality – Making It Yours
Your entrance hall should function perfectly, but it should also feel like you. These next five ideas add soul.
12. Hang a Piece of Art That Makes You Smile
Art isn’t just for living rooms. Your entrance hall is the first thing you see when you come home tired. Hang something that sparks joy.
What to buy:
- A large canvas print of a favorite vacation photo.
- A framed family portrait (black and white looks timeless).
- A textile wall hanging (adds softness and absorbs sound).
- A set of three small matching prints arranged vertically.
Step-by-step hanging guide:
- The center of your art should be 57-60 inches from the floor (eye level for average adults).
- If hanging above a console table, leave 6-8 inches of space between the tabletop and the art’s bottom edge.
- Use a picture hanging system with a level—crooked art drives me crazy.
Semantic keyword: entryway wall art sets.
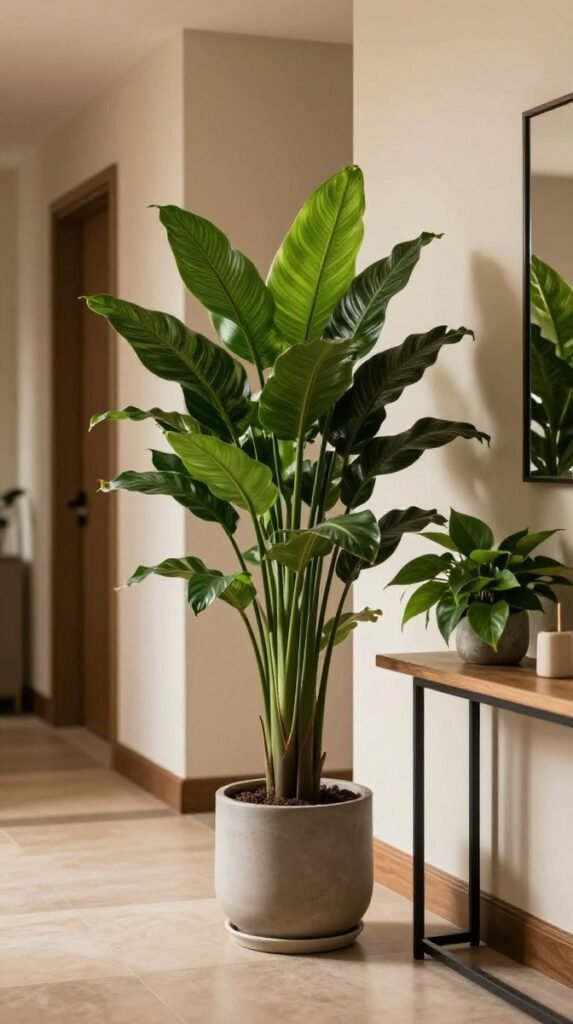
13. Add a Live Plant (Yes, Even in Low Light)
A living thing in your entrance hall instantly warms the space. But not all plants survive the dark, drafty entryway.
The best low-light, low-maintenance plants:
- Snake plant (Sansevieria): Virtually unkillable. Thrives on neglect.
- ZZ plant: Glossy leaves, needs water once a month.
- Pothos: A trailing vine that’s happy in a hanging pot.
- Cast iron plant: As tough as it sounds.
What to buy:
- A self-watering pot (game-changer for forgetful waterers).
- A ceramic pot with drainage and a saucer.
- A small plant stand to elevate it off the floor.
Pro tip: If you truly cannot keep a plant alive, buy a high-quality artificial fiddle leaf fig. The faux ones from premium brands look shockingly real. I have one in my dark hallway, and guests always try to water it.
14. Install a Statement Light Fixture
I mentioned layered lighting, but the ceiling fixture itself is a chance for drama. Swap that boring flush mount for something with personality.
Ideas for every style:
- Modern farmhouse: A black metal cage light or a wood bead chandelier.
- Mid-century modern: A Sputnik chandelier or a globe pendant.
- Traditional: A crystal semi-flush mount or a lantern-style light.
- Industrial: A vintage Edison bulb cluster or a metal shade.
Confidence tip: Make sure the fixture is rated for your ceiling height. For a standard 8-foot ceiling, a flush or semi-flush mount is safest. For 9+ feet, you can hang a mini chandelier.
15. Paint or Wallpaper a “Moment Wall”
You don’t need to paint the whole entrance hall. Sometimes, one dramatic wall is all it takes.
What to do:
- Paint one wall a deep, bold color: Navy blue, forest green, or charcoal gray. These colors hide dirt and make white trim pop.
- Hang removable peel-and-stick wallpaper: Perfect for renters. Choose a subtle geometric pattern or a bold botanical print.
- Create a board and batten accent wall: Use MDF boards and paint them white or a soft pastel.
Step-by-step for removable wallpaper:
- Measure your wall height and width.
- Buy 20% more wallpaper than you think you need (for mistakes).
- Clean the wall with rubbing alcohol.
- Start from the top, peel the backing, and smooth down with a credit card.
- Trim excess with a sharp utility knife.
Why you’ll love it: A statement wall turns your entrance hall into a destination, not a pass-through.
16. Add a Scent Strategy
Sight and sound matter, but scent is the strongest memory trigger. Your entrance hall should smell like a welcome hug.
Products to buy:
- A flameless candle with a timer: Set it to turn on every evening. Look for scents like “Sea Salt & Sage” or “Linen.”
- A reed diffuser: Safe and low-maintenance. Place it high (on a shelf) so it doesn’t get knocked over.
- An essential oil spray: Spritz the rug or a decorative pillow with peppermint or lavender.
Anecdote: My aunt’s entrance hall always smelled faintly of lemon and rosemary. I never knew why until I noticed a small reed diffuser behind a vase. She told me, “I want people to take a deep breath and relax the second they walk in. Scent does that faster than anything.” She was right. I bought the same diffuser the next week.
Part 4: Smart Tech & Modern Solutions
We live in the 21st century. Your entrance hall should, too.
17. Install a Smart Video Doorbell
This isn’t just security. A video doorbell transforms how you interact with your front door.
What to buy:
- A wired video doorbell (continuous power, no battery changes).
- A wireless battery-powered model (easier for renters).
Why you need it:
- See who’s at the door from your phone.
- Talk to delivery drivers without opening the door.
- Get alerts when packages arrive.
Integration tip: Pair it with a smart lock. Then, you can unlock the door for a guest remotely. I do this for my dog walker all the time.
18. Put a Charging Station in Your Landing Strip
Dead phone battery is a modern tragedy. Build charging into your entrance hall.
Products to buy:
- A wireless charging pad embedded in a wooden tray.
- A multi-port USB wall outlet (replace your standard outlet—it’s an easy DIY).
- A charging station with built-in cables (holds 2-4 devices).
Step-by-step:
- Designate one drawer or a corner of your console table for “charging central.”
- Run a power strip inside the drawer (drill a hole in the back for the cord).
- Place the charging pad or cables inside.
- Close the drawer. Phones charge invisibly.
Confidence tip: I used to have cables snaking across my entrance hall floor. My toddler loved to yank them. Now, everything is hidden inside a drawer. It’s safer, cleaner, and so satisfying.
19. Use Motion-Sensor Lights for Late Nights
Stumbling to the bathroom at 2 AM? Fumbling for a light switch? Not anymore.
What to buy:
- Plug-in motion sensor nightlights (place them along the baseboard every 6 feet).
- Battery-powered stick-on motion lights (for inside closets or under shelves).
- A smart bulb with a motion sensor (screws into your existing fixture).
Why you’ll love it: The lights turn on automatically when you enter, then turn off after 60 seconds. It feels like magic. Plus, it saves electricity.
Part 5: Small Space & Rental Hacks
No permanent changes? Tiny square footage? These ideas are for you.
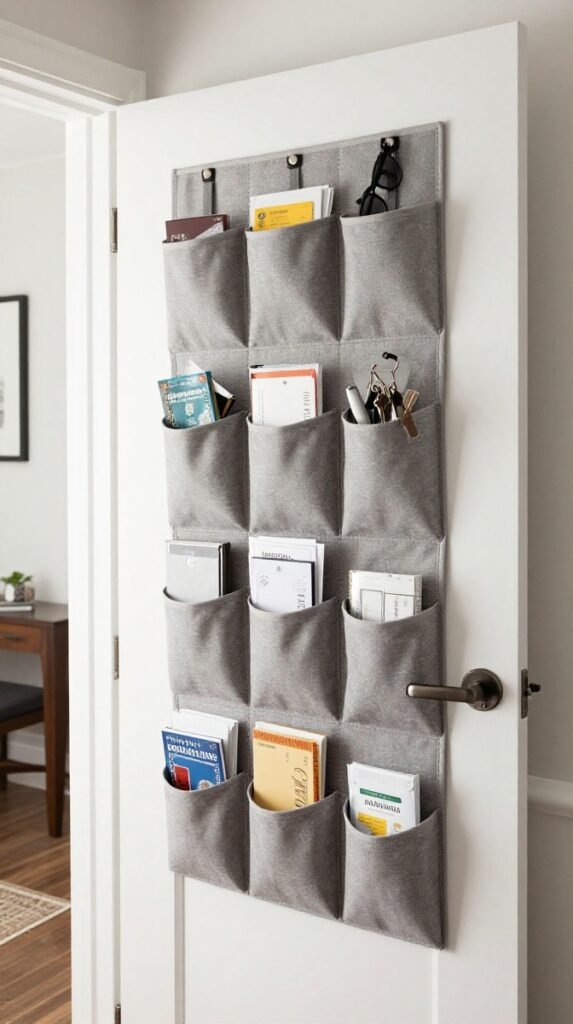
20. Use Over-the-Door Organizers (But the Pretty Kind)
Over-the-door shoe racks are ugly. I said it. But there are beautiful alternatives.
What to buy instead:
- An over-the-door hook rack with a decorative backplate (looks like wall art).
- An over-the-door storage cabinet (a slim, wooden cabinet that hangs on the door).
- A canvas organizer with a printed design (choose a subtle stripe or geometric pattern).
Step-by-step for door storage:
- Measure your door’s thickness (standard is 1.75 inches).
- Buy an organizer with padded hooks to protect the paint.
- Use it for lightweight items only (keys, sunglasses, small umbrellas). No heavy boots.
21. Create a “Pop-Up” Entryway with a Folding Table
If you have zero floor space, go vertical and foldable.
What to buy:
- A wall-mounted drop-leaf table (folds flat against the wall when not in use).
- A collapsible stool (hangs on a hook).
- A magnetic strip (for knives? No—for keys and metal clips).
How to use it:
- Mount the folding table at waist height.
- Leave it folded down 90% of the time.
- When you need a landing strip (bringing in groceries, wrapping gifts), flip it up.
- Hang the collapsible stool nearby for seating that disappears.
Anecdote: My cousin lives in a 400-square-foot studio. Her “entrance hall” is a 2-foot-wide stretch of wall. She installed a folding table and a magnetic strip. When I visited, I was amazed. “Where does everything go?” I asked. She flipped the table down and pointed to the magnetic strip holding her keys. “It’s all temporary,” she said. “Just like my need to organize.”
22. Label Everything with Chalkboard Labels
Finally, the simplest but most transformative idea. Labeling turns a chaotic entrance hall into an organized system.
What to buy:
- Chalkboard sticker labels (stick them on baskets, bins, and drawers).
- A liquid chalk marker (writes smoothly, wipes off with water).
- A label maker with clear tape (for a more permanent look).
Step-by-step labeling guide:
- Group all similar items (all hats, all gloves, all leashes).
- Put each group into a separate basket or drawer.
- Label each container clearly: “WINTER HATS,” “DOG GEAR,” “RETURN TO STORE.”
- When a label changes, erase and rewrite (chalkboard) or peel off (label maker).
Why this convinces you to buy: Labels create accountability. When everyone in the house knows exactly where the “MAIL TO SORT” basket lives, they actually use it. No more “I didn’t know where to put it.” Labels remove the guesswork.
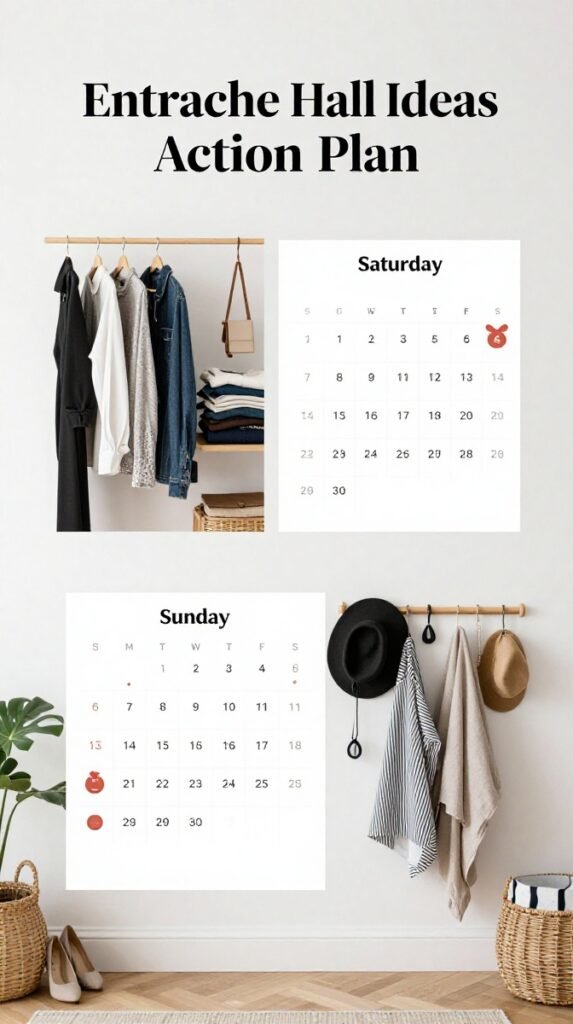
Your Final Step-by-Step Action Plan (Do This This Weekend)
You have 22 ideas. That’s a lot. Don’t try to do everything at once. Here’s your 7-day plan to transform your entrance hall with confidence.
Day 1 (Friday Evening): The Purge
- Empty your entire entrance hall. Every shoe, every coat, every random item.
- Make three piles: Keep, Donate, Trash.
- Be ruthless. If you haven’t worn it in a year, donate it.
Day 2 (Saturday Morning): Measure & Map
- Measure your floor space, wall height, and doorway clearances.
- Draw a simple map. Mark your three zones (Arrival, Storage, Transition).
- Identify your “problem spots” (e.g., “Shoes pile up here,” “Bags fall off this hook”).
Day 3 (Saturday Afternoon): Shop Your List
- Based on your map, choose 5-7 ideas from this article that solve your specific problems.
- Buy these products first:
- A slim shoe cabinet or storage ottoman (solves 80% of clutter).
- A console table with a drawer (creates your landing strip).
- A set of heavy-duty wall hooks (for daily coats).
- A washable runner rug (protects your floor).
- Skip the decorative items until the function is fixed.
Day 4 (Sunday): Install & Organize
- Assemble and place your furniture.
- Mount your hooks and shelves (use a stud finder!).
- Put items back, but only in their new “homes.”
- Add labels to baskets and drawers.
Day 5 (Monday): The Test Drive
- Live with your new entrance hall for one full day.
- Notice what works and what doesn’t. Does the shoe cabinet hold everything? Is the landing strip big enough?
- Make small adjustments (move a hook, swap a basket).
Day 6 (Tuesday): Add Soul
- Now that the function is solid, add your statement mirror, art, plant, and scent diffuser.
- Install your motion-sensor light and charging station.
Day 7 (Wednesday): Celebrate
- Invite a neighbor over. Watch them walk in and say, “Wow, your entrance hall is amazing.”
- Take a photo. You’ve earned it.
The Bottom Line: Buy With Confidence
I’ve walked you through 22 proven entrance hall ideas, shared my own mistakes and wins, and given you a clear shopping list. Now, it’s your turn.
Don’t let another day pass with a dark, cluttered, stressful entryway. The products I’ve recommended—from solid wood console tables to magnetic key holders to self-watering planters—are investments in your daily happiness. They’re not expenses. They’re solutions.
Every time you walk through your front door, you deserve to feel a sense of calm. You deserve a place to set down your bags, hang your coat, and take a deep breath. You deserve an entrance hall that works for you, not against you.