There’s something magical about cherry blossom season—the soft pink petals, the fleeting beauty, and that fresh, romantic energy in the air. Bringing sakura nails onto your fingertips lets you carry that same ephemeral charm everywhere you go. Whether you love subtle elegance or bold floral statements, these 19 sakura nails design ideas will inspire your next manicure. From glossy minimalists to textured 3D art, each idea captures the gentle spirit of Japan’s most beloved flower.
1. Classic Pink and White Cherry Blossoms
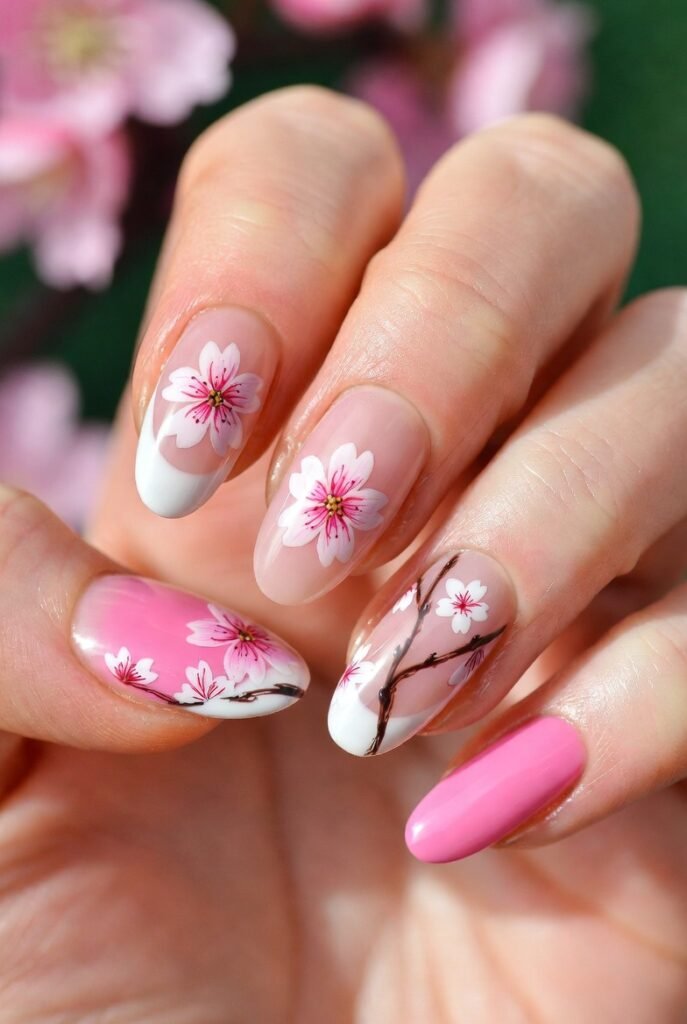
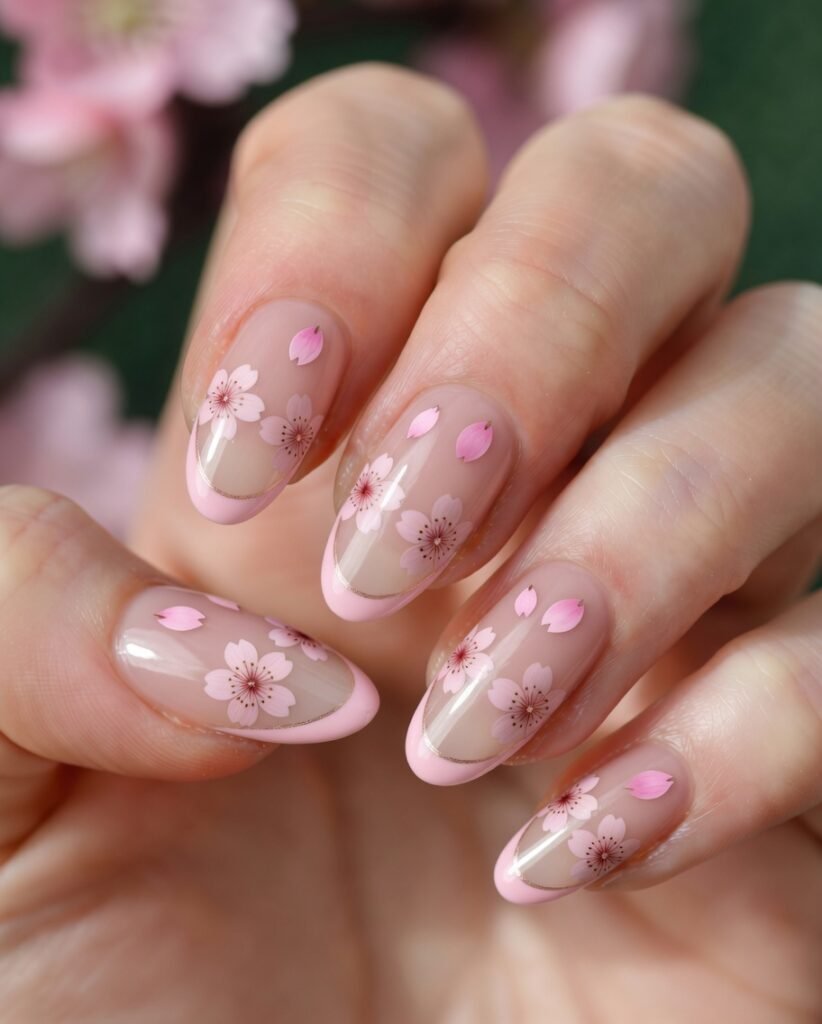
The most timeless approach to sakura nails starts with a soft pink base, almost like the sky just before sunrise. Over that delicate canvas, tiny five-petal blossoms are painted in creamy white with minuscule yellow or gold dots at their centers. This design works beautifully on all nail shapes, but it truly shines on medium-length almond or oval nails, where the flowers can spread naturally without feeling crowded. The contrast between the barely-there pink background and the crisp white petals creates a fresh, clean look that feels both romantic and understated.
To add depth without overwhelming the simplicity, many nail artists place the largest cherry blossom near the cuticle and let smaller buds drift toward the tip. A single accent nail on each hand can feature a slightly denser cluster of flowers, while the rest remain airy with just one or two blossoms per nail. Classic sakura nails like these pair perfectly with glossy top coats for a polished, almost wet finish. They’re ideal for bridal showers, spring weddings, or any day you want to feel softly elegant without shouting for attention.
2. Watercolor Wash Sakura Nails
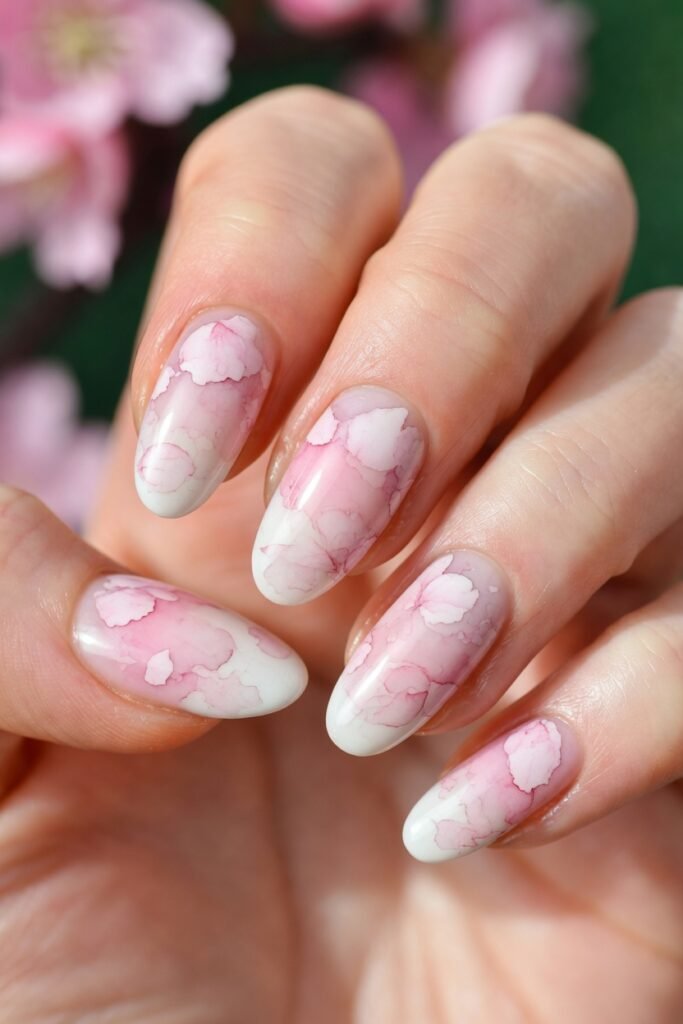
For a dreamy, artistic take on sakura nails, nothing beats a soft watercolor wash effect. Instead of crisp, solid petals, imagine translucent pinks and lavenders bleeding gently into a sheer nude or white base, mimicking the way cherry blossoms blur in the rain or fade into a hazy spring morning. The technique involves layering thin, diluted gel or polish with a fine brush, then blending the edges while still wet. Each flower looks like a tiny painting, with petals that overlap in shades of blush, coral, and pale rose. This design feels incredibly romantic and slightly bohemian, perfect for free spirits who love ethereal beauty.
To keep the watercolor look from becoming muddy, skilled artists leave plenty of negative space around the blossoms. A few scattered petals might appear to drift away from the main flower, as if caught in a gentle breeze. The base is often a milky white or translucent pink, allowing your natural nail line to peek through. Watercolor sakura nails work wonderfully on shorter nails because the soft edges don’t require precise tips. Finish with a matte top coat to enhance the painterly feel, or use a glossy sealer for a wet, fresh-from-the-canvas shine. Either way, these nails whisper rather than shout.
3. Gold Foil and Cherry Blossom Accents
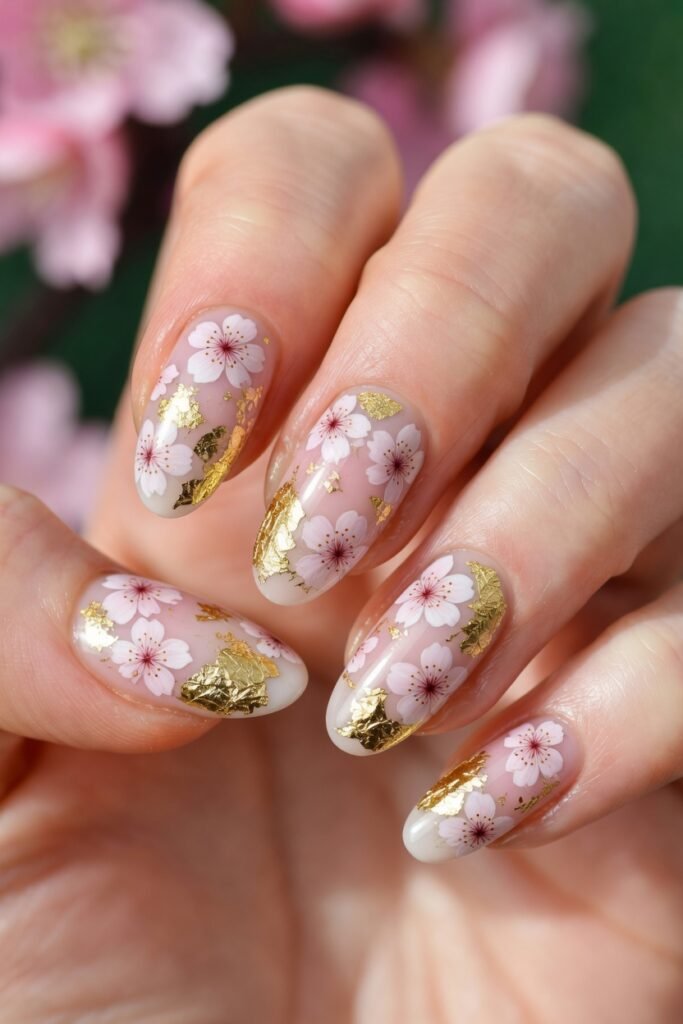
Elevate your sakura nails with luxurious touches of gold foil or gold leaf. The contrast between delicate pink petals and irregular, shimmering metallic flakes creates a high-end, almost jewel-like look. Place a single cherry blossom near the center of each nail, then add tiny fragments of torn gold foil around the flower’s edges or drifting like golden pollen in the air. The gold catches light beautifully, making your manicure feel celebratory and special. This design is particularly stunning for engagement parties, anniversaries, or any occasion where you want your hands to gleam.
Balance is key: too much gold can overwhelm the softness of sakura, so most artists use gold sparingly. One accent nail might feature a full gold base with a negative-space blossom cut out, while the other nails keep a blush pink background with just a few gold flecks. Gold foil sakura nails pair exceptionally well with coffin or stiletto shapes, where the metallic accents follow the nail’s long lines. Apply a high-shine top coat to lock in both the gold and the flowers, ensuring everything stays smooth and luxurious. You’ll find yourself staring at your hands all day.
Also Read: 15 Glam Makeup Look Ideas to Elevate Your Beauty Routine
4. Reverse French with Sakura Petals
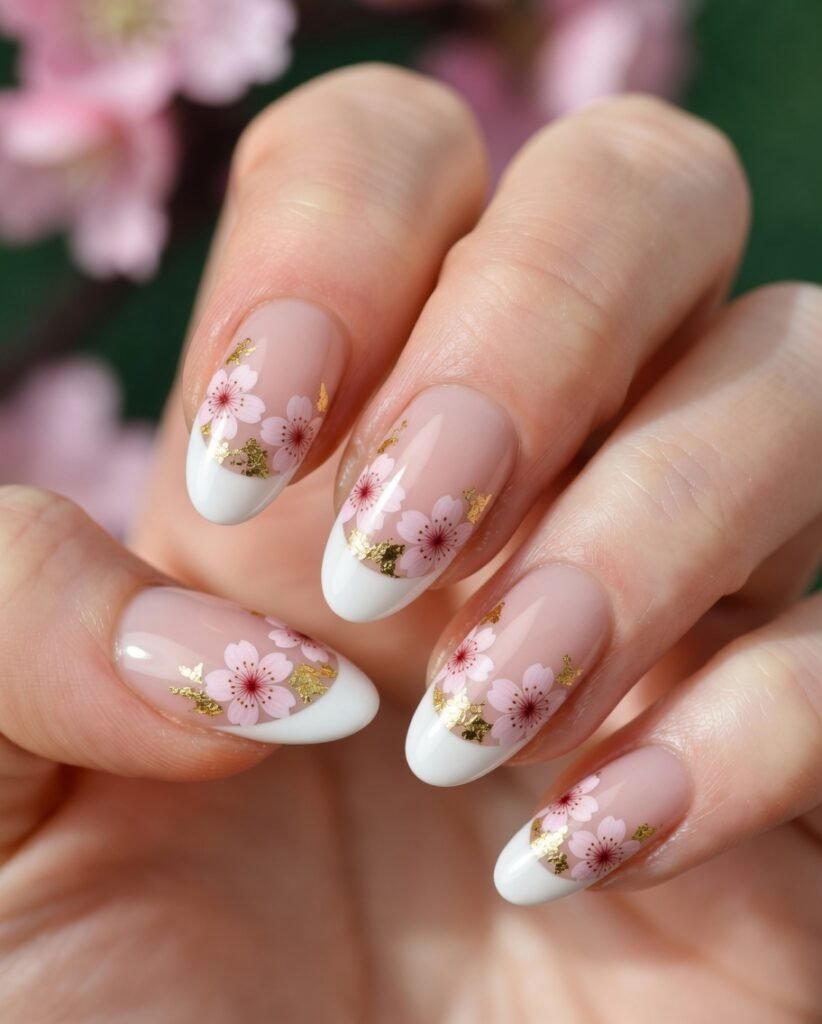
Put a floral twist on the classic French manicure by flipping the design. Instead of a white tip, paint a thin, curved line in soft pink or sheer white near your cuticle area, then decorate the rest of the nail with scattered sakura petals. This reverse French style keeps the nail bed mostly bare or lightly tinted, while the tip remains transparent or has just a whisper of color. Then, one or two full cherry blossoms bloom near the free edge, with a few individual petals floating down toward the reverse crescent. The result is airy, modern, and unexpectedly fresh.
This design works brilliantly on short, square nails because the reverse crescent opens up the nail plate, making fingers look longer. For a cohesive look, use the same petal color across all nails, but vary the placement so each nail tells a slightly different story. Reverse French sakura nails are office-appropriate yet artistic—they won’t distract in a professional setting but will definitely spark compliments during coffee breaks. Stick to a matte finish for a subdued elegance, or go glossy for that classic French shine. Either way, you’re reinventing a timeless style.
5. Glitter Gradient Sakura Nails
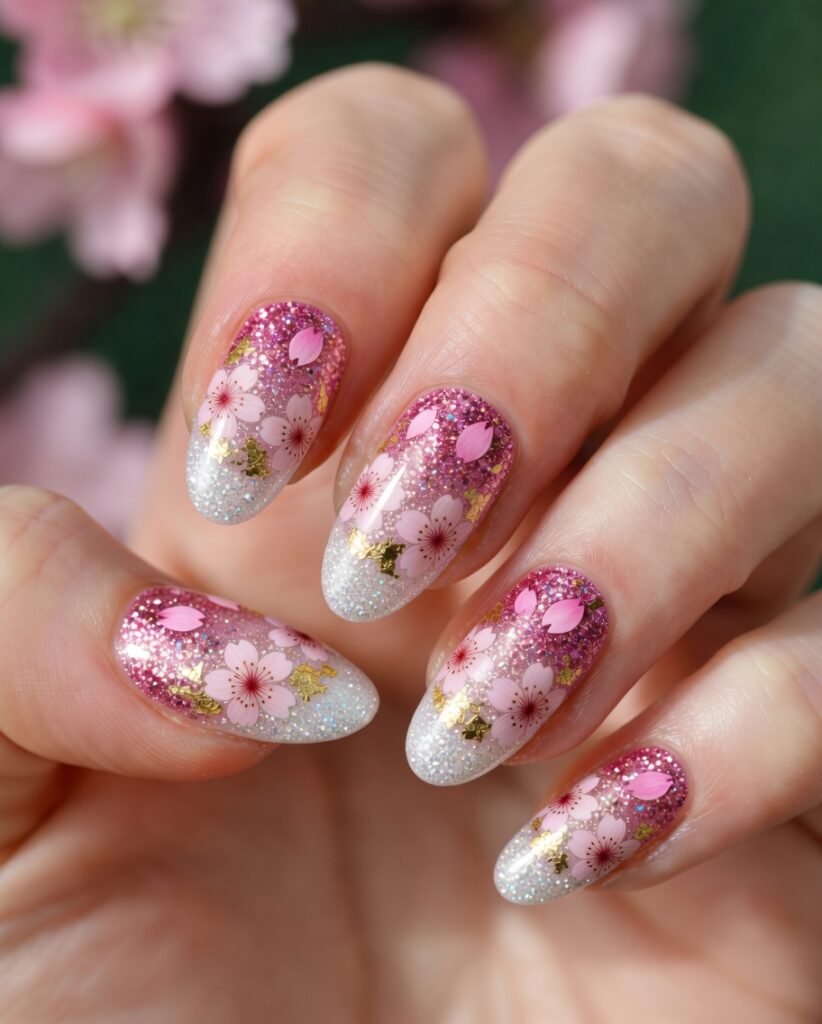
Nothing says celebration like a touch of sparkle. A glitter gradient on sakura nails starts with a sheer pink or nude base near the cuticle, then intensifies into a dense glitter finish toward the tip, using fine iridescent or rose-gold shimmer. Over that glittery fade, paint delicate cherry blossoms—usually just one or two per nail—so they sit partially on the glitter and partially on the smooth base. The contrast between matte petals and sparkling background makes the flowers pop without looking chaotic. This design captures the feeling of cherry blossoms glowing under spring sunlight.
Choose glitter that mimics the natural shimmer of dew on petals: think soft champagne, pale rose, or opalescent white. Avoid chunky craft glitters; stick to ultrafine powders or liquid glitter polishes for a seamless gradient. Glitter gradient sakura nails look especially beautiful on almond or ballerina shapes, where the gradient can stretch elegantly along the nail’s length. For extra harmony, pick a glitter that has tiny flecks of the same pink used in your blossoms. Wear these to garden parties, birthday dinners, or any night out when you want your nails to catch every candlelight flicker.
6. Negative Space Cherry Blossoms
Minimalists, rejoice. Negative space sakura nails leave large portions of your natural nail exposed, with only thin outlines or partial petals painted directly onto the bare nail. Imagine a clear or barely-there base, then a single, delicate cherry blossom drawn in soft pink outline near the side of your nail, with no background color to compete. The rest of the nail remains completely naked except for a glossy top coat. This design celebrates simplicity and the beauty of your own nail shape, making it incredibly modern and wearable for anyone who finds full-coverage floral too busy.
You can also play with half-flowers that begin at the nail edge and fade into nothingness, as if the blossom is growing from your skin. Another option is painting just the centers of the flowers with tiny yellow dots, leaving the petals implied by empty space. Negative space sakura nails require precise brush control because every line is visible. They work best on short, cleanly filed nails—think squoval or rounded. Since there’s no opaque base, these nails last longer without visible grow-out. Perfect for the woman who wants cherry blossom energy without committing to a full floral scene.
7. Ombre Pink to White Sakura Nails
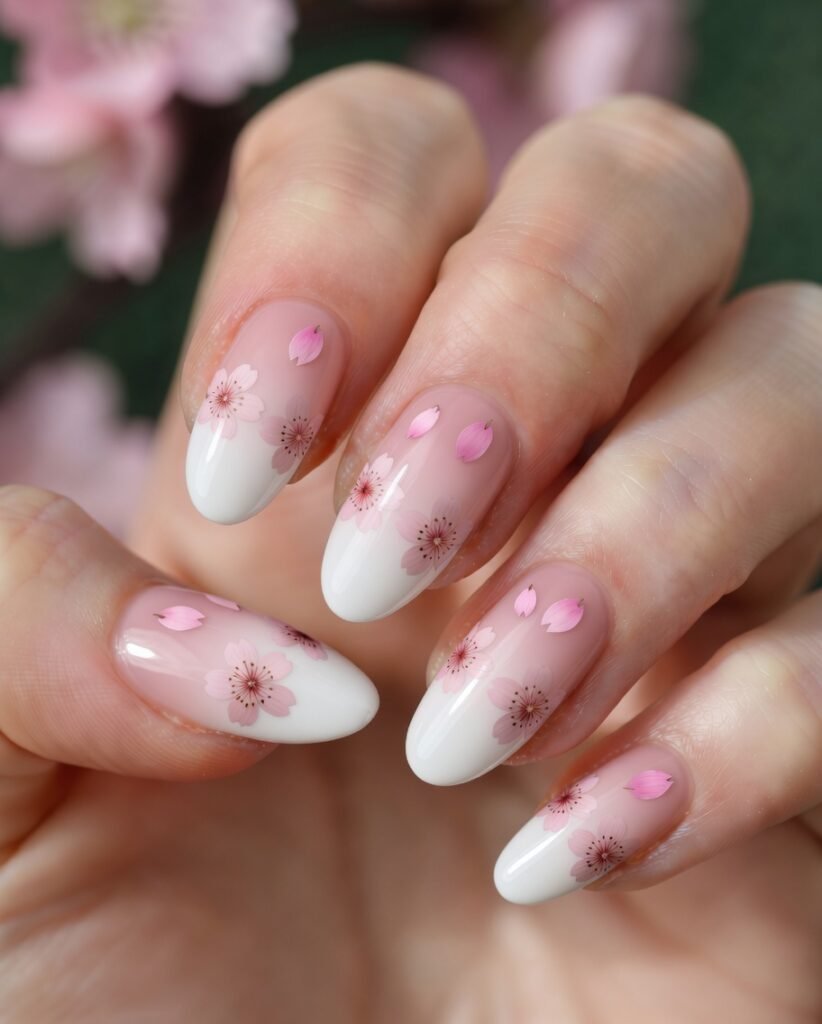
An ombre fade from deep blush pink at the cuticle to pure white at the tip creates a dreamy canvas for sakura nails. The gradient itself already mimics the gradual lightening of cherry blossom petals from stem to edge. Then, add small clusters of flowers in contrasting shades: use darker pink blossoms near the cuticle and white or pale pink ones near the tip. This layered approach gives your nails incredible depth and movement, as if the flowers are shifting color as they bloom. The ombre background does most of the heavy lifting, so you only need one or two blossoms per nail.
To achieve a seamless fade, use a sponge or an airbrush for gel polish, blending until there are no harsh lines. The transition should feel like a soft sunrise. Ombre sakura nails look especially stunning on long, coffin-shaped nails where the gradient has room to breathe. For a cohesive set, keep all nails in the same ombre direction, but vary flower placement—some near the sidewall, some centered, some trailing toward the tip. A glossy top coat enhances the ombre’s smoothness. Wear these for spring bridal showers, maternity photoshoots, or anytime you want a romantic, candy-colored manicure.
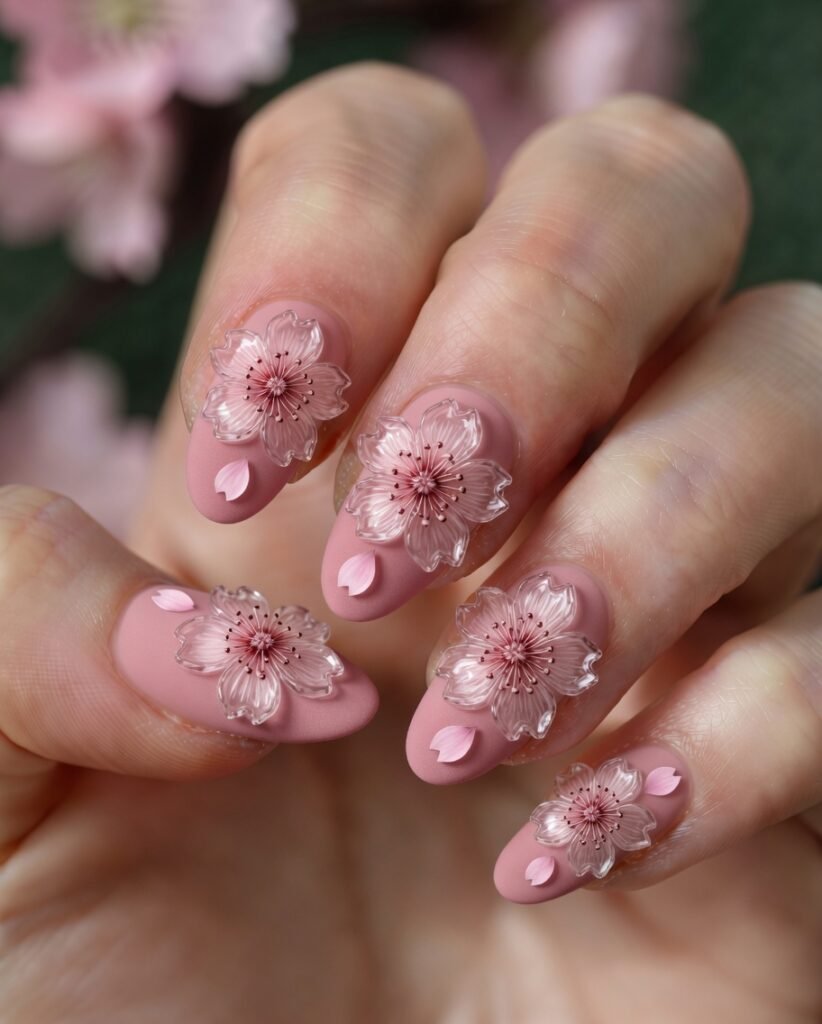
8. 3D Resin Sakura Nails
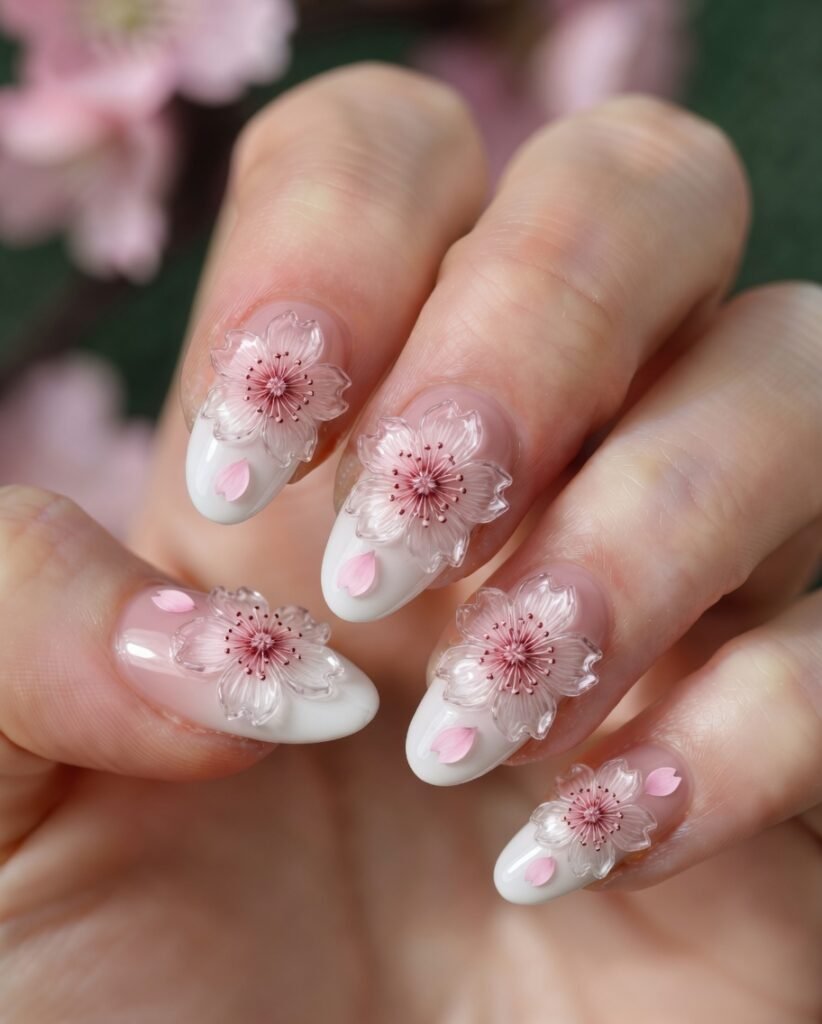
Take sakura nails into the third dimension with clear resin or builder gel sculpted into actual raised petals. Each cherry blossom becomes a tiny, tactile sculpture on your nail, with individual petals curving upward like real flowers catching the breeze. The 3D effect is achieved by placing small beads of clear or tinted gel, then shaping each petal with a fine liner brush before curing under a lamp. Once hardened, the petals are painted in translucent pinks with deeper centers. The result is almost like having miniature porcelain flowers glued to your nails—extremely eye-catching and deeply satisfying to touch.
Because 3D flowers add thickness, they work best on accent nails rather than every finger. Choose one or two nails per hand to feature sculpted blossoms, keeping the rest flat with painted sakura. 3D resin sakura nails require careful maintenance: avoid picking at the raised petals and use a soft brush to clean underneath them. They look spectacular on long almond or stiletto nails, where the extra height of the 3D flower doesn’t feel clunky. Finish with a generous layer of top coat over the petals to seal color and add shine. These are conversation-starters at art openings, weddings, or any event where your hands will be in the spotlight.
9. Matte Sakura with Glossy Petals
Mixing finishes adds instant sophistication. For this version of sakura nails, apply a muted, velvety matte top coat over a dusty rose or lavender base. Then, paint your cherry blossoms using glossy polish and seal only the flowers with a high-shine top coat—leaving the surrounding nail matte. This contrast makes the petals look wet, vibrant, and almost freshly picked, while the matte background recedes quietly. The effect is subtle from far away but mesmerizing up close. It’s a clever way to make floral art stand out without adding extra colors or glitter.
You can reverse the finish as well: matte flowers on a glossy base. However, glossy petals on matte ground tend to look more natural because real petals have a slight sheen. Keep the blossoms small and precise, using no more than three per nail. Matte sakura nails with glossy petals work on any nail length, but they’re especially flattering on short, square nails where the finish contrast is more obvious. Be sure to use a high-quality matte top coat that won’t yellow over time. Wear these to casual brunches or creative offices—they’re artistic without being loud.
10. Cherry Blossom Branch Nails

Instead of isolated flowers, paint an entire sakura branch winding across your nails. Start with a soft beige or pale pink base, then draw a thin, dark brown or charcoal line that curves from the cuticle of your pinky, climbs over the ring finger, dips onto the middle, and ends with a flourish on your index finger. Along this branch, place clusters of cherry blossoms in varying sizes, plus tiny unopened buds and a few green leaves. This design tells a story across your whole hand, making each nail feel like a panel in a Japanese woodblock print.
To make the branch design cohesive, plan the composition before you start painting. The branch should flow naturally, not look like separate pieces on each nail. Some artists use stamping plates for the branch lines to ensure consistency, then hand-paint the flowers. Cherry blossom branch nails are best on longer nail shapes like almond or coffin, where there’s enough length to show the branch’s movement. Leave your thumb as an accent with a larger branch section and dense blossoms. Finish with a glossy top coat to protect the fine lines. This is for serious floral nail art lovers.
11. Pastel Rainbow Sakura Nails
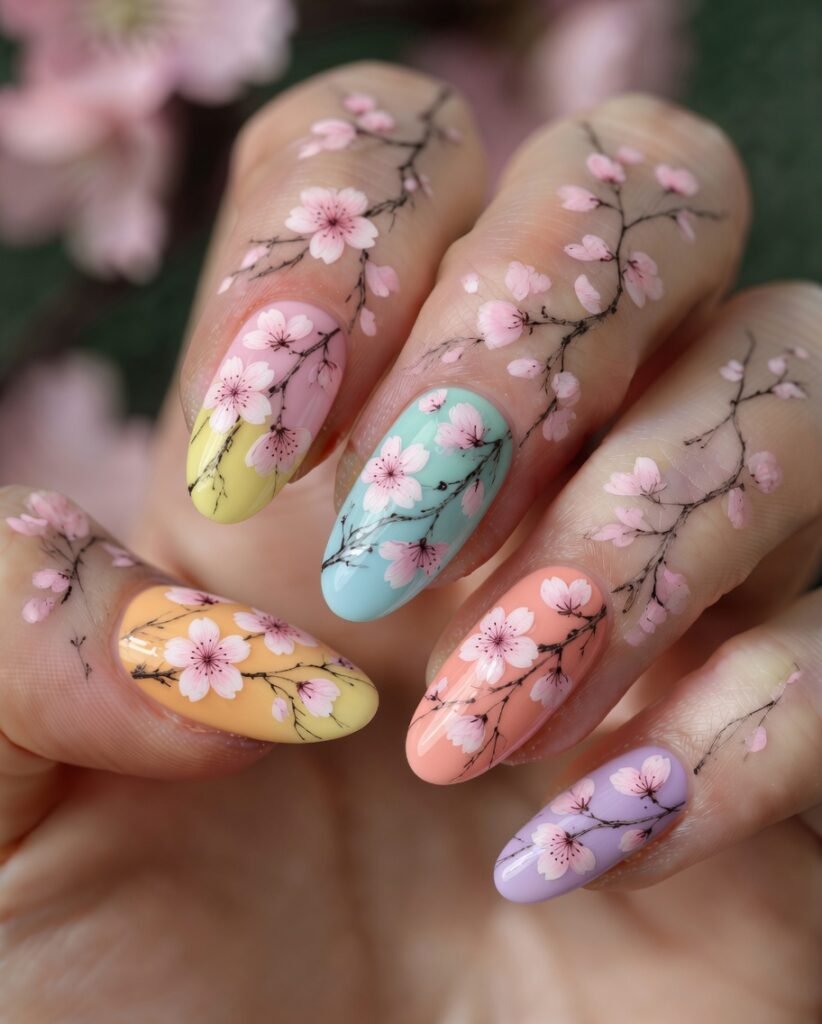
Who says sakura has to stay pink? For a playful, unexpected twist, use pastel rainbow backgrounds—each nail a different soft hue like mint, lavender, baby blue, peach, and lemon. Then, paint classic white or light pink cherry blossoms on every nail. The rainbow base amplifies the joyful, celebratory feeling of spring, while the consistent flower motif ties everything together. This design is perfect for those who love color but still want a cohesive look. The blossoms act as a neutral anchor, allowing the background to shine without becoming chaotic.
Keep the flowers simple: five-petal shapes with tiny yellow centers. Avoid adding extra leaves or branches, as that would compete with the rainbow backdrop. Pastel rainbow sakura nails look fantastic on short, rounded nails where the bright colors feel like candy buttons. For a more grown-up version, mute the pastels to dusty tones—think sage, powder blue, and lilac. Use a high-gloss finish to make both the background and flowers gleam. Wear these to music festivals, pride parades, or any day you need a mood boost. They’re impossible to frown at.
12. Holographic Sakura Nails
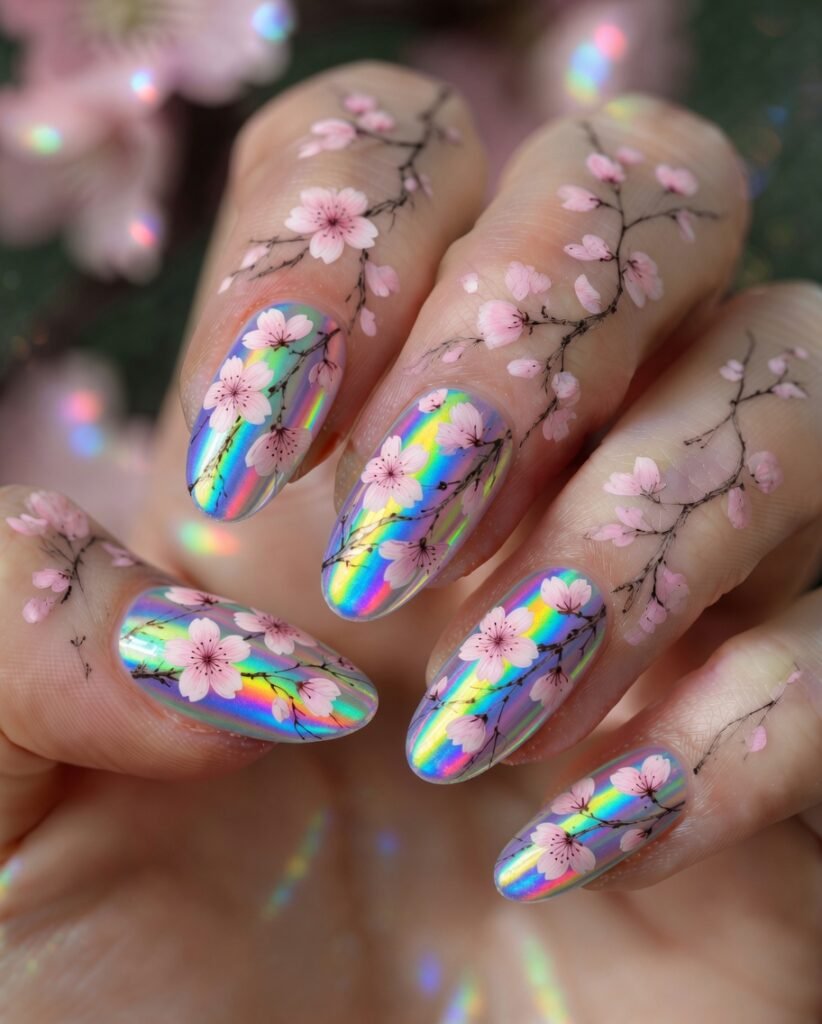
Combine nature with futurism by adding a holographic effect to your sakura nails. Start with a sheer holographic polish that shifts from pink to gold to green as your hand moves. Over this iridescent base, paint cherry blossoms in solid white or deep magenta so they remain visible despite the shimmer. The holographic background mimics the way light plays through real petals, creating a magical, ever-changing display. This design feels simultaneously delicate and edgy—perfect for anyone who loves anime-inspired or cyberpunk aesthetics.
Use a holographic powder rubbed into a no-wipe top coat for the strongest color shift. Apply it only as a faint shimmer, not an overpowering rainbow, so the flowers stay readable. Holographic sakura nails shine brightest on long stiletto or coffin nails, where the light-catching surface has more area to dance. For a balanced look, keep flowers sparse—one per nail is plenty. Finish with a thick, glossy top coat to lock the holographic particles. These nails look incredible under club lights, at raves, or even just in direct sunlight during your commute.
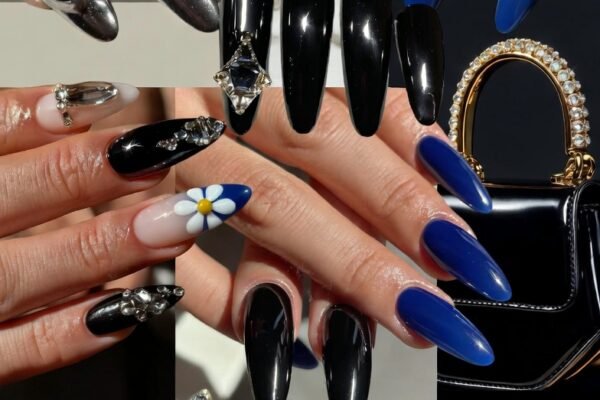
13. Black Base Sakura Nails
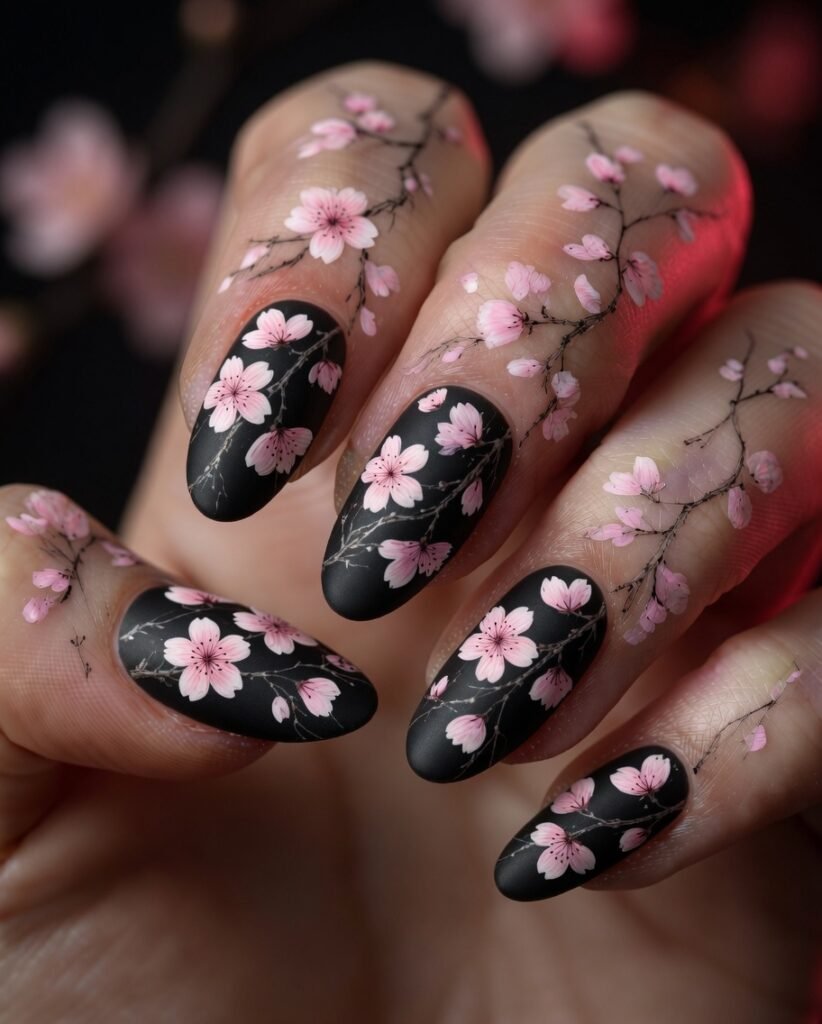
For a dramatic, gothic-romantic contrast, paint your nails deep black or charcoal gray, then add bright white, hot pink, or cherry-red sakura blossoms. The dark background makes each petal glow like neon against a night sky. This design subverts the usual soft, pastel expectations of cherry blossoms, giving them a bold, edgy personality. It works beautifully for fall or winter, when you want spring motifs but with seasonal darkness. The black base also makes the floral art look incredibly crisp, almost like a high-contrast ink drawing.
To keep the look elegant rather than Halloween-like, use a satin or matte black base instead of glossy. Paint the blossoms in layers: start with a white under-painting, then add pink or red on top so the colors pop against the dark. Black base sakura nails often feature gold or silver centers for extra luxury. This design is stunning on short, square nails or long ballerina shapes. Wear them to evening events, rock concerts, or any time you want your nails to say “romantic but don’t mess with me.” Add a single crystal stud to each flower’s center for extra drama.
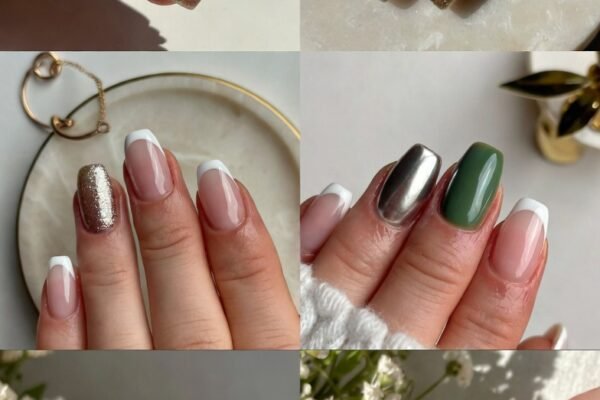
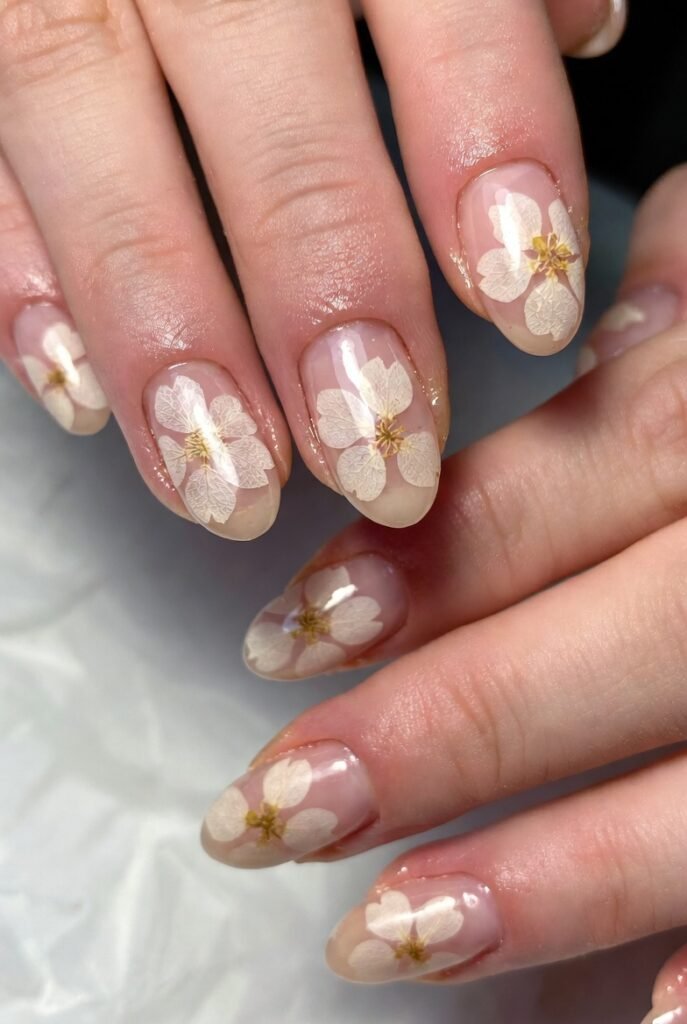
14. Milky White Sakura Nails
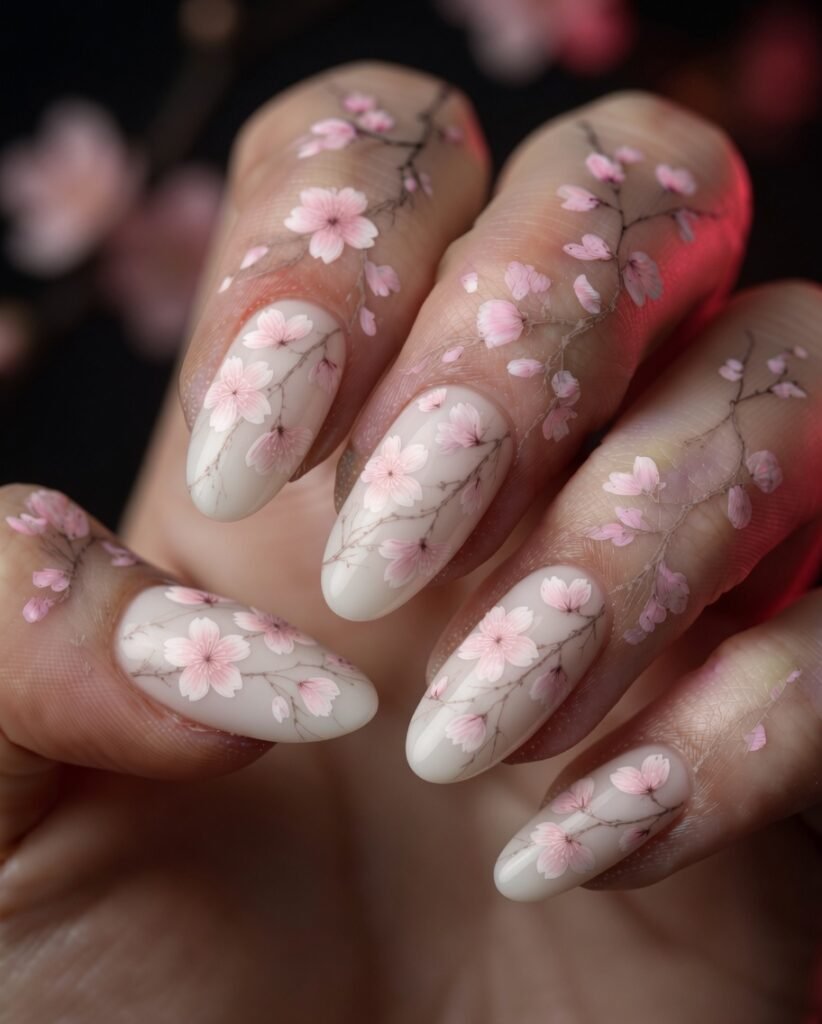
Sometimes the simplest canvas is the most beautiful. A milky white translucent base—neither sheer nor opaque, but softly cloudy like fresh milk—creates the perfect backdrop for barely-there sakura nails. On this base, paint cherry blossoms in the palest possible pink or even pure white, so the flowers almost blend in then reveal themselves upon close inspection. This is the ultimate “your nails but better” floral design. It’s subtle enough for conservative workplaces but artistic enough to satisfy your creative cravings.
The milky white effect comes from mixing a drop of white pigment into a clear builder gel or using a commercial “milky” polish. Apply two thin coats for that signature soft glow. Milky white sakura nails look especially chic on short, rounded nails where the minimalist vibe feels intentional. Place just one small blossom near each cuticle, then let the rest of the nail remain pristine. A glossy top coat enhances the milk-glass effect. These nails pair beautifully with gold or pearl rings. Wear them to job interviews, graduations, or any event where you want to look polished without being flashy.
15. Crystal and Rhinestone Sakura Nails
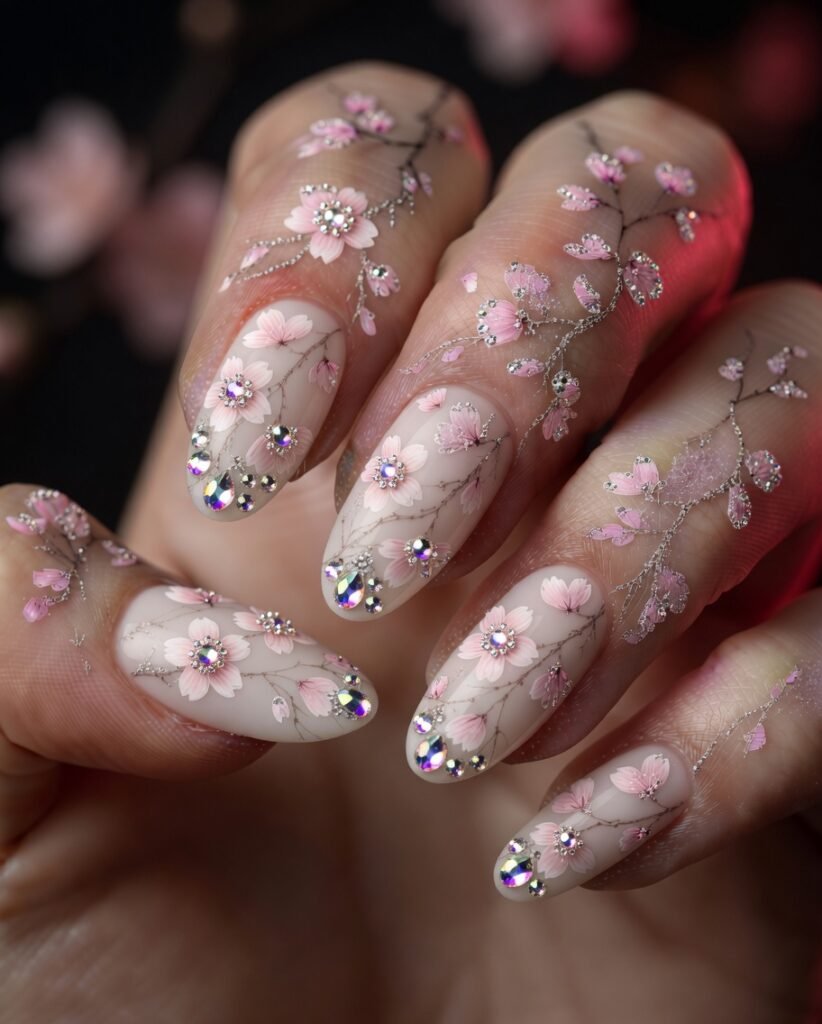
Add serious bling by embedding tiny clear or pink crystals and rhinestones into your sakura nails. Place a small crystal at the center of each painted cherry blossom to mimic the flower’s stamen cluster. Surround the flower with scattered micro-rhinestones that look like dewdrops or falling petals made of glass. The light refraction from the gems makes your manicure sparkle with every hand gesture. This is a red-carpet-worthy design, ideal for brides, prom nights, or any celebration where you want maximum glamour.
Because rhinestones add dimension, use a thick builder gel to encase them smoothly, then top with a glossy layer to avoid snagging on hair or clothing. Limit rhinestones to two or three nails per hand, keeping the rest of the nails flat with painted blossoms. Crystal sakura nails work best on coffin or almond shapes where the gems can align along the center line. Choose high-quality, faceted crystals (like Swarovski) for the brightest sparkle. Wear these with caution—they’re addictive, and you’ll catch yourself staring at your hands during every meeting.
16. Abstract Sakura Nails

Not every sakura design needs literal flowers. Abstract sakura nails capture the essence of cherry blossoms through impressionistic blobs, curved lines, and color fields. Imagine a soft pink crescent shape near your cuticle, a few stray dots in deeper rose, and thin brushstrokes that suggest petals without fully forming them. The result feels modern, artistic, and effortlessly cool. This style is perfect for anyone who loves the cherry blossom color palette but finds realistic floral art too fussy or time-consuming.
You can build an abstract sakura manicure using just three colors: sheer nude base, dusty pink, and white. Use a small detail brush to make comma-shaped strokes that cluster together like petals in the wind. Leave plenty of negative space. Abstract sakura nails look fantastic on short, squoval nails because the design doesn’t require length to read clearly. A matte top coat gives an avant-garde gallery feel, while gloss keeps it playful. Wear these to art galleries, creative workspaces, or coffee dates. They’re sophisticated without being predictable.
17. Dual-Tone Sakura Petals
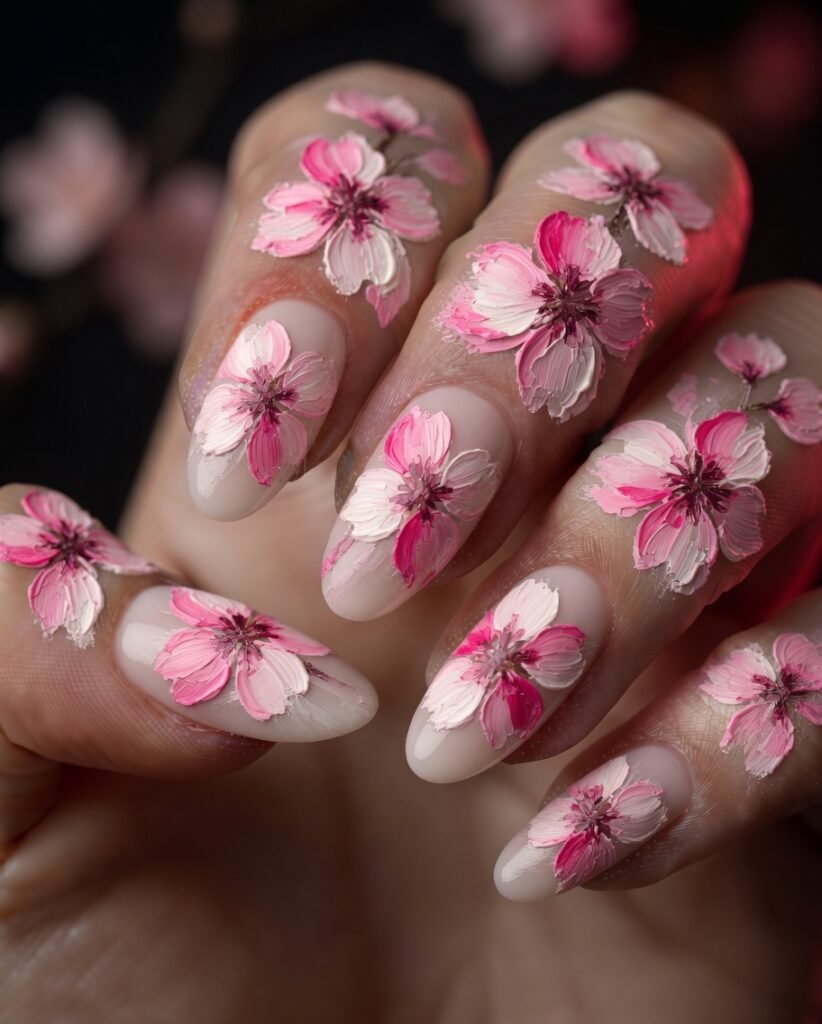
Add depth by painting each cherry blossom petal in two different shades. For example, the upper half of each petal might be soft baby pink, blending down into a deeper magenta at the base. This dual-tone technique mimics the natural gradient of real sakura, where petals are lighter at the edges and richer near the center. You can also alternate colors per petal: three petals in pale pink, two in coral on the same flower. The variation keeps the eye moving and makes each blossom feel more complex and organic.
To execute this, use a fine liner brush and dip it first in one color, then the tip in the second color before painting each petal in one stroke. This creates a built-in fade. Dual-tone sakura nails work best on larger nail surfaces like long almond or coffin shapes, where there’s room to appreciate the gradient. Pair with a sheer nude base so the flowers remain the star. Finish with a high-gloss top coat to enhance the color transition. These nails are for detail lovers who appreciate the little things.
18. Silver Lining Sakura Nails
Outline each cherry blossom with a delicate silver or white lining to make the petals pop against any background. This technique involves painting the flower in a solid color (say, translucent pink), then tracing the edges with a thin metallic silver gel or acrylic paint. The silver lining acts like a halo, separating the flower from the background and giving it a slight stained-glass or jewelry-like quality. It’s a simple addition that transforms basic sakura nails into something ornate and special.
You can also use silver lining to create negative-space petals: draw only the silver outline of each petal, leaving the center empty so your natural nail shows through. Silver lining sakura nails look stunning on dark bases like navy or plum, but also work on pale pink. Keep the flower count low—one or two blossoms per nail—so each outlined flower feels like a precious detail. Use a fine liner brush and steady hands. This design is ideal for evening events, holiday parties, or anytime you want a touch of metallic elegance without full-on glitter.
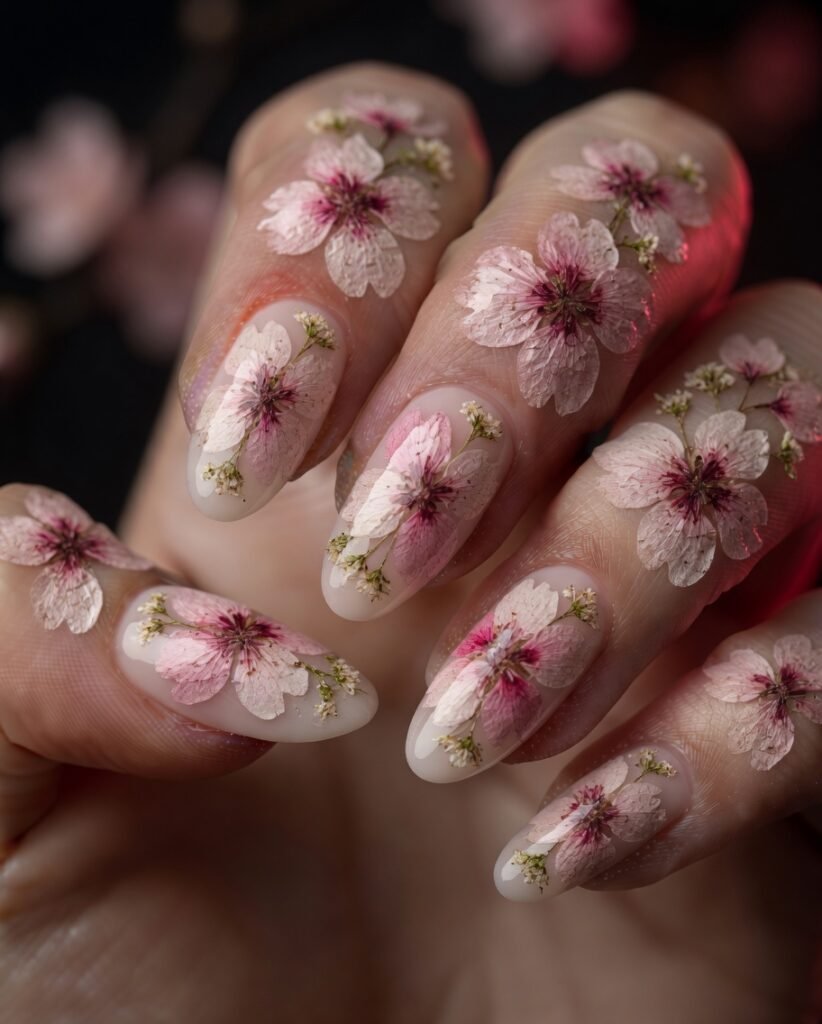
19. Pressed Dried Flower Sakura Nails
For the most authentic, organic take on sakura nails, use real pressed dried flowers. Tiny, genuine cherry blossom petals (or similarly sized white and pink flowers) are preserved and flattened, then embedded into a clear gel or acrylic layer on your nails. The result is unmatched texture and realism—you can see the veins and slight translucency of real petals. This design feels like wearing a piece of spring itself, frozen in time on your fingertips. It’s a beautiful tribute to nature and a conversation starter wherever you go.
To achieve this, apply a thin layer of clear builder gel, place the dried flower petal onto the sticky surface, then encapsulate with more gel and cure. Smooth the surface with a file if needed, then finish with a glossy top coat. Pressed dried flower sakura nails work best on medium to long nails, as the petals need enough room to lie flat. Use only one or two petals per nail to avoid a cluttered look. This design is surprisingly durable and lasts until your next fill. Wear them for garden weddings, Mother’s Day, or any occasion that celebrates the fleeting beauty of blossoms.
Conclusion
From whisper-soft watercolors to bold black bases and real pressed petals, sakura nails offer endless ways to express your personal style while honoring spring’s most beloved bloom. Whether you prefer the timeless charm of classic pink-and-white florals or the edgy glamour of holographic and 3D designs, there’s a cherry blossom manicure here for every mood and occasion. The key is to choose a look that makes you feel beautiful every time you glance at your hands. So go ahead—book that nail appointment or pull out your gel kit, and let these 19 sakura nails design ideas inspire your next floral masterpiece. When those delicate petals meet your fingertips, you’ll carry a little piece of spring with you all year long.