Let me paint you a picture. It was a rainy Tuesday evening, the kind that makes your bones feel cold and your wallet feel thin. I had just gotten paid, but the siren song of a greasy paper bag from the local Chinese takeout spot was calling my name. I reached for my phone, ready to drop $40 on two combo platters that would leave me feeling sluggish and slightly disappointed, as usual.
But then, I looked in my fridge. A lonely chicken breast. A half-bell pepper turning soft at the edges. A sad little nub of ginger. And I thought, “What if I just… tried?”
That night, I failed. Miserably. The chicken was rubbery, the sauce was a salty puddle, and the rice turned into glue. I ended up ordering pizza anyway. But that failure was the best thing that could have happened. It sent me down a rabbit hole of research, testing, and tasting. After over 50 attempts, I finally cracked the code.
Today, I am going to share that code with you. This isn’t just any stir fry chicken recipe; this is your ticket to meals that are faster, healthier, and infinitely more delicious than anything a delivery driver can bring you. By the end of this guide, you will cook with the confidence of a wok-wielding master. Let’s get that pan hot.
Why This Stir Fry Chicken Recipe Will Change Your Weeknights

Before we dive into the sizzle, let’s talk about the “why.” In our busy lives, we often sacrifice health for convenience. A box of mac and cheese is fast, but it’s not fuel. A frozen dinner is easy, but it tastes like cardboard.
This stir fry chicken recipe solves every problem:
- Speed: We are talking 20 minutes from fridge to plate. Faster than delivery.
- Health: You control the sodium, the sugar, and the oil. No mystery ingredients.
- Budget: Chicken thighs are cheap. Veggies are cheap. Sauces are pantry staples.
- Flavor: When done right, stir fry has wok hei—that smoky, charred, addictive flavor you crave.
I remember making this for my skeptical father. He is a “meat and potatoes” purist who thinks anything with a sauce that isn’t brown gravy is “foreign nonsense.” He ate three servings. He asked for the recipe. If I can convert him, I can convert you.
The Psychology of a Great Stir Fry (Yes, Psychology)
Why do restaurant stir fries taste better than home versions? It’s not magic. It’s preparation and heat. Restaurants use jet-engine burners. You have a home stove. But we can cheat the system.
The secret lies in velveting. This is a Chinese cooking technique that sounds fancy but is stupidly simple. It involves marinating your chicken in a mixture of soy sauce, Shaoxing wine, cornstarch, and sometimes egg white or baking soda.
When you velvet chicken, you create a microscopic barrier around each piece. That barrier traps moisture and prevents the protein from seizing up when it hits the hot oil. The result? Chicken that is slippery, tender, and juicy—not dry and chalky.
Furthermore, you need to accept a hard truth: Your pan is too crowded. If you dump all the ingredients into a cold pan, you steam the food. Steamed chicken is sad chicken. You need sear. You need browning. The Maillard reaction is your best friend.
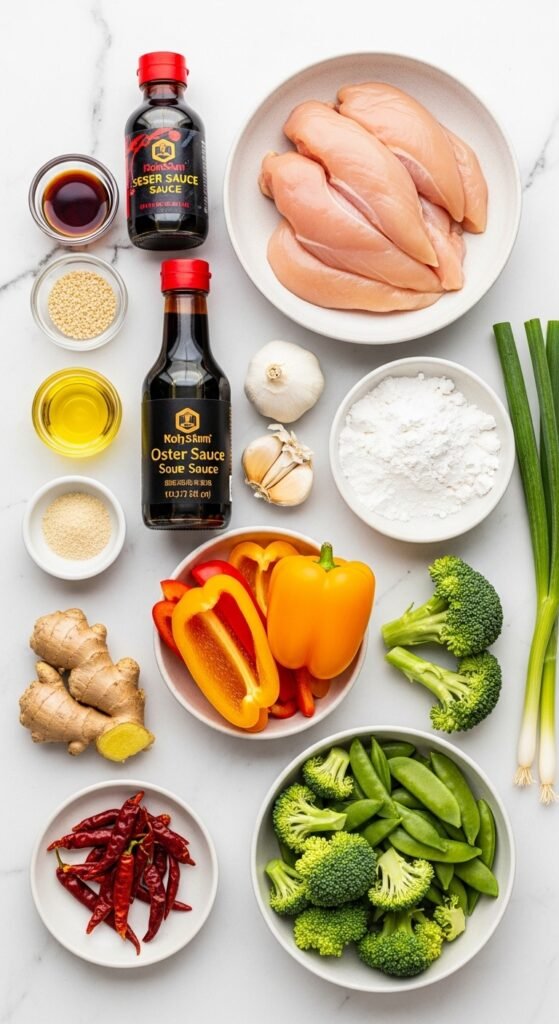
Ingredient Deep Dive: The Stir Fry Chicken Recipe Pantry
You cannot build a skyscraper on a shaky foundation. Likewise, you cannot build a great stir fry chicken recipe with bad ingredients. Let’s break down the shopping list.
The Star: The Chicken
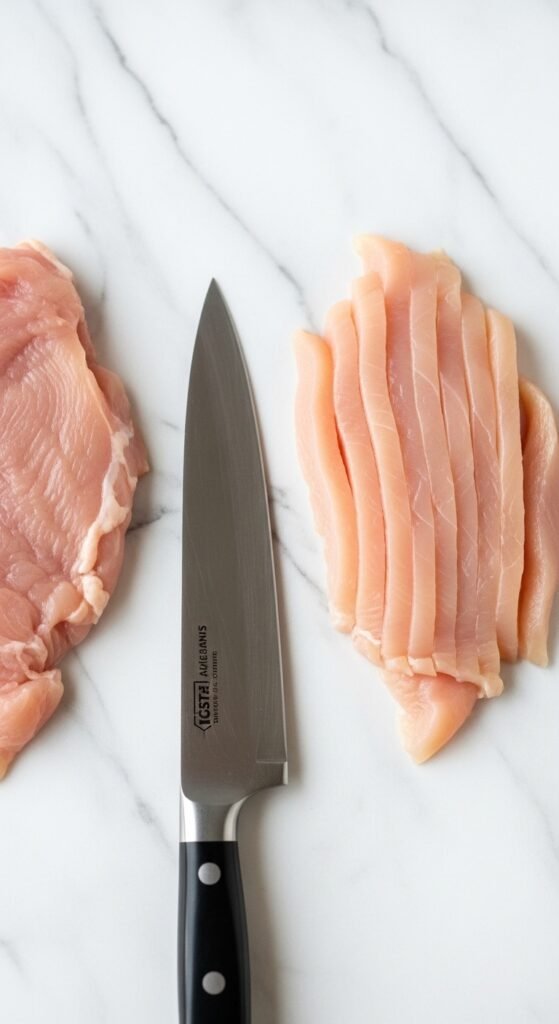
- Best Cut: Boneless, skinless chicken thighs. I know, breasts are leaner. But thighs have fat. Fat equals flavor and forgiveness. If you overcook a thigh by 30 seconds, it’s fine. Overcook a breast? You have a rubber tire.
- Alternative: Chicken breast works, but you must slice it against the grain and never skip the velveting step.
- Keyword to remember: Juicy chicken stir fry comes from thighs.
Also Read: The Ultimate Guide to Veggie Pizza Dip: A Crowd-Pleasing Appetizer You’ll Love
The Velvet Marinade
- Soy Sauce (Light): For saltiness. Not dark soy (that’s for color).
- Shaoxing Wine: This is Chinese cooking wine. It adds a nutty, aromatic depth. No wine? Use dry sherry or skip it.
- Cornstarch: The non-negotiable ingredient for that glossy, thick coating.
- Baking Soda (Optional): Just a pinch. It raises the pH of the meat, making it impossible to toughen up. Use ¼ teaspoon per pound.
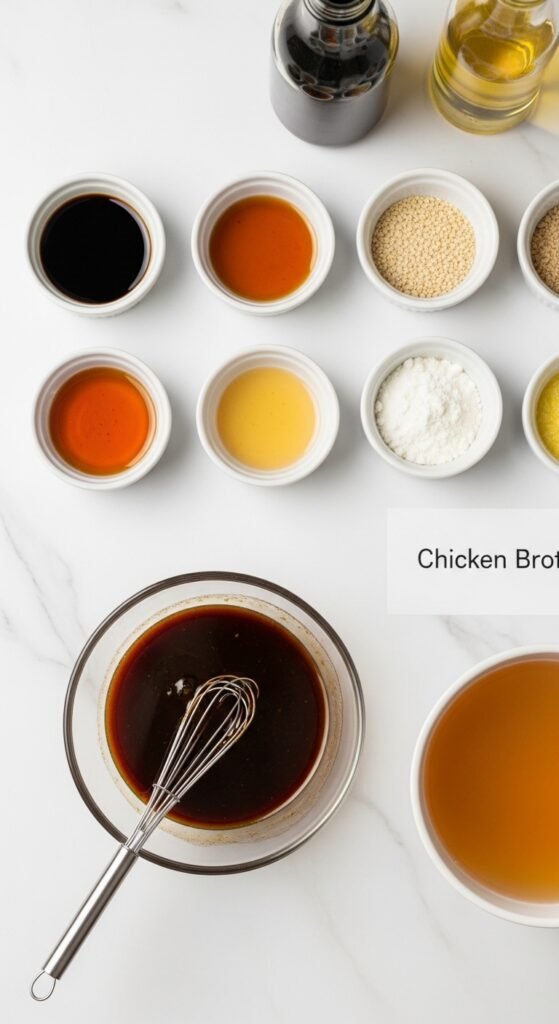
The Stir Fry Sauce
Do not buy bottled stir fry sauce. It is usually corn syrup and sadness. Make this homemade stir fry sauce in 60 seconds:
- ½ cup low-sodium chicken broth (water + bouillon works)
- 3 tablespoons soy sauce (or tamari for gluten-free)
- 2 tablespoons oyster sauce (trust me, this is umami gold)
- 1 tablespoon sesame oil (just a drizzle for fragrance)
- 1 tablespoon sugar or honey (to balance the salt)
- 1 teaspoon white pepper (black pepper works, but white is authentic)
- 2 tablespoons cornstarch mixed with 3 tablespoons cold water (this is your “slurry”)
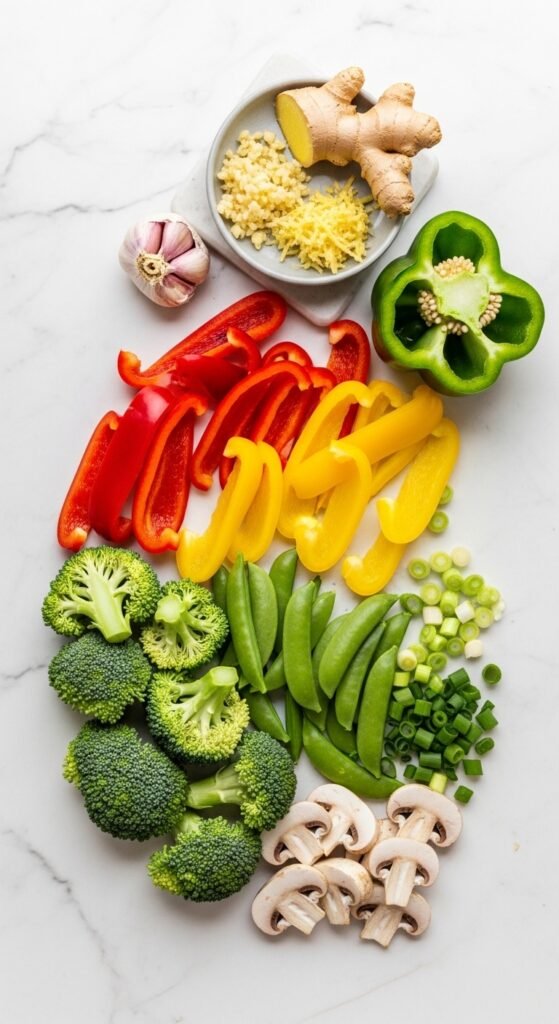
The Aromatics & Veggies
- Garlic: 4 cloves, minced. Do not use the jarred stuff. Fresh only.
- Ginger: A 1-inch knob, grated or minced.
- Scallions: The green parts for garnish.
- Vegetables: Bell peppers, broccoli florets, snap peas, carrots, or baby corn. Pick two or three. Do not use frozen veggies unless thawed and patted bone dry.
Essential Equipment: You Do NOT Need a Wok
Here is a controversial statement for you: You do not need a wok to make a perfect stir fry chicken recipe.
If you have a gas stove, a wok is great. If you have an electric or induction stovetop, a wok is actually bad because the sides don’t get hot. The flat bottom doesn’t touch the coil.
What you actually need:
- A 12-inch Stainless Steel or Carbon Steel Skillet: Non-stick pans cannot get hot enough without releasing toxic fumes. Stainless steel gives you a sear.
- A Metal Spatula: To scrape up the browned bits (the fond).
- A Large Bowl: For marinating.
- A Small Bowl: For the sauce slurry.
I remember using a warped, non-stick pan from college for years. The coating was peeling. The chicken steamed. Once I bought a $30 stainless steel skillet from a restaurant supply store, my stir fry game improved 500% overnight. Invest in the pan.
Step-by-Step Guide: The Perfect Stir Fry Chicken Recipe
Alright, aprons on. Let’s cook. Read the whole thing once, then follow it while cooking.
Step 1: The Mise en Place (French for “Get Your Act Together”)
Stir frying is a sprint, not a marathon. Once the heat goes on, you do not have time to chop garlic or find the soy sauce.
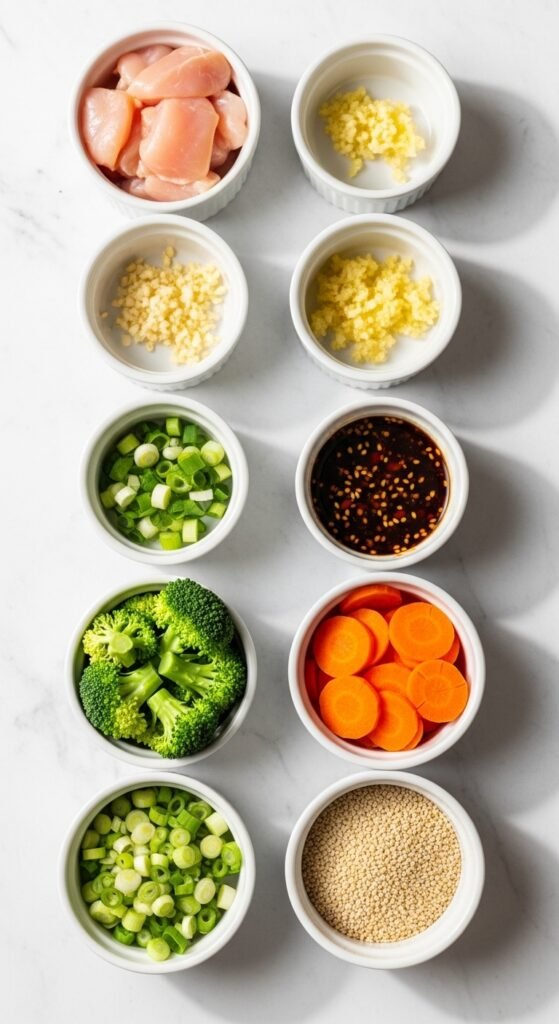
- Action: Chop all veggies into uniform, bite-sized pieces (about 1 inch).
- Action: Mince garlic and ginger together. Keep them in a little pile.
- Action: Mix your sauce liquids (broth, soy, oyster, sugar) in a measuring cup.
- Action: Make your cornstarch slurry in a separate tiny bowl.
- Action: Slice your chicken. Cut against the grain into ¼-inch thick slices.
Anecdote Time: I once started making this recipe without prepping first. My oil was smoking. I realized I hadn’t cut the broccoli. I panicked. I cut my finger. The broccoli went in raw. The chicken burned. The fire alarm went off. My cat hid under the bed for three hours. Prep first. Always.
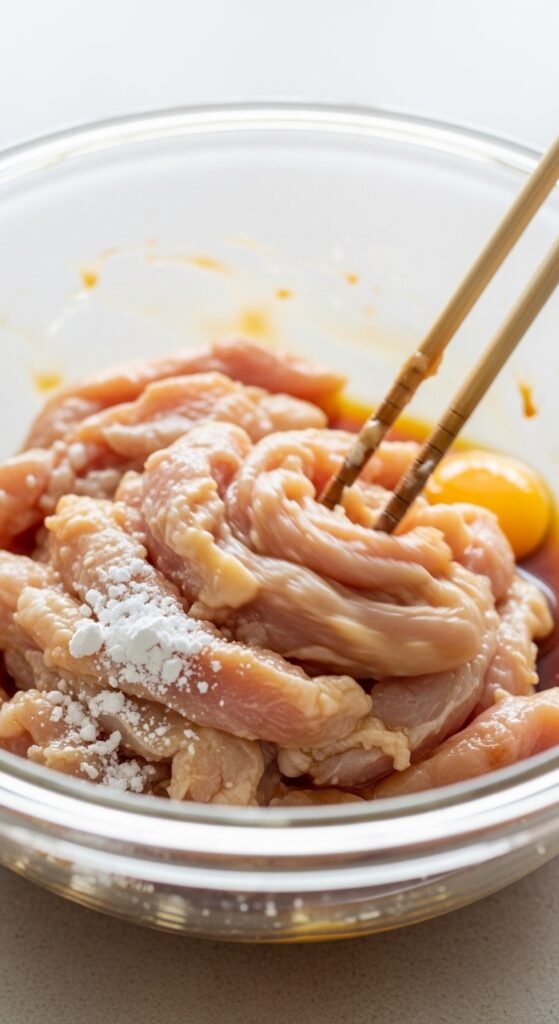
Step 2: Velvet the Chicken (The Magic Step)
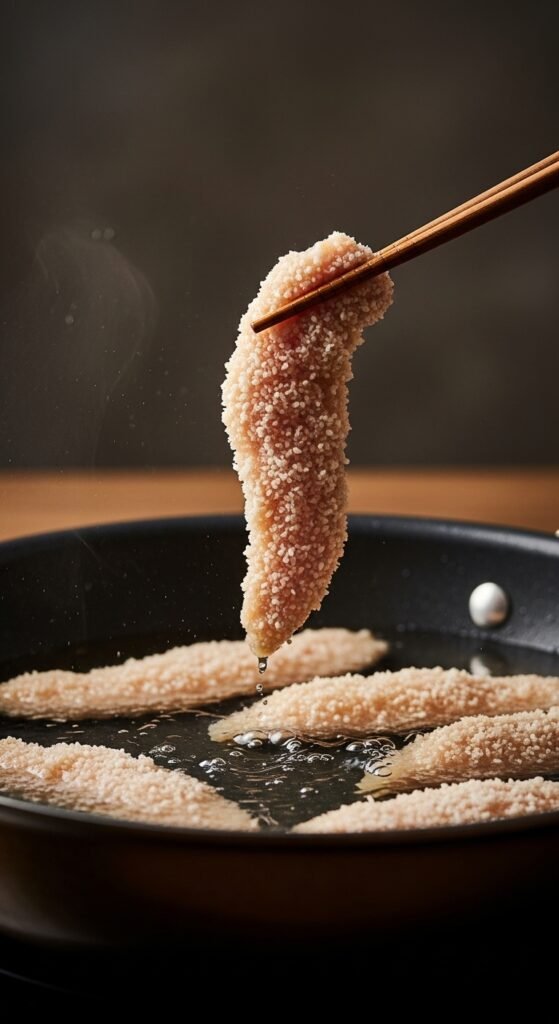
In a medium bowl, combine your sliced chicken with:
- 1 tablespoon soy sauce
- 1 tablespoon Shaoxing wine
- 1 tablespoon cornstarch
- 1 teaspoon oil (any neutral oil like vegetable or canola)
- A tiny pinch of baking soda (optional but glorious)
Use your hands. Squish it all together until the chicken looks slimy and coated. That “slimy” feeling is exactly what you want. It is a protective forcefield. Let it sit for 10 minutes. If you have time, 30 minutes is better. If you have zero time, 5 minutes will still help.
Step 3: The Blanching Shortcut (Restaurant Secret)
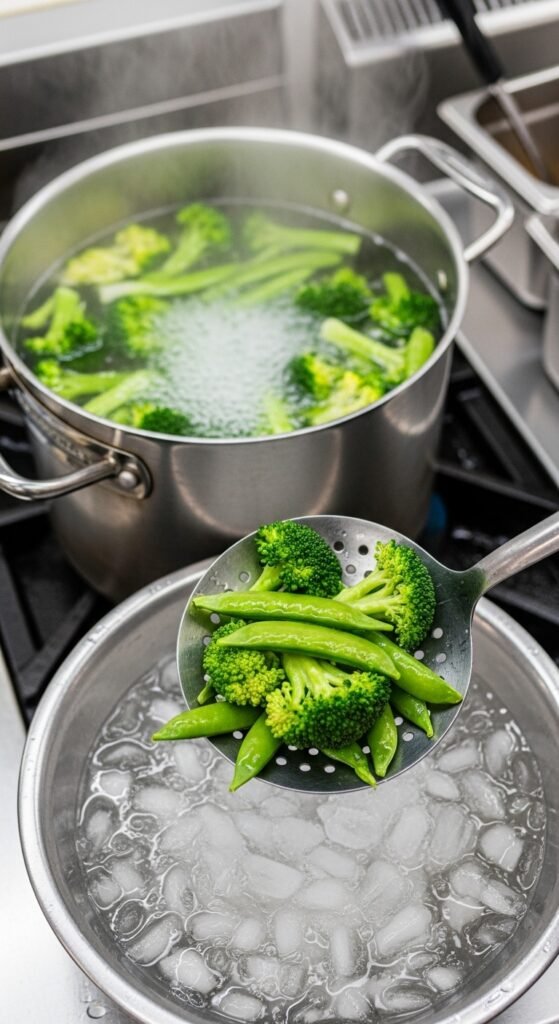
Most home cooks skip this. Do not skip this.
Bring a small pot of water to a boil. Drop your broccoli or carrots in for exactly 60 seconds. Drain them. Douse them in cold water to stop the cooking. This is called blanching. It turns the veggies bright green and gets them 80% cooked. When they hit the wok later, they just need a 30-second reheat. This prevents the “raw crunch” or the “mushy mess” trap.
Step 4: Get the Pan Sext-Hot
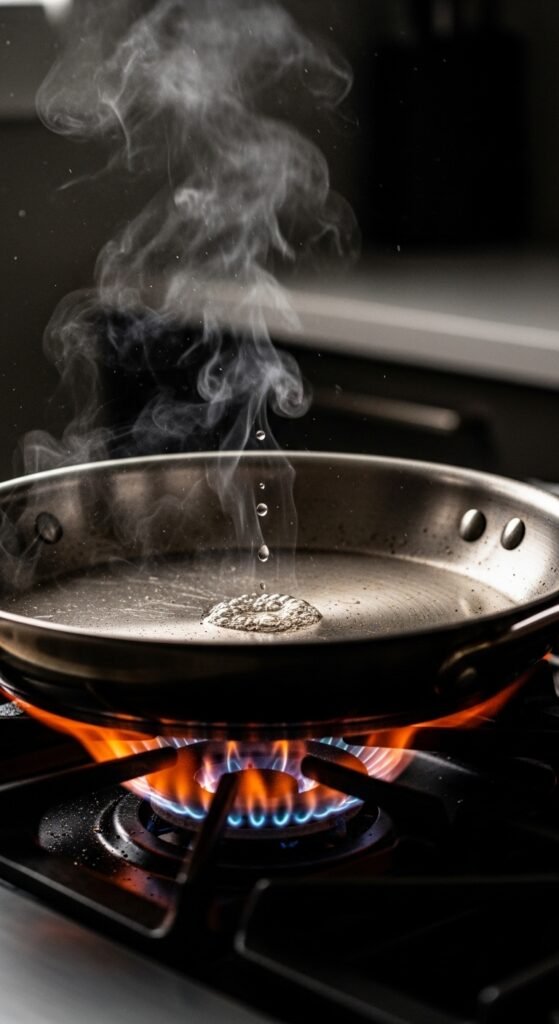
Place your skillet on the stove. Turn the heat to high. Not medium-high. High. Let the pan sit empty for 2 minutes.
The Water Test: Flick a drop of water into the pan. If it sizzles and evaporates instantly, it’s not hot enough. If the water forms a ball (a “Leidenfrost droplet” ) and skates around the pan like a hockey puck, now it is ready.
Add 2 tablespoons of high-smoke-point oil (avocado, peanut, or vegetable oil). Swirl to coat. The oil should shimmer immediately, maybe even smoke a tiny bit. This is the danger zone, but also the flavor zone.
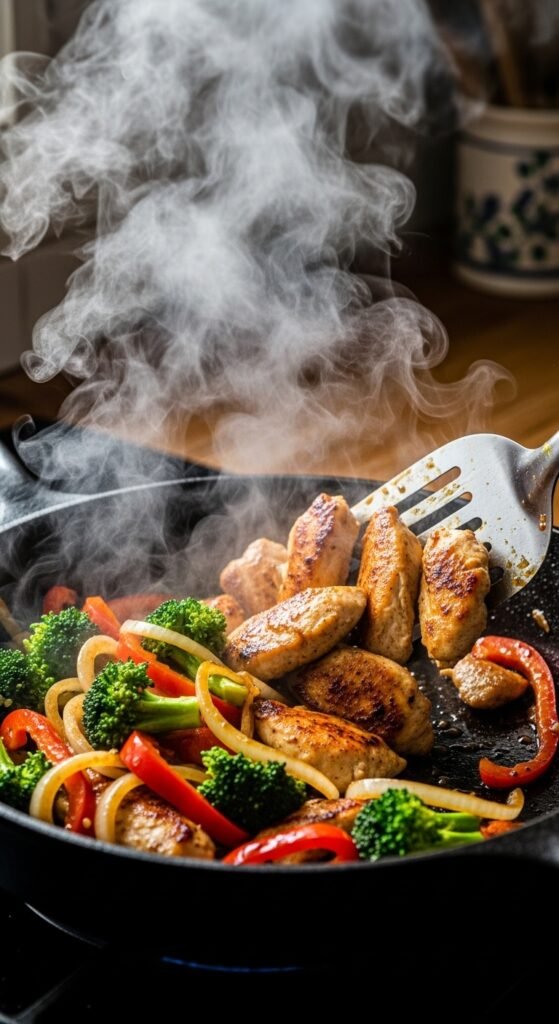
Step 5: Sear the Velveted Chicken
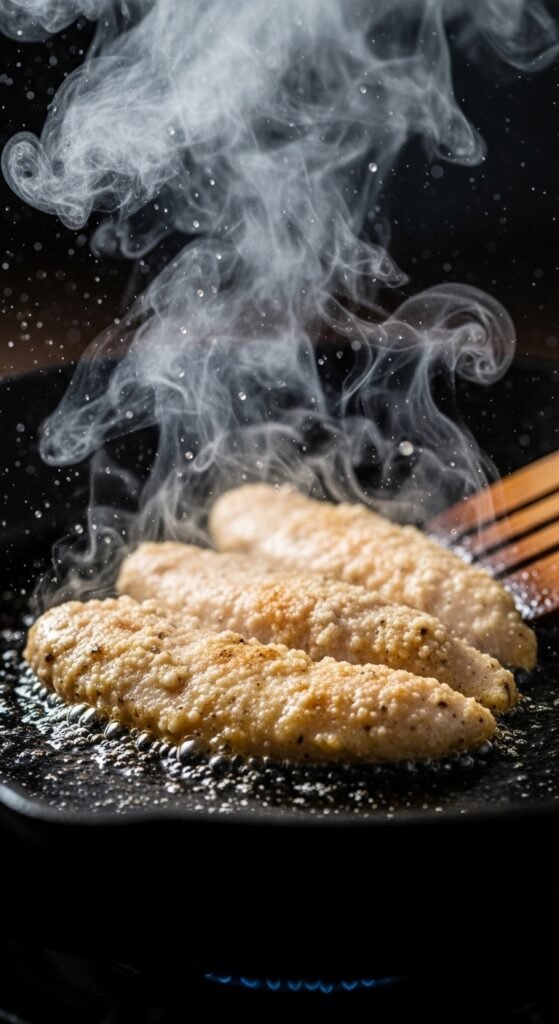
Carefully lay the chicken pieces into the pan in a single layer. Do not move them. Do not stir them. Let them sit untouched for 60 seconds.
You want a golden-brown crust to form. After 60 seconds, flip the pieces. Cook for another 60 seconds. The chicken should be 80% cooked (white on the outside, slightly pink in the middle). Remove the chicken with a slotted spoon and put it on a plate. Leave the oil in the pan.
Why remove it? If you leave the chicken in, it will overcook while you do the veggies. We will add it back at the end.
Step 6: The Aromatic Explosion
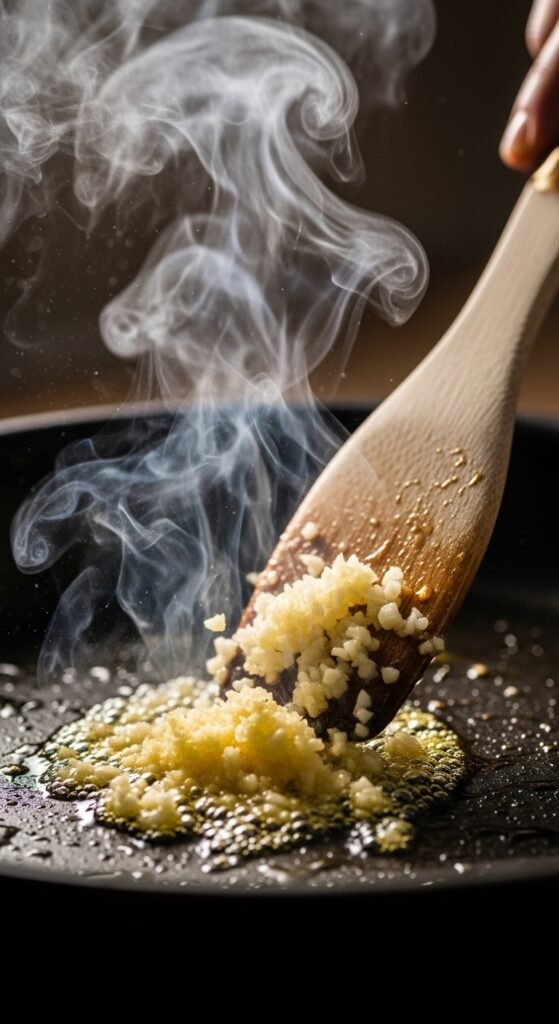
Your pan is still hot. There might be a few browned bits stuck to the bottom ( fond ). This is gold.
- Add the minced garlic and ginger.
- Stir constantly for 15 seconds. No longer. Burnt garlic is bitter, and bitterness will ruin your entire stir fry.
You will smell heaven immediately. That is the fragrance waking up.
Step 7: The Veggies & Sauce
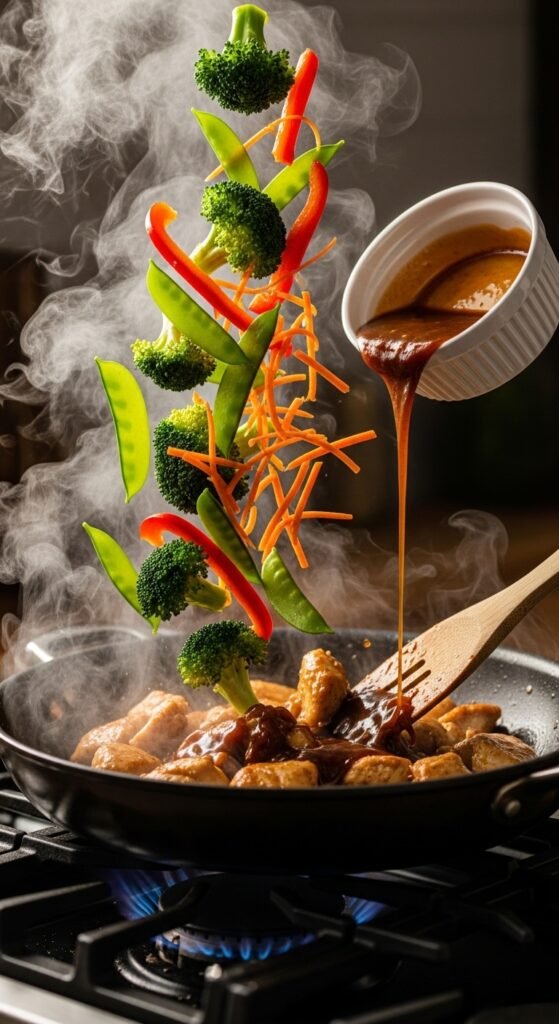
Add your blanched veggies (or raw bell peppers, which cook fast) to the pan. Stir fry for 30 seconds. They should get lightly charred on the edges.
Now, pour your liquid sauce mixture (the broth/soy/oyster mix) around the edges of the pan. It will bubble violently. That’s good. That’s the steam carrying the flavor.
Let it bubble for 30 seconds. Then, add the cornstarch slurry while stirring vigorously. Watch the magic happen: the watery liquid will turn into a glossy, thick sauce in about 10 seconds.
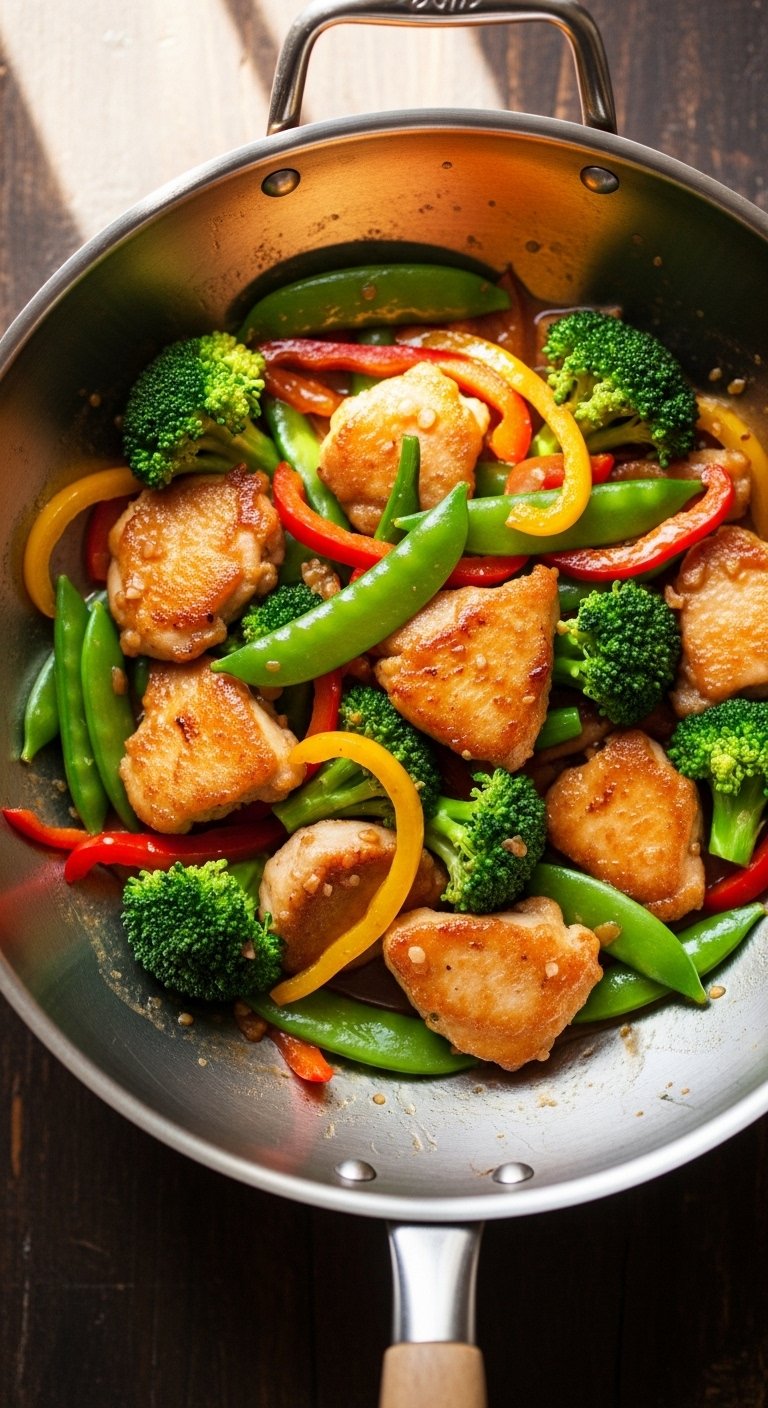
Step 8: The Reunion
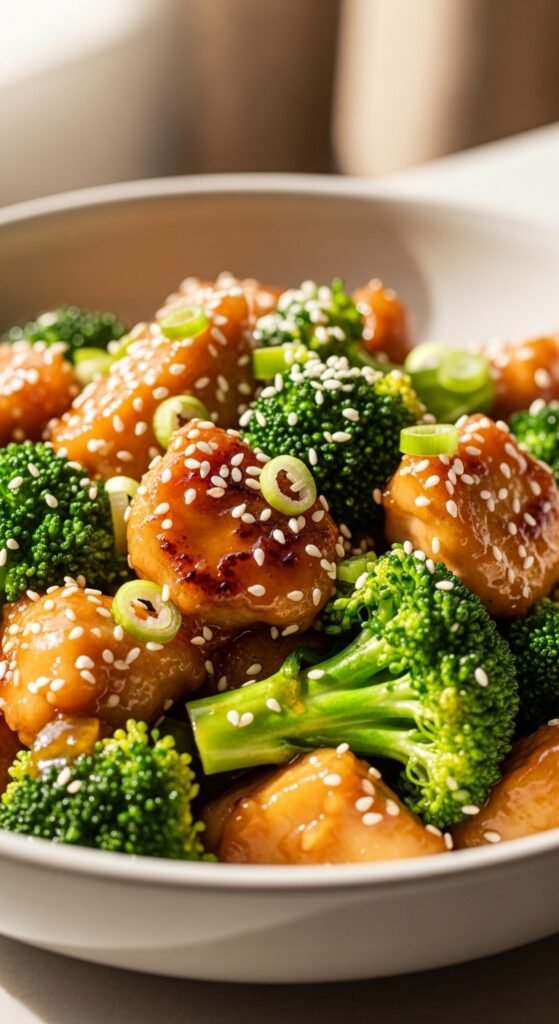
Add the cooked chicken back into the pan. Add the green parts of the scallions. Toss everything together for 30 seconds until the sauce coats every single piece of juicy chicken and crisp veggie.
Turn off the heat. Drizzle that final ½ teaspoon of sesame oil over the top. Sesame oil loses its flavor when heated, so always add it at the end.
Troubleshooting: Why Didn’t My Stir Fry Chicken Recipe Work?
Let me save you from the mistakes I made.
| Problem | Solution |
|---|---|
| Chicken is tough or rubbery | You didn’t velvet it, or you used a breast without velveting. Also, you overcooked it. Remove the chicken early! |
| Sauce is watery | You didn’t use enough cornstarch, or you didn’t boil the sauce long enough before adding the slurry. Let it bubble hard! |
| Sauce is a gluey blob | You added too much cornstarch, or you added the slurry to cold liquid. Always boil first, then slurry. |
| Veggies are raw or crunchy | You didn’t blanch hard veggies (broccoli, carrots). Next time, blanch for 90 seconds. |
| Veggies are mushy | You overcrowded the pan and steamed them instead of frying. Cook in batches. |
| The pan is burning | Your heat is too high, or your oil is low smoke-point (don’t use olive oil). Use avocado or peanut oil. |
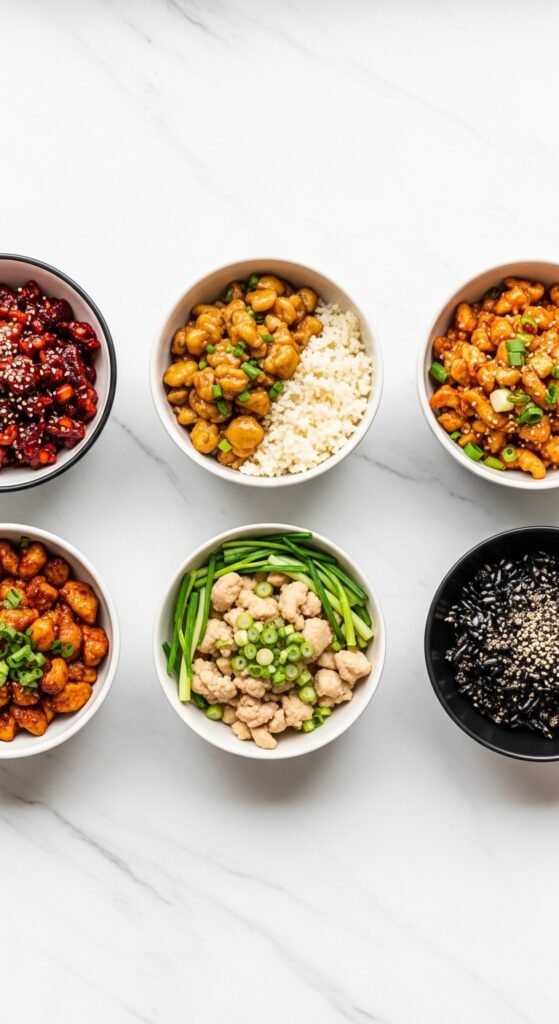
Variations: 5 Ways to Spin This Stir Fry Chicken Recipe
Once you master the base recipe, the world is your oyster (sauce).
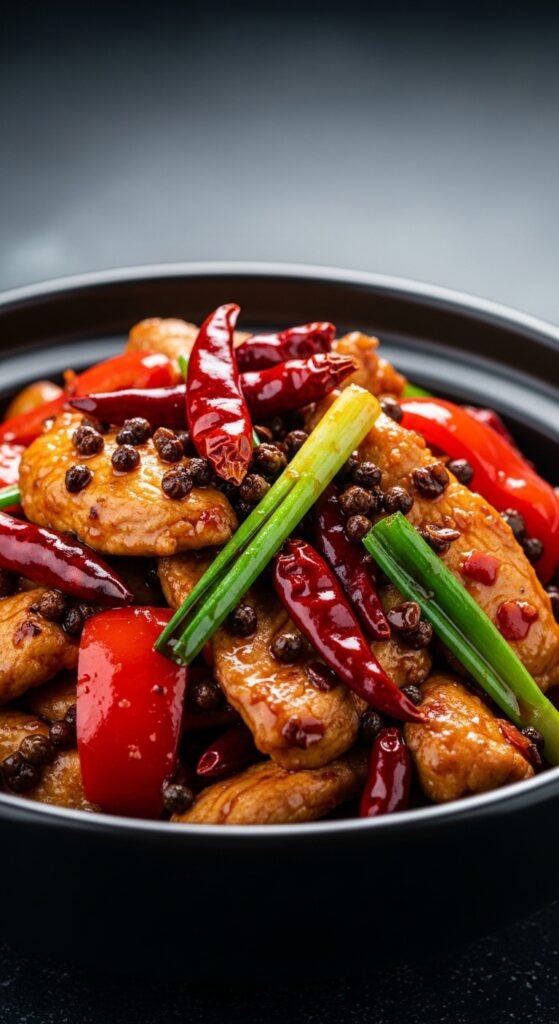
1. The Spicy Szechuan (Ma La)
- Add 1 tablespoon of doubanjiang (spicy fermented bean paste) with the garlic.
- Add 1 teaspoon of Szechuan peppercorns (crushed) for that numbing tingle.
- Garnish with crushed peanuts and extra chili oil.
2. The Honey Garlic (Kid-Approved)
- Increase the sugar or honey to 3 tablespoons.
- Double the garlic (use 8 cloves).
- Omit the oyster sauce. Add 1 tablespoon of ketchup for color and tang.
- Serve with steamed rice and broccoli. My nephew, who normally eats only chicken nuggets, inhaled this.
3. The Low-Carb Keto Stir Fry
- Substitute coconut aminos for soy sauce.
- Substitute xanthan gum (¼ tsp) for cornstarch. Cornstarch has carbs.
- Double the veggies (zucchini noodles work great).
- Use chicken thighs exclusively for the fat content.
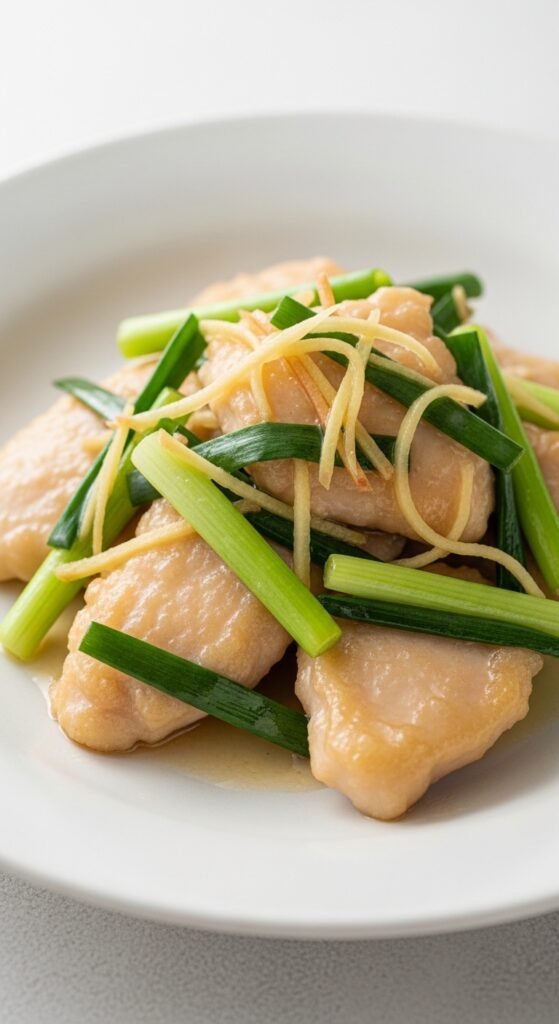
4. The Ginger-Scallion Simplicity
- Remove garlic. Triple the ginger.
- Use only scallions (1 whole bunch, cut into 2-inch pieces).
- No oyster sauce. Use 2 tablespoons of light soy and 1 tablespoon of fish sauce.
- This is a Cantonese classic. Very clean, very bright.
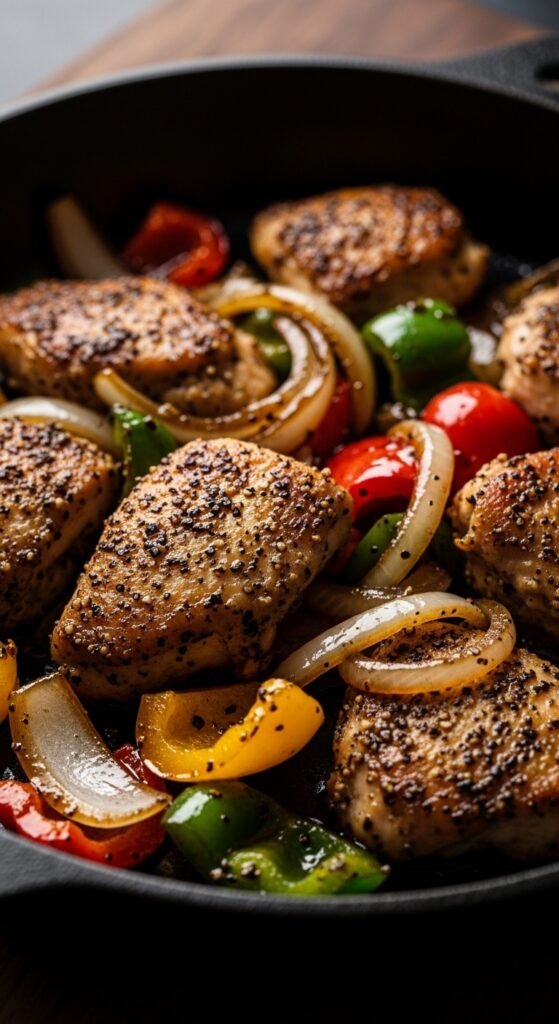
5. The Black Pepper Craze
- Crush 2 tablespoons of coarse black pepper.
- Add 1 diced onion with the garlic.
- Use ¼ cup of heavy cream or coconut milk at the end to make a creamy peppercorn sauce.
- Serve over mashed potatoes or rice.
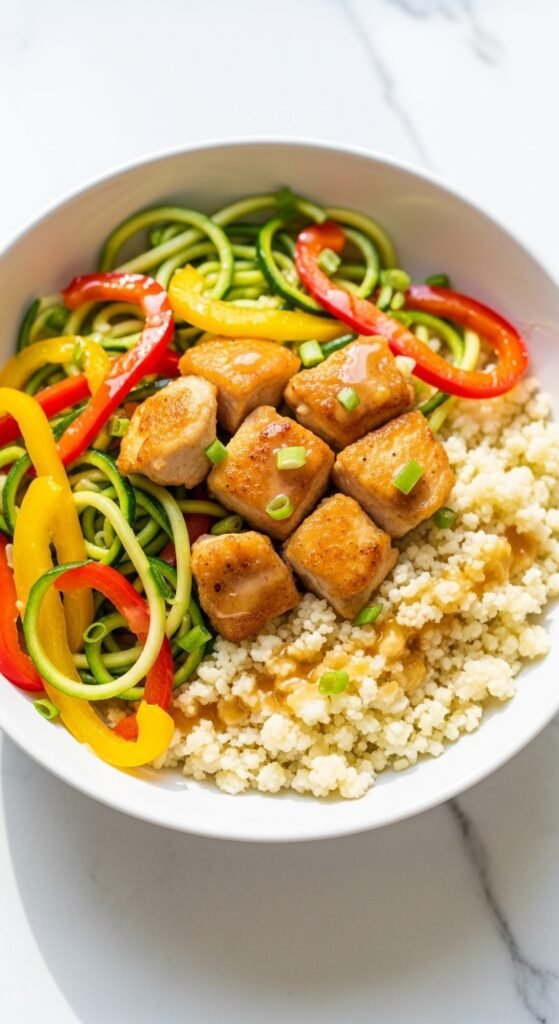
How to Serve Your Stir Fry Chicken Recipe
You have made the perfect dish. Do not ruin it by serving it wrong.
- With Rice: Steamed jasmine rice is the classic. To make it restaurant style, rinse the rice five times before cooking to remove starch.
- With Noodles: Toss this with lo mein noodles or even regular spaghetti. Boil the noodles, then fry them for 2 minutes in the wok before adding the chicken.
- By Itself: Eat it straight from the pan. No judgment here. It’s a complete meal.
Pro Tip: Serve in pre-warmed bowls. Cold bowls suck the heat out of your hot stir fry. Run the bowls under hot water for 30 seconds, dry them, and then plate.
Meal Prep & Storage (Because Life is Busy)
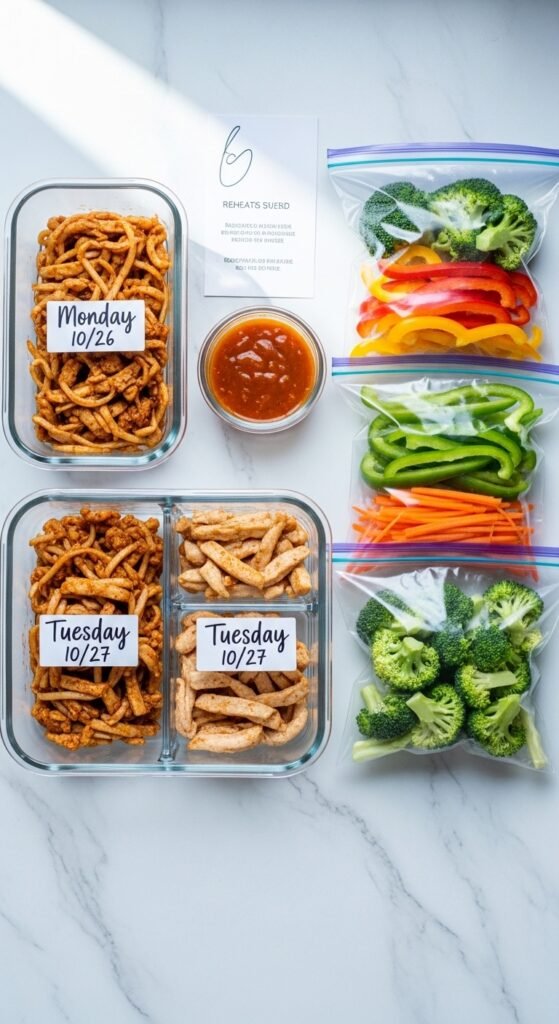
One of the best things about this stir fry chicken recipe is that it is a meal prep champion.
- Fridge: Keeps for 4 days in an airtight container. The sauce will soak into the rice (if you have rice), which makes the leftovers taste even better the next day.
- Freezer: Freeze the cooked stir fry (without rice) for up to 3 months. Thaw in the fridge overnight.
- Reheating: Do not use a microwave if you can help it. It makes the chicken rubbery. Reheat in a dry skillet over medium heat for 3 minutes. The residual sauce will re-liquefy.
Make-Ahead Sauce: I make a quadruple batch of the sauce (without the cornstarch slurry) and keep it in a mason jar in the fridge for two weeks. When it’s time to cook, I just shake the jar, pour it in, and add the slurry. This reduces my cooking time to 10 minutes.
The Final Sales Pitch: Why You Need to Buy This Product (Your New Skillet)
Look, I have given you the recipe for free. I have given you the secrets of velveting, the magic of the Leidenfrost effect, and the troubleshooting guide.
But a recipe is just words on a screen without the right tools.
You need a heavy-gauge, 12-inch stainless steel skillet.
Do not go buy a $10 non-stick pan from the drugstore. That pan will warp. The coating will flake into your food. It cannot get hot enough to sear. You will try this recipe, fail, and think you are the problem. You are not the problem. The pan is the problem.
Here is what you need to look for when you buy today:
- Material: 18/10 stainless steel (tri-ply construction is best).
- Handle: Riveted, stay-cool handle. If the handle is plastic, do not buy it.
- Oven Safe: Up to 500°F. This allows you to finish the dish in the oven if needed.
- Weight: It should feel heavy in your hand. Light pans are cheap pans.
When you buy a quality skillet, you are not buying a pan. You are buying confidence. You are buying 15-minute dinners. You are buying the end of sad, soggy takeout.
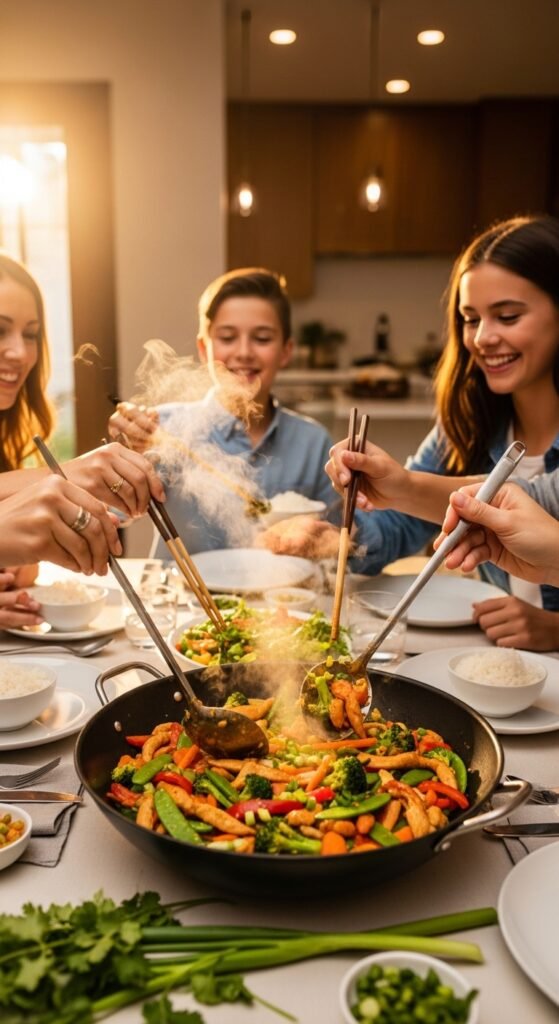
Invest in your kitchen. Invest in your health. And tonight, when you pull that perfectly seared, glossy, juicy chicken stir fry out of your new pan, and your family asks, “Did you order this?” — you can smile and say, “No. I made it. It’s easy when you have the right tools.”
The Printable Stir Fry Chicken Recipe (Quick Reference)
Prep: 15 minutes | Cook: 8 minutes | Total: 23 minutes
Ingredients:
- 1.5 lbs boneless, skinless chicken thighs
- 1 tbsp soy sauce (for marinade)
- 1 tbsp Shaoxing wine
- 1 tbsp cornstarch (for marinade)
- 2 tbsp oil (for frying)
- 4 cloves garlic, minced
- 1 inch ginger, minced
- 2 cups mixed veggies (broccoli, bell pepper)
- ¼ cup low-sodium chicken broth
- 3 tbsp soy sauce (for sauce)
- 2 tbsp oyster sauce
- 1 tbsp sugar
- 2 tbsp cornstarch + 3 tbsp water (slurry)
- 1 tsp sesame oil
Instructions:
- Slice chicken. Mix with soy, wine, cornstarch, oil. Set aside 10 min.
- Blanch hard veggies (broccoli or carrots) for 60 sec. Drain.
- Mix broth, 3 tbsp soy, oyster sauce, sugar in a cup.
- Heat skillet to high. Add oil.
- Sear chicken 60 sec per side. Remove.
- Add garlic and ginger. Stir 15 sec.
- Add veggies. Stir 30 sec.
- Pour in liquid sauce. Boil 30 sec.
- Add cornstarch slurry. Stir until thick (about 10 sec).
- Return chicken to pan. Toss.
- Turn off heat. Drizzle sesame oil.
- Serve immediately with rice.
Conclusion: Your Skillet Awaits
You now possess the knowledge to execute a flawless stir fry chicken recipe that rivals any restaurant. You understand velveting, heat management, and the importance of mise en place.
The only thing left is action. Do not wait for a special occasion. Dinner happens tonight. It happens tomorrow. Armed with this guide and a quality skillet, you will never fear the stir fry again.
Go forth. Get that pan hot. And remember: if you burn the garlic, just start over. We have all been there.
Happy cooking, chef. 🥢