I still remember standing in my first apartment, staring at a massive, empty living room wall. It was the kind of blank canvas that should have felt exciting but instead felt completely overwhelming. I had no idea where to start, what to put up, or how to arrange anything without making it look like a hot mess. Sound familiar?
Fast forward to today, and I’ve become somewhat of a gallery wall enthusiast. I’ve helped friends design their own, experimented with countless wall art layouts in my own home, and learned that creating a stunning 20 gallery wall ideas collection isn’t about being an interior designer—it’s about telling your story on your walls.
Whether you’re a renter with white walls crying out for personality or a homeowner looking to fill that awkward staircase wall, I’ve got you covered. Let’s walk through twenty incredible gallery wall inspiration concepts that range from super simple to absolutely show-stopping.
Why Gallery Walls Work So Well in Any Home
Before we jump into the specific ideas, let’s talk about why decorative wall arrangements have become such a beloved home decor trend. A well-executed art display does more than just cover empty space—it becomes the soul of your room. It’s the first thing guests notice, the backdrop for your daily life, and a constant reminder of what matters most to you.
The beauty of creative wall displays is that they’re infinitely customizable. You can start small and build over time, or you can plan everything meticulously and install it all at once. There’s no right or wrong way to approach it, which takes some of that pressure off.
Getting Started: The Foundation of Every Great Gallery Wall
Before we dive into the twenty ideas, let’s cover some wall art arrangement basics that will serve you well no matter which direction you choose. Think of this as your gallery wall planning guide.
First, gather your materials. You’ll need:
- Your artwork, photos, and special pieces
- Frames (more on this in a minute)
- Measuring tape
- Pencil and paper for sketching
- Painter’s tape
- Hammer and nails or picture hanging strips if you’re renting
- A level (don’t skip this, trust me)
Now that you’re equipped, let’s explore these twenty gallery wall design ideas that’ll have you grabbing your hammer before you finish reading.
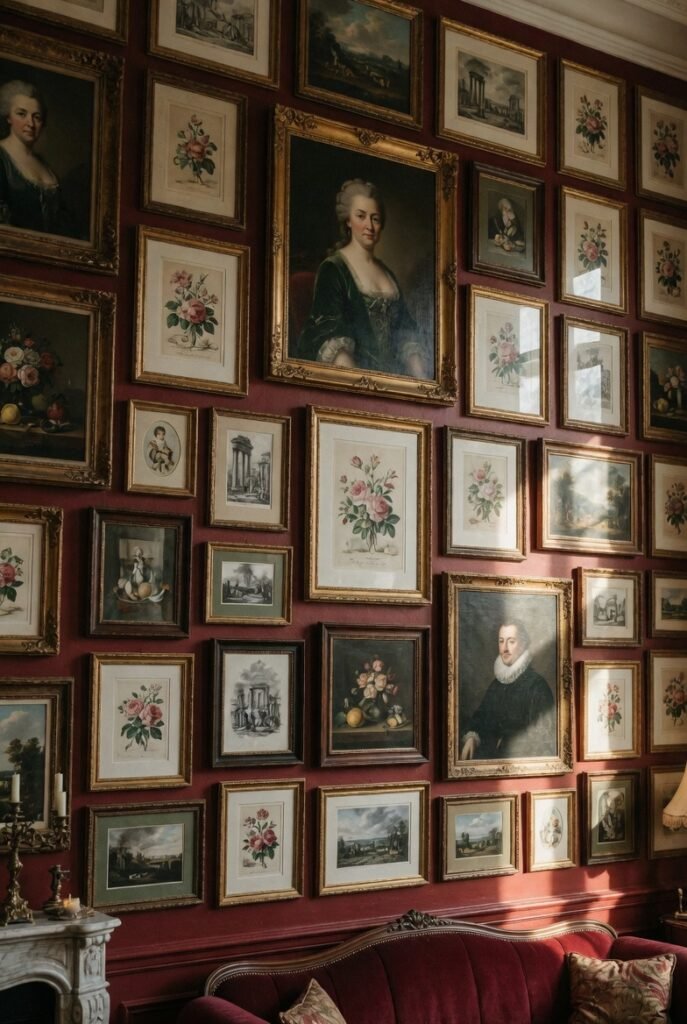
Salon Style Gallery Wall: The Classic Art Display
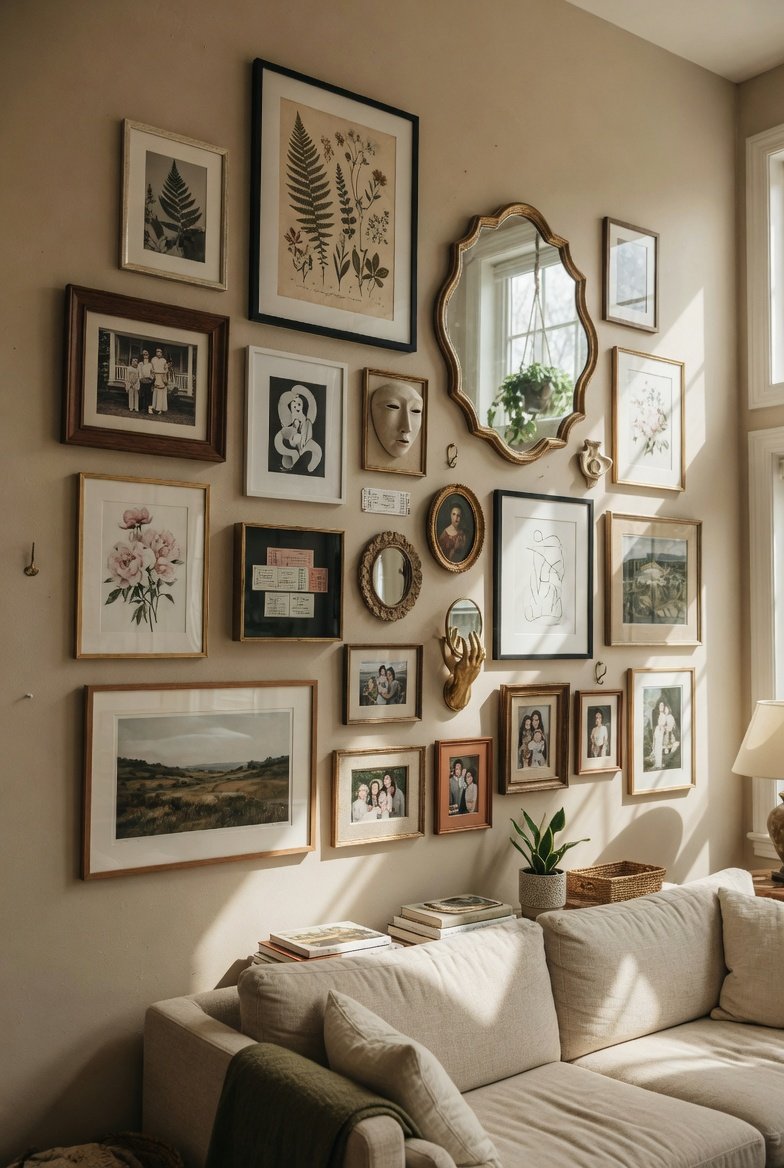
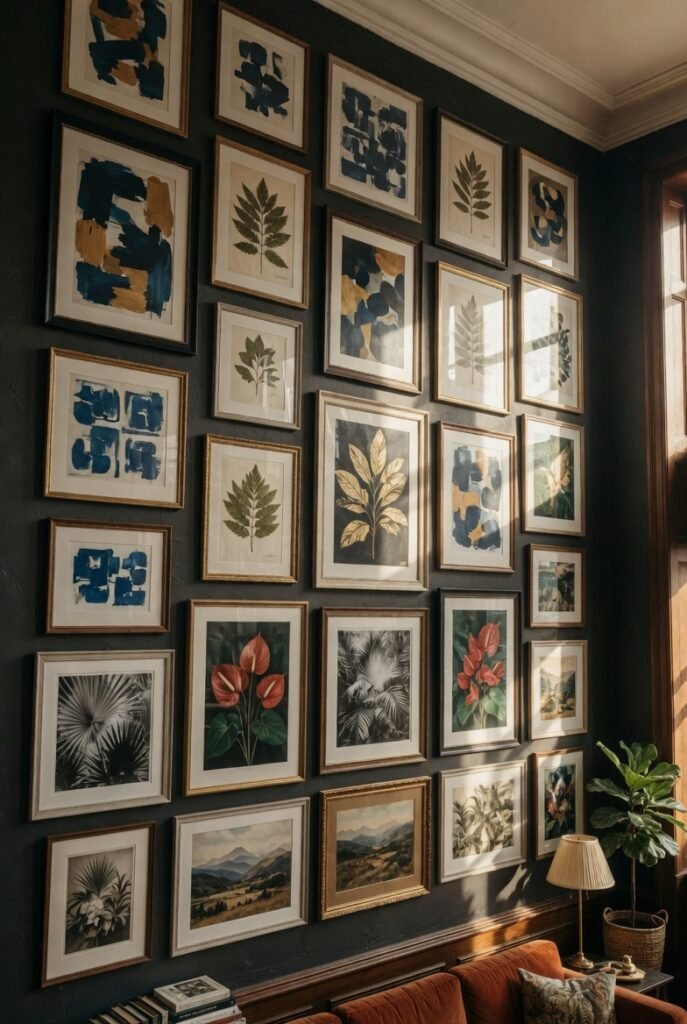
This is where most people start, and for good reason. The salon style wall—characterized by densely hung artwork covering a large portion of the wall—has been around since the 17th century. It’s the original vintage gallery wall concept, and it works because it feels curated and intentional despite looking effortlessly collected.
Start by selecting a mix of frame styles and sizes. The key here is variety. You want small pieces nestled next to larger ones, landscapes alongside portraits, and frames that complement each other without matching perfectly. I like to lay everything out on the floor first, playing with arrangements until something clicks.
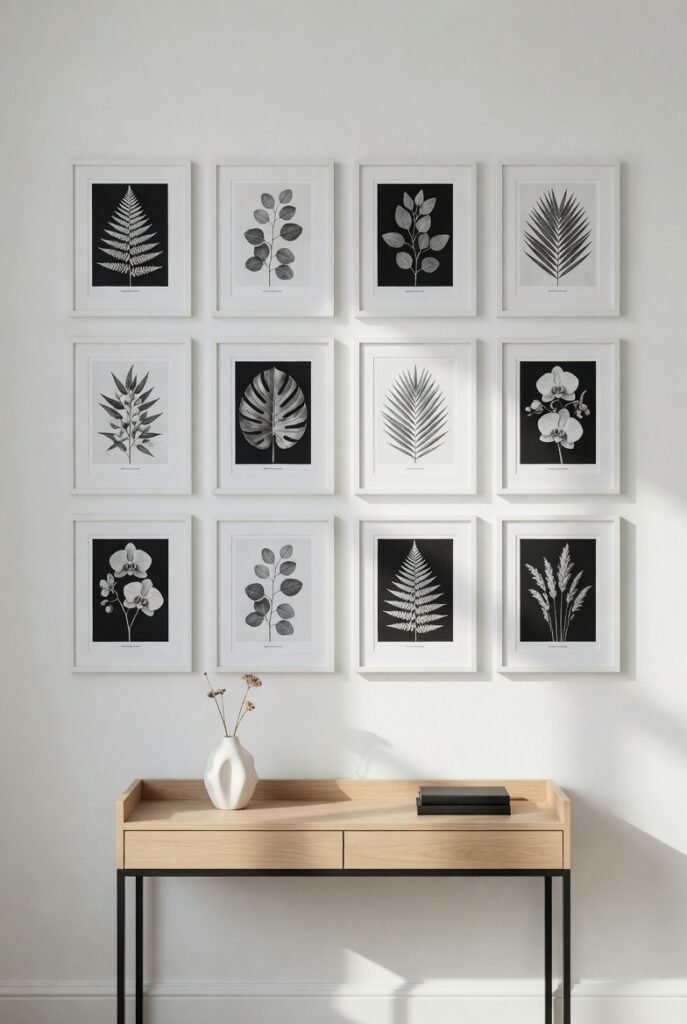
Symmetrical Grid Layout: Modern Wall Art Arrangement
If the salon style makes your eye twitch, the symmetrical grid wall might be more your speed. This approach uses identically sized frames arranged in perfect rows and columns. It’s clean, modern, and incredibly satisfying to look at. This modern gallery wall approach works beautifully in dining rooms, hallways, or above a sofa where you want order without sacrificing visual interest.
You can use all black and white photography for a monochromatic look, or mix in colorful pieces that pop against the structured layout. The uniform frame arrangement creates a sense of calm and order that’s hard to achieve with other styles.
Also Read: The Ultimate Guide to the 11 Timeless Nursery: Why Every New Parent Needs This Heirloom Collection
Staircase Gallery Wall That Follows the Line
Staircases present a unique challenge because the wall follows an angle. But here’s the thing—angled walls can create some of the most dynamic vertical gallery wall concepts you’ll ever see. This staircase art display requires special attention to wall spacing tips.
Instead of fighting the slope, follow it. Let your arrangement mirror the staircase’s ascent, with pieces climbing step by step. This creates movement and draws the eye upward, making your stairwell feel grander and more intentional. When planning stairwell decor, remember that guests will see your arrangement from multiple angles.
I helped a friend do this last year, and we used a mix of family photos and vintage botanical prints. The result was stunning—every time you walk up or down the stairs, you see something new. This is one of those unique wall displays that never gets old.
Leaner Gallery Wall: No Nails Required
Renters, this one’s for you. The leaner gallery wall involves placing artwork directly on shelves, mantels, or the floor, leaning pieces against the wall rather than hanging them. It’s casual, easily changeable, and requires zero commitment. This rental-friendly decor approach is perfect for those who can’t make permanent changes.
You can lean larger pieces on the floor behind a sofa, then layer smaller frames on floating shelves above. The key is varying heights and depths to create dimension. Add some small sculptures or plants between the frames, and you’ve got a shelf decor idea that feels curated without the permanence.
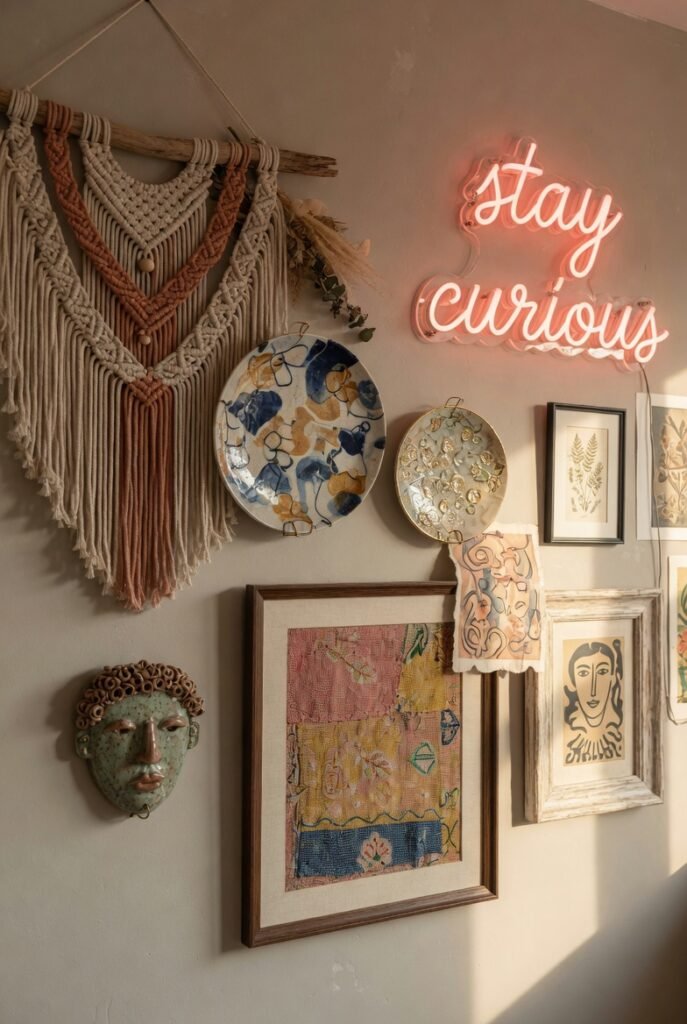
Mixed Media Marvel: Beyond Traditional Frames

Who says gallery walls have to be just frames? Some of the most memorable eclectic wall art concepts incorporate unexpected objects alongside traditional artwork. This mixed media display adds depth and personality that framed prints alone can’t achieve.
Think about adding a small mirror, a textile piece, a vintage clock, or even a collection of plates. These three-dimensional elements break up the flatness of framed art and add texture that catches the light throughout the day. This textured wall decor approach creates visual interest that changes as the light shifts.
Monochromatic Masterpiece: Cohesive Color Schemes
Pick a single color palette and run with it. This could mean all black and white photography, all pieces in shades of blue, or frames that share a metallic finish like brass or silver. This color-coordinated wall approach creates harmony even when your subject matter varies wildly.
The monochromatic approach creates cohesion. You can mix family photos, abstract art, and typography prints, and they’ll all feel connected because the color palette ties everything together. This artwork coordination technique is foolproof for beginners.
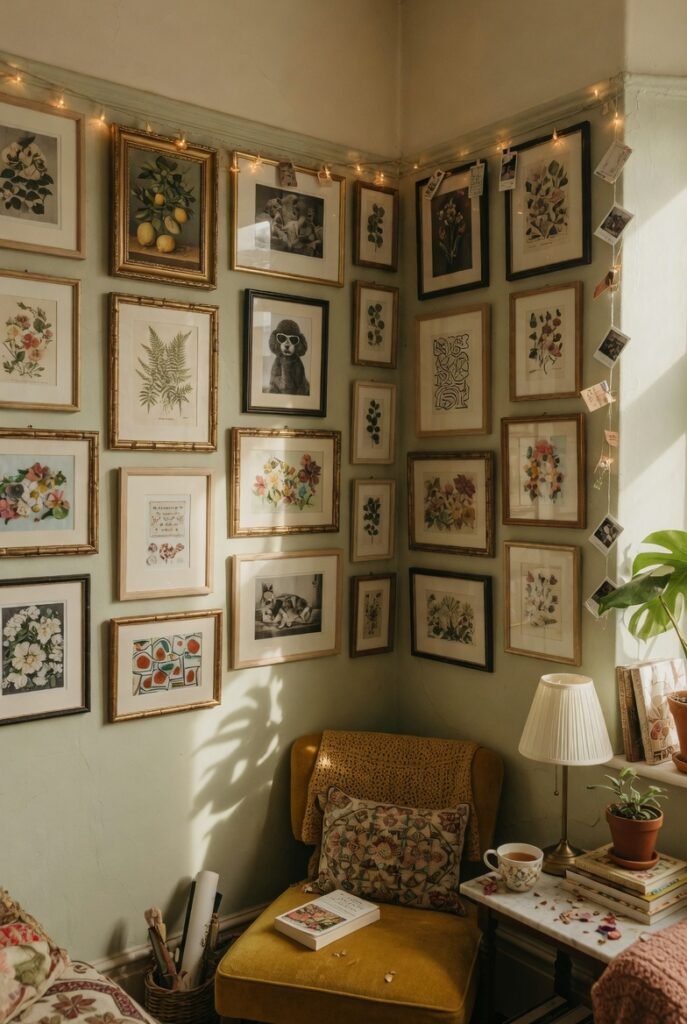
Themed Collection Wall: Tell Your Story

Sometimes the best personalized wall art comes from a specific theme you’re passionate about. Maybe you collect botanical prints from your travels. Perhaps you’re obsessed with vintage maps. Or maybe you want to showcase your child’s artwork in a way that feels intentional rather than refrigerator-cluttered.
Choosing a theme gives your wall direction and tells a clear story. Guests will immediately understand what matters to you, and you’ll enjoy the process of hunting for new pieces that fit your collection. This curated art collection approach turns your wall into a conversation starter.
Floor-to-Ceiling Statement: Maximize Vertical Space
Why stop at eye level? Taking your gallery wall from floor to ceiling creates drama and makes small rooms feel taller. This vertical art installation works especially well in narrow hallways or small bedrooms where you want to maximize impact. It’s a space-maximizing decor solution that transforms ordinary rooms.
You’ll need a ladder for installation, and I recommend starting at the top and working your way down. This approach requires more pieces, so it’s perfect if you’ve been collecting art for years and need somewhere to put it all. The floor-to-ceiling display creates a immersive gallery experience.
Single Row Gallery: Horizontal Impact
Sometimes less really is more. A single row of artwork running horizontally across your wall creates a clean line that anchors the room without overwhelming it. This is one of those linear wall arrangements that works beautifully above a long sofa, console table, or headboard.
Keep the frames consistent in size and style, or vary them slightly while maintaining the same bottom alignment. Either way, the horizontal line will draw the eye across the room and make your space feel wider. This streamlined wall decor approach is perfect for modern interiors.
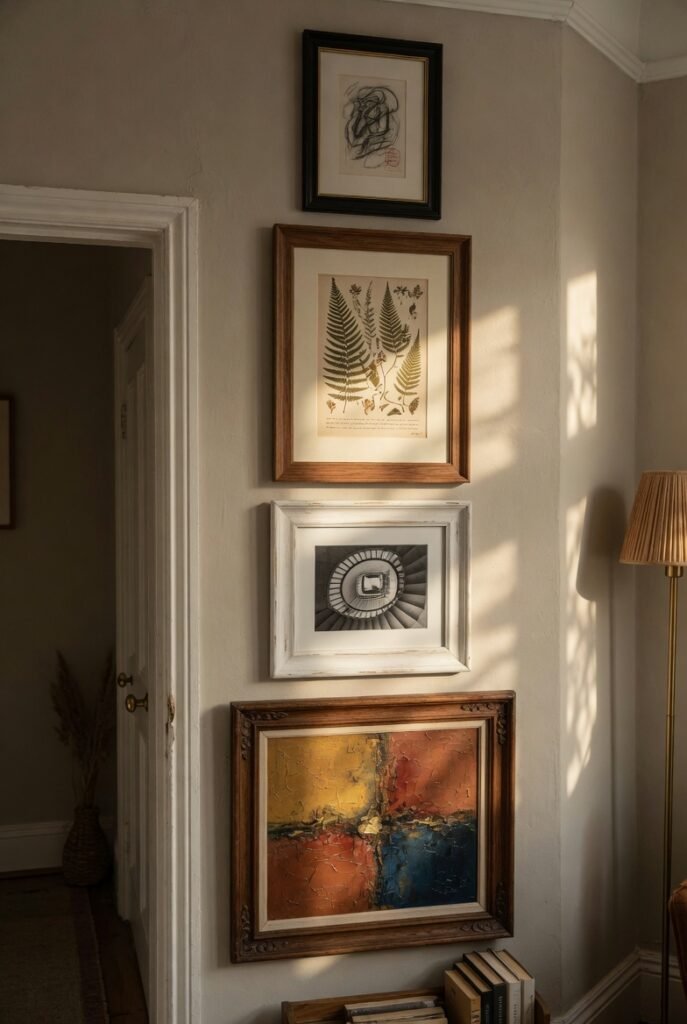
Vertical Stack: Create Height and Drama

On the flip side, a vertical stack of frames creates height and draws the eye upward. This is perfect for narrow walls between windows or doors, or for filling those awkward empty spaces that standard furniture can’t address. This tall wall solution makes ceilings feel higher.
Use three to five frames in graduated sizes or keep them identical. The vertical line becomes a sculptural element in your room, breaking up the horizontals of your furniture. This space-filling technique works wonders in challenging areas.
Corner Gallery Wall: Utilize Awkward Spaces
Don’t forget about your corners! Wrapping artwork around a corner creates an immersive experience that makes your room feel larger and more interesting. This corner art display approach works best in open concept spaces where the eye naturally travels from one area to the next.
The trick is choosing pieces that transition well. You might use all black and white photography so the shift around the corner feels seamless, or you could use the corner as a natural divider between two different themes. This room transition decor creates flow throughout your space.
Matching Frame Approach: Simplify Your Choices
If the idea of mixing frame styles gives you anxiety, take the matching frames path. This is one of the easiest frame coordination methods because consistency does all the work for you.
Choose one frame style and color, then fill them with artwork that varies in subject matter. The uniform frames create rhythm and repetition that feels intentional and polished. White frames on a white wall create a subtle, textured look, while black frames on a white wall provide striking contrast. This cohesive framing technique is beginner-friendly.
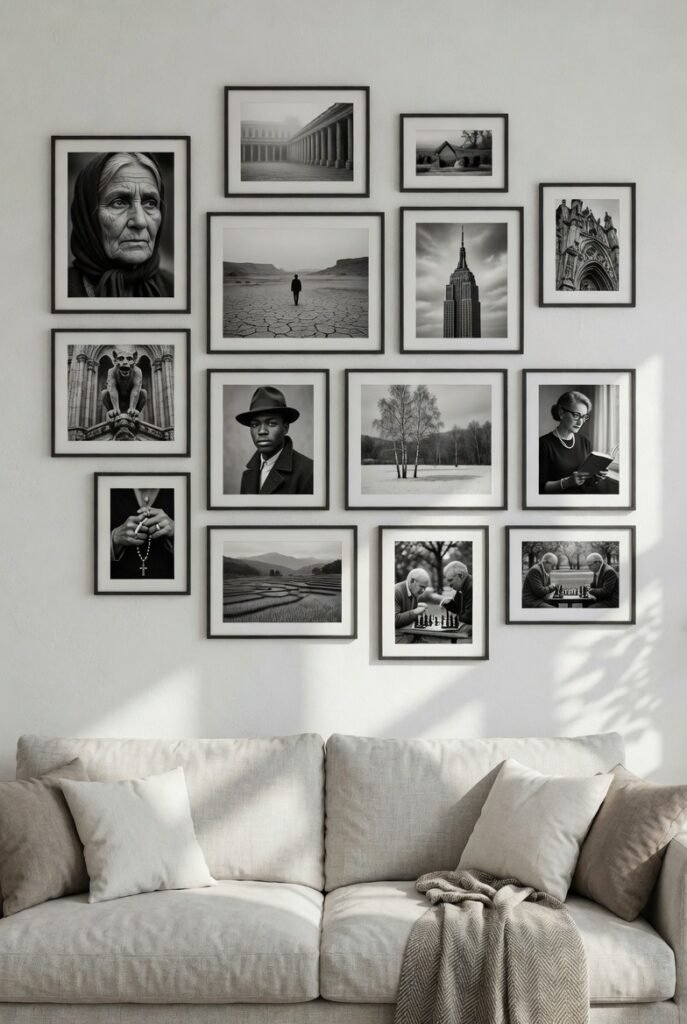
Black and White Photography Wall: Timeless Elegance
There’s something timeless about black and white photography. Whether you use family portraits, travel shots, or vintage finds, a wall of monochrome images feels sophisticated and curated. This classic photo display never goes out of style.
Mix portrait orientations with landscapes, and vary the sizes to keep things interesting. You can use all modern frames or mix in some antique ones for contrast. The lack of color means your eye focuses on composition and emotion, which creates a deeper connection to the images. This vintage photo arrangement adds instant sophistication.
Kid-Friendly Gallery Wall: Family Art Projects
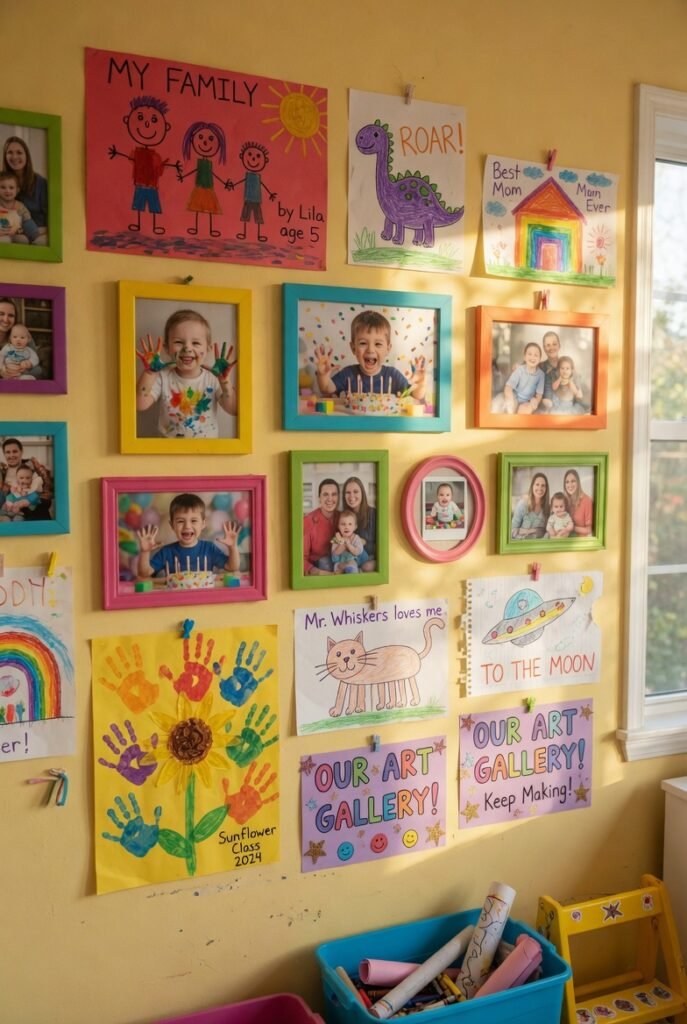
Parents, this one’s for you. Instead of relegating your children’s masterpieces to the refrigerator, create a gallery wall that celebrates their creativity. Use inexpensive frames that are easy to update, and swap out artwork as new pieces arrive. This family art display grows with your children.
Make it interactive by including a few frames with clips instead of glass, so your kids can change their own art whenever inspiration strikes. This not only keeps your walls looking fresh but also teaches your children that their creativity deserves to be displayed and celebrated. This children’s art gallery becomes a source of pride for the whole family.
Architectural Salvage Gallery: Unique Found Objects
For those who love character and history, incorporating architectural salvage into your gallery wall creates instant conversation starters. Think old window frames, decorative corbels, vintage signs, or architectural drawings. This vintage decor mix adds instant character.
These pieces have patina and stories built in. They add texture and depth that new frames simply can’t replicate. Mix them with traditional artwork for contrast, or let them stand alone as the stars of the show. This salvaged art display is perfect for those who love one-of-a-kind pieces.
Digital Display Gallery: Modern Technology Meets Art
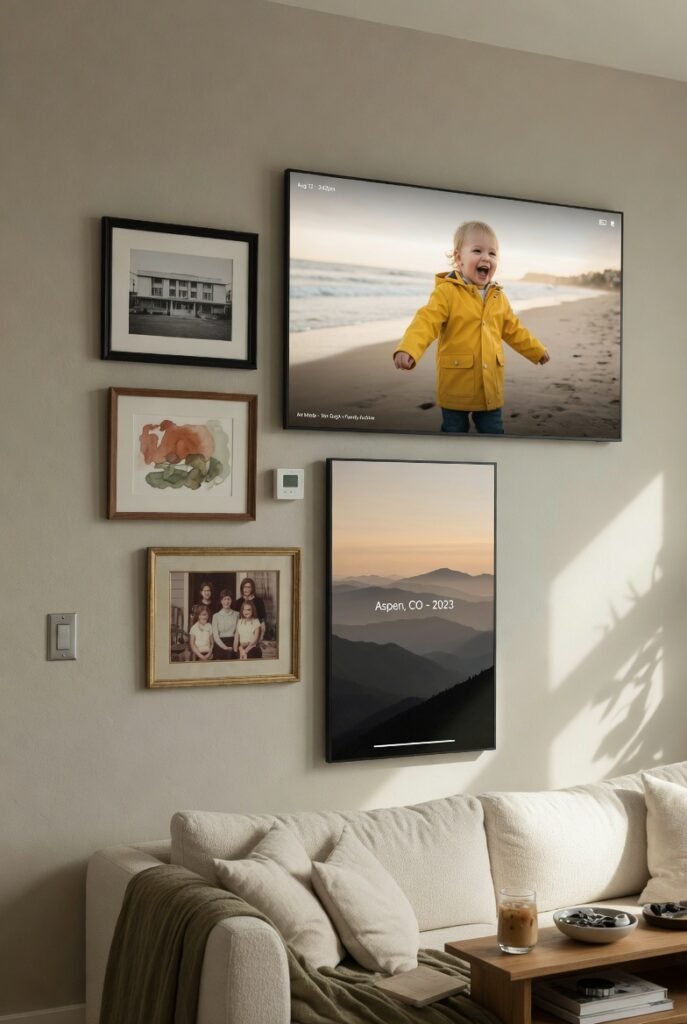
Technology has changed how we think about modern art display. Digital frames now allow you to rotate through hundreds of images, giving you endless variety without the need for more wall space. This tech-savvy decor approach is perfect for the modern home.
Use a large digital frame as the centerpiece of your gallery wall, surrounded by traditional frames. Program it to cycle through family photos, vacation shots, or even artwork you’ve discovered online. It’s like having a rotating exhibition in your home. This electronic art display keeps your walls fresh and exciting.
Typography and Quote Wall: Words That Inspire
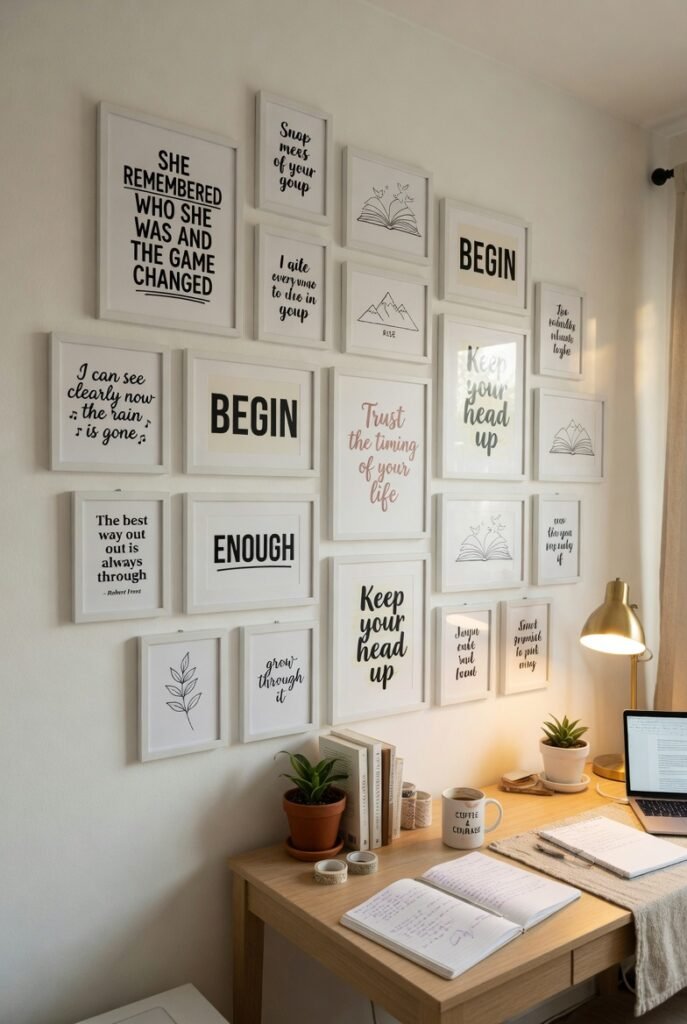
Words have power, and displaying them on your walls can be incredibly inspiring. Whether you love song lyrics, literary quotes, or motivational sayings, a typography-focused gallery wall speaks directly to anyone who reads it. This inspirational quote wall adds meaning to your space.
Mix hand-lettered pieces with vintage signage and modern prints. The variety in fonts and styles adds visual interest while the messages add meaning. This works beautifully in home offices, reading nooks, or anywhere you need a daily dose of inspiration. This word art collection becomes your personal mantra wall.
Minimalist Trio: Less Is More
Not every gallery wall needs twenty pieces. Sometimes three well-chosen frames create more impact than a crowded wall. The key is choosing pieces that relate to each other—maybe through color, subject matter, or frame style. This simple wall arrangement proves that restraint can be powerful.
Space them generously, giving each piece room to breathe. The negative space becomes part of the design, allowing your eye to rest between the artwork. This is one of those minimalist art displays that proves sometimes less really is more. The sparse arrangement creates a modern, gallery-like feel.
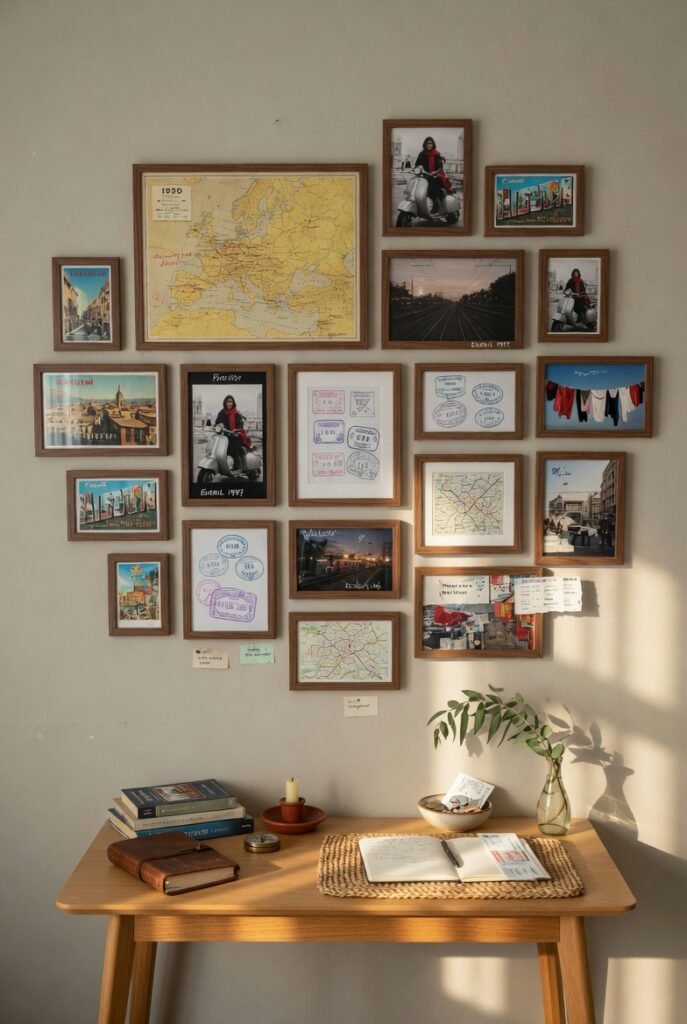
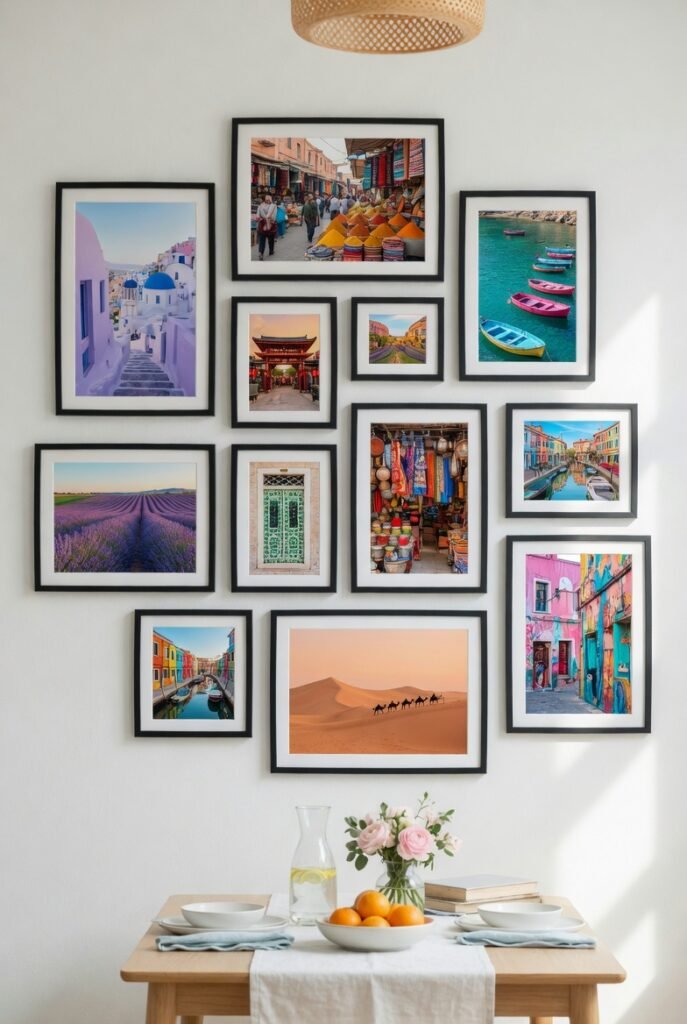
Map Wall for Wanderlusters: Travel Memories
If you love to travel, why not let your walls tell the story? A collection of maps—vintage, modern, or both—creates a gallery wall that’s both decorative and personal. This travel-themed decor brings your adventures home.
You could use maps of places you’ve visited, places you dream of going, or even a single large map surrounded by photos from your adventures. Add push pins to mark your travels, or leave them clean for a more polished look. This wanderlust wall display keeps your travel memories alive every day.
Eclectic Mix of Everything: No Rules, Just Right
Finally, my personal favorite—the eclectic mix that follows no rules except your own. Combine family photos with abstract art, vintage finds with modern prints, three-dimensional objects with flat frames. The only requirement is that every piece means something to you. This personal art collection is uniquely yours.
This approach takes the most time to develop because you’re curating over months or years rather than buying everything at once. But the result is a wall that truly represents you, your history, and your aesthetic. It can’t be replicated, and that’s what makes it special. This signature wall style becomes the heart of your home.
Step-by-Step Guide to Planning Your Gallery Wall
Now that you’ve got twenty ideas swirling in your head, let’s talk about how to actually make it happen. I’ve installed countless gallery walls, and I’ve learned that planning prevents problems. Follow this wall art installation guide for best results.
Step 1: Measure Your Wall
Grab your measuring tape and note the dimensions of your empty wall. Take photos and print them out so you can sketch on them. This space planning step is crucial.
Step 2: Gather Your Pieces
Collect everything you might want to include. Don’t worry if you don’t have enough yet—gallery walls can grow over time. This art curation process is ongoing.
Step 3: Create Paper Templates
Trace each frame onto kraft paper or newspaper, then cut out the shapes. Label each template so you know which piece goes where. This layout planning technique saves headaches later.
Step 4: Arrange on the Floor
Lay your paper templates on the floor and play with arrangements. Snap photos of layouts you like so you can compare them later. This mockup method lets you experiment risk-free.
Step 5: Tape Templates to the Wall
Use painter’s tape to stick your paper templates to the wall. Step back, live with it for a day, and make adjustments. This is your chance to fix things before you make any holes. This visualization technique prevents mistakes.
Step 6: Hammer and Hang
Once you’re happy with the arrangement, start hanging. Use a level for each piece, and don’t rush the process. Follow these hanging tips for professional results.
Step 7: Fill and Adjust
After everything is up, fill any nail holes from rearrangements, and make tiny adjustments until everything feels right. This final tweaking ensures perfection.
Where to Find Artwork for Your Gallery Wall
You don’t need a massive art budget to create a stunning gallery wall. Some of my favorite art sourcing tips are surprisingly affordable:
- Thrift stores and estate sales for vintage finds
- Etsy for affordable prints from independent artists
- Your own photo collection printed and framed
- Free museum archives online (many offer high-res downloads)
- Children’s book illustrations (frame the pages)
- Calendar pages from beautiful art calendars
- Your children’s artwork (seriously, it’s adorable)
The key is being open to possibilities. Some of the most interesting pieces in my own home came from unexpected places—a vintage textbook illustration, a postcard from a friend’s trip, a fabric sample that caught my eye. These budget-friendly finds make your wall unique.
Building Confidence in Your Gallery Wall Choices
I know what you’re thinking. “But what if I mess it up? What if it looks terrible?” These fears are completely normal. I’ve had them myself more times than I can count. Let me share some design confidence tips.
Here’s the thing about gallery wall ideas—they’re not permanent. Nail holes can be filled and painted over. Frames can be rearranged. Artwork can be swapped out. The worst that happens is you try something, don’t love it, and try something else. This fear-free decorating mindset liberates you to experiment.
Start small if you’re nervous. Pick a corner or a small wall and experiment with just three pieces. Live with it for a few weeks. You’ll likely find yourself adding to it naturally over time. This gradual approach builds confidence.
And remember, there’s no such thing as perfect. The most beautiful gallery walls I’ve seen weren’t perfectly planned—they evolved organically, with each piece telling part of a larger story. Your wall should look like you, not like a magazine spread. This authentic design philosophy creates spaces with soul.
Why You Should Start Your Gallery Wall Today
Every day you wait is another day your walls stay blank and your memories stay hidden. Your photos deserve to be seen. Your children’s artwork deserves to be celebrated. Your travels deserve to be remembered. This home transformation starts today.
Creating a gallery wall isn’t just about decorating—it’s about surrounding yourself with the people, places, and things that bring you joy. It’s about walking into a room and feeling instantly at home because you’re surrounded by your story. This personalized home decor changes how you feel about your space.
So grab your hammer, gather your frames, and start experimenting. Whether you choose the structured grid or the eclectic mix, whether you fill your wall in one weekend or over several years, you’re creating something uniquely yours. This rewarding project will bring you joy for years to come.
And if you need frames, prints, or hanging supplies, we’ve got everything you need to get started. Browse our collection of frames in every size and style, explore our curated print sets, and grab our gallery wall planning kit that includes everything except the hammer. These quality materials ensure your wall looks professional.
Your walls are waiting. Let’s fill them with something beautiful.
Frequently Asked Questions About Gallery Walls
How high should I hang my gallery wall?
Generally, center your arrangement at eye level, about 57-60 inches from the floor. But rules are made to be broken—above furniture, you’ll want about 6-8 inches of space between the furniture top and your lowest frame. These hanging height guidelines ensure comfortable viewing.
How much space should I leave between frames?
For a cohesive look, keep spacing consistent, usually 2-4 inches. Tighter spacing creates a busier look while wider spacing feels more relaxed. This frame spacing advice creates visual harmony.
Can I mix frame colors?
Absolutely. Mixed metals and woods add depth and interest. Just make sure there’s some unifying element—maybe similar frame profiles or a consistent mat color. This frame mixing guidance helps you create cohesion.
What if I don’t have enough pieces yet?
Start with what you have and leave room to grow. Gallery walls are meant to evolve. You can always add more later. This gradual collecting approach takes the pressure off.
How do I hang heavy pieces?
Use wall anchors appropriate for your wall type and the weight of your piece. For very heavy items, locate studs whenever possible. These heavy art hanging tips ensure safety and stability.
Remember, the best gallery wall is the one that makes you smile every time you walk by. So take a deep breath, trust your instincts, and start creating. Your walls are about to get a whole lot more interesting.