Let me tell you a quick story. Last summer, I walked into a popular home improvement store looking for a simple patio set. Just a table and four chairs. Nothing fancy. When I saw the price tag—$1,200 for basic aluminum and mesh—my jaw literally dropped. I turned around, walked out, and decided right there that I would figure out how to build my own. That decision changed everything. Not only did I save over $800, but I also discovered a passion for creating DIY outdoor furniture that actually looks better than the expensive store-bought stuff.
Now, I am not a professional carpenter. I am a regular person with basic tools, a small workspace, and a desire to enjoy my backyard without going into debt. If I can do it, so can you.
In this guide, I will share 18 DIY outdoor furniture projects that range from beginner-friendly to slightly advanced. By the time you finish reading, you will have more than enough ideas, plans, and confidence to transform your outdoor space. Moreover, I will show you exactly which products and materials will save you time, money, and frustration.
Let us dive in.
Why Build Your Own Outdoor Furniture? The Real Benefits
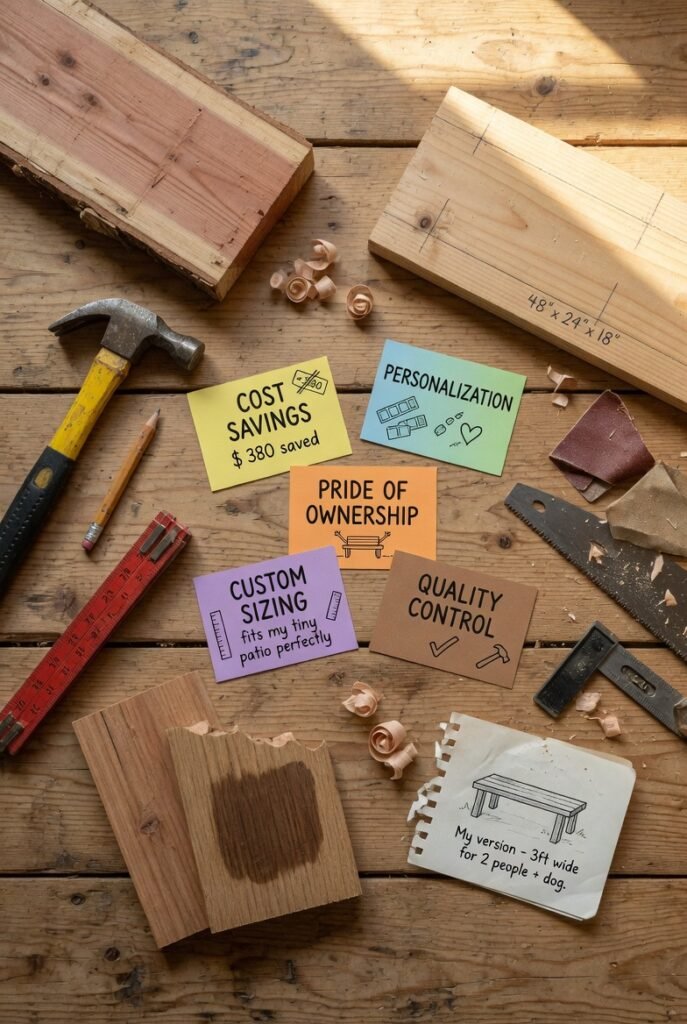
Before we jump into the projects, let us talk about the “why.” Honestly, if you have never built furniture before, the idea can feel intimidating. However, here is the truth:
You save 50-70% compared to retail prices. That $1,200 patio set I mentioned? I built a cedar version for $340. The lumber, screws, and sealant cost less than a single chair at the store.
You control the quality. Mass-produced furniture often uses particleboard, thin metal, or cheap plastic that cracks after one season. When you build DIY outdoor furniture, you choose pressure-treated wood, cedar, or teak. You decide how many screws go into each joint. You make it sturdy.
You can customize everything. Need a table that is 30 inches tall instead of 28? No problem. Want a deep-seated chair for tall people? Easy. Prefer a natural stain over white paint? Done.
It is genuinely fun. There is a deep satisfaction in sitting on something you built with your hands. Every time I have people over, they ask, “Where did you buy this?” And I get to say, “I made it.”
So, let us get started. Below are 18 projects, organized by difficulty. I have included step-by-step guides where it matters most.
Beginner Projects (Perfect for Weekends)
These first six projects require only a drill, a saw (hand saw or circular saw), and a measuring tape. No fancy tools needed.
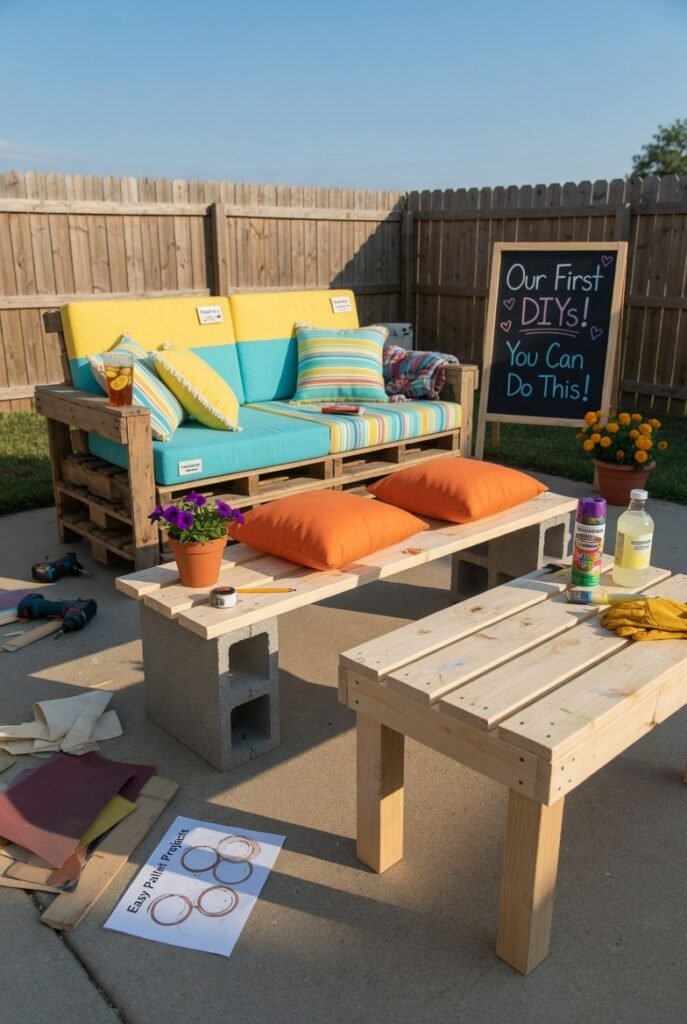
1. The Simple Pallet Couch
Pallets are everywhere. Grocery stores, warehouses, even behind shopping centers. Most businesses are happy to give them away for free. I built my first pallet couch in about four hours.
Materials Needed:
- 4 identical wooden pallets (heat-treated, marked “HT”)
- Outdoor wood screws (2.5 inches)
- Sandpaper (80 and 120 grit)
- Outdoor cushions (18×18 inches works well)
- Wood sealant or exterior paint
Step-by-Step Guide:
Step 1: Find clean, heat-treated pallets. Avoid any marked “MB” (methyl bromide—toxic). Sand all surfaces thoroughly to prevent splinters.
Step 2: Arrange three pallets side by side for the base. Screw them together through the support beams.
Step 3: Attach the fourth pallet vertically to the back of the base. This becomes your backrest. Use corner brackets for extra stability.
Step 4: Apply two coats of wood sealant. Let dry completely.
Step 5: Add outdoor cushions. You can buy these affordably at discount stores or online.
Why this works: This DIY outdoor furniture project costs under $50 if you get free pallets. It is lightweight yet durable. Plus, you can easily disassemble it if you move.
Also Read: 15 Baby Nursery Ideas: Transform Your Little One’s Room into a Safe, Stylish Haven
2. Concrete Block Bench
I built this for my garden area, and it is still standing strong after two harsh winters. Concrete blocks cost about $1.50 each.
Materials:
- 12 concrete blocks (8x8x16 inches)
- 4 pressure-treated 2×4 boards (8 feet long)
- Outdoor wood glue
- Weatherproof cushions (optional)
Step-by-Step Guide:
Step 1: Lay out six blocks on flat ground—two stacks of three blocks each, spaced 6 feet apart.
Step 2: Place a 2×4 board across each stack. These are your seat supports.
Step 3: Stack the remaining six blocks on top of the 2x4s, creating a second level.
Step 4: Run the remaining 2×4 boards across the top blocks to form the seating surface.
Step 5: Add cushions on top. That is it. No screws, no drilling.
This is honestly one of the easiest DIY outdoor furniture ideas out there. Moreover, it looks surprisingly modern.
3. Log Side Table
After trimming a tree in my yard, I had several log slices lying around. Instead of throwing them away, I turned one into a rustic side table.
Materials:
- 1 large log slice (at least 15 inches wide, 3 inches thick)
- 3 hairpin legs (available online for $20)
- Sandpaper
- Polyurethane sealant
Step-by-Step Guide:
Step 1: Let the log slice dry indoors for 2-3 weeks (this prevents cracking).
Step 2: Sand the top and edges until smooth.
Step 3: Screw the hairpin legs evenly into the bottom.
Step 4: Apply three coats of polyurethane sealant, sanding lightly between coats.
Total cost: Around $30. Compare that to $150 for a similar table at a home goods store.
4. Cinder Block Planter Bench
This combines seating with gardening. I made two of these for my vegetable patch.
Materials:
- 20 cinder blocks
- 4 rebar rods (cut to 3 feet each)
- 2 cedar 2×6 boards (6 feet long)
- Landscape fabric
- Potting soil
Step-by-Step Guide:
Step 1: Arrange cinder blocks in two parallel rows, three blocks long. Leave gaps between blocks for planting.
Step 2: Insert rebar rods vertically through the block holes to stabilize.
Step 3: Lay the cedar boards across the top as seats.
Step 4: Line the empty block cavities with landscape fabric, fill with soil, and plant herbs or flowers.
This DIY outdoor furniture piece serves two purposes—sitting and growing food—which is brilliant for small patios.
5. Rope Spool Table
Large wooden cable spools are often free from electrical supply companies. I found one in an alley, cleaned it up, and turned it into a patio table.
Materials:
- 1 large wooden spool
- Sandpaper
- Outdoor paint or stain
- Casters (optional for mobility)
Step-by-Step Guide:
Step 1: Disassemble the spool carefully. Keep the top disc and center cylinder.
Step 2: Sand everything thoroughly. Spools are rough and may have splinters.
Step 3: Reattach the top disc to the cylinder using heavy-duty screws.
Step 4: Paint or stain. Add casters to the bottom if you want to move it easily.
This table is massive. I use mine for outdoor dinners, board games, and even as a buffet table for parties.
6. Milk Crate Storage Ottoman
Plastic milk crates are incredibly strong. Stack them right, and you get a lightweight ottoman with hidden storage.
Materials:
- 9 plastic milk crates
- Heavy-duty zip ties
- 1 plywood square (18×18 inches)
- 2-inch foam pad
- Outdoor fabric
- Staple gun
Step-by-Step Guide:
Step 1: Arrange the crates in a 3×3 square. Zip tie them together at all contact points.
Step 2: Place the plywood on top. This creates a solid base for the cushion.
Step 3: Cut foam to size and wrap with outdoor fabric. Staple the fabric to the plywood bottom.
Step 4: Set the cushion on top. Store blankets, toys, or gardening gloves inside the crates.
This is one of the most clever DIY outdoor furniture projects because it solves two problems: seating and clutter.
Intermediate Projects (One Weekend Each)

These next six projects require a bit more precision and maybe a miter saw. Nevertheless, I will walk you through each step.
7. X-Frame Adirondack Chair
The Adirondack chair is iconic. Sloped back, wide armrests, perfect for lemonade and good books. I built my first one using free plans from a woodworking blog.
Materials:
- 2 cedar 1×6 boards (8 feet)
- 1 cedar 2×4 board (8 feet)
- Exterior wood screws (1.5 and 2.5 inches)
- Wood glue
- Outdoor sealant
Step-by-Step Guide:
Step 1: Cut the 1×6 boards into seat slats (20 inches each—you will need 5 of them).
Step 2: Cut the 2×4 into two 30-inch pieces (legs) and two 20-inch pieces (armrest supports).
Step 3: Create the X-frame by overlapping the leg pieces at the center and screwing them together.
Step 4: Attach the seat slats starting from the back, working forward. Leave a 1/4-inch gap between each slat for water drainage.
Step 5: Add armrests and back supports. Sand everything smooth.
Step 6: Apply sealant.
This chair costs about $40 in materials. A similar cedar Adirondack chair at a retail store? $180 or more.
8. Hexagonal Picnic Table
Regular picnic tables are boring. A hexagon table creates natural conversation areas. I built one for my fire pit, and it has become the gathering spot for every barbecue.
Materials:
- 10 pressure-treated 2×4 boards (8 feet)
- 1 sheet of 3/4-inch exterior plywood
- 3-inch deck screws
- Circular saw or miter saw
Step-by-Step Guide:
Step 1: Cut the plywood into a hexagon shape. Each side should be 24 inches.
Step 2: Build the frame using 2x4s. Attach the plywood top.
Step 3: Create six legs by cutting 2x4s to 28 inches. Attach one leg at each corner.
Step 4: Add support braces between legs for stability.
Step 5: Build six separate bench seats around the perimeter.
This DIY outdoor furniture project looks complicated, but the math is simple. Each angle is 120 degrees. Once you cut one piece correctly, you just replicate it five times.
9. Folding Bistro Set
Small spaces need smart solutions. This folding bistro set includes a round table and two chairs that fold flat against the wall.
Materials:
- 4 cedar 1×4 boards (6 feet)
- 2 cedar 2×2 boards (4 feet)
- Hinges (4 pairs)
- Screws, glue, sealant
Step-by-Step Guide:
Step 1: Build the chair frames using the 2×2 boards. Each chair needs two side frames connected by seat slats.
Step 2: Attach hinges at the center of each chair frame so they can fold.
Step 3: Build the table using the 1×4 boards for the top and 2x2s for the legs.
Step 4: Add folding hinges to the table legs as well.
Step 5: Seal everything.
When folded, this set takes up less than 6 inches of wall space. It is perfect for balconies, tiny patios, or RVs.
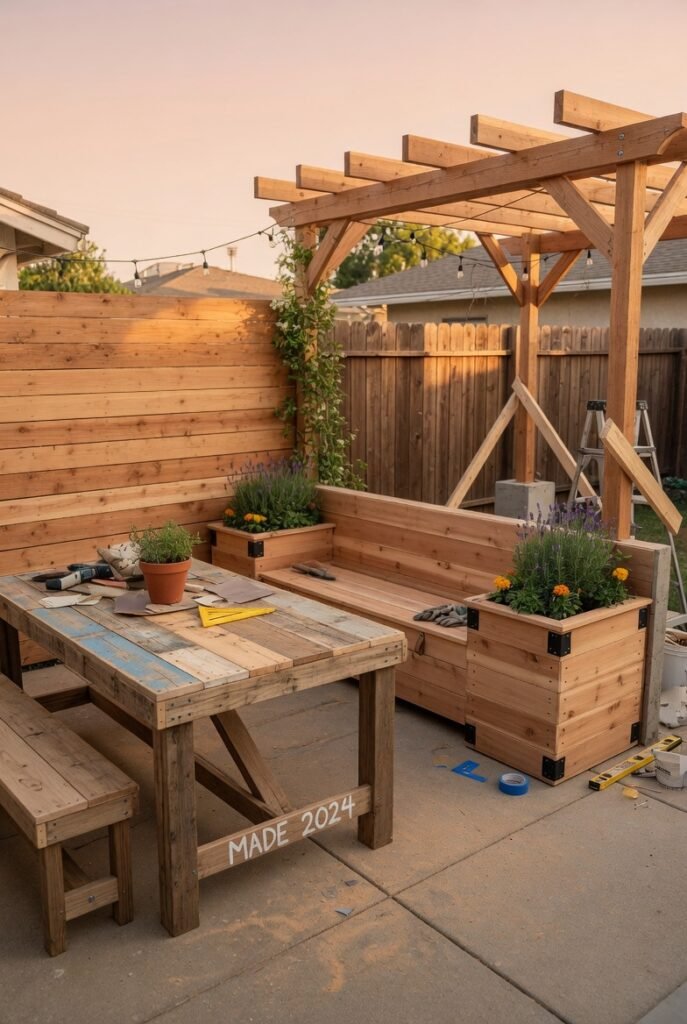
10. Outdoor Sectional Sofa
Sectionals are expensive—often $2,000 or more. However, you can build a modular DIY outdoor furniture sectional for under $300.
Materials:
- 15 pressure-treated 2×4 boards (8 feet)
- 3 sheets of 1/2-inch exterior plywood
- Outdoor foam cushions (24×24 inches)
- Outdoor fabric
- Heavy-duty screws
Step-by-Step Guide:
Step 1: Build three identical boxes: 24 inches wide, 24 inches deep, 18 inches tall. Use 2x4s for the frame and plywood for the bottom.
Step 2: Add backrests to two of the boxes. Leave one box without a backrest—this becomes the corner piece.
Step 3: Sand, seal, and paint.
Step 4: Sew or buy cushion covers. Insert foam.
Step 5: Arrange the three pieces in an L-shape. Screw them together from underneath.
You now have a custom sectional. Want it bigger? Build four boxes instead of three. Want a chaise? Make one box 36 inches deep.
11. Hanging Egg Chair
This one looks fancy, but it is surprisingly simple. The “egg” shape comes from bending plywood.
Materials:
- 2 sheets of 1/4-inch flexible plywood
- Wood glue
- 100 feet of cotton rope
- Ceiling hook or stand
- Outdoor cushion
Step-by-Step Guide:
Step 1: Cut the plywood into long strips (3 inches wide, 8 feet long).
Step 2: Layer three strips together with glue, bending them around a form (a large trash can works).
Step 3: Clamp and let dry overnight.
Step 4: Repeat to create a second bent frame.
Step 5: Connect the two frames with horizontal strips to create the egg shape.
Step 6: Weave rope through the frame to create the seat and back.
Step 7: Hang from a sturdy ceiling beam or a metal stand.
This DIY outdoor furniture project takes patience, but the result is stunning. People will think you spent $800 on it.
12. Pallet Bar
Pallet bars have become incredibly popular, and for good reason. They are cheap, mobile, and perfect for parties.
Materials:
- 6 pallets
- 4 locking casters
- Plywood for the countertop
- Outdoor paint
- Shelving brackets
Step-by-Step Guide:
Step 1: Stack three pallets on top of each other. Screw them together.
Step 2: Attach casters to the bottom.
Step 3: Attach the remaining three pallets vertically to one side. These become the back bar and bottle storage.
Step 4: Cut plywood to size for a smooth countertop. Paint or stain.
Step 5: Add shelving brackets inside for glassware.
Step 6: Add a towel rack, bottle opener, and small hooks for bar tools.
I built one of these for my brother’s wedding. We rolled it onto the lawn, stocked it with drinks, and it became the most popular spot at the reception.
Advanced Projects (For the Dedicated DIYer)
These last six projects require more tools, time, and skill. However, the payoff is huge.
13. Outdoor Daybed with Canopy
Imagine napping in your backyard on a cushioned daybed with a flowing canopy overhead. Now imagine building it yourself for a fraction of the retail price.
Materials:
- 20 pressure-treated 2×4 boards (10 feet)
- 4×4 posts for the canopy frame (8 feet tall)
- Outdoor canvas
- 6-inch thick foam mattress (twin size)
- Outdoor fabric for cushions
- Stainless steel hardware
Step-by-Step Guide:
Step 1: Build the base frame: 80 inches long, 40 inches wide, 18 inches tall.
Step 2: Add slats every 4 inches to support the mattress.
Step 3: Attach 4×4 posts to the four corners of the base.
Step 4: Build a roof frame connecting the posts at the top.
Step 5: Sew or staple canvas to the roof frame, creating a canopy.
Step 6: Waterproof the entire structure.
Step 7: Add the mattress and cushions.
This DIY outdoor furniture piece turns your yard into a resort. Total cost: around $400. Retail equivalent: easily $2,000.
14. Concrete Fire Table
A fire pit is great, but a fire table is even better. You can eat off it, then turn on the flames for ambiance.
Materials:
- 10 concrete blocks (12×12 inches)
- Fire-rated mortar
- Propane fire pit insert (buy this pre-made for safety)
- Decorative glass rocks
- Steel tabletop frame
Step-by-Step Guide:
Step 1: Arrange concrete blocks in a rectangle (48×24 inches). Mortar them together.
Step 2: Build a steel frame to sit on top of the concrete base.
Step 3: Install the propane insert according to manufacturer instructions.
Step 4: Fill the insert with glass rocks.
Step 5: Add a removable wooden or concrete top that covers the fire insert when not in use.
Safety note: Always follow local fire codes and never leave a propane fire unattended.
15. Modular Privacy Screen with Planters
Privacy is precious in a backyard. This project combines a folding screen with built-in planters.
Materials:
- 8 cedar 1×4 boards (8 feet)
- 4 cedar 2×2 boards
- Hinges
- 4 small planter boxes
- Outdoor stain
Step-by-Step Guide:
Step 1: Build three frames, each 6 feet tall and 2 feet wide.
Step 2: Attach vertical slats inside each frame (gaps between slats for partial privacy).
Step 3: Connect the three frames with hinges so they fold.
Step 4: Attach planter boxes to the bottom of each frame.
Step 5: Plant climbing vines or tall grasses.
Step 6: Stain everything.
This DIY outdoor furniture concept is brilliant because it serves three purposes: privacy, greenery, and visual appeal.
16. Cedar Hot Tub Enclosure
Okay, this one is for the serious builder. However, if you have a hot tub, an enclosure extends your season and adds luxury.
Materials:
- 30 cedar 2×4 boards (10 feet)
- 10 cedar 1×6 boards
- Weatherproof roofing panels
- Screws, hinges, latches
- Outdoor sealant
Step-by-Step Guide:
Step 1: Build a rectangular frame around your hot tub, leaving room for the lid to open.
Step 2: Add walls on three sides, leaving the front open for entry.
Step 3: Build a roof with a slight slope for rain runoff.
Step 4: Install roofing panels.
Step 5: Build a door that swings open.
Step 6: Seal every piece of wood thoroughly.
Step 7: Add hooks for robes, a small shelf for drinks, and outdoor lights.
This project costs about $600 in materials. A pre-built cedar enclosure? $3,000 minimum.
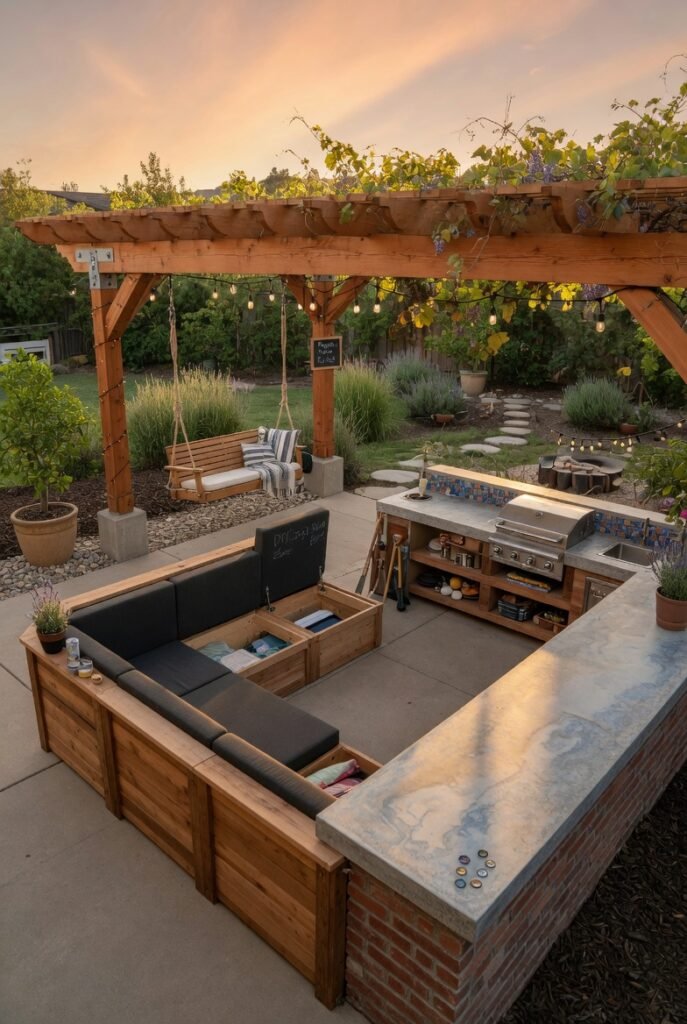
17. Outdoor Kitchen Cart
Grilling is better when you have counter space. This rolling cart gives you a prep area, storage, and even a spot for a small sink.
Materials:
- 10 pressure-treated 2×4 boards
- 2 sheets of exterior plywood
- 4 heavy-duty casters (two locking)
- Stainless steel countertop or tile
- Hooks, baskets, and magnetic strips
Step-by-Step Guide:
Step 1: Build a box frame: 60 inches long, 24 inches deep, 36 inches tall.
Step 2: Add a bottom shelf for storage.
Step 3: Attach casters.
Step 4: Install the countertop.
Step 5: Add side hooks for grilling tools.
Step 6: Attach a magnetic strip for knives.
Step 7: Seal everything against moisture.
This DIY outdoor furniture cart has saved me countless trips back inside while grilling. Everything I need is right there.
18. Reclaimed Wood Porch Swing
There is something magical about a porch swing. The gentle motion, the creak of chains, the conversations that happen there. I built mine from old barn wood, and it is my favorite place in the world.
Materials:
- 5 reclaimed wood boards (1×6, 6 feet long)
- 2 heavy-duty chains (6 feet each)
- 2 large eye bolts
- 2 swing hangers (rated for 500 pounds)
- Sandpaper, wood conditioner, sealant
Step-by-Step Guide:
Step 1: Arrange the five boards side by side. This is your seat.
Step 2: Attach two support boards underneath (running perpendicular) to hold everything together.
Step 3: Build a backrest using three more boards at a slight angle.
Step 4: Sand all surfaces thoroughly. Reclaimed wood can have splinters.
Step 5: Apply wood conditioner, then sealant.
Step 6: Drill holes in the armrests for the chains.
Step 7: Install eye bolts into a sturdy porch beam.
Step 8: Attach chains and hang the swing.
Test the weight before sitting. A properly installed swing will hold multiple adults safely.
Essential Products to Buy With Confidence
Now that you are excited about building DIY outdoor furniture, let me recommend the specific products I have personally used and trust. Buying the right materials makes all the difference.
Best Wood for Outdoor Furniture
Cedar is my top recommendation. It is naturally rot-resistant, lightweight, and smells amazing. A cedar 1×6 board costs about $4 per foot.
Pressure-treated pine is cheaper ($2 per foot) but requires sealing and is not as pretty. Use it for hidden structural parts.
Teak is the gold standard but expensive ($15 per foot). Only use teak if budget is not a concern.
Buy with confidence: Look for wood labeled “KDAT” (kiln-dried after treatment) . It will not warp or crack.
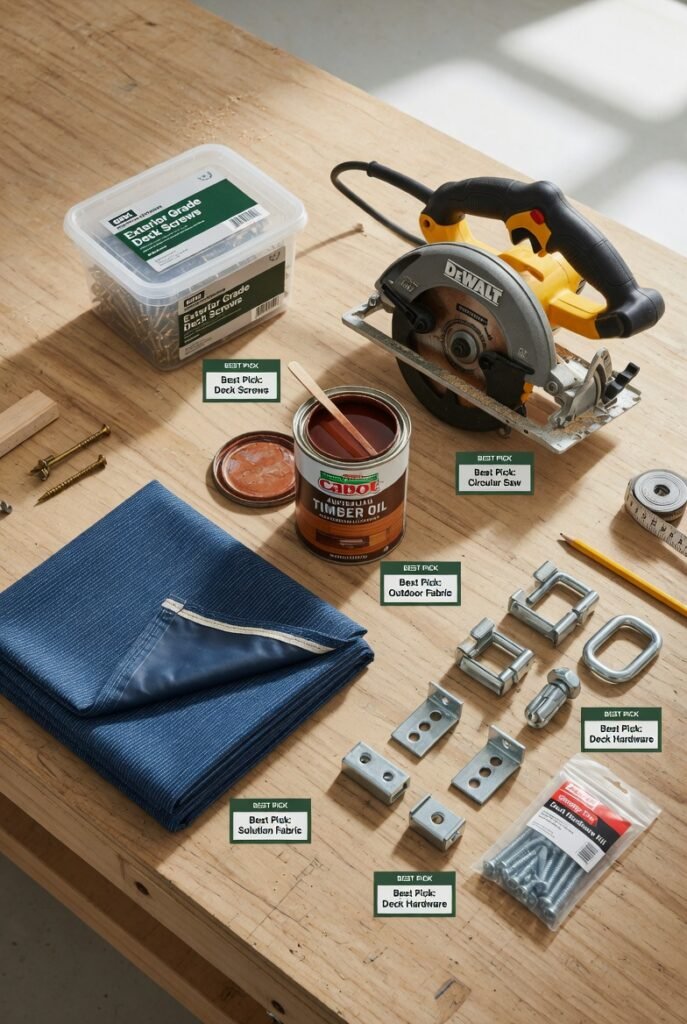
Best Outdoor Screws
Regular steel screws rust within months. You need stainless steel or coated deck screws. I have used the GRK RSS line for years. They never strip, and they hold like crazy.
Buy with confidence: Get a 5-pound mixed box of 2-inch and 3-inch screws. That is enough for multiple projects.
Best Wood Sealant
Spar urethane is designed for boats. If it holds up to ocean spray, it will handle your backyard. Thompson’s WaterSeal is another solid choice.
Buy with confidence: Apply three thin coats rather than one thick coat. Thin coats penetrate better.
Best Outdoor Cushions
Sunbrella fabric is worth every penny. It resists fading, mildew, and stains. Yes, it costs more upfront, but cheap cushions disintegrate after one summer.
Buy with confidence: Measure your furniture first, then order custom-sized cushions online. Many Etsy sellers make them affordably.
Best Tools for the Job
If you own nothing else, buy these three tools:
- A 20V cordless drill (DeWalt or Ryobi). Around $100.
- A circular saw (Skilsaw brand is reliable). Around $80.
- A speed square ($10). This ensures your cuts are perfectly straight.
Buy with confidence: Do not buy the cheapest tools. Mid-range tools last for decades. Cheap tools break and frustrate you.
Common Mistakes (And How to Avoid Them)
I have made every mistake possible so you do not have to.
Mistake #1: Skipping the sealant. Wood left untreated rots in one season. Always seal everything, even pressure-treated wood.
Mistake #2: Using interior screws. They rust, snap, and ruin your project. Spend the extra dollar on stainless steel.
Mistake #3: Not accounting for wood movement. Wood expands and contracts with humidity. Leave 1/8-inch gaps between boards.
Mistake #4: Building without a level. A slightly tilted table drives you crazy. Check level at every step.
Mistake #5: Forgetting about weight. A bench that wobbles is dangerous. Add corner brackets, extra screws, and cross-braces.
Final Thoughts: Your Backyard Awaits
When I finished that first pallet couch two years ago, I sat on it with a glass of iced tea and just smiled. I had saved money, learned a skill, and created something that did not exist before. That feeling never gets old.
Now it is your turn. Start small. Maybe the concrete block bench or the log side table. Get comfortable with your tools. Then tackle the Adirondack chair or the sectional sofa. Before you know it, you will have a backyard full of DIY outdoor furniture that tells a story—your story.
And here is the best part: Every time a guest says, “Where did you buy this?” you get to say, “I built it.”
That confidence? That pride? You cannot buy it at any store.
So grab your drill, pick a project from this list, and start building. Your outdoor oasis is waiting.