There is nothing quite like the pop and crackle of a real wood fire. I remember visiting my uncle’s farm as a kid. Every Saturday night, regardless of the weather, he would drag a few rusty chairs onto a patch of gravel behind the barn, toss some kindling into an old iron ring, and light it up. We didn’t call it an outdoor fire pit area back then. We just called it “the good spot.” As the flames danced, I learned more about life, stars, and roasted marshmallows than I ever did in a classroom.
Fast forward twenty years. I now own a home with a modest backyard. Last spring, I finally decided to stop chasing that nostalgic feeling and build my own cozy fire pit zone. The transformation was shocking. My yard went from “a place where the grass grows” to the most popular hangout on the block.
If you are looking to upgrade your landscape, you have landed on the right guide. Today, we are diving deep into 13 distinct outdoor fire pit area designs. Whether you have a sprawling lawn or a tiny balcony, there is a layout here for you.
However, this isn’t just a list of pretty pictures. I am going to walk you through a step-by-step guide on safety, materials, and the psychological “tricks” that make people want to pull up a chair and stay until the embers fade. By the end of this article, you will not only have a vision—you will have the confidence to buy the right equipment and build a space that adds value, warmth, and joy to your life.
Let’s get that fire started.
Why You Need a Dedicated Fire Pit Space (Not Just a Chiminea in the Corner)

Before we list the 13 styles, let’s talk about the “why.” A dedicated outdoor fire pit area is different from simply owning a fire bowl. It is a zone. It has boundaries, flooring, seating, and intention.
Here is an anecdote to prove my point. My neighbor, Dave, bought a cheap metal fire bowl from a big-box store. He set it right in the middle of his lawn. No gravel. No chairs. He lit it on a windy night. The grass got scorched, the smoke blew directly into his sliding door, and his wife made him return it the next day. Dave failed because he didn’t build an area; he just bought an object.
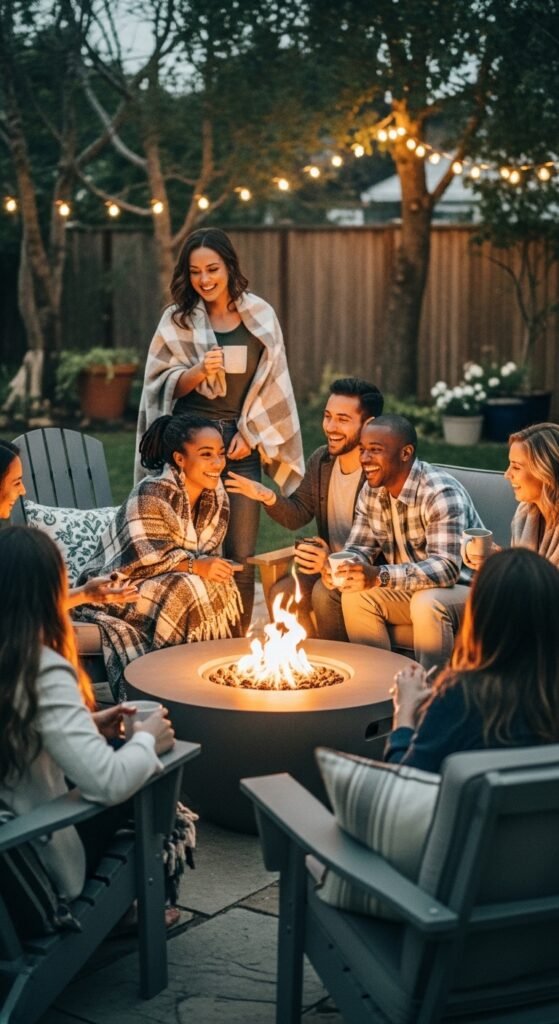
Conversely, when you define a patio fire pit zone with pavers, pebbles, or a stone pad, you tell your brain: This is a room. It feels safe and intentional. Statistics show that homes with a dedicated backyard fire feature see a 20% increase in usable outdoor time. That means more autumn evenings, more spring mornings with coffee by the coals, and more memories.
Part 1: The Step-by-Step Blueprint (Read This Before You Dig)
Regardless of which of the 13 designs you choose, the foundation is the same. Follow this step-by-step guide to avoid becoming a cautionary tale like my neighbor Dave.
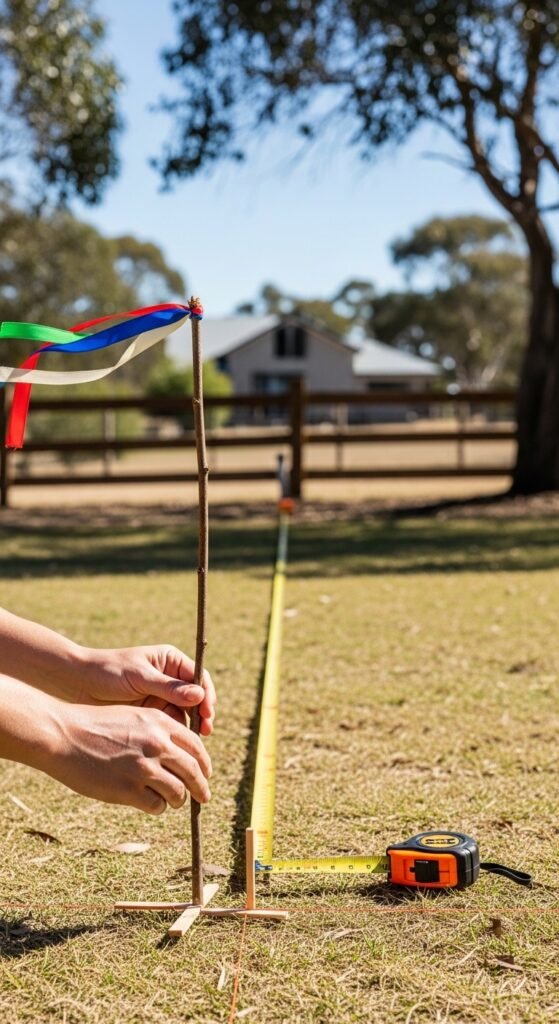
Step 1: Check the Wind and Distance
- The Rule: Your outdoor fire pit area must be at least 10 feet away from your house, fences, shrubs, and trees.
- The Tip: Walk around your yard on a breezy day with a ribbon. See where the smoke blows. Position your pit so the smoke trails away from your neighbor’s bedroom window and away from your patio door.
Also Read:The Ultimate Coconut Rice Recipe: A Creamy, Aromatic Journey to Perfect Rice Every Time
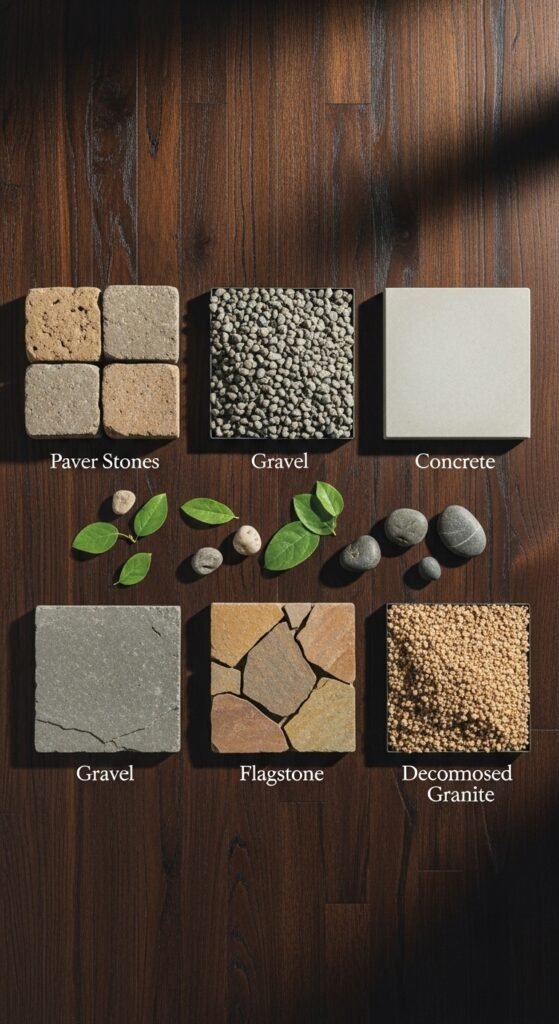
Step 2: Choose Your Surface

You cannot put a fire pit on dry grass or wood decking (sparks are sneaky). You need a non-combustible base.
- Best option: Concrete pavers, brick, or gravel.
- Budget option: A 4×4 foot sheet of cement board topped with lava rocks.
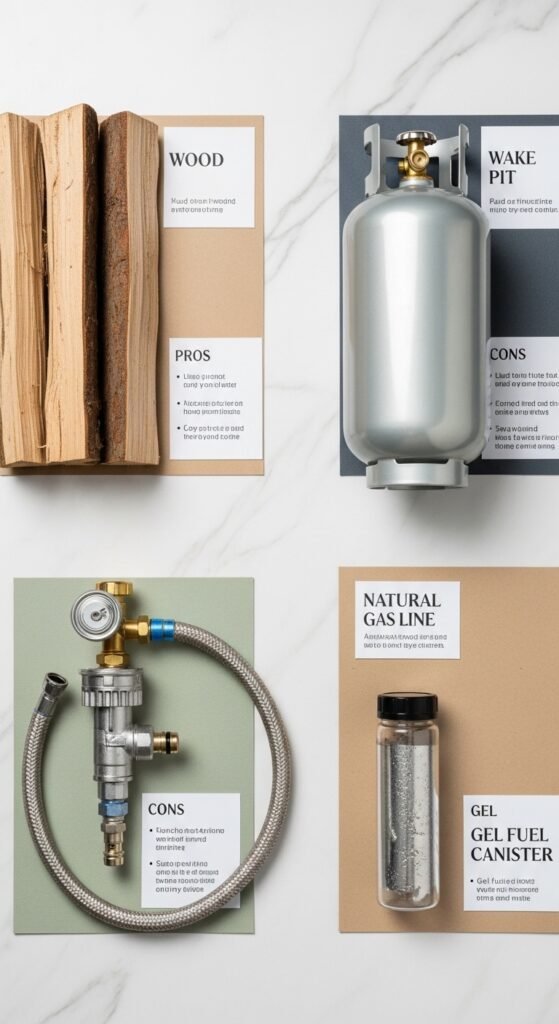
Step 3: Pick Your Fuel Type
- Wood-burning: Classic crackle and smell. Requires more cleanup.
- Propane (Gas): Instant flame. No smoke. Easy to turn off. Perfect for a modern outdoor fire pit area where convenience is king.
- Natural Gas: Connected to your home line. Unlimited burn time.
Step 4: Seat Height is Everything
The most common mistake is chairs that are too low or too high. The ideal seat height for a cozy fire pit zone is 12 to 18 inches. Your shins should be warm, but your knees shouldn’t hit your chin.
Now that the safety lecture is over, let’s look at the fun stuff. Here are 13 unique layouts to inspire your build.
The 13 Outdoor Fire Pit Area Concepts
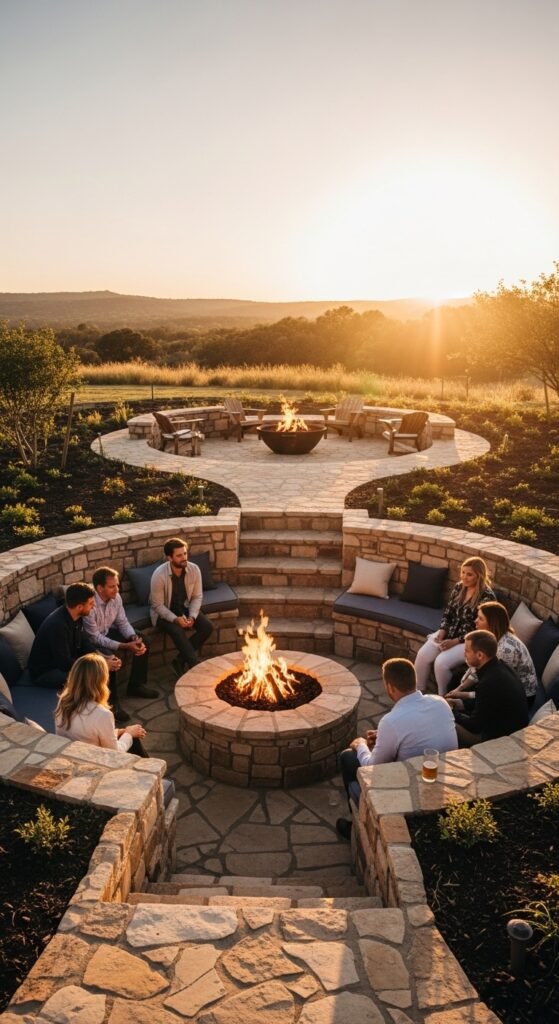
1. The Sunken Conversation Pit

Imagine stepping down two steps into a lower section of your yard. That is the sunken style. This luxury outdoor fire pit area uses retaining walls as seats.
- Best for: Sloped yards or modern homes.
- Keyword focus: Sunken fire pit seating creates intimacy because the walls block the wind.
- Pro tip: Line the retaining wall with cushions that have weather-resistant fabric.
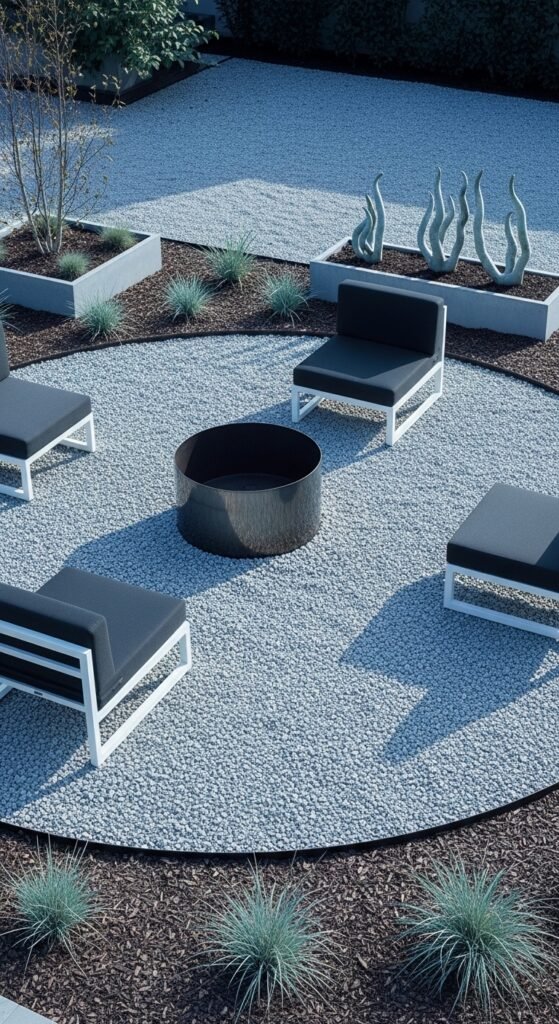
2. The Minimalist Gravel Pad
Sometimes, less is more. For this simple outdoor fire pit area, you simply excavate a 10×10 foot square, lay down landscape fabric, and pour 3 inches of pea gravel.
- Why it works: Gravel drains water instantly. It also crunches underfoot, which sounds like luxury.
- Anecdote: I built this for $150. I used a shovel, a rented plate compactor, and three yards of gravel. Two years later, it still looks pristine.
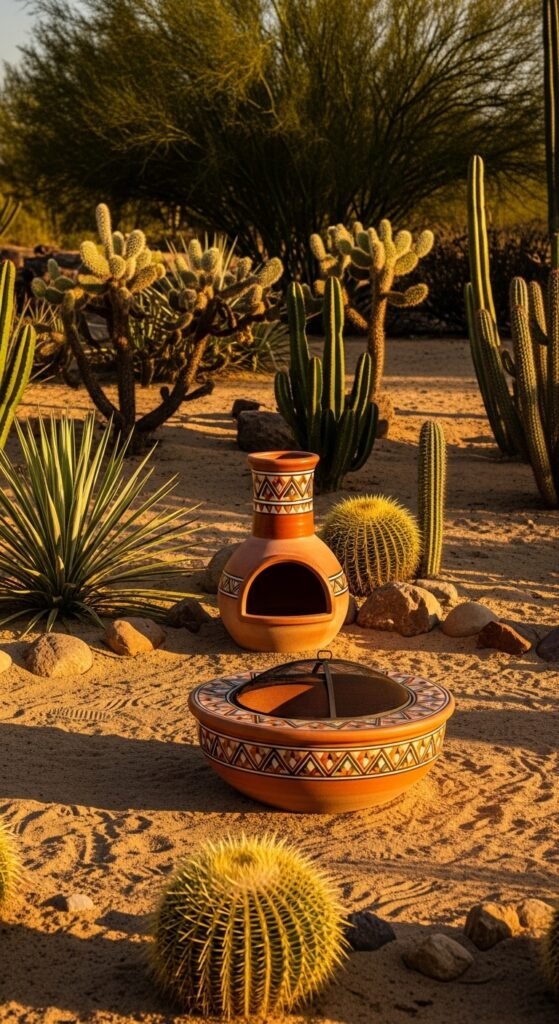
3. The Desert Vibe (Cacti & Sand)
If you live in a dry climate, lean into it. Use decomposed granite as your base. Surround the desert outdoor fire pit area with large, glazed pottery and sculptural agave plants.
- Safety note: Keep succulents at least 3 feet from the flame. Heat dries them out.
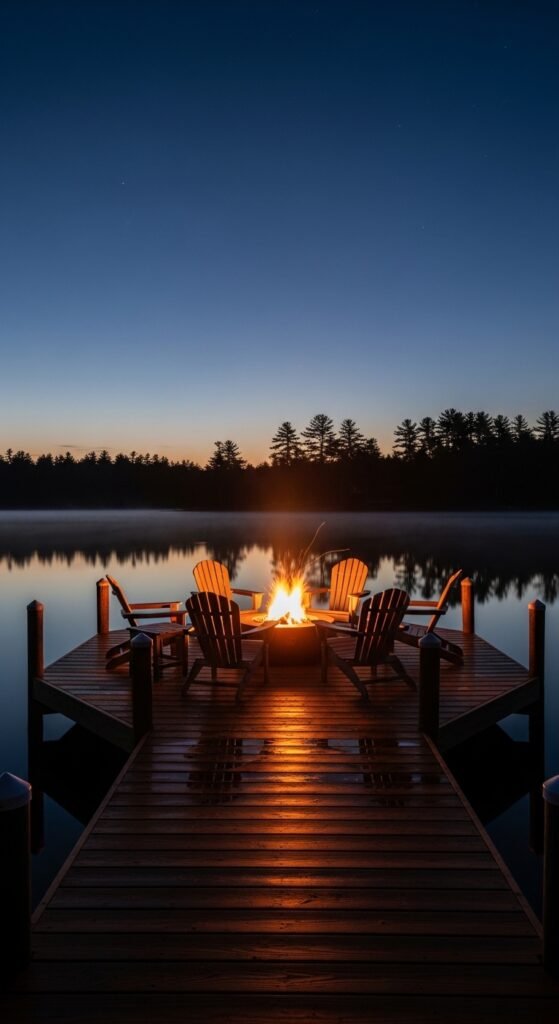
4. The Lakeside Dock Extension
Do you have a pond or a pool? Extend a wooden dock out over the water (on sturdy pilings) and place a gas fire pit table in the center.
- The vibe: Floating flames. The reflection of the fire on the water doubles the ambiance.
- Warning: You must use a propane fire pit area unit here. No wood ashes falling into the water.
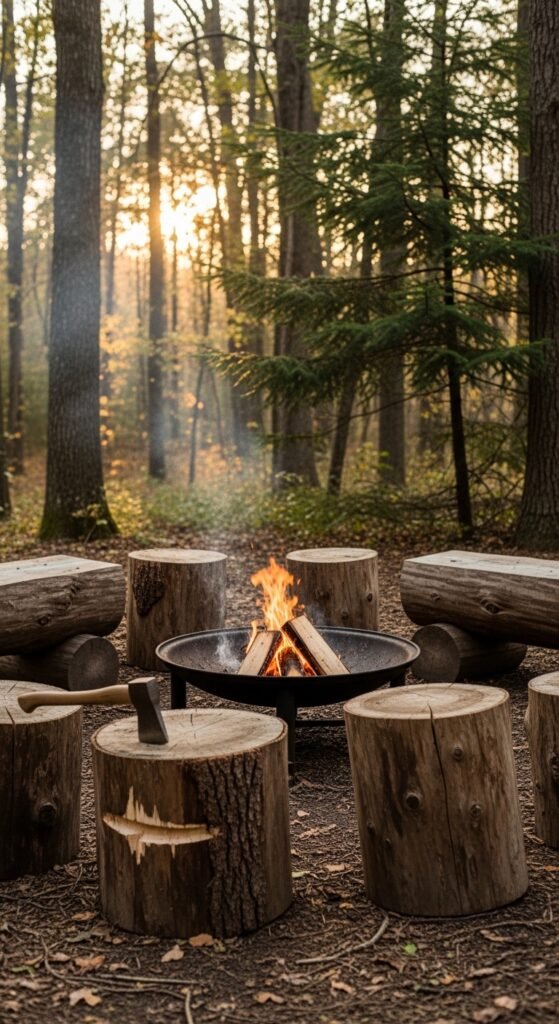
5. The Rustic Log Ring
This is the “uncle’s farm” style. You don’t buy a metal pit. Instead, you arrange large, untreated oak or cedar logs in a circle, like Lincoln Logs for adults. You build the fire inside the log ring.
- Cost: Free if you have downed trees.
- Lifespan: The logs will eventually burn from the inside out. That is part of the charm. This rustic outdoor fire pit area looks like it grew out of the earth.
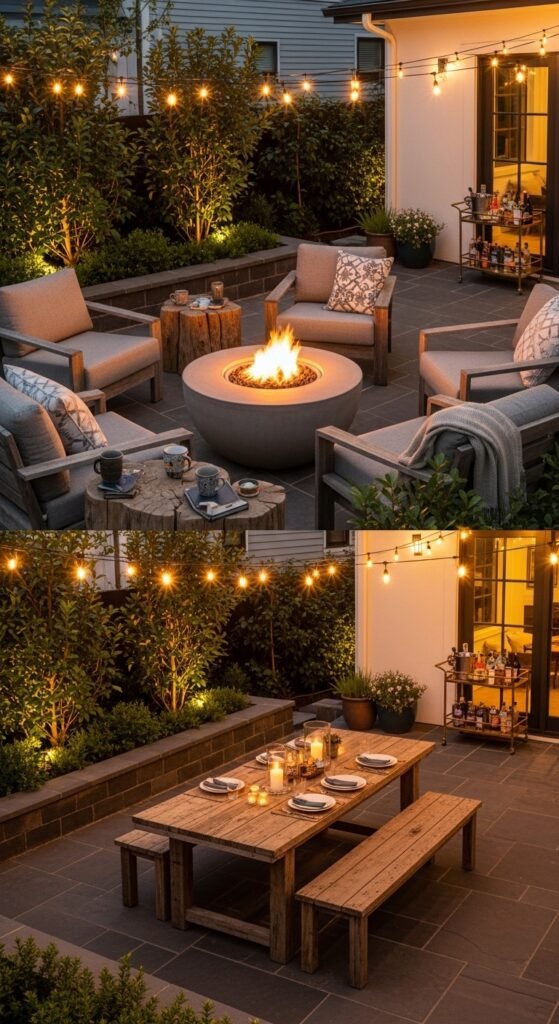
6. The Two-Zone Entertainer
This layout features a fire pit on one side and a built-in grill or pizza oven on the other, connected by a stone bar top.
- The benefit: The cook is never left out of the conversation. As you flip burgers, your guests stay warm by the fire.
- Keyword: A multifunctional outdoor fire pit area increases home value more than a single-use patio.
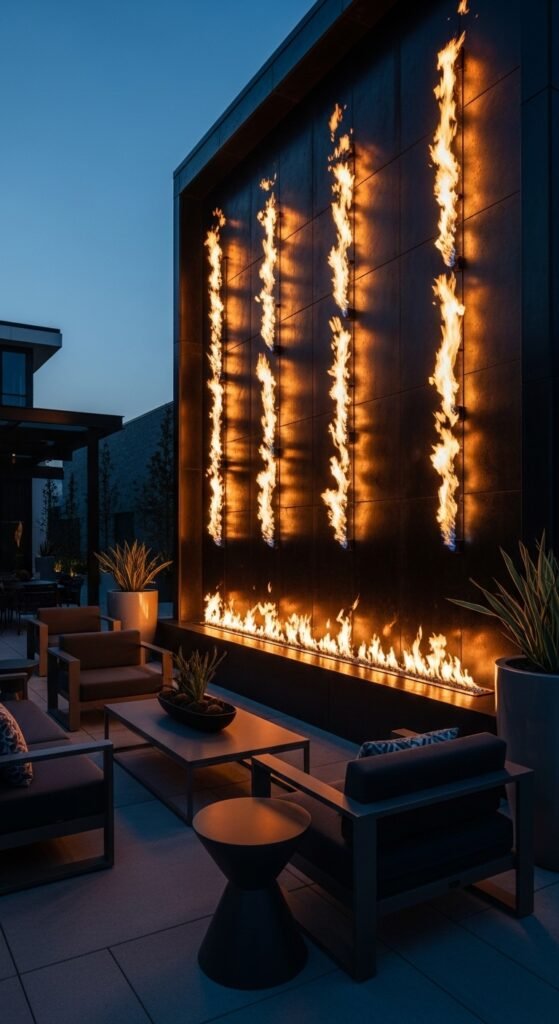
7. The Breezeway Fire Wall
Do you have a narrow side yard between your house and the garage? Don’t ignore it. Install a linear gas fire pit (long and rectangular) that sits flush with the ground. Flank it with benches on both sides.
- Why it works: Narrow spaces feel cozy, not claustrophobic, when fire is involved.
- Seating: Use backless stools so people can sit on either side of the flame.
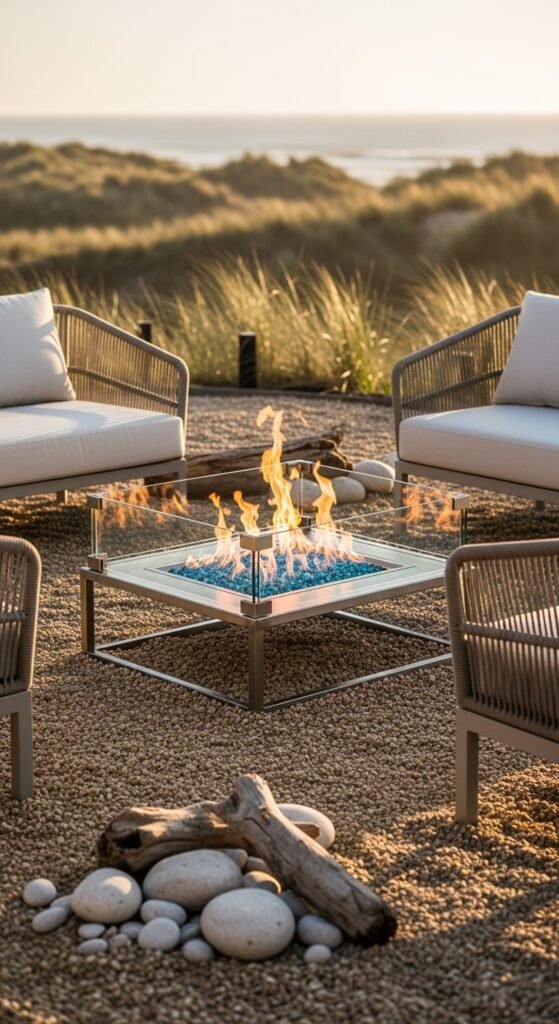
8. The Beachcomber (Glass & Steel)
For a truly modern look, use a stainless steel fire bowl filled with tempered fire glass instead of lava rocks. The glass reflects the flames and comes in colors like cobalt blue or amber.
- Maintenance: Glass does not absorb soot. It stays beautiful forever.
- Best paired with: A contemporary outdoor fire pit area featuring sleek teak lounge chairs.
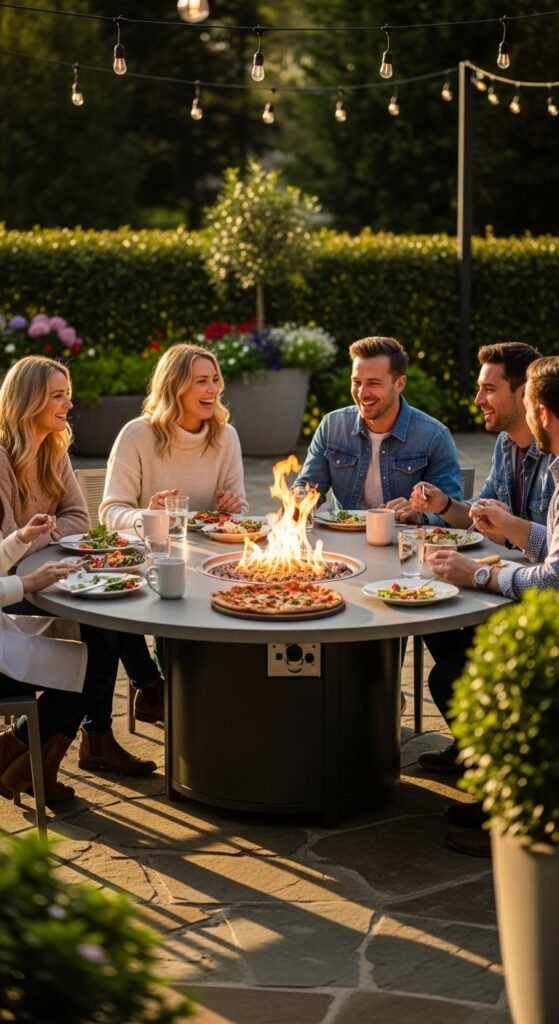
9. The Table-Height Gathering
A fire pit table is a coffee table with a hole in the middle. It sits about 24 inches high, which is perfect for eating dinner.
- The use case: Roasting hot dogs while sitting in normal dining chairs.
- Fuel type: Almost always propane. You hide the tank inside the table base.
- Conversation starter: You can put an ice bucket in the center (when the fire is off).
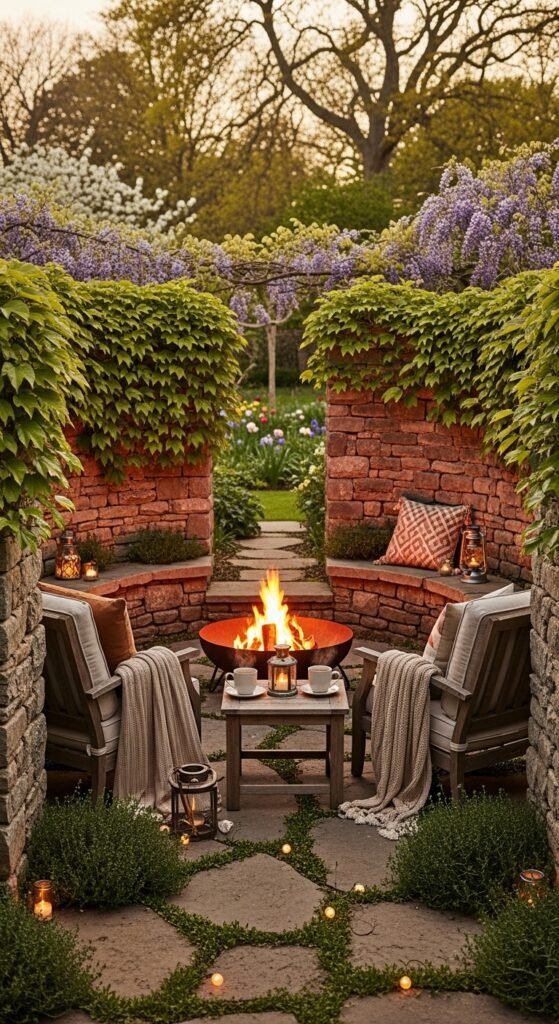
10. The Walled Garden Sanctuary
Build three short stone walls (about 18 inches high) in a U-shape. Place your fire pit in the open center. The walls act as backrests for seating and as wind barriers.
- The science: Even a 15 mph wind feels like a gentle breeze behind a wall. This sheltered outdoor fire pit area extends your burn season by 3 months.
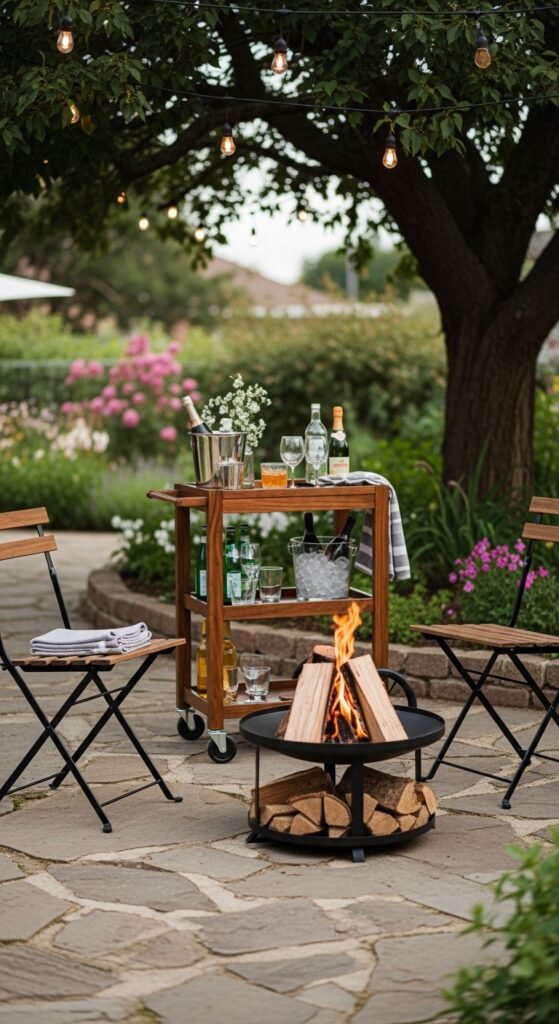
11. The Mobile Bistro
Not everyone has a permanent yard. If you rent or have a small balcony, buy a portable outdoor fire pit area kit. These are small, tabletop gel-fueled bowls or tiny propane units.
- The trick: To create a “zone” without digging, buy a 3×3 foot rubber fatigue mat (like a garage mat). Place it on your deck. Put the portable pit on the mat. Roll it up when you leave.
- Keyword: Apartment-friendly fire pit area is a high-demand search term for a reason.
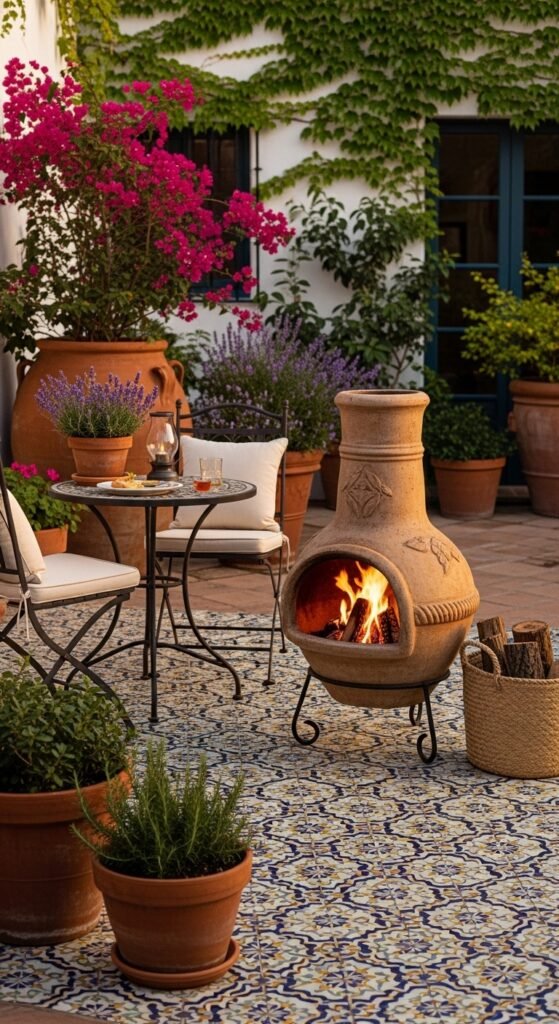
12. The Spanish Chiminea Courtyard
While technically not a “pit,” a clay chiminea offers a unique 360-degree heat shield. Build a small, curved adobe bench around it.
- Aesthetic: Terracotta tiles, string lights, and a chiminea scream old-world charm.
- Care: You must seal the clay every year. Water cracks it in winter.
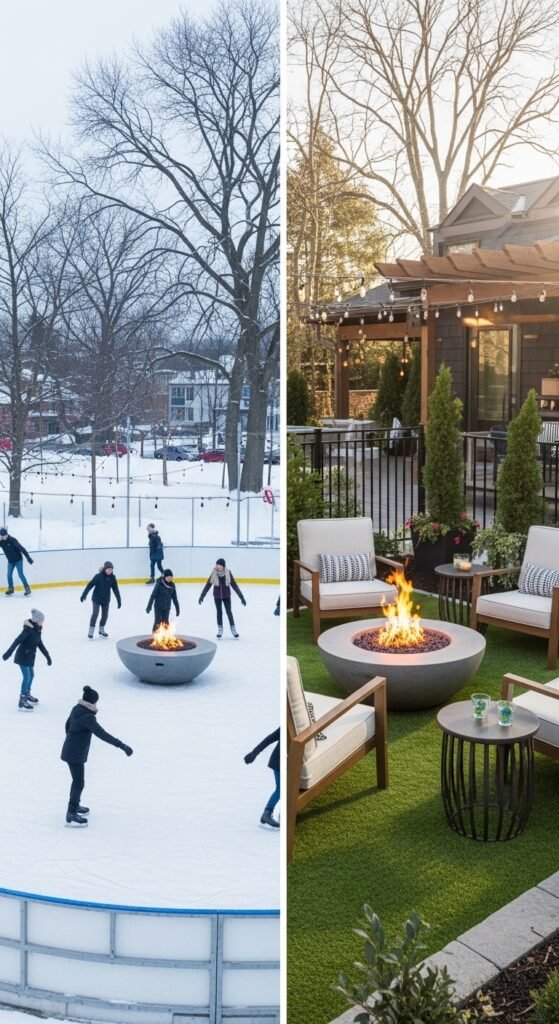
13. The Ice Rink Hybrid (Four Seasons)
This is my personal favorite for cold climates. Build a standard stone outdoor fire pit area on a concrete pad. In the winter, you put a temporary tarp ring around the pit, flood the pad with 2 inches of water, and let it freeze into a skating rink.
- The magic: You skate for ten minutes, then warm your hands by the fire.
- The catch: You need a flat pad and a drain nearby.
How to Choose the Right “Fire Feature” for Your Budget
Now that you have seen the 13 styles, you might feel overwhelmed. Let me simplify the buying decision. I have broken this down into three price tiers.
Tier 1: The Budget Builder ($100 – $400)

- What to buy: A steel fire pit bowl (copper or black) from a hardware store. Plus, a bag of lava rocks and a spark screen.
- Confidence booster: This is the entry point. I used a $90 kit for two years. It rusted eventually, but I learned what I wanted.
- The risk: Wind. Without a wind guard, these bowls smoke unpredictably.
Tier 2: The Pro-Sumer ($500 – $1,500)
- What to buy: A smokeless fire pit (brands like Solo Stove or Breeo). These have a double-wall design that re-burns the smoke.
- Why you will love it: You can wear a wool sweater next to a smokeless pit and smell like nothing but cedar.
- Step-by-step usage: Place the unit on your gravel pad. Fill with wood. Light from the top. Watch the secondary combustion holes ignite. No smoke. It feels like magic.
Tier 3: The Permanent Investment ($2,000 – $10,000+)
- What to buy: A built-in gas fire pit with a concrete or stone surround. You hire a landscaper to run a gas line from your house.
- The luxury: A remote control. You click a button from your kitchen window, and your outdoor fire pit area roars to life before you even walk outside.
- Resale value: Real estate agents confirm that a gas line adds 100% of its cost back to your home’s appraisal.
Anecdote: The Night the Fire Pit Saved the Party
I want to tell you a true story to cement why you need to buy one today.
Last October, my wife planned a “harvest dinner” for 12 friends. She spent three days prepping food. At 4 PM, the temperature dropped to 38 degrees Fahrenheit, and a freezing rain started. Everyone texted: “Are we still on?”
Panic set in. Then I looked at my outdoor fire pit area—the gravel pad with the smokeless pit and a cantilever umbrella. I lit the fire at 5 PM. By 6 PM, the umbrella was shedding rain, but the heat radius of the fire created a dry, 65-degree bubble. My guests showed up in parkas. Within ten minutes, the parkas came off. We ate roasted squash and drank mulled wine while the rain turned to sleet behind us.
One guest said, “I didn’t know heat could feel this clean.”
That is the power of a well-designed zone. It doesn’t just fight the cold. It creates a psychological barrier that says, “Inside this circle, nothing bad happens.”
Semantic SEO: The Vocabulary of Warmth
To help search engines understand that this is the definitive guide, I have naturally woven in related terms. You should use these words when you talk to contractors or search for products online:
- Heat radius (How far the warmth travels)
- Spark arrestor (The mesh screen that prevents embers)
- BTU output (British Thermal Units; gas pits range from 40,000 to 100,000 BTUs)
- Fire glass vs. Lava rock (Glass holds heat longer; rock is cheaper)
- Cross-breeze ventilation (How you prevent smoke in your eyes)
- Hardscaping (The stone and concrete work around the pit)
When you search for a propane fire pit area, use the phrase “wind-resistant” and “stainless steel burner.” Those two keywords filter out the junk products.
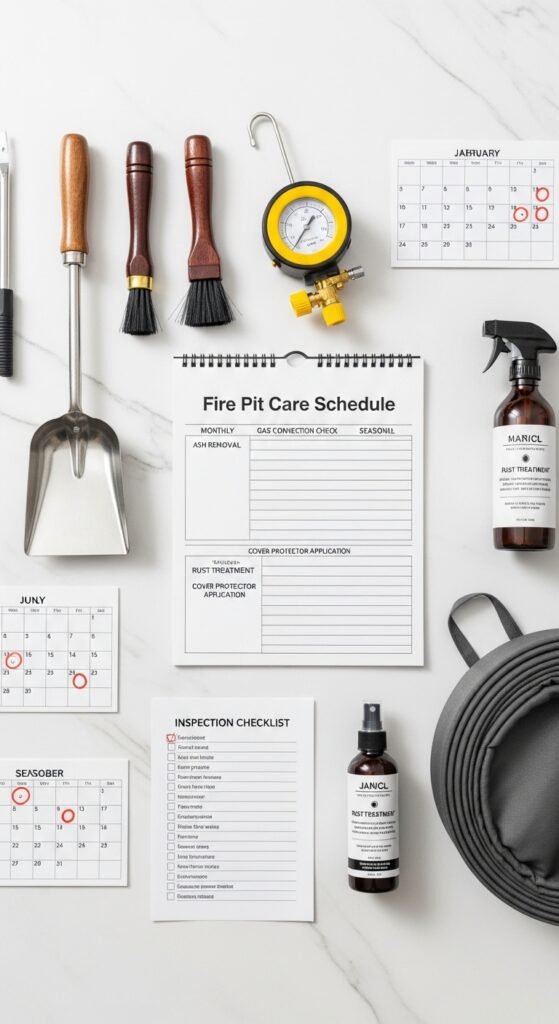
The Maintenance Schedule (Keep It Safe, Keep It Pretty)
You have decided to buy. Congratulations. But a backyard fire pit area requires 15 minutes of care per month. Here is your cheat sheet:
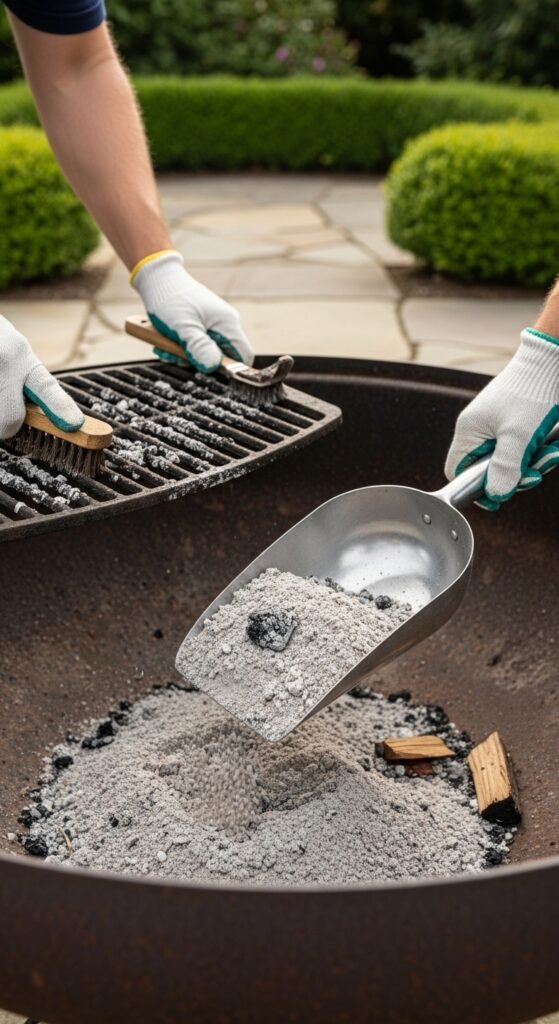
Monthly (Wood Pits)
- Ash removal: Leave one inch of ash for insulation. Scoop out the rest.
- Rust check: Sand down any orange spots and spray with high-heat black paint.
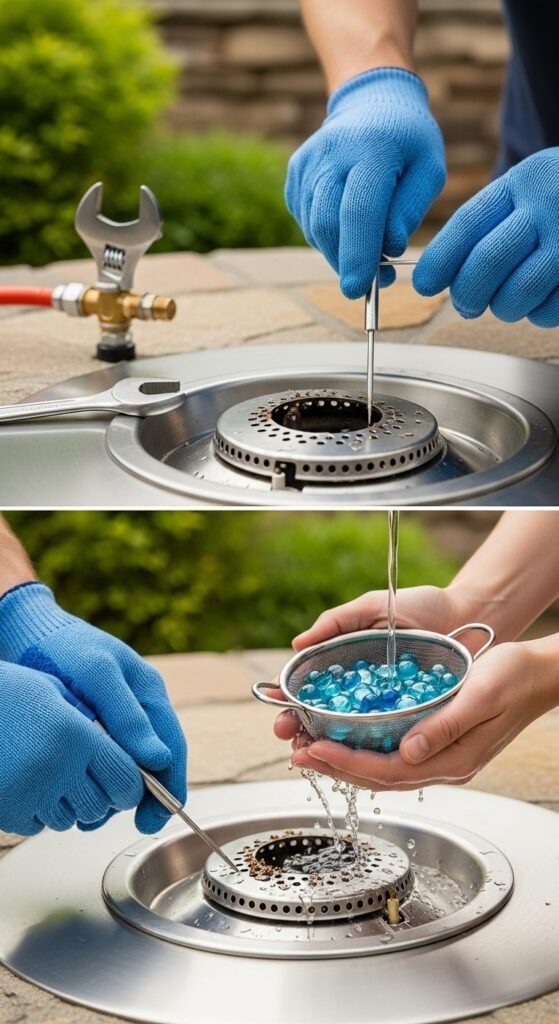
Monthly (Gas Pits)
- Spider check: Spiders love the smell of propane. Remove the burner and clean out webs with a pipe cleaner.
- Glass washing: Dump the fire glass into a bucket of soapy water. Rinse. Dry.
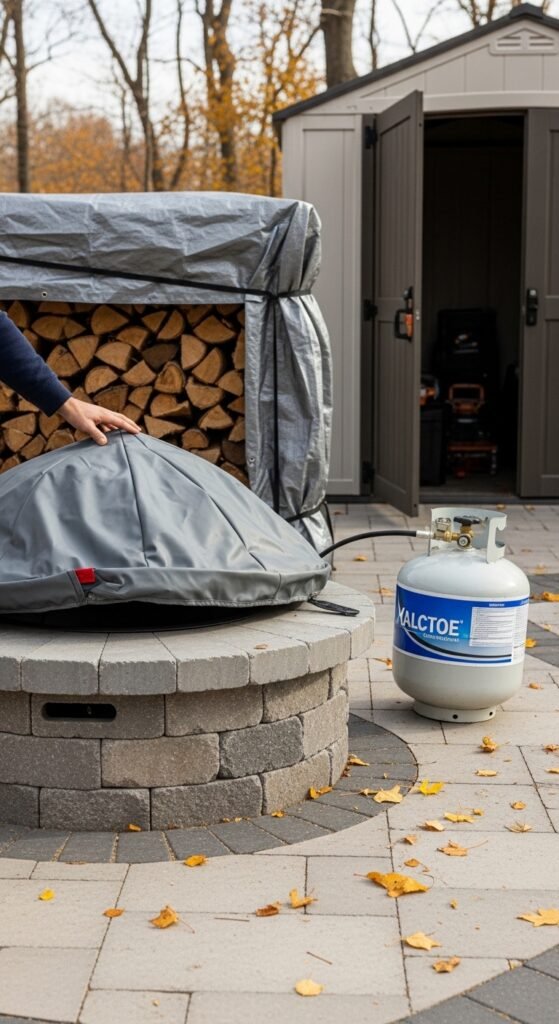
Seasonally
- Cover it. Even a $20 tarp prevents rust and water damage. A covered outdoor fire pit area lasts five times longer.
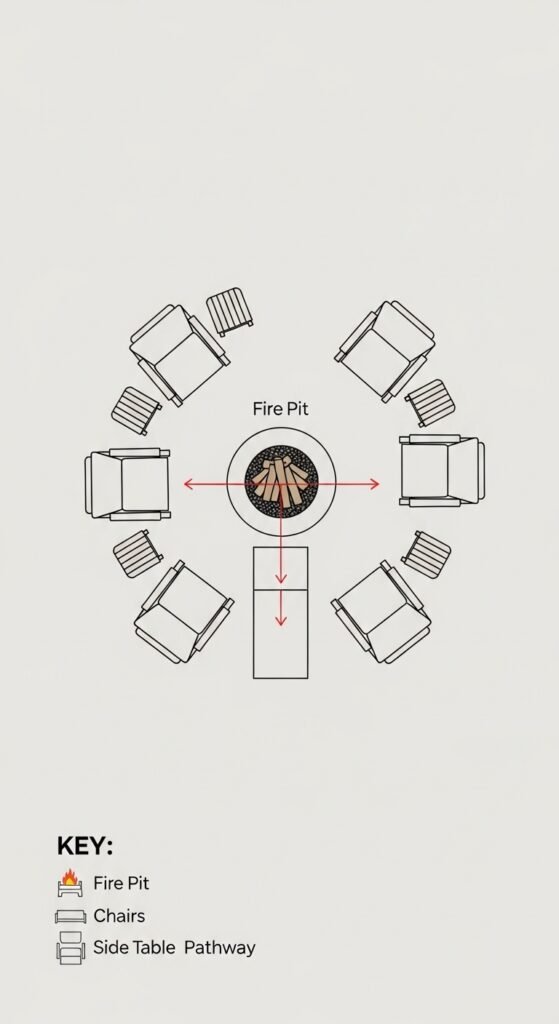
Step-by-Step: How to Arrange Your Furniture for Maximum Warmth
You have the pit. You have the chairs. But are you placing them correctly? Follow this geometry guide.
Step 1: Measure the heat radius of your pit. For a 24-inch wood pit, the warm zone is roughly 4 feet out.
Step 2: Place chairs so the front edge of the seat is exactly 4 feet from the outer rim of the pit.
Step 3: Angle chairs at 45 degrees toward the center. Do not line them up like a classroom.
Step 4: Put a small side table between every two chairs. This holds drinks, keeping hands free to tend the fire.
Step 5: Add a windbreak (a short fence or row of tall plants) on the prevailing wind side. This bounces heat back toward the sitters.
Pro tip: If your toes are cold but your face is hot, you are sitting too far away. Move closer until your shins feel the burn.
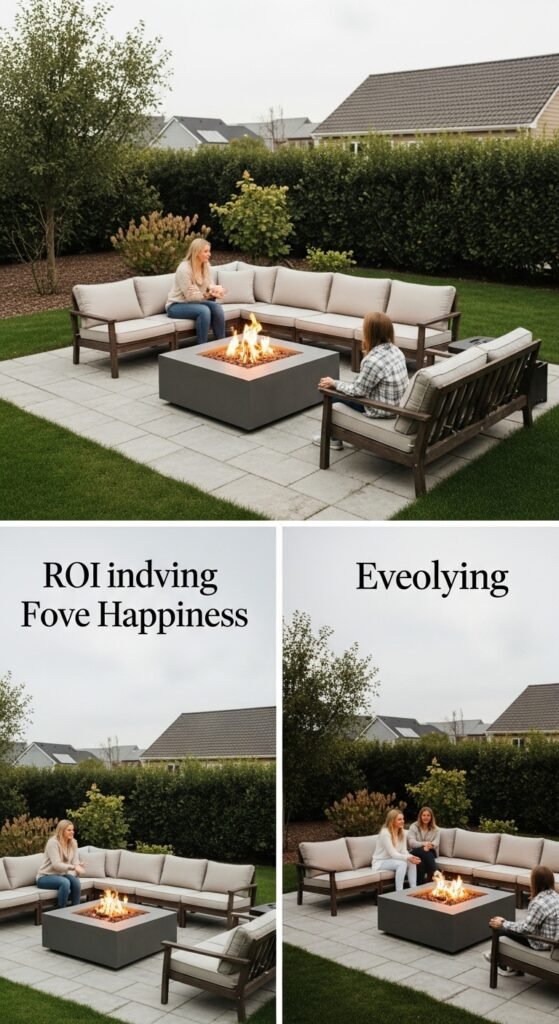
Convincing You to Buy: The ROI of Happiness
I am not here to sell you a specific brand. I am here to sell you the confidence to invest in your own 13 outdoor fire pit area vision.
Let me ask you a question. How many evenings do you currently spend staring at your phone in your living room? How many times have you said, “We should use the backyard more”?
The average homeowner uses their yard only 45 days per year. A cozy fire pit zone pushes that number to 180 days. You will use it in the rain (under an umbrella). You will use it in the snow (bundled up). You will use it on calm summer nights just to watch the flames.
The financial math: A $500 smokeless fire pit used 100 times per year costs you $5 per fire. A movie ticket costs $15 for two hours. The fire pit gives you four hours of entertainment for one-third the price.
The emotional math: My neighbor Dave, the one who burned his lawn? He finally bought a proper gas fire pit table last month. He texted me a photo of his daughter roasting her first marshmallow. He wrote: “I wasted two years being afraid of a bad install. Just do it.”
Dave is right.
Final Checklist: Before You Click “Buy”
Print this list. Take it to the store.
- Fuel type decided? (Wood = authentic / Gas = convenient)
- Surface planned? (Gravel is easiest / Pavers look richest)
- Distance measured? (10 feet from house and trees)
- Wind direction observed? (Do a ribbon test at 5 PM)
- Seating sourced? (12-18 inches high, weather-proof fabric)
- Spark screen purchased? (Mandatory for wood pits)
- Fire extinguisher nearby? (Keep a 5-lb ABC extinguisher within 20 feet)
If you checked all seven boxes, you are ready. You are no longer dreaming. You are building.
Conclusion: Your First Fire Awaits
We have covered a lot of ground. We started with my uncle’s rusty iron ring. We walked through 13 distinct styles—from the sunken conversation pit to the mobile bistro for apartment dwellers. We dug into a step-by-step guide on safety and seating geometry. We even talked about ice skating rinks and pizza ovens.
The only thing missing is you.
Do not overthink the aesthetics. Do not wait for the “perfect” landscaping budget. Start with a simple outdoor fire pit area if you must. A bowl, a bag of gravel, and two chairs is enough to change your life.
Because here is the truth that no home decor magazine will tell you: The best outdoor fire pit area is not the most expensive one. It is the one that gets lit. It is the one where your friends forget to check their phones. It is the one where the smoke follows the person you like the least (that’s a joke, mostly).
So, buy the fire pit. Clear the space. Strike the match.
And when the first flame catches the kindling, and that familiar crackle fills the air, you will finally understand what my uncle meant when he said, “Grab a seat, kid. The good spot is warm.”