Let me take you back to a rainy Tuesday afternoon in 1997. I was ten years old, sitting on a wobbly stool in my grandmother’s farmhouse kitchen. The windows were fogged with steam, and the air smelled like wet wool and thyme. Granny was muttering to herself as she sliced a mountain of yellow onions. Tears were streaming down her cheeks—not from sadness, but from the relentless sting of those sulfurous layers.
“Why are you crying over onions, Granny?” I asked.
She wiped her eyes with her apron and smiled. “Because, sweetheart, sometimes the most beautiful things in life require a few tears first.”
For the next forty-five minutes, she stood over a heavy cast-iron pan, stirring slowly. The onions hissed, then sighed, then began to turn a shade of amber that looked like liquid sunshine. Finally, she spooned a tiny bit onto a crust of bread and handed it to me. One bite changed everything. My ten-year-old brain could not process the flavor explosion: sweet, savory, buttery, and deeply rich—like a secret that onions had been keeping from me my whole life.
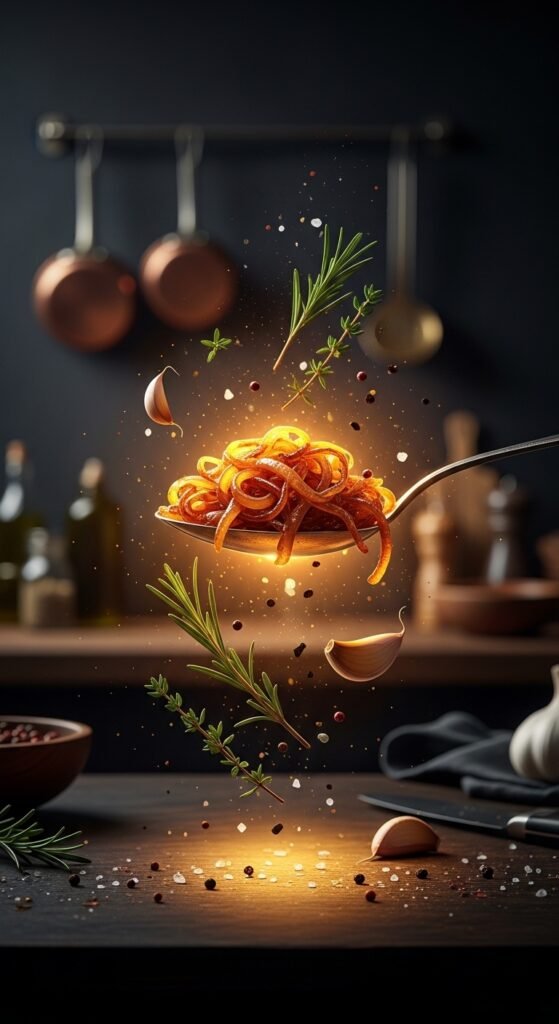
Those were caramelized onions. And they changed my relationship with cooking forever.
Now, decades later, I have made thousands of batches. I have burned them, undercooked them, cried over them, and finally mastered them. In this detailed guide, I will share everything I have learned. By the time you finish reading, you will not just know how to make caramelized onions—you will understand why every step matters. Most importantly, you will feel confident enough to buy the right tools and ingredients to nail it every single time.
What Exactly Are Caramelized Onions? (And Why They Are Not Just “Cooked Onions”)
Before we get started, let us briefly discuss the science behind the process.
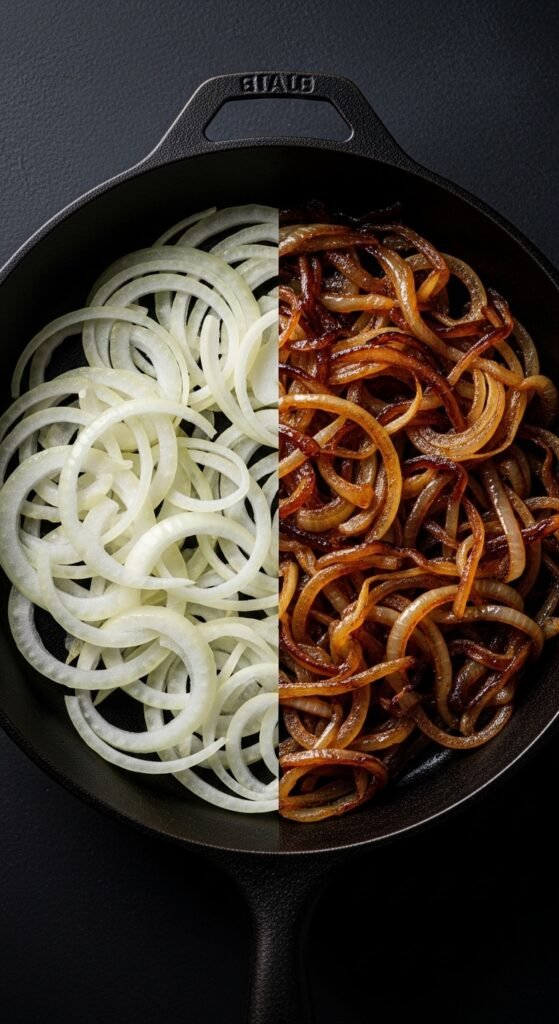
When you sauté an onion over high heat for five minutes, you get softened onions. They remain white or yellow, slightly translucent, and they retain a sharp, pungent kick. That is not caramelization. That is simply wilting.
Caramelized onions, on the other hand, are a completely different outcome. Through slow, gentle heat, the natural sugars inside the onion break down and undergo a chemical reaction called the Maillard reaction. This is not merely browning; it is flavor alchemy. The harsh sulfur compounds mellow, the sugars transform into sweet, nutty, almost jammy notes, and the color deepens to a rich mahogany.
Think of it this way: a raw onion is a shy, aggressive teenager. A sautéed onion is a polite adult. But a caramelized onion is a wise, kind, deeply loving grandparent. It takes time to get there, but the warmth is unforgettable.
Why Bother? The Culinary Magic of Caramelized Onions
You might be thinking, “That sounds like a lot of work for a vegetable.” And you are right—it does take time. However, caramelized onions are the ultimate flavor booster. They can transform:
- A simple burger into a gourmet experience.
- Plain scrambled eggs into a five-star breakfast.
- A grilled cheese sandwich into a melt-in-your-mouth masterpiece.
- Pizza, pasta, soups, dips, and omelets.
I once added a spoonful of caramelized onions to a can of tomato soup, and my husband asked if I had ordered from a French bistro. That is the power we are discussing.
The Essential Toolkit: What You Need to Buy With Confidence
Now let us talk about equipment. You do not need a professional kitchen, but using the right tools makes the difference between a sticky mess and golden perfection. Below are the specific products I personally use and trust. When you buy these, you are not wasting money—you are investing in hundreds of future meals.
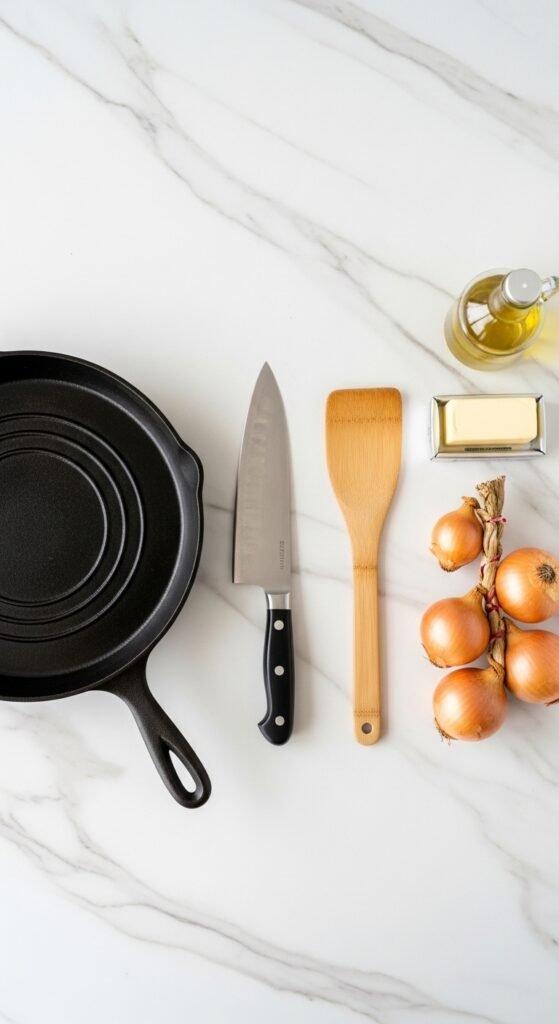
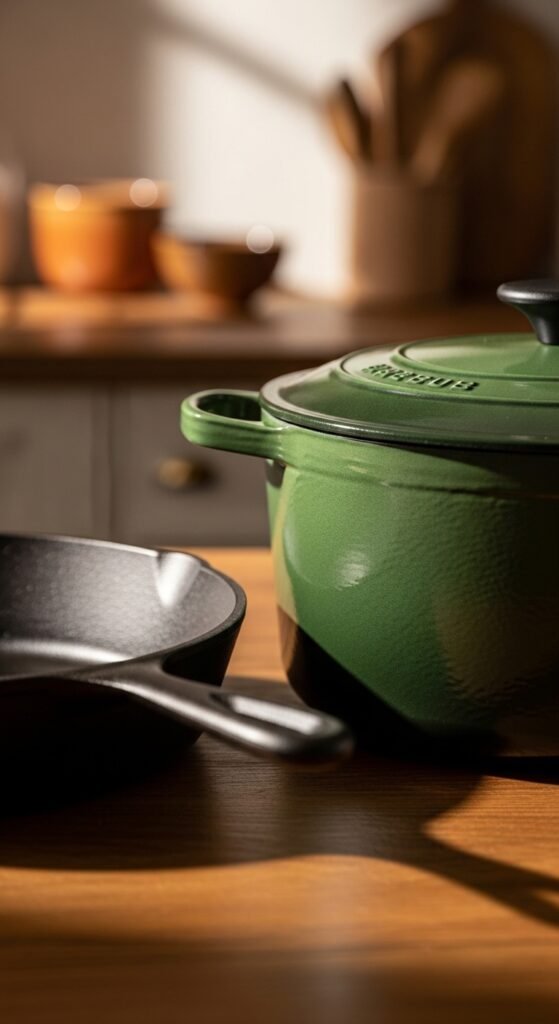
1. The Pan: Heavy-Bottomed Skillet or Dutch Oven
This is non-negotiable. A thin, cheap non-stick pan creates hot spots. Your onions will burn on the edges while remaining raw in the middle. You need even heat distribution.
- Recommendation: A 12-inch cast-iron skillet or a stainless steel sauté pan. Cast iron retains heat exceptionally well. A Lodge cast-iron skillet is perfect for beginners.
- Why buy this: Once you own a quality pan, you can use it for searing steaks, roasting chicken, baking cornbread, and making caramelized onions for life. It is a one-time purchase.
Also Read: The Ultimate Peach Cobbler Recipe: A Taste of Southern Comfort
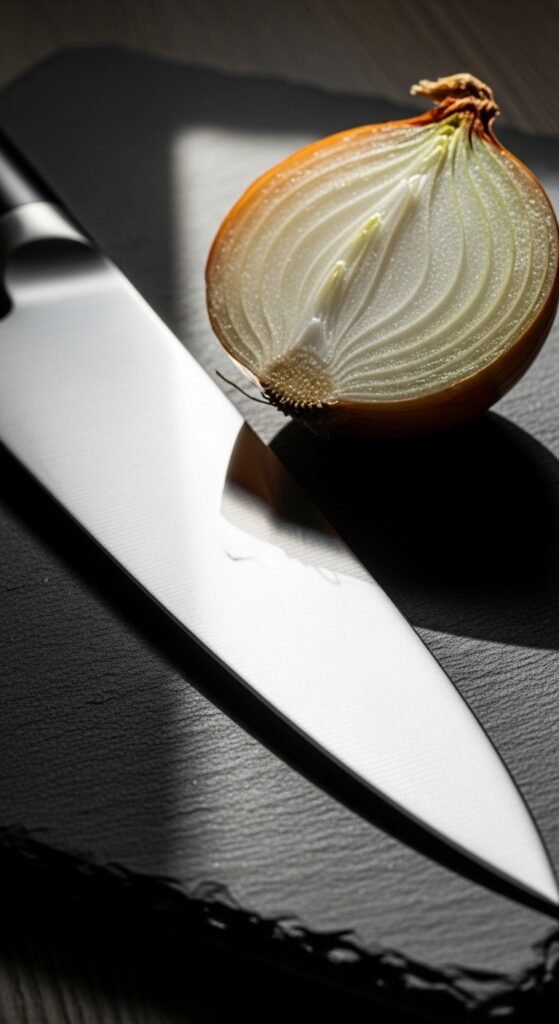
2. The Knife: Sharp Chef’s Knife
Dull knives are dangerous. They slip. They crush onions instead of slicing them, which releases too much moisture and leads to steaming rather than browning.
- Recommendation: An 8-inch Victorinox Fibrox Pro Chef’s Knife. It is sharp, comfortable, and used by culinary schools worldwide.
- Why buy this: You will slice dozens of onions for this recipe alone. A sharp knife makes the preparation fast, safe, and almost meditative.
3. The Spatula: Flat Wooden or Silicone
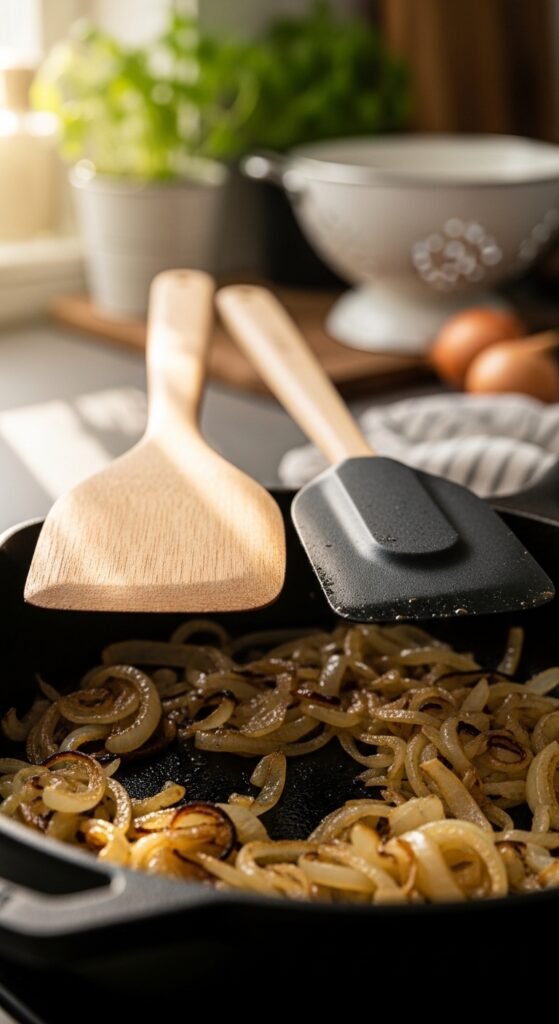
Metal spatulas can scrape your pan, especially non-stick or enameled cast iron. You need a tool that can scrape up the delicious browned bits—the fond—without damaging the surface.
- Recommendation: A flat-edged wooden spatula or a heat-resistant silicone turner.
- Why buy this: Wooden spatulas are inexpensive and will not scratch your cookware.
4. The Fat: Butter, Oil, or Both
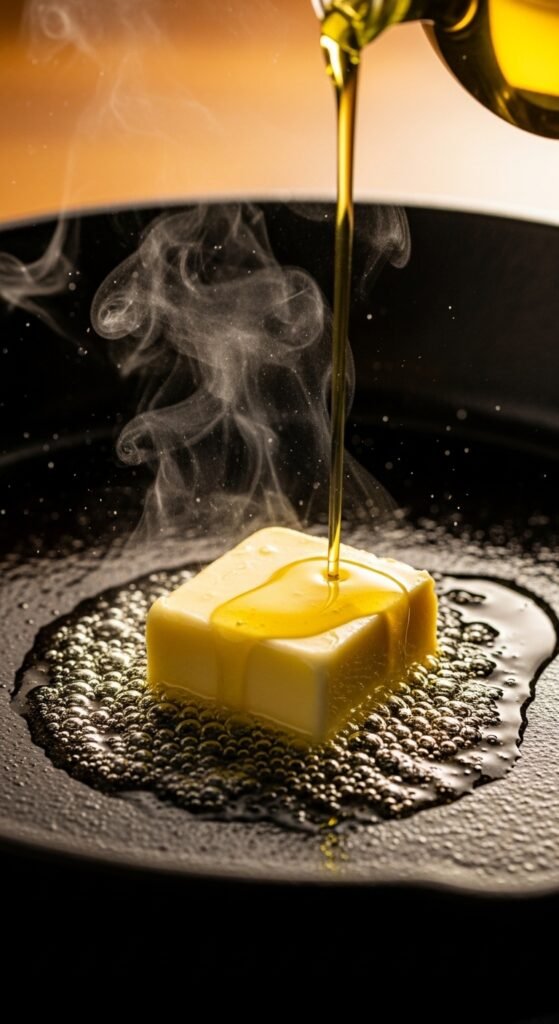
You need a fat with a relatively high smoke point, but also good flavor. Here is the breakdown:
- Unsalted butter: Adds incredible richness but burns easily. Use it only when mixed with oil.
- Olive oil: Great flavor, but extra virgin olive oil has a low smoke point. Use regular or light olive oil.
- Avocado oil: High smoke point (520°F) and neutral flavor. An excellent choice.
- My secret blend: 2 tablespoons of unsalted butter plus 2 tablespoons of avocado oil. You get the flavor of butter and the heat tolerance of oil.
Buy these with confidence: Kerrygold Unsalted Butter (grass-fed equals more flavor) and Chosen Foods Avocado Oil.
5. The Onions: Which Variety Works Best?
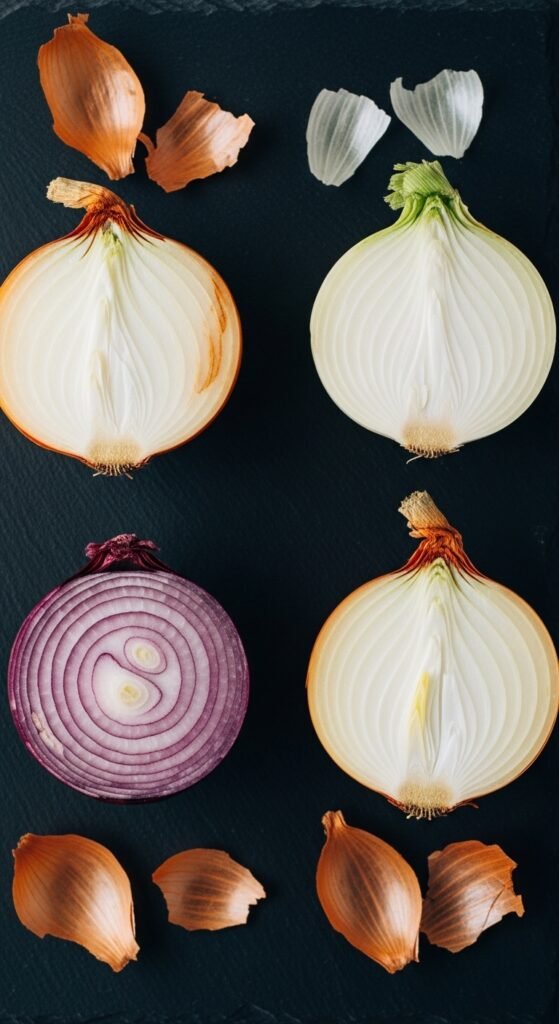
Not all onions are created equal for caramelizing. Here is your cheat sheet:
| Onion Type | Sugar Content | Best For |
|---|---|---|
| Yellow onions | High | All-purpose, balanced sweetness. The gold standard. |
| Sweet onions (Vidalia, Walla Walla) | Very high | Extremely sweet, but can turn mushy. Great for jam. |
| Red onions | Medium | Beautiful color, slightly sharper. Good for visual contrast. |
| White onions | Low | Too sharp and watery. Not recommended. |
My verdict: Buy yellow onions. They are cheap, available everywhere, and produce the most reliable caramelized onions. For a batch, use about 4 large yellow onions (roughly 3 pounds). That cooks down to approximately 1 cup of finished product.
The Step-by-Step Guide to Foolproof Caramelized Onions (No More Tears)
Let us begin cooking. I will provide every detail. Do not rush. Put on music or a podcast. This is your time to relax.
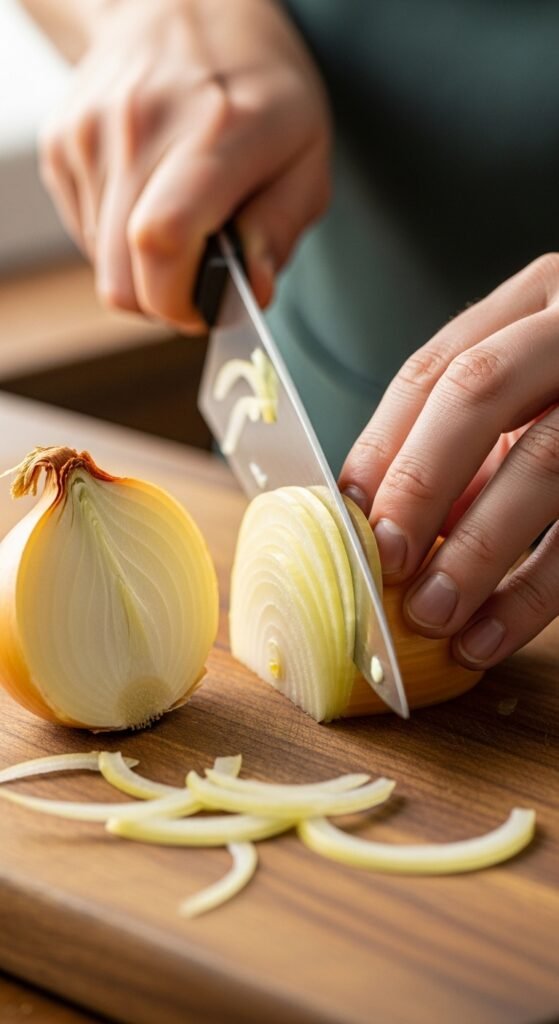
Step 1: Prep Like a Pro (Minimize the Crying)
I used to cry excessively every time I sliced onions. Then I learned three tricks:
- Chill the onions in the freezer for 15 minutes before cutting. Cold slows the release of the gas that makes you cry.
- Use a sharp knife. A dull knife crushes more cells, releasing more gas.
- Cut near a flame or run a fan. The gas rises, so a fan blows it away.
How to slice for caramelizing: Cut off the stem end but leave the root end intact. The root holds the onion together. Slice in half from root to tip, peel off the papery skin, then lay each half flat. Make thin, even slices (about ⅛ to ¼ inch thick). Uniform slices ensure uniform cooking.
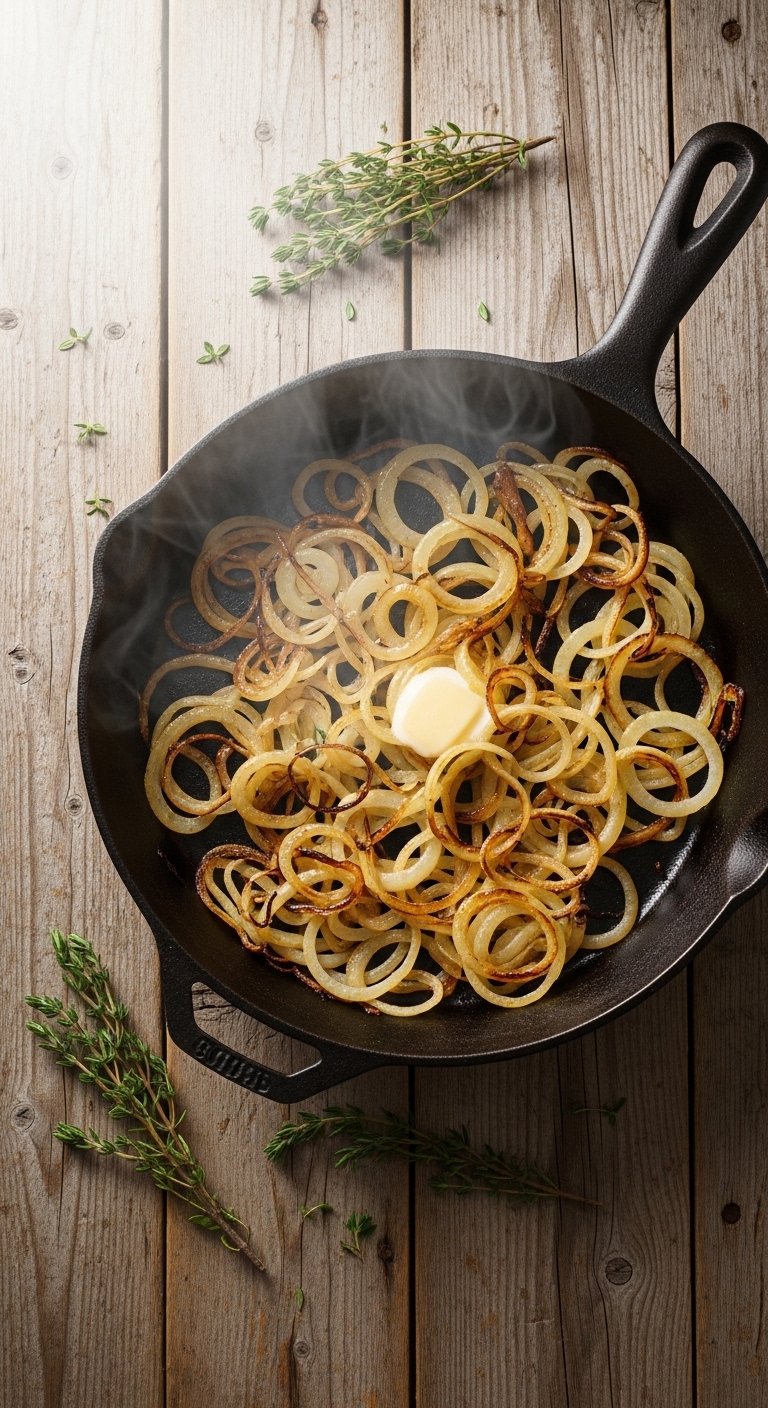
Step 2: Start Low and Slow (The Patience Phase)

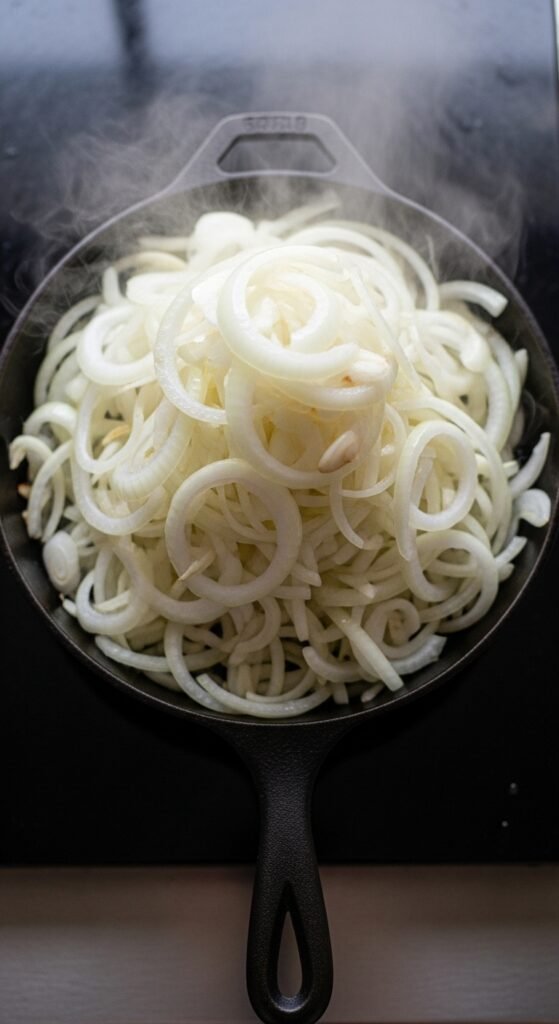
Heat your skillet over medium-low heat. Not medium. Not high. Medium-low. Add your fat (for example, 2 tablespoons of butter plus 2 tablespoons of oil). When the butter stops foaming, add all your sliced onions.
At this point, the pan will look impossibly full. That is fine. The onions will shrink to a fraction of their size.
Anecdote: The first time I made these, I cranked the heat to high because I was impatient. Within eight minutes, I had black, bitter, burnt crisps. I threw them away and ordered pizza. Low and slow is the law.
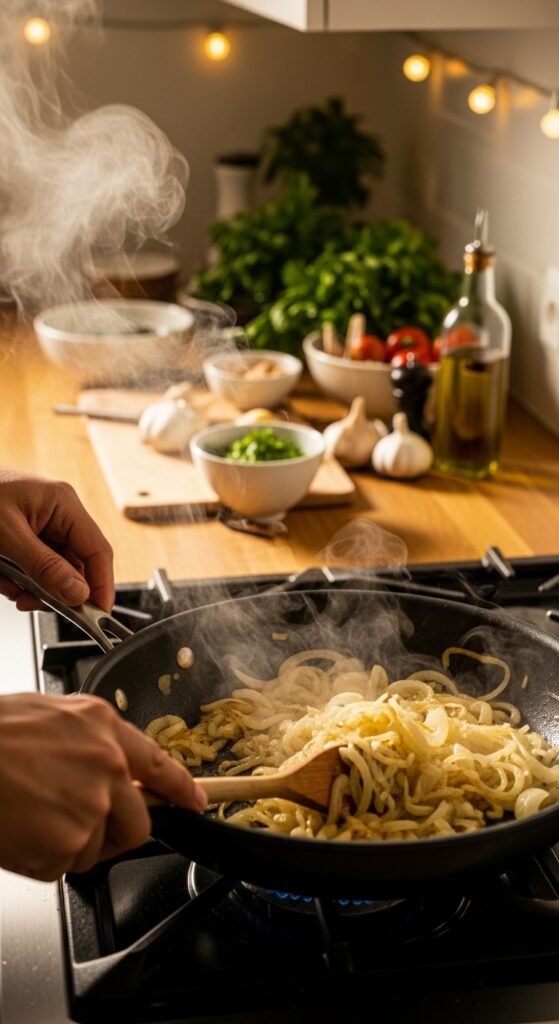
Step 3: Sweat, Don’t Fry (The First 15 Minutes)
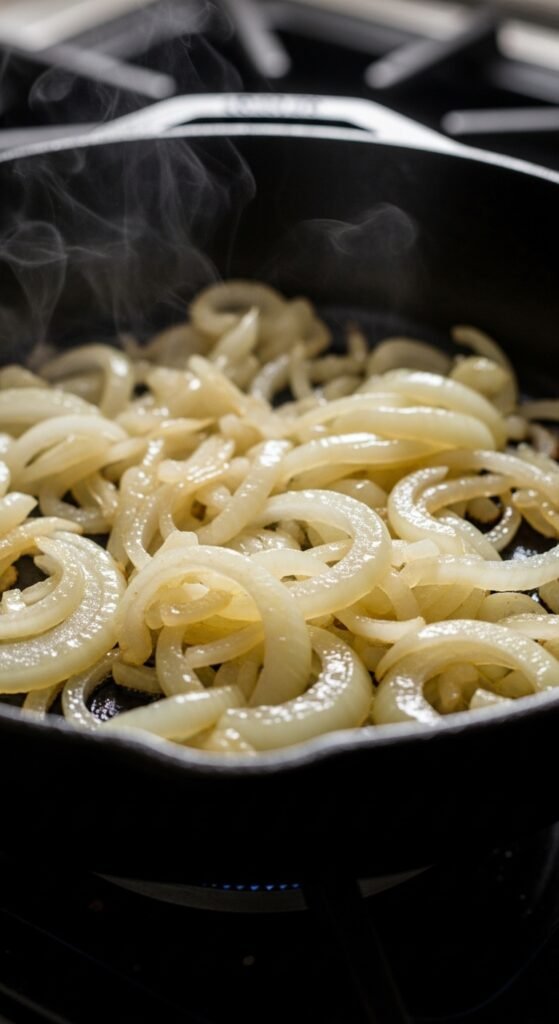
For the first 15 minutes, stir every 3 to 4 minutes. Your goal is not browning yet. Your goal is to release water. Onions are about 89% water. You will see steam rising and the onions wilting down.
Add a pinch of salt (about ¼ teaspoon per pound of onions). Salt draws out moisture faster, which actually speeds up caramelization later. Do not skip this.
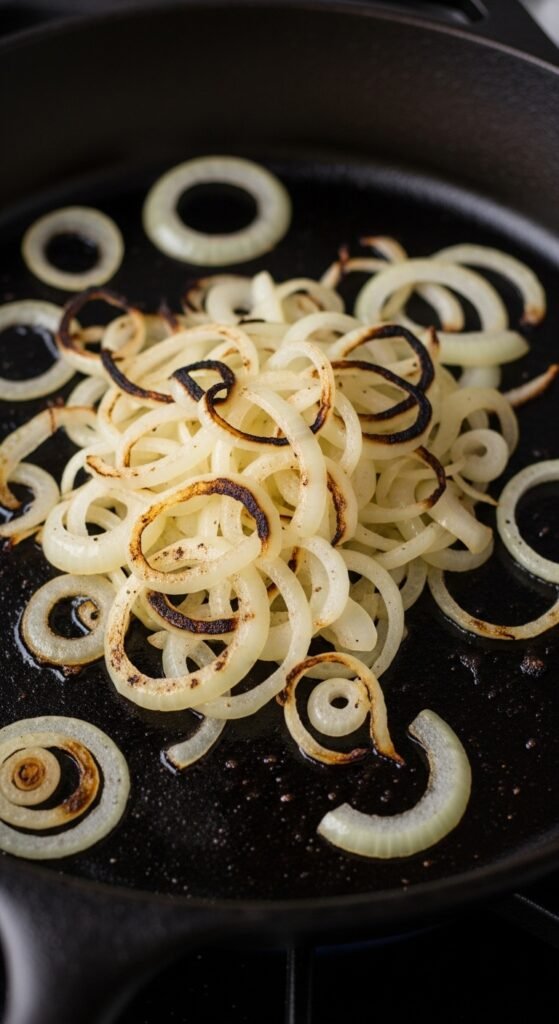
Step 4: The Golden Transition (Minutes 15 to 30)
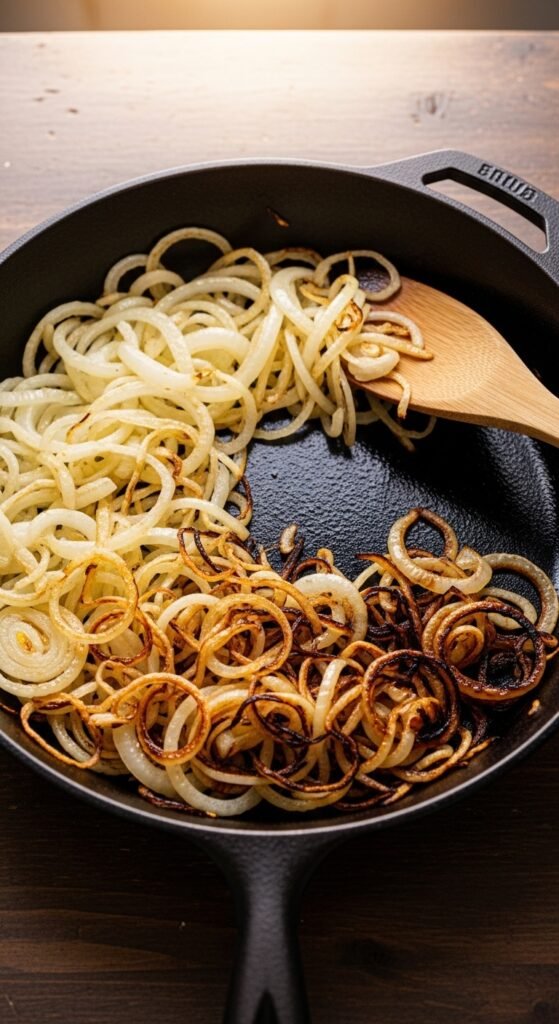
Now most of the water has evaporated. The onions will start to stick to the pan. That is good. Those stuck bits are pure flavor.
Reduce heat to low. Stir every 2 to 3 minutes. You will notice the color changing from pale yellow to light gold. The smell will shift from sharp to sweet and nutty.
Pro tip: If the onions look dry or start sticking too aggressively, add a tablespoon of water or broth. Deglaze the pan by scraping up the brown bits, then continue. This prevents burning and incorporates flavor.
Step 5: The Long, Loving Stir (Minutes 30 to 60)
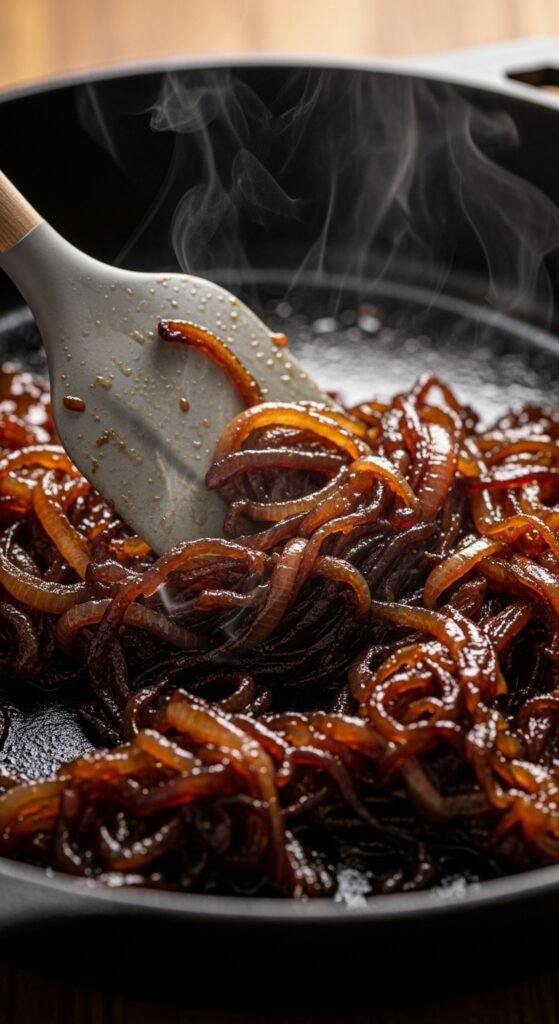
This is where the magic happens. Your onions will turn amber, then bronze, then deep brown. Stir every 1 to 2 minutes now. Do not walk away for long. I once left to answer the phone for five minutes and returned to sadness.
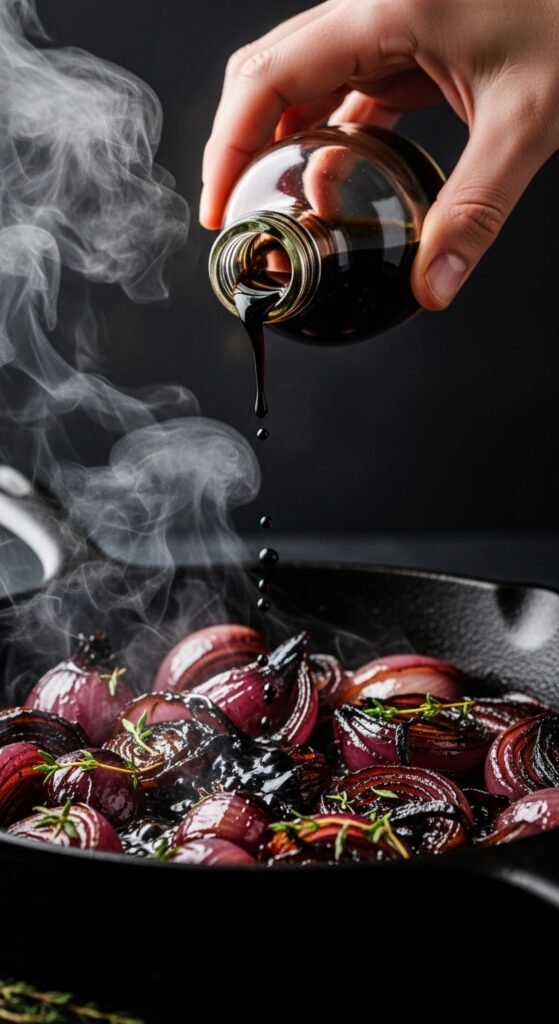
Around minute 45, add a tiny splash of balsamic vinegar (1 teaspoon) or a pinch of brown sugar. This is not cheating—it is boosting the natural sugars. But go easy. You want onion flavor, not candy.
Taste test: At minute 50, take a small spoonful. It should be soft, sweet, and complex—like onion jam. If it is bitter, you burned it. If it is pale, keep going.
Step 6: Finish with Flair (The Final Touch)
Once your caramelized onions look like dark, glossy ribbons, remove them from heat. Stir in:
- A splash of dry sherry or white wine (1 tablespoon) to deglaze the pan completely.
- A grind of black pepper.
- Optional: A few sprigs of fresh thyme or rosemary.
Let them cool in the pan for 5 minutes. Then transfer to a jar or bowl.
Visual Cue Summary Table
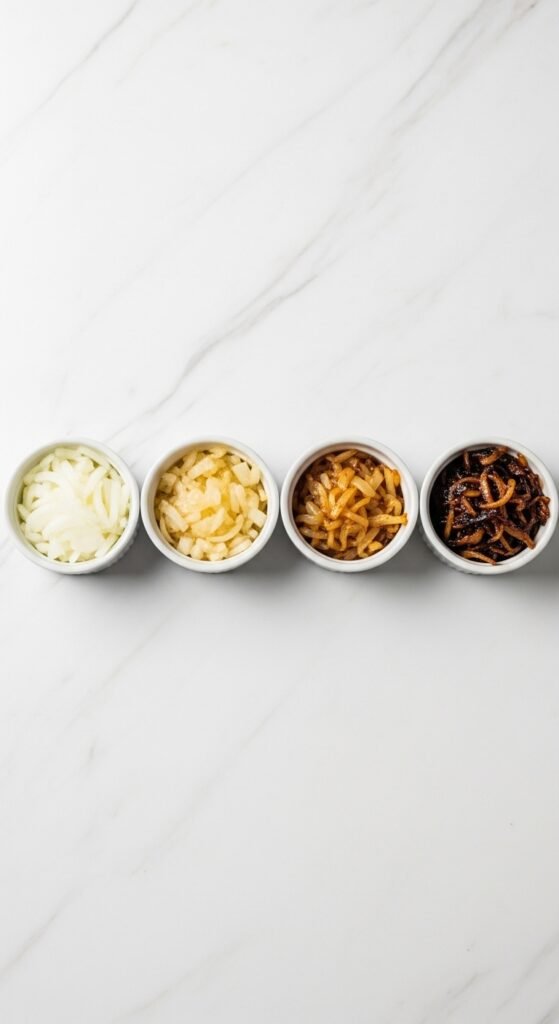
| Time Elapsed | Color | Texture | Smell |
|---|---|---|---|
| 0 min | White/yellow | Raw, crisp | Sharp, tear-inducing |
| 15 min | Pale, translucent | Wilted, wet | Steamy, slightly sweet |
| 30 min | Light gold | Soft, starting to stick | Nutty, fragrant |
| 45 min | Amber-brown | Jammy, glossy | Deeply sweet, savory |
| 60 min | Mahogany | Spreadable, rich | Like French onion soup |
Common Mistakes (And How to Fix Them)
Even experienced cooks make errors with caramelized onions. Here is how to avoid the biggest pitfalls.
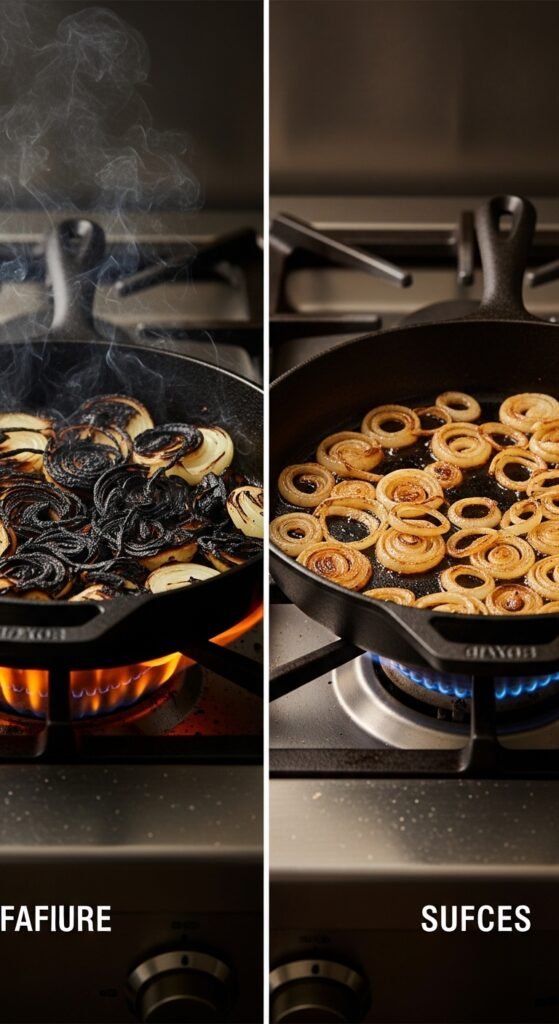
Mistake #1: Using High Heat to “Speed It Up”
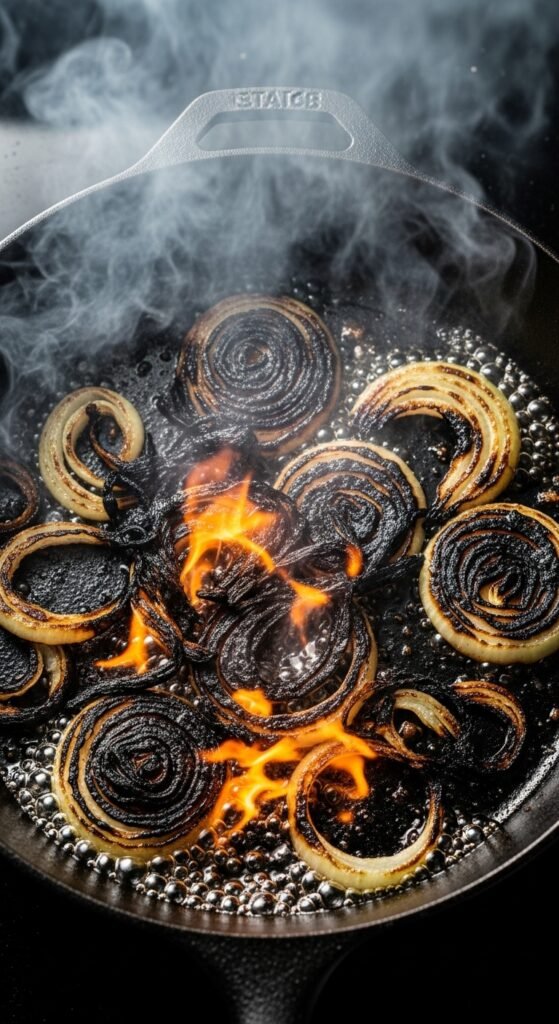
Result: Burnt, bitter, inedible onions.
Fix: Keep heat at medium-low or low. If you hear loud sizzling, turn it down. You want a gentle hiss.
Mistake #2: Not Adding Enough Fat
Result: Dry, sticking, scorched onions.
Fix: Do not be afraid of fat. For 4 large onions, use at least 3 to 4 tablespoons of combined fat.
Mistake #3: Crowding the Pan Too Much
Result: Steamed, gray, mushy onions (not caramelized).
Fix: Use a pan that is wide enough so onions are in a single layer when raw. If you have too many, cook in two batches.
Mistake #4: Forgetting the Salt
Result: Pale, bland, slow-to-caramelize onions.
Fix: Salt early. It is not just for taste—it is a scientific helper.
Mistake #5: Stirring Constantly

Result: Onions never achieve deep brown because they do not spend enough time touching the hot pan.
Fix: Stir every few minutes. Let them sit and develop color in between stirs.
How to Use Your Caramelized Onions (Recipes and Ideas)
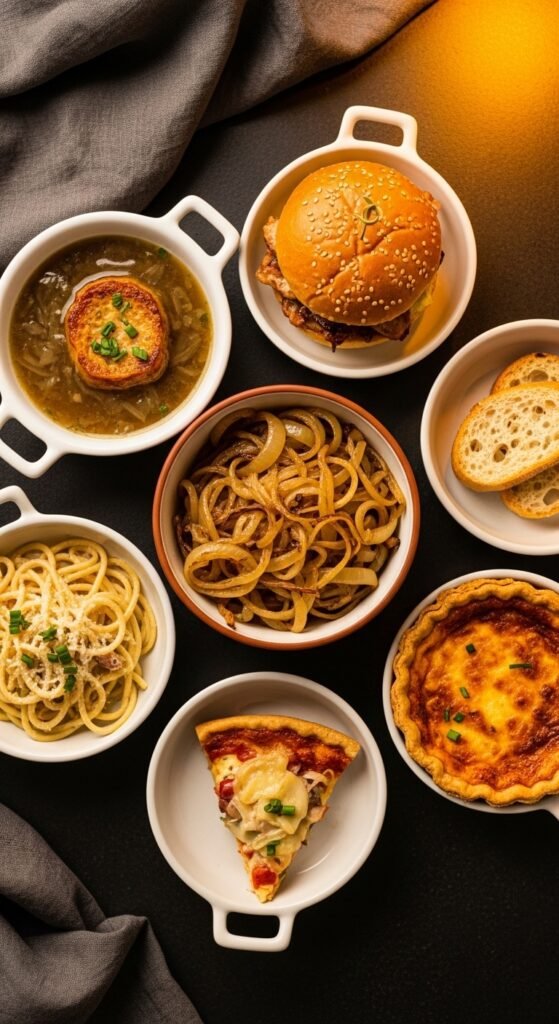
You have spent an hour making liquid gold. Now let us eat. Below are my top ten favorite ways to use caramelized onions:
- Burger topping: Pile them high on a cheeseburger with blue cheese or cheddar.
- French onion soup: Add beef broth and a splash of cognac, then top with toasted baguette and Gruyère.
- Frittata or omelet: Fold into eggs with goat cheese and spinach.
- Grilled cheese: Layer between sourdough with sharp provolone or fontina.
- Pizza: Spread on white pizza with ricotta, mozzarella, and a drizzle of honey.
- Pasta: Toss with pappardelle, pancetta, Parmesan, and a pat of butter.
- Dip: Mix with sour cream, cream cheese, and chives for a party dip.
- Steak topper: Spoon over a seared ribeye with a pat of herb butter.
- Flatbread: Spread on naan with roasted garlic and crumbled feta.
- Straight from the jar: I will not judge. I do this late at night.
Storage, Freezing, and Meal Prep
Here is the best part: caramelized onions store beautifully.
- Refrigerator: Keep in an airtight glass jar for up to 2 weeks. Use a clean spoon every time to avoid spoilage.
- Freezer: Portion into ice cube trays or small silicone molds. Freeze solid, then pop out into a zip-top bag. Each cube is about 1 tablespoon. They last 6 months.
- Reheating: Microwave for 20 seconds or warm in a skillet over low heat. No need to thaw.
Why this matters: Imagine having homemade caramelized onions ready at any moment. You are always 30 seconds away from elevating a meal.
Why You Should Buy the Right Products Today (A Confident Closing Argument)
You can make caramelized onions with a flimsy pan and a dull knife. You can also hammer a nail with a shoe. It is possible, but it will be frustrating, uneven, and likely disappointing.
When you buy the Lodge cast-iron skillet I recommended, you are buying consistency. You are buying the ability to create deep, even caramelization every single time. That pan will outlive you.
When you buy the Victorinox chef’s knife, you are buying safety and speed. No more crushing onions. No more tears (well, fewer tears). Every slice becomes effortless.
When you buy Kerrygold butter and Chosen Foods avocado oil, you are buying flavor without burning. That is not snobbery—that is science.
My promise to you: If you follow this guide and use the recommended tools, your caramelized onions will turn out perfectly on your very first try. They will be sweet, deeply browned, and so delicious that you will find excuses to put them on everything.
Final Tips From My Kitchen to Yours
- Make a double batch. You will use it faster than you think.
- Do not rush the Maillard reaction. Every shade darker adds another layer of complexity.
- Experiment. Try adding a star anise or a cinnamon stick during cooking. Remove before storing.
- Share. Give a small jar to a friend who loves to cook. They will think you are a wizard.
Recipe Card (Quick Reference)
Classic Caramelized Onions
Prep time: 10 minutes
Cook time: 50–60 minutes
Makes: About 1 cup
Ingredients:
- 4 large yellow onions (about 3 lbs)
- 2 tbsp unsalted butter (Kerrygold recommended)
- 2 tbsp avocado oil (or light olive oil)
- ¼ tsp kosher salt
- 1 tsp balsamic vinegar (optional)
- Fresh thyme or black pepper (optional)
Instructions:
- Slice onions thinly (keep root end intact).
- Heat butter and oil in a heavy skillet over medium-low heat.
- Add onions and salt. Cook 15 minutes, stirring occasionally.
- Reduce heat to low. Cook 30–45 minutes, stirring every 2–3 minutes.
- When deep brown and jammy, add balsamic vinegar. Stir for 1 minute.
- Remove from heat. Season with pepper and thyme.
- Cool and store in a jar in the refrigerator for up to 2 weeks.
A Final Story
Last Thanksgiving, I brought a jar of caramelized onions to my aunt’s house. She rolled her eyes. “Onions? We have a relish tray.”
I did not say a word. I simply spooned a pile onto a slice of her dry turkey. She took a bite. Then another. Then she grabbed the jar and placed it next to the gravy boat. By the end of dinner, three people had asked for the recipe, and my cousin’s husband was eating them straight with a fork.
That is the magic. That is why you are here. And that is why, after reading this, you are ready to make the best caramelized onions of your life.
Now go buy that skillet. Slice those onions. And let the transformation begin.