When you think about a 25 minimalist landscaping front yard design, what comes to mind? For most people, it’s probably images of clean lines, open spaces, and a sense of calm that welcomes you home. But here’s the truth: many homeowners feel overwhelmed by landscaping. They think it requires endless weekends of weeding, expensive plants that die within months, or complicated designs that need a professional team to execute.
I used to be one of those people.
Let me share a quick story. Three years ago, my front yard was a chaotic mess. Overgrown bushes blocked my windows, patchy grass fought for survival, and a sad collection of mismatched pots sat near the doorstep. Every time I pulled into my driveway, I felt a little embarrassed. My neighbor, Sarah, had this gorgeous, simple front yard with just a few large pots, smooth gravel, and two perfectly placed ornamental grasses. It looked expensive. It looked intentional. Most importantly, it looked peaceful.
One Saturday, I finally asked her, “How much did that cost you?” Her answer shocked me. “Less than three hundred dollars,” she said with a smile. “Minimalist landscaping isn’t about spending money. It’s about making smart choices.”
That conversation changed everything. Since then, I’ve helped dozens of friends and family members redesign their front yards using minimalist principles. And today, I’m going to share 25 minimalist landscaping front yard ideas that will save you time, money, and frustration—while making your home the best‑looking one on the block.
Why Minimalist Landscaping Makes Sense for Everyone
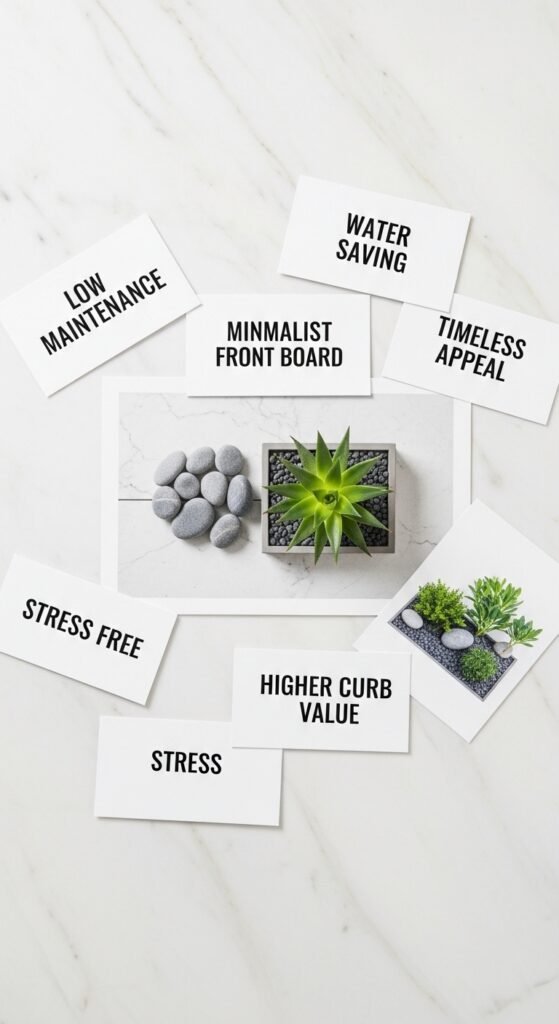
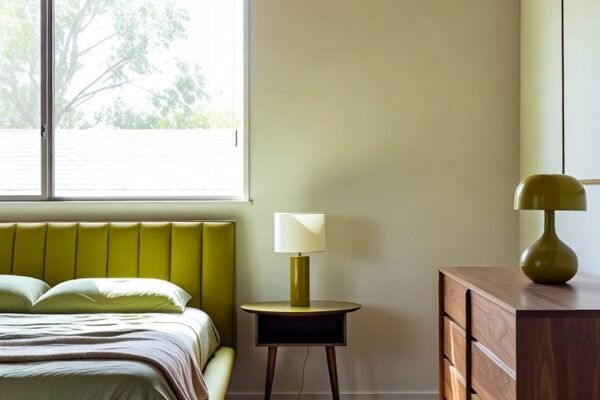
Before we dive into the 25 ideas, let’s talk about why this approach works so well. Minimalist front yard design focuses on three core principles: simplicity, functionality, and intentionality. Instead of cramming your yard with dozens of different plants, ornaments, and features, you carefully select fewer elements that work together harmoniously.
Here’s what that means for you:
- Less maintenance – Fewer plants mean less watering, pruning, and weeding.
- Lower costs – You’re buying less stuff, so your wallet stays happier.
- Better curb appeal – Clean designs actually look more modern and attractive.
- More free time – Weekend mornings become relaxation time, not work time.
Additionally, low-maintenance front yard landscaping has become incredibly popular over the last five years. Why? Because people are busier than ever. Between jobs, kids, and social obligations, who has hours to spend pulling weeds? Nobody. And that’s perfectly fine.
Before You Start: A Simple Step‑by‑Step Guide to Planning Your Minimalist Landscape
Jumping straight into buying plants and materials without a plan is a recipe for disaster. Trust me—I learned this the hard way when I bought twelve lavender plants only to realize my yard didn’t get enough sun. Consequently, I wasted both money and effort.
Follow these steps first:
Step 1: Observe Your Space for One Week
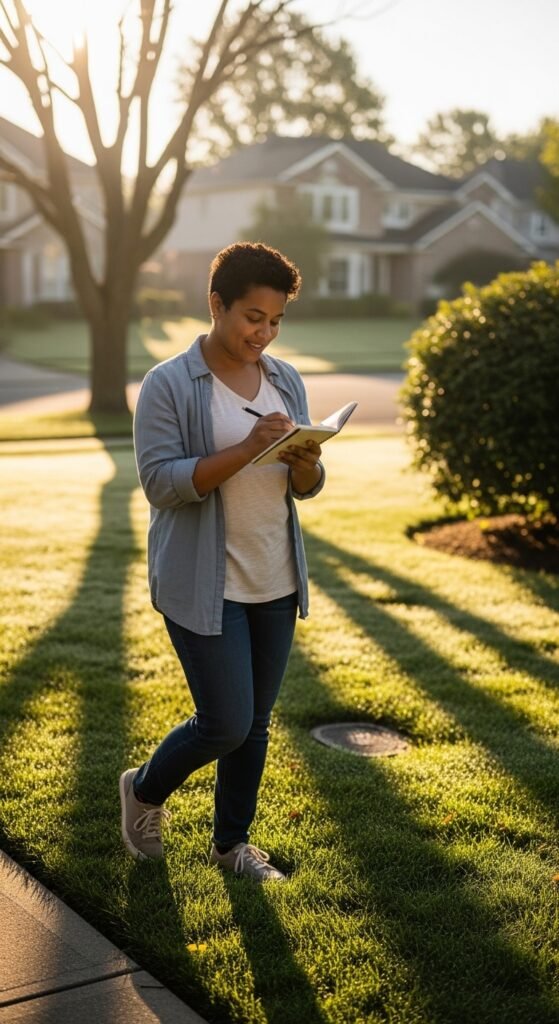
Take a notebook and walk around your front yard at different times of day. Note down:
- Where does the sun hit? (Morning sun vs. afternoon sun matters a lot)
- Which areas stay wet after rain?
- What do you see from your living room window?
- What do visitors see when they approach your front door?
Step 2: Remove Everything Non‑Essential
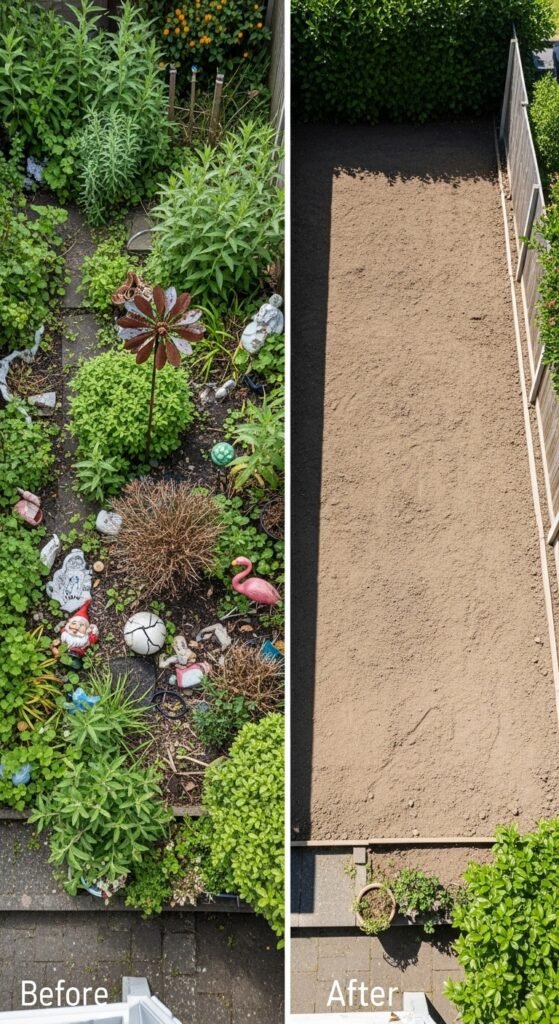
Here’s where most people hesitate. But decluttering your front yard is the most important step. Remove dead plants, overgrown bushes, random garden gnomes, broken pots, and anything that doesn’t serve a clear purpose. Be ruthless.
Step 3: Choose a Simple Color Palette
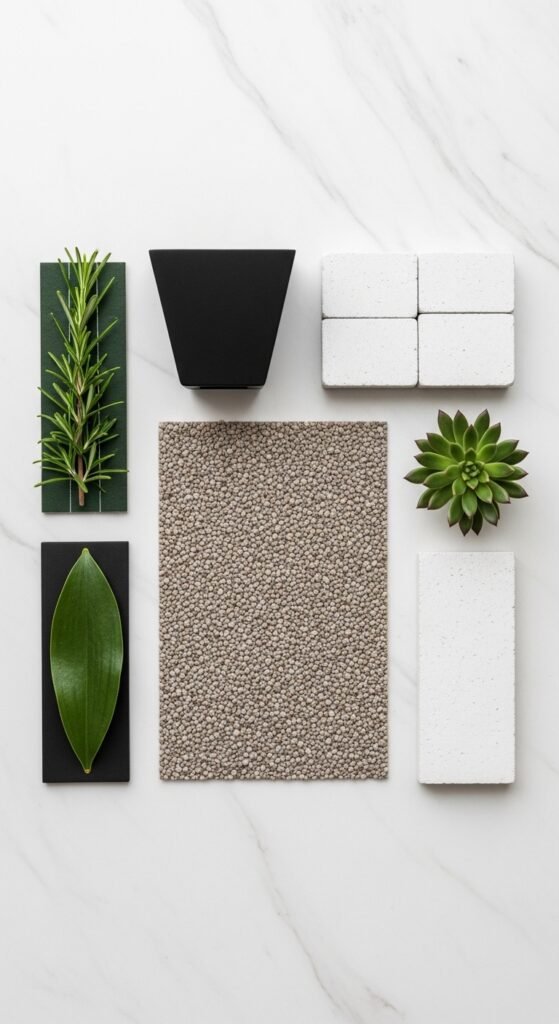
Modern curb appeal thrives on limited colors. Stick to 2–3 colors maximum. For example:
- Greens (different shades of foliage)
- Whites (flowers or hardscape elements)
- Grays (stones, concrete, or gravel)
Step 4: Select Your Hardscape First
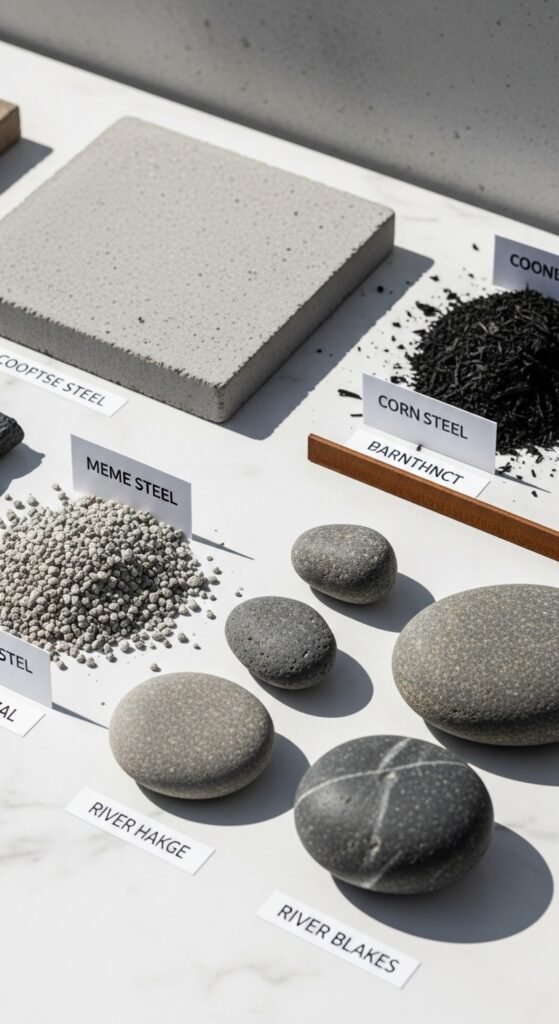
Before buying a single plant, decide on your hardscape materials. Gravel pathways, concrete pavers, stone borders, and wooden decks create the foundation. Plants come second.
Also Read: Sweet Italian Sausage Recipes Dinners That Will Save Your Weeknights (And Wow Your Family)
Step 5: Pick Plants That Work Together
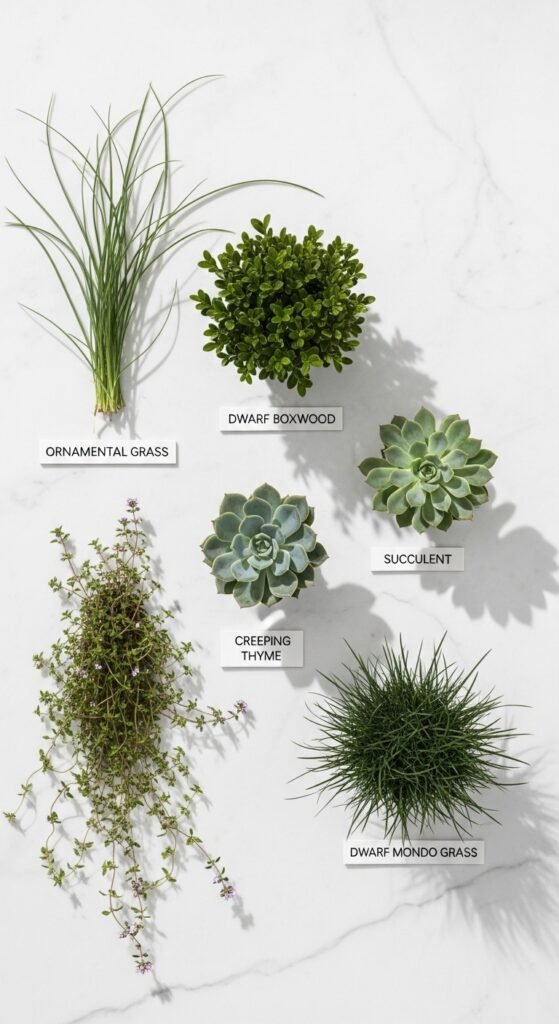
Choose plants with similar water and sun needs. Additionally, repeat the same plant throughout the design rather than using twenty different varieties. Repetition creates calmness.
Step 6: Install in Phases
You don’t need to complete everything in one weekend. Start with the hardscape, then add plants, then finish with decorative elements like minimalist outdoor lighting.
The 25 Minimalist Landscaping Front Yard Ideas
Now, let’s get to the good stuff. Below are 25 actionable ideas, each with clear instructions, personal anecdotes, and product recommendations where helpful.
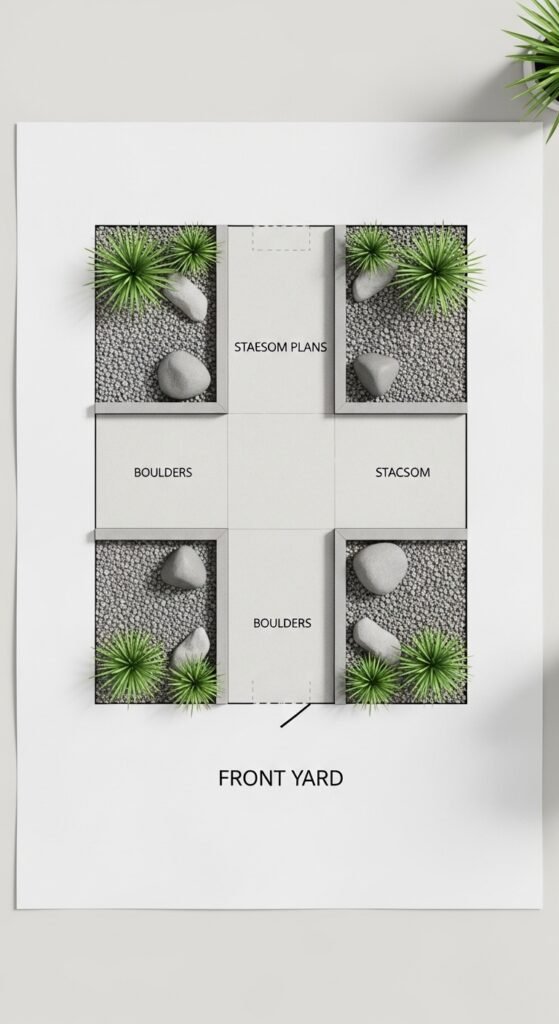
1. The Gravel Garden with Three Statement Plants

Gravel gardens are the backbone of minimalist landscaping. They drain well, suppress weeds, and look stunning year‑round. For this design, you’ll need crushed gravel (in a color that matches your home), landscape fabric, and three identical plants.
Here’s what my neighbor Sarah used: three evergreen shrubs called ‘Sky Pencil’ holly. They grow straight up, take up almost no ground space, and stay green in winter. She placed them in a straight line about four feet apart.
Step‑by‑step:
- Remove all grass and weeds from the area.
- Lay down high‑quality landscape fabric.
- Cut holes where your plants will go.
- Plant your three shrubs.
- Spread 2–3 inches of gravel over the entire area.
- Step back and admire the simplicity.
Buy this product with confidence: Look for crushed granite or river gravel from your local landscaping supply store. A ½ cubic yard bag costs around $50 and covers roughly 50 square feet at 2 inches deep.
2. The Single Specimen Tree with a Ring of Mulch
Sometimes, less really is more. A single beautiful tree can transform an entire front yard. Choose a tree with year‑round interest—like a Japanese maple, crepe myrtle, or dwarf magnolia.
I remember helping my uncle with his front yard. He had this massive, empty lawn that looked boring and flat. We planted one Japanese maple right in the center, created a large circular mulch bed around it (about eight feet in diameter), and added nothing else. The result? His house instantly looked more sophisticated. Neighbors started stopping their cars to compliment it.
Step‑by‑step:
- Choose a spot that’s visible from the street and your front window.
- Dig a hole twice as wide as the root ball but no deeper.
- Plant the tree at the same depth it was in the nursery pot.
- Create a circle of hardwood mulch extending out from the trunk.
- Keep mulch away from the trunk itself (leave a 2‑inch gap).
Buy this product with confidence: Invest in a slow‑growing, dwarf variety tree. Dwarf trees stay small, require less pruning, and cost less to maintain long‑term. The Japanese maple ‘Bloodgood’ is a fantastic choice for most climates.
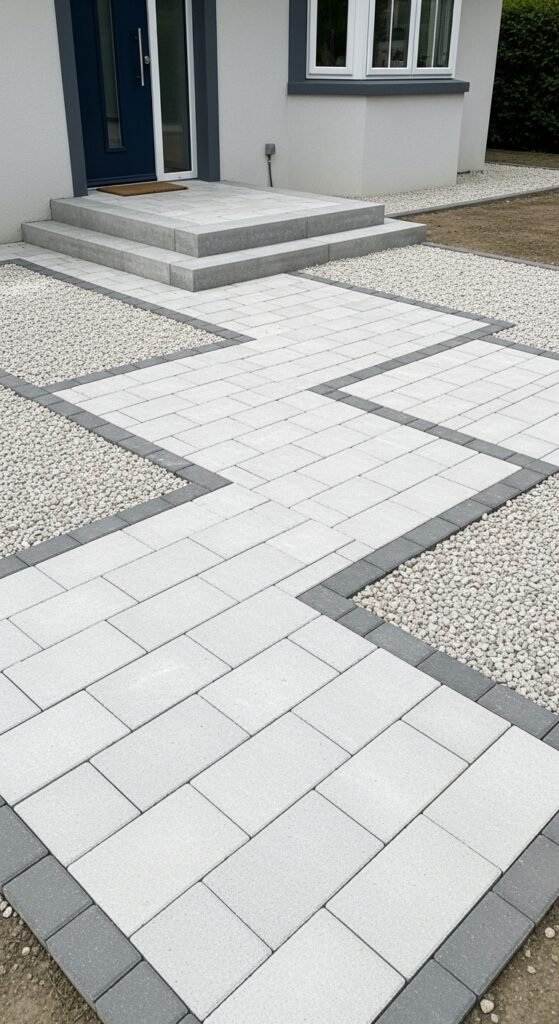
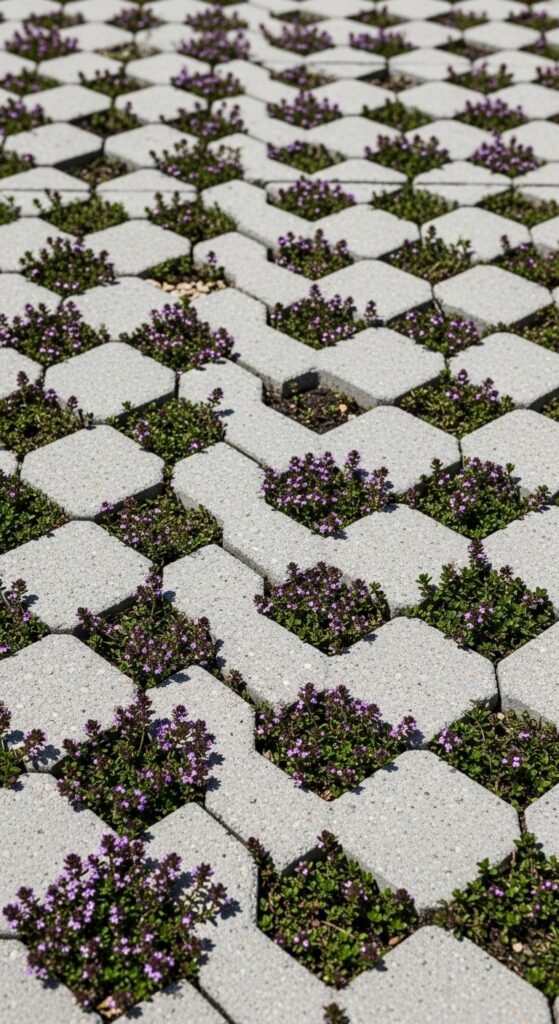
3. Concrete Pavers with Creeping Thyme
Concrete pavers create clean, geometric patterns that define minimalist spaces beautifully. However, plain concrete can feel cold. That’s where creeping thyme comes in. This low‑growing plant spreads between pavers, softening the edges while adding a subtle herbal scent when you walk on it.
Step‑by‑step:
- Lay out your pavers in a grid or staggered pattern.
- Leave 2–3 inches of space between each paver.
- Fill the gaps with sand first (to prevent sinking).
- Plant small plugs of creeping thyme in the sand.
- Water regularly for the first month until established.
Pro tip: Creeping thyme comes in several colors—green, gold, and even pink‑flowering varieties. Choose one color and stick with it for that minimalist look.
Buy this product with confidence: Purchase 12×12 inch concrete pavers from any home improvement store. A pallet of 50 pavers costs around $150. For the thyme, buy a flat of 32 plugs online or at a nursery for roughly $40.
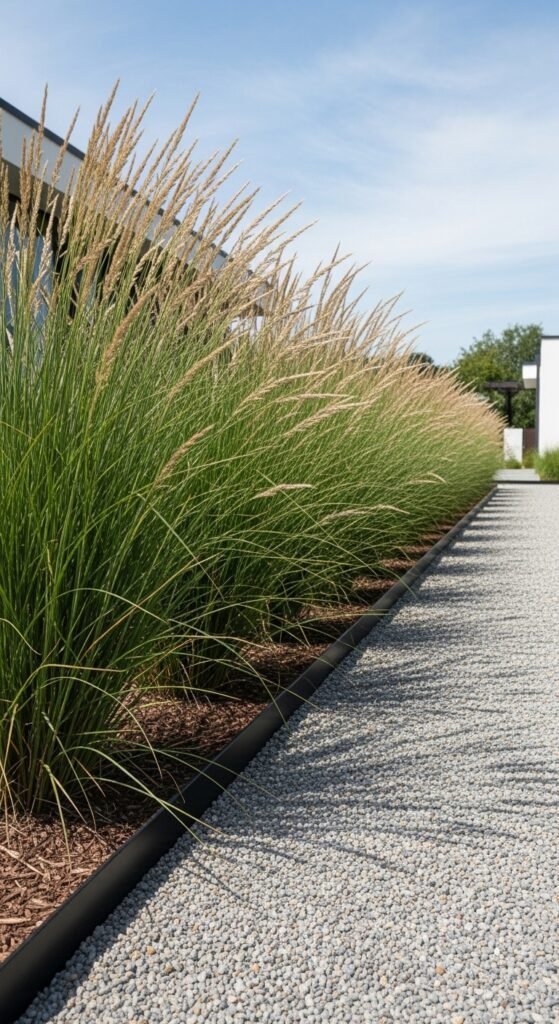
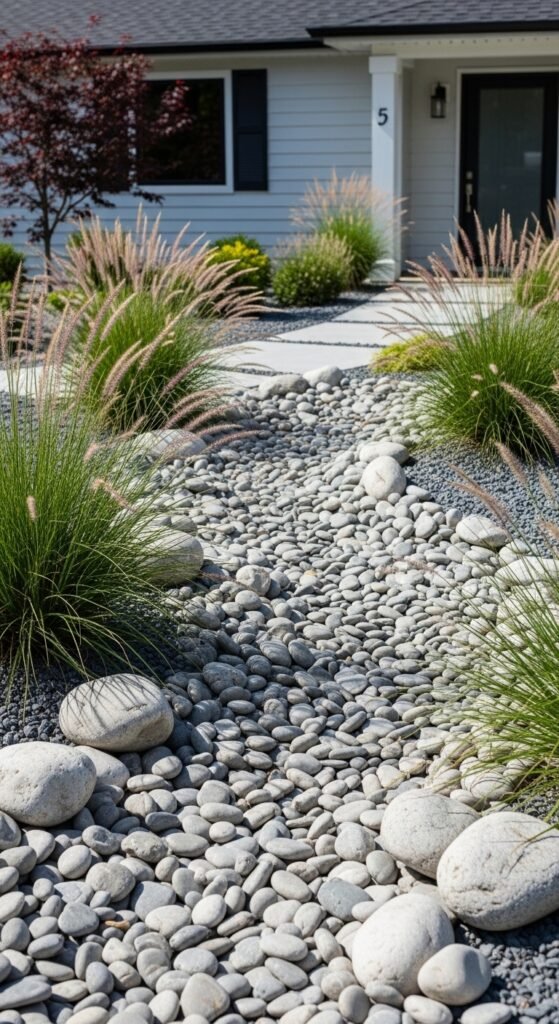
4. Ornamental Grasses in a Straight Row
Ornamental grasses add movement, texture, and height without looking busy. Furthermore, they’re incredibly drought‑tolerant once established. Plant three, five, or seven grasses in a perfectly straight line along your walkway or driveway.
My friend Marco used this trick on his narrow front yard. He planted five Miscanthus sinensis ‘Morning Light’ grasses along the edge of his driveway. The grasses sway in the wind, catch the sunlight beautifully, and require almost no care. He cuts them down once in late winter, and that’s literally all the maintenance.
Step‑by‑step:
- Measure your space and mark spots every 3–4 feet.
- Dig holes and plant grasses at the same depth as their pots.
- Add a 2‑inch layer of brown mulch around each plant.
- Water deeply once a week for the first two months.
- In late winter, cut grasses down to 4 inches tall.
Buy this product with confidence: Look for cold‑hardy ornamental grasses that match your USDA zone. Feather reed grass (Calamagrostis) and switchgrass (Panicum) are excellent choices for most of the United States.
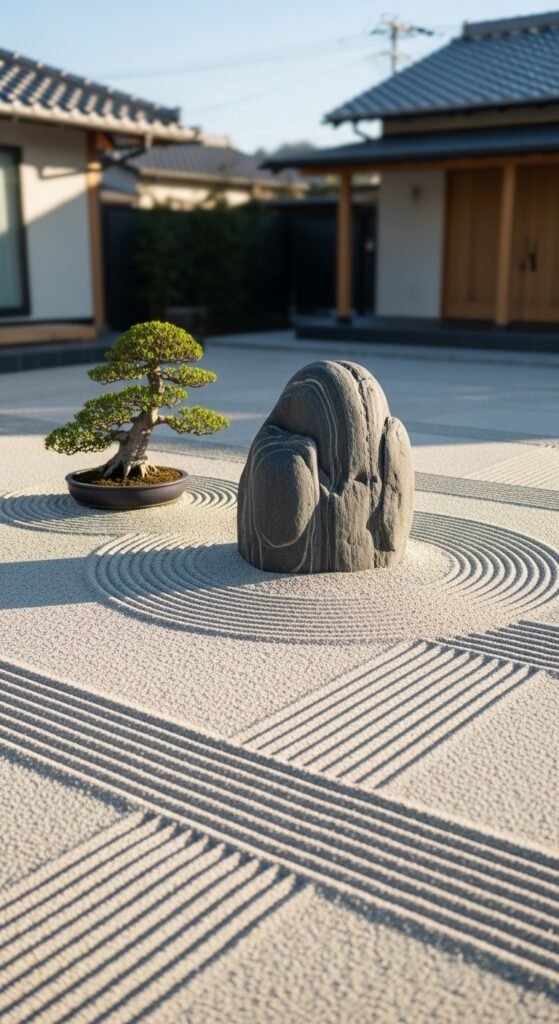
5. The Zen Sand Garden with a Single Boulder
Zen garden design brings meditation and calmness to your front yard. While traditional Zen gardens are large, you can create a small version using just sand, a boulder, and a rake. This works especially well for narrow side yards or small front patios.
Step‑by‑step:
- Build a wooden frame (or use existing concrete borders).
- Fill the area with fine white sand (play sand works great).
- Place one large boulder off‑center (following the rule of thirds).
- Use a rake to create concentric circles around the boulder.
- Re‑rake every few weeks to refresh the pattern.
Personal story: My aunt struggled with anxiety for years. Her therapist suggested creating a calming space at home. She built a small Zen garden in her front yard—just six feet by four feet. Every morning, she spends five minutes raking patterns before work. She told me it changed her entire mindset. Plus, her neighbors love watching the patterns change each week.
Buy this product with confidence: Purchase medium‑grained white sand from a landscape supplier. A 50‑pound bag costs about $15 and covers 5 square feet at 2 inches deep. For the boulder, visit a stone yard where you can choose your exact rock. Expect to pay $50–$150 depending on size.
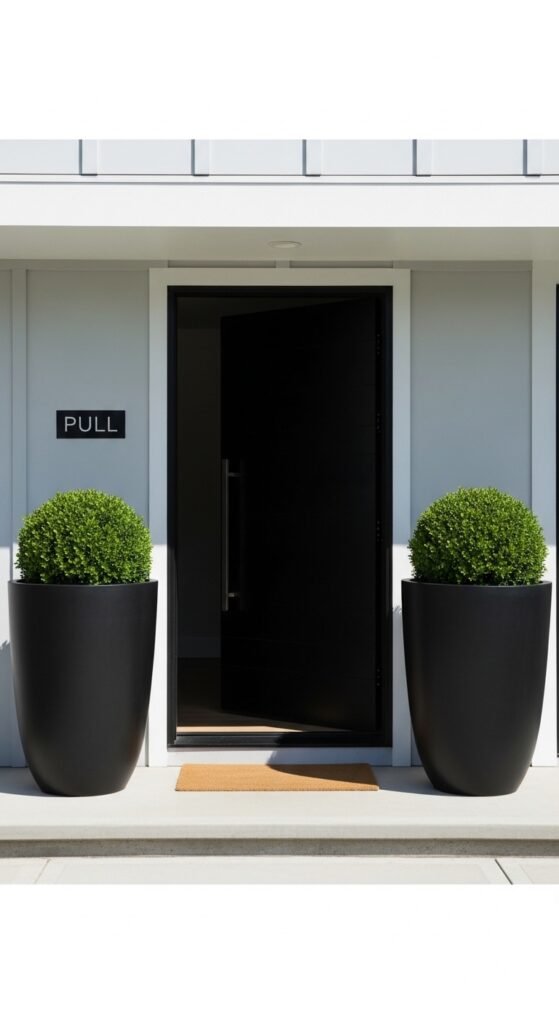
6. Large Black Planters with Single Shrubs
Large planters create instant structure without permanent changes. This is perfect for renters or anyone who likes changing their design seasonally. The key is using identical planters arranged symmetrically.
Step‑by‑step:
- Buy three identical large black planters (at least 20 inches wide).
- Place them in a triangle pattern near your front door.
- Fill each with the same boxwood shrub or dwarf Alberta spruce.
- Add potting mix and water thoroughly.
- Replace plants seasonally if desired.
Why this works: The repetition creates rhythm. The black color recedes visually, making the green plants pop. And because the plants are in pots, you can move them if you change your mind.
Buy this product with confidence: Choose fiberstone planters instead of cheap plastic. Fiberstone looks like real stone but weighs much less. A set of three 22‑inch planters costs around $120 online. For the shrubs, Japanese boxwood stays small and dense for years.
7. The River Rock Dry Creek Bed
If your front yard has drainage issues, turn that problem into a design feature. A river rock dry creek bed directs water away from your house while adding natural beauty. Moreover, it requires zero plants and zero maintenance once installed.
Step‑by‑step:
- Observe where water flows during rain.
- Dig a shallow trench (6–8 inches deep) following that path.
- Line the trench with landscape fabric.
- Fill with large river rocks (3–6 inches diameter) on the bottom.
- Add smaller pebbles (1–2 inches) on top for a natural look.
- Optional: add a few boulders at curves for visual interest.
Buy this product with confidence: Order river rocks by the ton from a landscape supply company. One ton covers roughly 100 linear feet of a 2‑foot wide creek bed. Expect to pay $100–$150 per ton, including delivery.
8. Monochromatic White Garden

A white garden glows in the evening and looks clean during the day. Choose white‑flowering plants, white stones, and even white planters. This creates a cohesive, almost magical appearance.
Step‑by‑step:
- Remove all existing plants and grass.
- Cover the ground with white marble chips.
- Plant clusters of white hydrangeas, white caladiums, or white impatiens.
- Add white ceramic pots with white bacopa trailing over the edges.
- Install warm white landscape lights to enhance the evening effect.
Personal anecdote: My coworker Jessica bought a house with terrible brown dirt and dead grass. She couldn’t afford a full renovation. So she spent $200 on white marble chips and three white hydrangeas. She arranged them in a simple triangle. Two years later, her front yard still looks fresh and intentional, and she hasn’t spent another dollar on it.
Buy this product with confidence: White marble chips cost more than regular gravel but reflect heat and light beautifully. A 0.5 cubic foot bag costs $8 and covers 2 square feet. For larger areas, buy by the cubic yard from a landscape supplier ($120 per yard delivered).
9. Symmetrical Boxwood Hedges
Symmetrical landscaping creates formality and elegance. Frame your front door with two identical boxwood hedges planted in matching rectangular beds. Add nothing else. The simplicity speaks for itself.
Step‑by‑step:
- Measure the space on both sides of your front door.
- Create two identical rectangular beds (same length and width).
- Plant boxwood shrubs 18 inches apart in each bed.
- Mulch both beds with the same brown hardwood mulch.
- Prune twice yearly to maintain straight lines.
Buy this product with confidence: Winter gem boxwood stays smaller and more compact than other varieties. A 1‑gallon plant costs about $15 at most nurseries. Buy them all from the same source to ensure identical size and health.
10. Vertical Succulent Wall
For homes with tiny front yards or zero ground space, go vertical. A living wall of succulents adds texture and color without taking up any ground footprint. Additionally, succulents require almost no water.
Step‑by‑step:
- Buy a vertical planter system (frames with pockets).
- Mount it on an exterior wall that gets partial sun.
- Fill pockets with cactus potting mix.
- Insert succulent cuttings into each pocket.
- Water once every two weeks (or less in winter).
Buy this product with confidence: The Woolly Pocket vertical planter system costs around $100 for a 4‑pocket unit. For succulents, buy a 25‑variety succulent cutting set online for $30. These plants propagate themselves, so you’ll have more than enough.
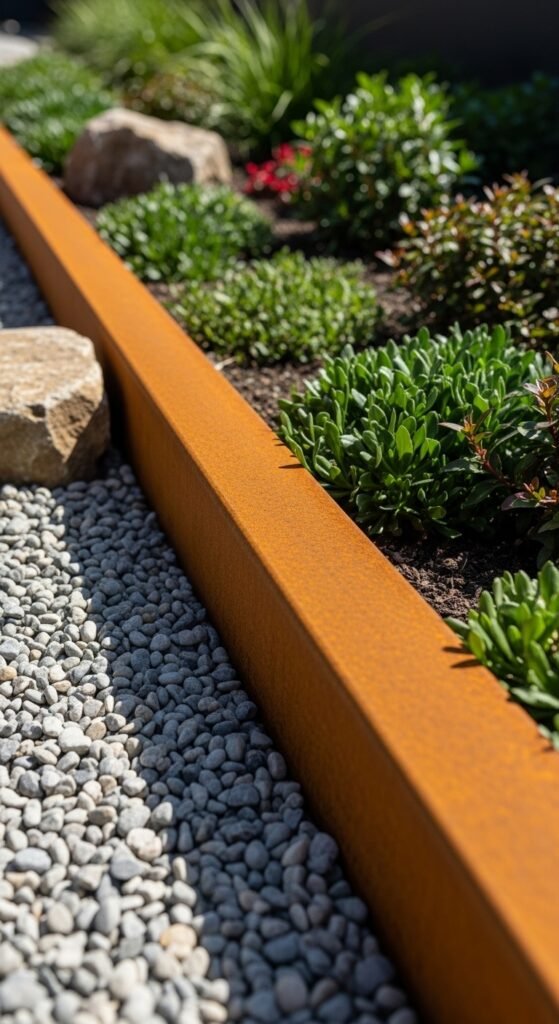
11. Corten Steel Edging with Gravel Paths
Corten steel edging develops a beautiful rusted patina over time. It creates razor‑sharp lines between different materials. Use it to separate gravel paths from plant beds or lawn areas.
Step‑by‑step:
- Mark your desired path or bed shape with spray paint.
- Dig a 4‑inch deep trench along your lines.
- Insert corten steel edging strips into the trench.
- Backfill soil on both sides to lock edging in place.
- Fill one side with gravel and the other with plants or mulch.
Buy this product with confidence: Corten steel edging costs more than plastic or aluminum, but it lasts forever. A 4‑foot strip costs $25–$40. For a standard front yard path, budget $200–$300 total.
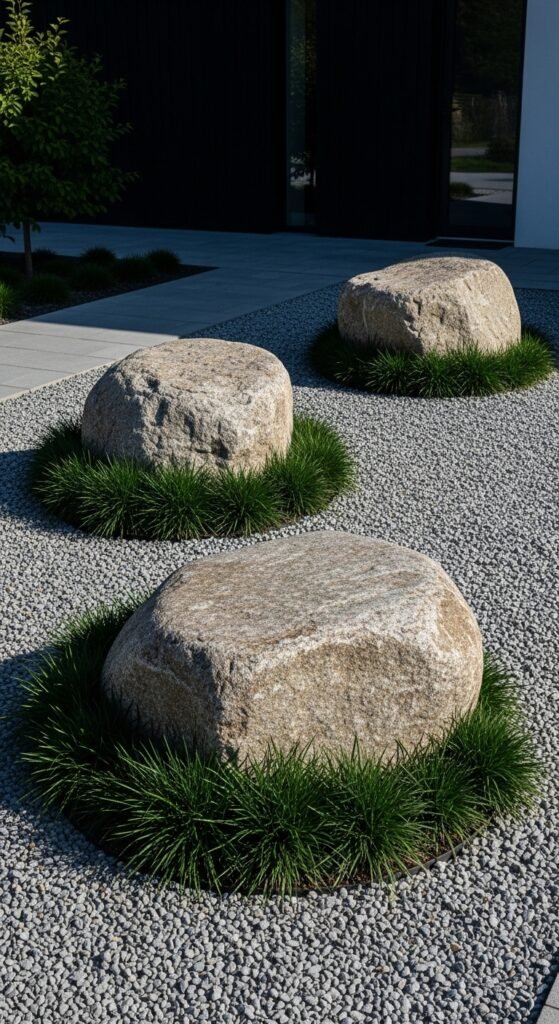
12. Three Large Boulders with Dwarf Mondo Grass
Boulder arrangements mimic nature in the most minimalist way possible. Three boulders of different sizes, grouped asymmetrically, create a focal point that requires zero maintenance. Add dwarf mondo grass around the base to soften the transition to the ground.
Step‑by‑step:
- Choose one large boulder (2–3 feet wide), one medium (1–2 feet), one small (under 1 foot).
- Arrange them in a triangle, with the large boulder slightly off‑center.
- Bury each boulder 1/3 of the way into the ground (looks more natural).
- Plant dwarf mondo grass in clusters around the boulders.
- Add black mulch over all exposed soil.
Buy this product with confidence: Visit a local stone yard to hand‑pick your boulders. Prices range from $50 for small boulders to $300 for large ones. For the grass, dwarf mondo grass comes in flats of 50 plugs for $40.
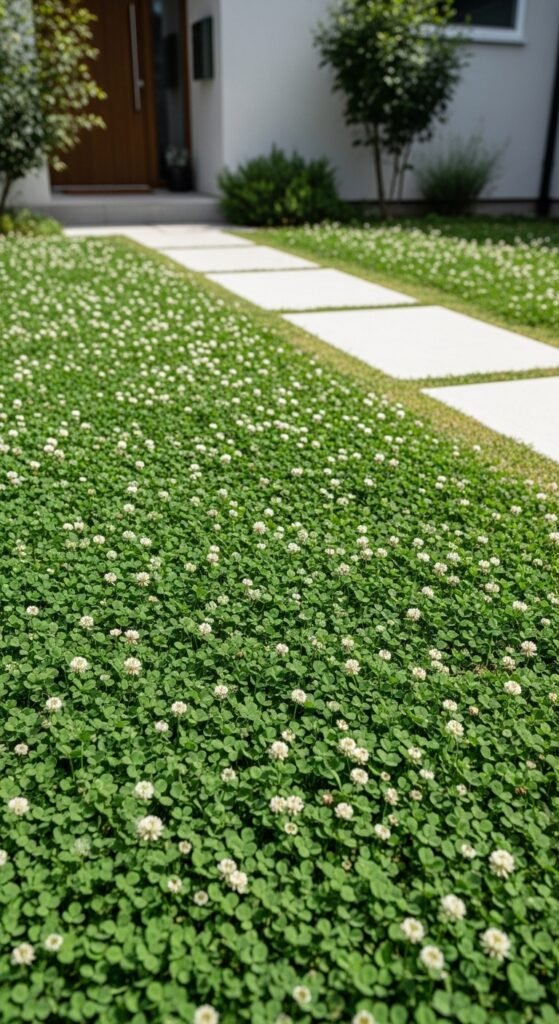
13. The No‑Lawn Clover Yard
Traditional lawns require constant mowing, watering, and fertilizing. Microclover solves all these problems. It stays green without much water, never grows taller than 4–6 inches, and fixes its own nitrogen (so no fertilizer needed).
Step‑by‑step:
- Kill your existing grass (cover with cardboard or use an eco‑friendly herbicide).
- Rake the area smooth.
- Scatter microclover seed at the recommended rate.
- Rake lightly to cover seeds.
- Water gently every day for two weeks.
- Enjoy your no‑mow lawn.
Buy this product with confidence: Microclover seed costs about $30 for a 1‑pound bag, which covers 500 square feet. Buy from a reputable seed company online rather than big box stores—quality varies dramatically.
14. Matching Containers on a Gravel Bed
Here’s a simple formula that always works: Gravel bed + two matching containers + two matching plants. That’s it. Place this arrangement on either side of your front door or garage.
Step‑by‑step:
- Spread pea gravel over a 4×4 foot area.
- Place two identical tall ceramic pots on the gravel.
- Fill pots with the same evergreen tree (like dwarf arborvitae).
- Add a solar path light next to each pot for evening appeal.
Buy this product with confidence: Look for frost‑proof ceramic pots if you live in cold climates. A set of two 18‑inch pots costs $80–$120. Dwarf arborvitae ‘Danica’ stays perfectly round and small.
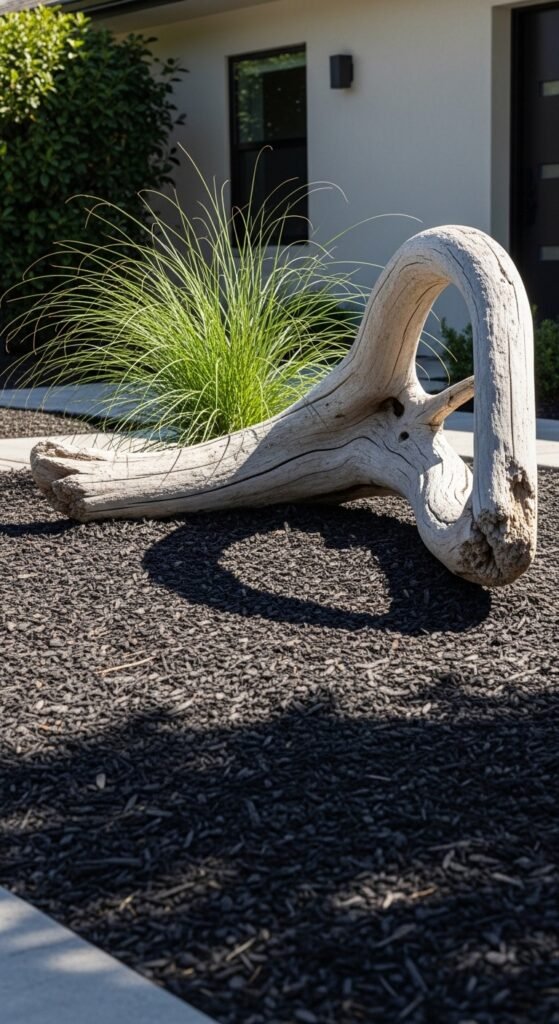
15. The Sculptural Driftwood Piece
Driftwood art adds organic shapes without requiring any living plants. Find one large, interesting piece of driftwood and mount it on a simple stand or lean it against your house. Surround it with white pebbles for contrast.
Step‑by‑step:
- Find a piece of driftwood with interesting curves (beachcomb or buy online).
- Clean and seal the wood with matte clear coat.
- Create a 3×3 foot bed of white pebbles.
- Position the driftwood in the center.
- Add three small succulents at the base (optional).
Buy this product with confidence: Etsy has hundreds of sellers offering large driftwood pieces starting at $40. For pebbles, white polished pebbles cost $15 for a 5‑pound bag.
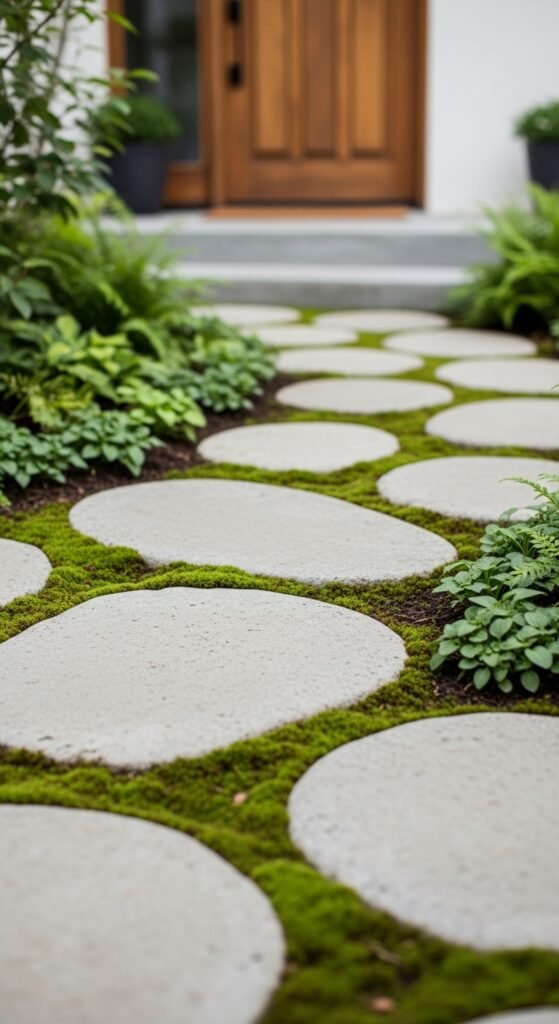
16. Concrete Stepping Stones with Moss
Concrete stepping stones create a path to your front door. Instead of standard spacing, place them close together (just 2–3 inches apart) and allow moss to grow in between. The moss softens the hard concrete and stays green year‑round.
Step‑by‑step:
- Pour your own concrete stepping stones using molds (cheaper than buying).
- Arrange them in a winding path.
- Fill gaps with potting soil.
- Blend moss with buttermilk in a blender (1 part moss, 2 parts buttermilk).
- Paint this mixture onto the soil between stones.
- Keep moist for 3 weeks until moss establishes.
Buy this product with confidence: Concrete stepping stone molds cost $15 on Amazon. One bag of quick‑set concrete ($10) makes 4–5 stones. For moss, harvest from your own yard or buy sheet moss online ($20 for a 1‑square‑foot sheet).
17. The Single Large Pot as a Focal Point
Sometimes, you only need one thing. Place one enormous pot (at least 3 feet tall) near your front door or at the corner of your house. Fill it with a single dramatic plant like a snake plant, ponytail palm, or topiary spiral.
Step‑by‑step:
- Choose a pot that contrasts with your house color.
- Ensure the pot has drainage holes.
- Fill with potting mix (not garden soil).
- Plant your feature plant.
- Add a 1‑inch layer of small pebbles on top of the soil (looks cleaner).
Buy this product with confidence: Fiberstone extra‑large planters (36 inches tall) cost around $200. A mature snake plant of that size costs $80–$120. This entire setup will last for years with almost no care.
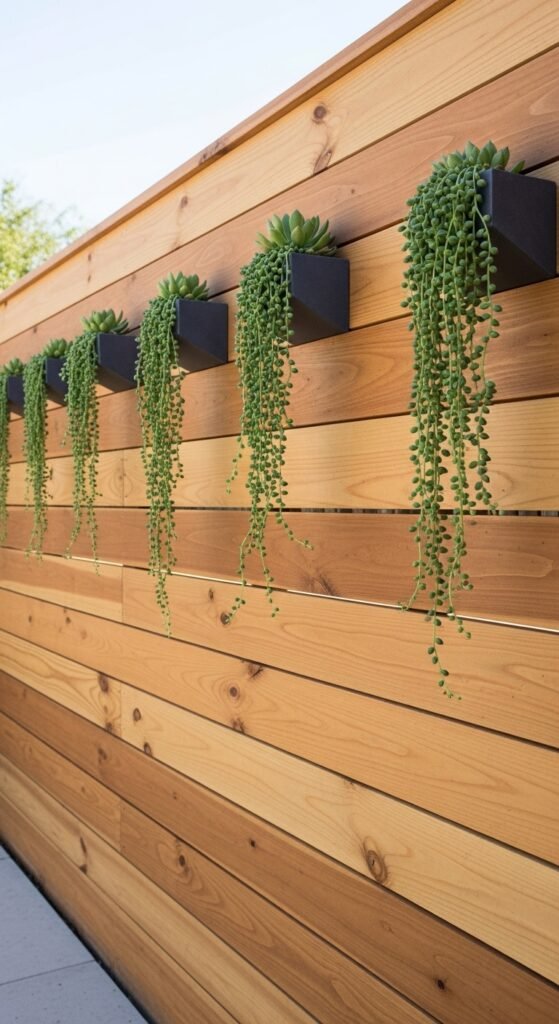
18. Horizontal Wooden Fence with Hanging Succulents
If your front yard faces a busy street, a horizontal wood fence creates privacy while adding warmth. Then, hang three identical succulent planters on the fence. The repetition creates that minimalist feeling.
Step‑by‑step:
- Install cedar fence boards horizontally (spaced ¼ inch apart).
- Stain the wood with clear sealer (no color).
- Mount three metal hanging brackets at equal heights.
- Hang ceramic pots filled with trailing succulents like string of pearls.
- Water once monthly.
Buy this product with confidence: Cedar fence pickets cost $3 each. A 20‑foot fence needs about 60 pickets ($180). String of pearls succulents cost $15 per 4‑inch pot.
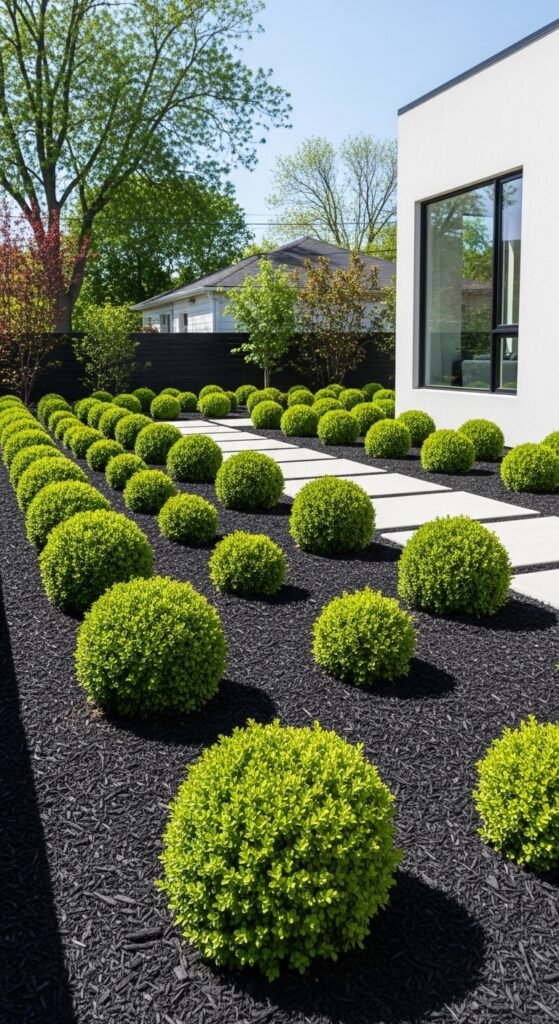
19. Black Mulch with Green Spheres
Black mulch creates a dramatic, dark canvas that makes green plants pop. Plant three identical trimmed shrubs shaped into perfect spheres (or buy pre‑shaped boxwood balls). The contrast between dark ground and green spheres is stunning.
Step‑by‑step:
- Remove grass from your bed area.
- Lay landscape fabric.
- Plant three boxwood shrubs in a line.
- Prune them into perfect spheres (or buy pre‑shaped).
- Cover everything with 3 inches of black dyed mulch.
Buy this product with confidence: Black dyed hardwood mulch costs $40 per cubic yard. Pre‑shaped boxwood balls cost $30–$50 each depending on size.
20. The Rain Chain Feature
Instead of a standard downspout, install a rain chain. These decorative chains guide water from your gutter to the ground, creating a gentle water feature during rain. Place a basin or gravel bed underneath to catch the water.
Step‑by‑step:
- Remove your existing downspout.
- Attach a rain chain hook to your gutter outlet.
- Hang the rain chain (copper or aluminum).
- Place a decorative basin or large flat stone directly below.
- Surround with river rocks to prevent splashing.
Buy this product with confidence: Copper rain chains cost $40–$80 and develop a beautiful patina over time. Aluminum rain chains cost $25–$50 and stay silver. Both last for decades.
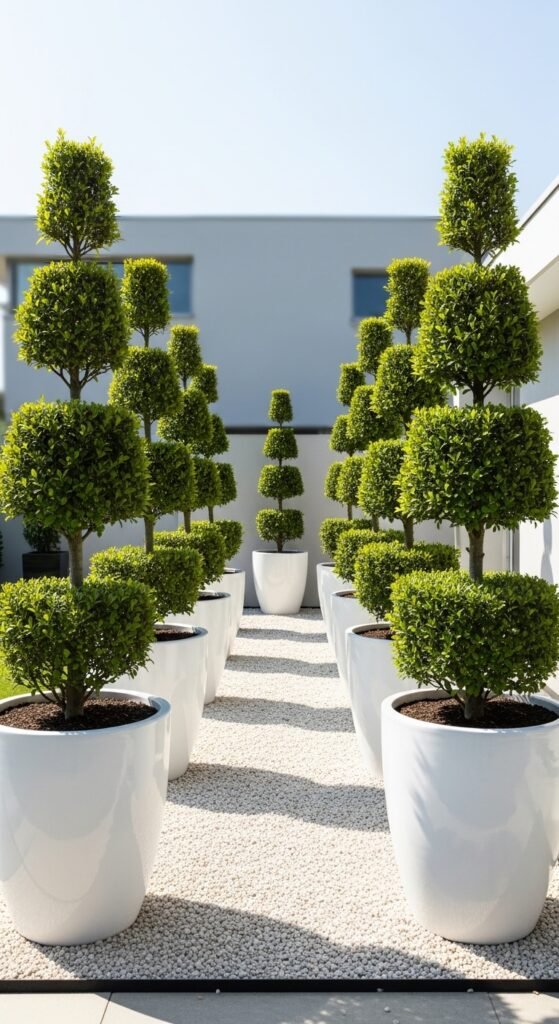
21. Potted Topiaries on a Gravel Mat
Topiaries (plants trimmed into shapes) add instant formality. Place two matching spiral topiaries in concrete planters on either side of your front door. Put a gravel mat underneath to define the space.
Step‑by‑step:
- Buy two identical spiral topiaries (usually Japanese holly or boxwood).
- Place them in concrete planters 24 inches wide.
- Cut a gravel mat to fit the area (these are mesh mats with gravel glued on).
- Set the planters on the gravel mat.
- Water once weekly.
Buy this product with confidence: Pre‑shaped spiral topiaries cost $60–$100 each. Concrete planters of that size cost $50 each. Gravel mats cost $15 for a 2×3 foot mat.
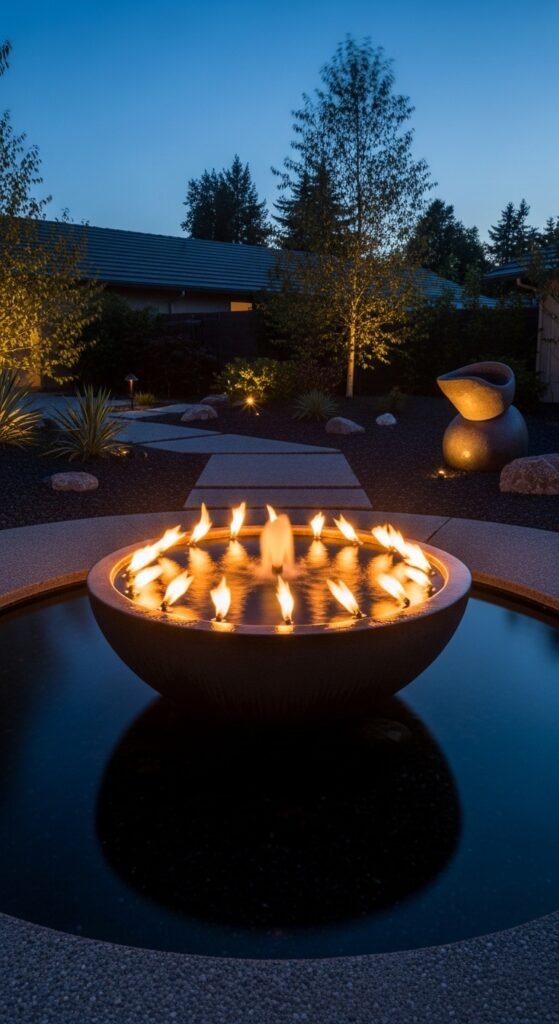
22. The Fire and Water Bowl
A fire and water bowl combines a gas fire pit with a water feature. It sounds fancy, but simple versions exist that run on a small propane tank. Place one bowl in your front yard as a dramatic focal point.
Step‑by‑step:
- Choose a level spot visible from the street.
- Set up your fire and water bowl according to instructions.
- Connect a small propane tank (hides inside the bowl base).
- Fill the water reservoir.
- Light it for evening gatherings or special occasions.
Buy this product with confidence: The Outland Living Fire and Water Bowl costs $300 and includes everything except the propane tank. This is a premium product, but it transforms your front yard into an entertainment space instantly.
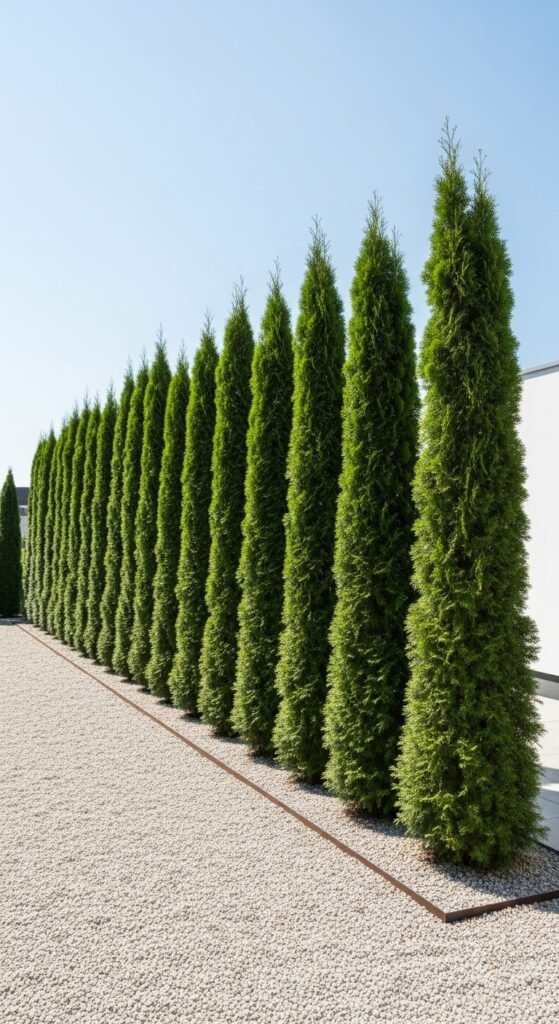
23. Identical Evergreens in a Row
Plant five identical evergreen trees in a straight row along your property line. This creates a living wall that provides privacy, noise reduction, and year‑round greenery. Space them according to their mature width.
Step‑by‑step:
- Measure your property line.
- Divide the length by 6 (for 6‑foot spacing) to find how many trees.
- Dig holes 2 feet from the property line.
- Plant emerald green arborvitae (they stay narrow).
- Mulch the entire row with brown mulch.
Buy this product with confidence: Emerald green arborvitae grow to 15 feet tall but only 4 feet wide. A 3‑foot tall tree costs $30–$40. For a 50‑foot property line, you’ll need about 9 trees ($270–$360).
24. The Minimalist Bird Bath
A simple pedestal bird bath made of concrete or stone adds life and movement (from visiting birds) without clutter. Choose a design with clean, straight lines—nothing ornate or curvy. Place it in an open area where you can see it from your window.
Step‑by‑step:
- Choose a spot that’s visible but not under trees (falling leaves dirty the water).
- Level the ground and set a concrete paver as a base.
- Assemble your bird bath on the base.
- Fill with water.
- Clean and refill weekly.
Buy this product with confidence: The Aquascape Pedestal Bird Bath costs $80 and has a simple, modern design. Concrete versions cost $100–$150 and last forever.
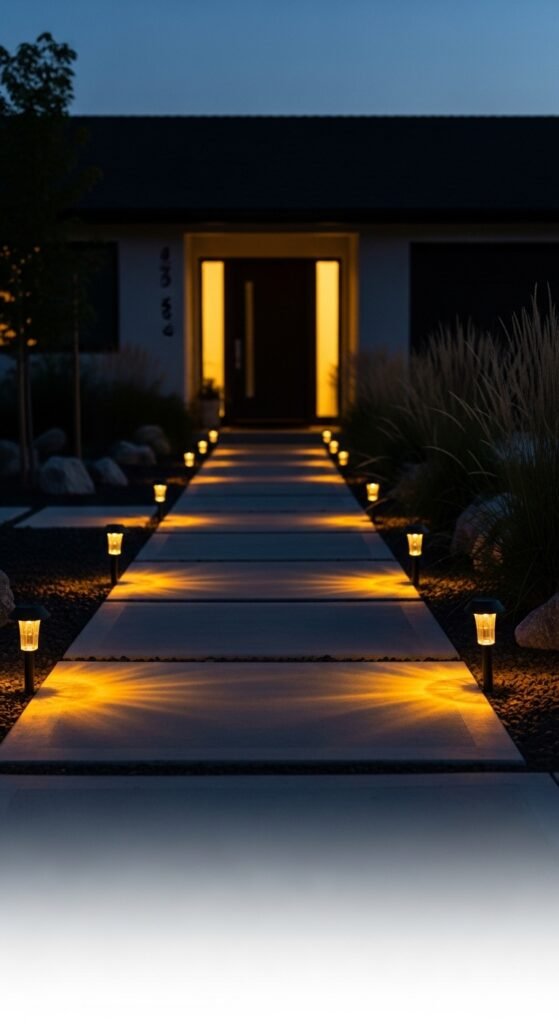
25. Solar Path Lights on a Schedule
Lighting transforms any minimalist design from daytime simple to evening magical. Install solar path lights along your walkway or driveway. The key is spacing them evenly and using identical lights. Furthermore, position them to highlight your best features.
Step‑by‑step:
- Choose warm white LED solar lights (avoid cool white or blue tones).
- Space them exactly 4 feet apart along your path.
- Push them into the ground until the base is level.
- Let them charge in direct sun for 2 full days.
- They’ll turn on automatically at dusk.
Buy this product with confidence: LuminAID Solar Path Lights cost $40 for a set of 6 and last 10+ hours on a full charge. Avoid cheap plastic lights from discount stores—they break within months.
Putting It All Together: A Sample Minimalist Front Yard Plan
Now that you have 25 ideas, how do you choose? Let me walk you through a complete plan for a typical suburban front yard (30 feet wide, 20 feet deep).
The Plan:
- Foundation plants: Three identical boxwood shrubs in a row under the front window (Idea #9)
- Pathway: Concrete pavers with creeping thyme between them (Idea #3)
- Focal point: One Japanese maple with a mulch ring (Idea #2)
- Border: Corten steel edging separating the lawn from the beds (Idea #11)
- Lighting: Solar path lights along the walkway (Idea #25)
Total cost estimate: $450–$600
Time to complete: Two weekends
Annual maintenance: 2 hours (pruning boxwoods, cutting back thyme, refreshing mulch)
Why You Should Start Your Minimalist Landscaping Project Today
Here’s the honest truth that most landscaping articles won’t tell you: Every month you wait, your front yard looks worse. The weeds spread. The dead plants look deader. And your embarrassment grows.
But more importantly, your home’s value suffers. According to real estate studies, good landscaping increases home value by 10–15%. For a $300,000 home, that’s $30,000–$45,000. A minimalist front yard costing $500 could add $30,000 to your selling price. That’s a 6,000% return on investment.
Additionally, you’ll enjoy your home more. You’ll feel prouder pulling into your driveway. Your neighbors will compliment your taste. And you’ll gain back dozens of hours previously spent on yard work.
Frequently Asked Questions About Minimalist Landscaping
Q: Is minimalist landscaping more expensive than traditional landscaping?
A: No. In fact, it’s usually much cheaper because you’re buying fewer plants and materials. Most minimalist front yards cost $200–$800, while traditional yards often exceed $2,000.
Q: What if I already have plants I want to keep?
A: That’s fine! Keep them, but remove everything else. Then add new elements that complement your existing plants. The key is reducing visual clutter, not eliminating everything.
Q: How do I prevent weeds in gravel areas?
A: Use high‑quality landscape fabric underneath your gravel. Additionally, apply a pre‑emergent herbicide twice yearly (spring and fall). This combination blocks 95% of weeds.
Q: Can I do this myself without professional help?
A: Absolutely. Every idea in this article is designed for a beginner with basic tools (shovel, rake, gloves, wheelbarrow). None require special skills or heavy equipment.
Q: What’s the one product I should absolutely buy?
A: Landscape fabric. It costs $30 for a large roll and prevents years of weeding. Don’t buy the cheap plastic stuff—buy woven polypropylene fabric that allows water through but blocks sunlight.
Your Next Steps: A 30‑Day Action Plan
Week 1: Observe your yard. Take photos at different times. Make notes about sun, water, and problem areas.
Week 2: Remove everything non‑essential. Pull weeds. Trim overgrown bushes. Haul away trash.
Week 3: Order your materials. Buy your gravel, pavers, plants, and mulch. Have them delivered.
Week 4: Install your design. Start with hardscape, then plants, then mulch, then lighting.
Day 30: Step back and take a photo. Compare it to your Week 1 photo. Smile at your transformation.
Final Thoughts: Confidence in Every Purchase
I’ve recommended specific products throughout this article because I’ve either used them myself or watched friends succeed with them. However, you don’t need to buy the exact brands I mentioned. The key is buying quality materials rather than the cheapest option.
Buy landscape fabric that costs $30 instead of $10. The cheap stuff rips within months, and you’ll be pulling weeds through it forever.
Buy plants from a local nursery instead of a big box store. Nursery plants have stronger root systems and better survival rates.
Buy gravel by the ton instead of by the bag. It’s dramatically cheaper.
When you invest in quality materials, your minimalist front yard will look beautiful for years with almost no maintenance. And that’s the entire point—creating a home that welcomes you without demanding your weekends.
Now it’s your turn. Pick one idea from this list. Just one. Start there. Complete it this weekend. See how it feels. I promise you’ll be hooked.
Your front yard deserves to make you smile every single time you come home. And with these 25 minimalist landscaping front yard ideas, you finally have a clear, simple path to get there.