Let me paint you a picture. It was a rainy Tuesday afternoon in April 2019. I was 24 years old, living in a cramped studio apartment that smelled faintly of last week’s curry and desperation. My bank account was hovering somewhere between ramen noodles and “sell my guitar.” Hungry, grumpy, and staring into the abyss of my refrigerator, I found the usual suspects: a sad, wilting celery stalk, half a block of cheddar cheese with a questionable corner, two slices of whole wheat bread that were almost stale, and—thank the culinary gods—a single can of tuna in water.
Desperation, as they say, is the mother of invention. I had no recipe. I had no training. But I had a hot skillet and a dream. I mixed the tuna with a glob of mayo, a squirt of yellow mustard that squeaked out of the plastic bottle, and a handful of shredded cheese. I slapped it between the bread, buttered the outside like I was greasing a squeaky door, and threw it in the pan.
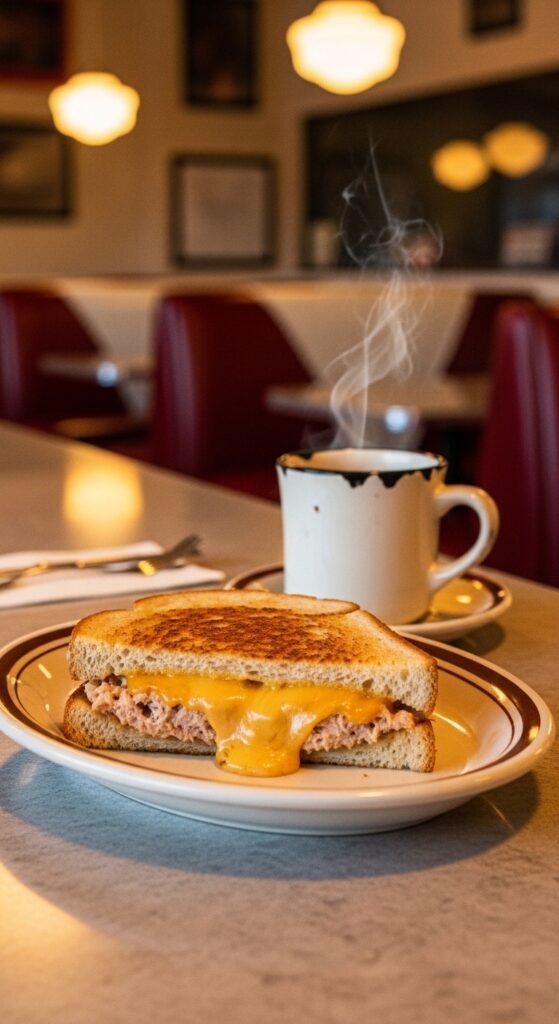
What happened next changed my life. Honestly. The moment my spatula pressed down on that golden-brown crust, the cheese began to ooze out like molten lava from a delicious volcano. The first bite? A symphony of textures: the crunchy, buttery exterior giving way to a warm, creamy, tangy tuna filling that was somehow greater than the sum of its parts. It was hot, comforting, and cost me less than two dollars.
That, my friends, is the magic of the best tuna melt sandwich recipe. It is not just a sandwich; it is a hug between two slices of bread. It is a gourmet experience on a shoestring budget. After testing over 30 variations (yes, my family staged an intervention), I have cracked the code. In this article, I will walk you through every single detail, from selecting the right tuna to achieving that perfect golden-brown crust. By the end, you will not just want to make this sandwich—you will be ready to buy a new non-stick skillet just to do it justice.
What Exactly Is a Tuna Melt Sandwich? A Brief, Delicious History
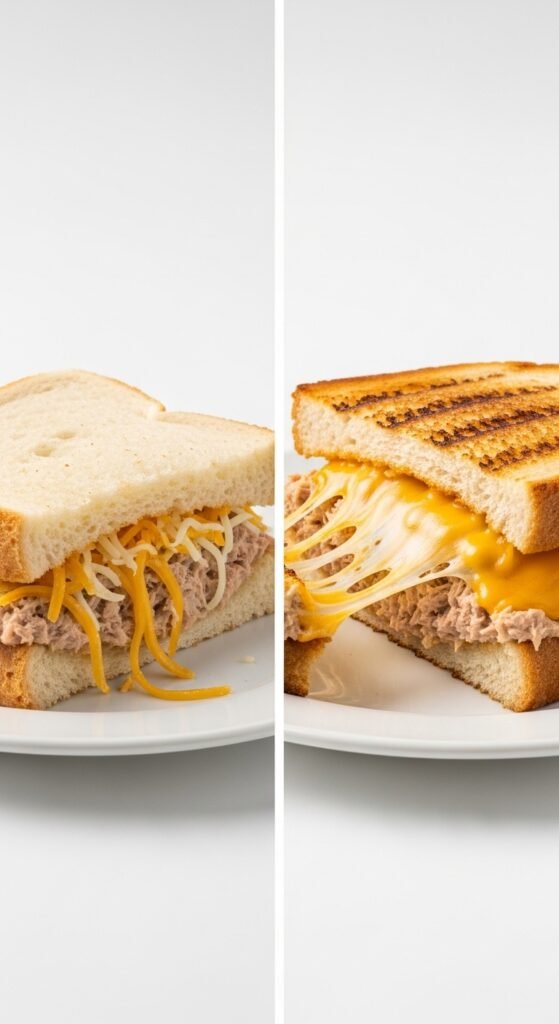
Before we dive into the recipe, let us get our facts straight. A tuna melt sandwich is the glorious lovechild of a tuna salad sandwich and a grilled cheese. It first appeared in American diners in the 1960s, likely as a way to use up leftover tuna salad. A brilliant line cook thought, “What if we make it warm? What if we add cheese?” And the universe shifted on its axis.
Unlike a standard cold tuna sandwich, the tuna melt is cooked open-faced or closed, traditionally on rye or sourdough, with a slice of Swiss, cheddar, or American cheese melted aggressively over the top. It is warm, savory, and solves the biggest problem of cold tuna salad: sogginess. When you toast the bread properly and seal the edges, you create a fortress against moisture.
Today, we are aiming for the best tuna melt sandwich recipe you have ever tasted. This is not your cafeteria’s sad, microwaved version. This is the version that makes you close your eyes when you take a bite.
Why You Need to Master This Recipe (And Buy the Right Tools)

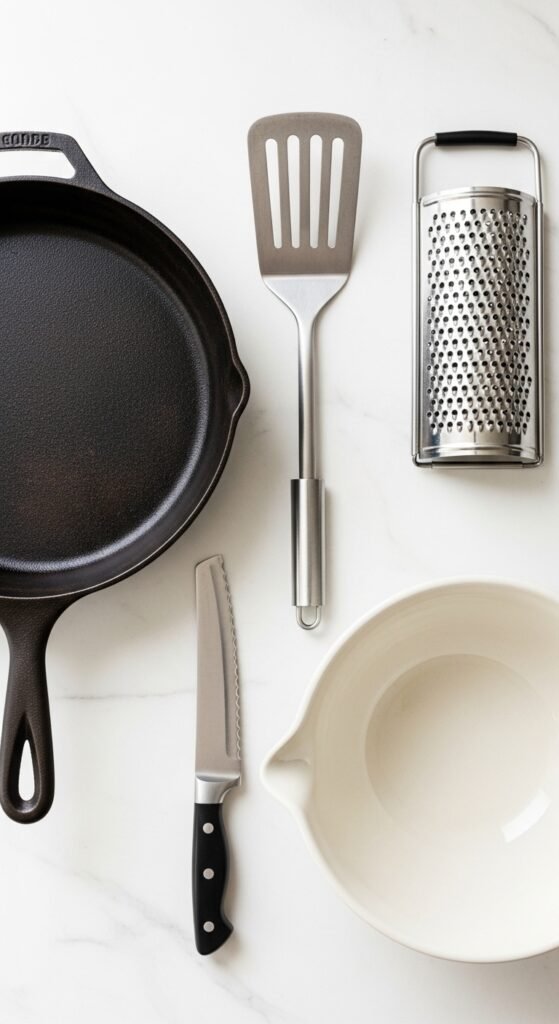
Here is the honest truth: You cannot make the best tuna melt sandwich recipe with a warped, scratched-up frying pan and a plastic spatula that melts at the sight of heat. I tried. I failed. The cheese stuck to the pan. The bread tore. I ended up eating the tuna salad with a fork while crying over burnt toast.
To convince you to buy the right gear with confidence, let me break down why quality matters. Investing in a few key items transforms a frustrating cooking experience into a 10-minute joy session. When you hold a heavy, non-stick skillet or a sturdy fish spatula, you are holding the keys to the kingdom.
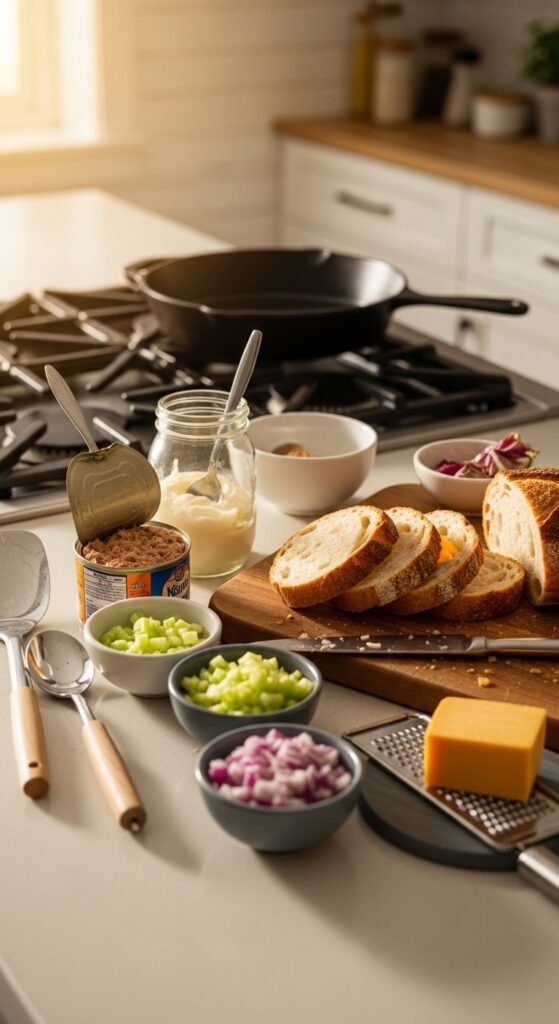
The Non-Negotiable Equipment List
- A Heavy-Bottomed Non-Stick Skillet (10 or 12-inch): This is your battlefield. A cheap, thin pan creates hot spots—meaning one side of your sandwich burns while the other is pale. A quality skillet (like a ceramic non-stick or a well-seasoned cast iron) distributes heat evenly.
- A Flexible Slotted Spatula (Fish Spatula): Standard spatulas are too thick to slide under a delicate, cheese-laden sandwich. A thin, flexible spatula ensures you flip without spilling the filling.
- A Mixing Bowl Set: You need one small bowl for the tuna salad and one shallow dish for the bread.
- A Can Opener (That Doesn’t Suck): Nobody wants metal shavings in their tuna.
- A Box Grater: Pre-shredded cheese contains anti-caking agents that prevent smooth melting. Grating your own cheese is a game-changer.
Buying Advice: You do not need a $200 pan. A $35 ceramic non-stick skillet from a reputable brand will last you two years of heavy use. The spatula? Spend the $12 on a stainless steel fish spatula. I promise you, this purchase alone will improve your egg-flipping game and your tuna melt flipping game. See my exact recommended tools below—they are the ones I used to develop this recipe.
Selecting Your Ingredients: The Blueprint for the Best Tuna Melt Sandwich Recipe
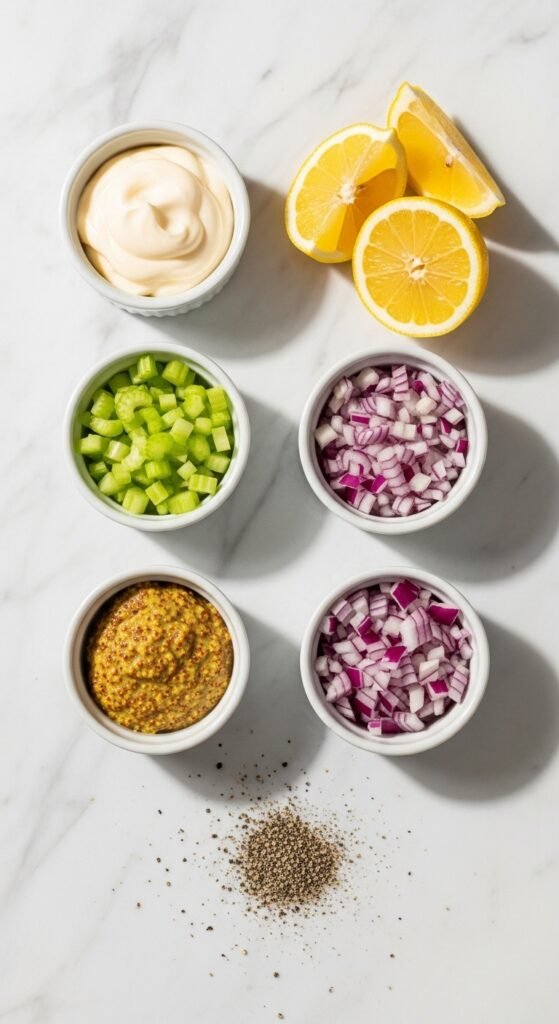
Let us talk groceries. You cannot build a cathedral on a shaky foundation. Every single ingredient plays a role. Do not skip the notes—they are the secret weapons.
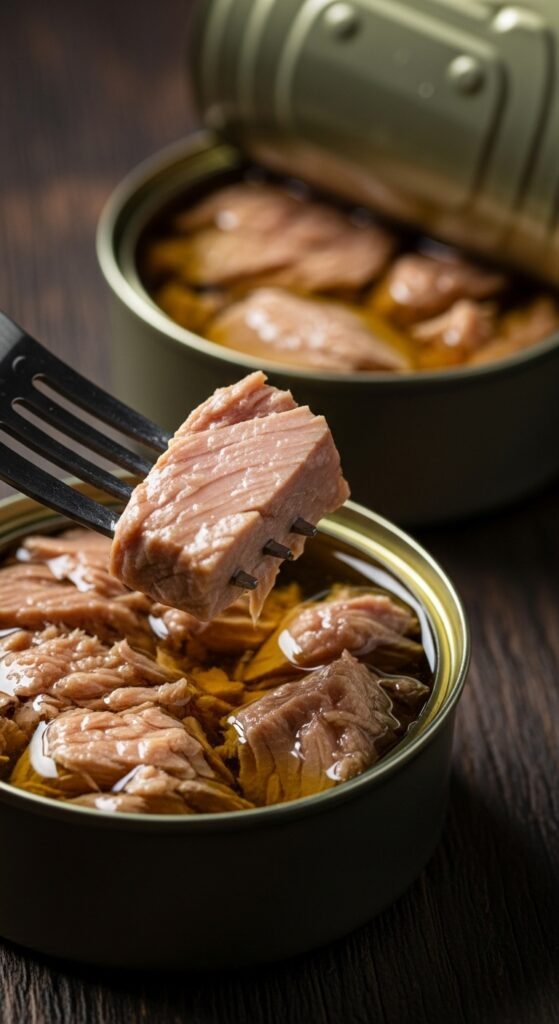
1. The Tuna: The Soul of the Sandwich
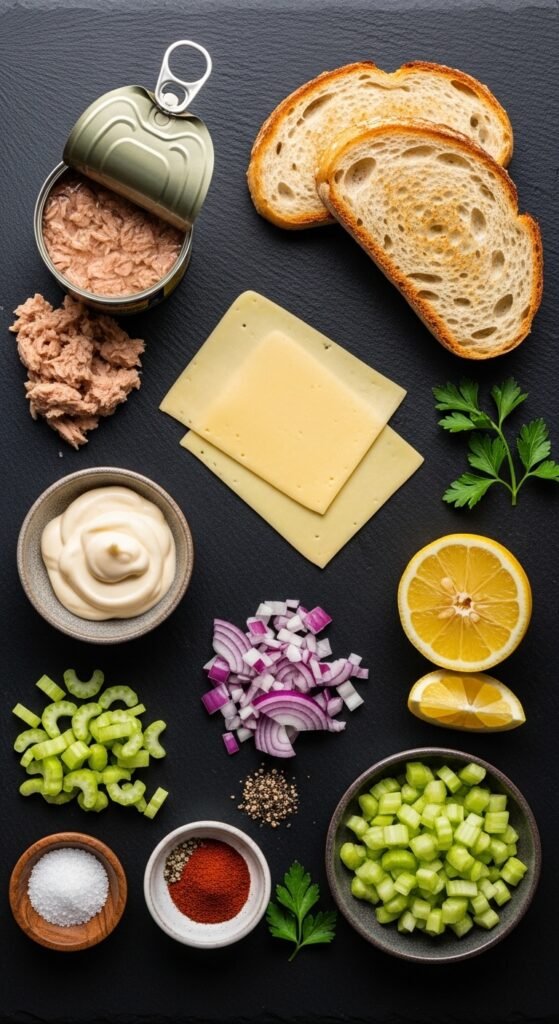
- What to buy: Solid white albacore tuna in water, not oil. Why? Oil-packed tuna can make the salad greasy. Water-packed tuna gives you a clean, briny flavor that you control.
- What to avoid: Chunk light tuna. It has a stronger, fishier flavor and a mushier texture. For the best tuna melt sandwich recipe, spend the extra $1.50 on albacore.
- Anecdote: I once tried to save 80 cents by buying generic chunk light. The melt tasted like the bottom of a bait bucket. My roommate asked, “Did the cat get sick?” Never again.
Also Read: Beat the Heat: Your Ultimate Guide to Healthy & Irresistible Summer Snacks
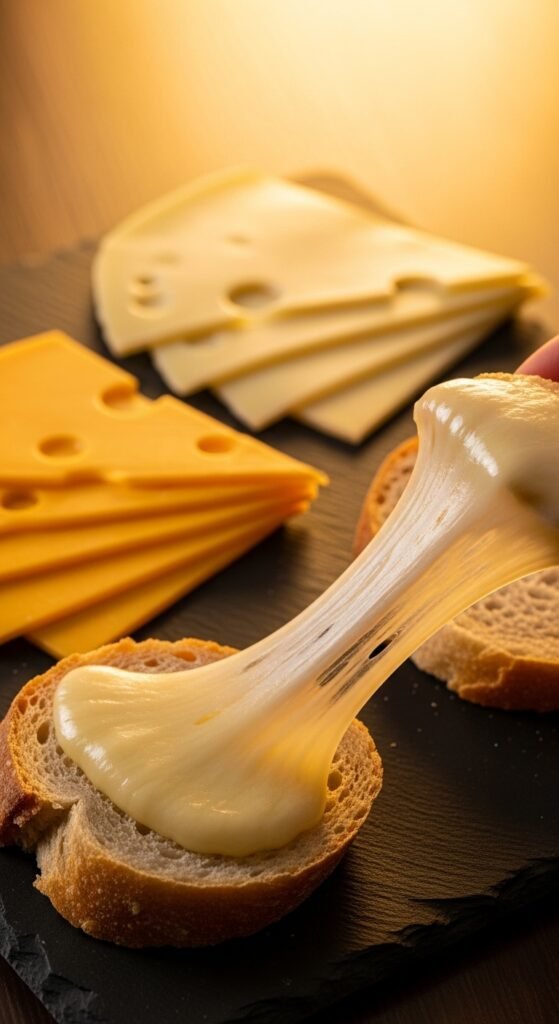
2. The Cheese: The Glue and the Glory
- The Classic Choice: Deluxe American cheese (the kind wrapped individually from the deli counter, not the plastic singles). It melts into a dreamy, non-greasy sauce.
- The Gourmet Choice: Sharp white cheddar or Gruyère. Cheddar gives a sharp tang; Gruyère gives nutty complexity.
- The Wildcard: Smoked Gouda for a BBQ-style twist.
- Pro tip: Use two slices of cheese per sandwich. One on the bottom, one on top of the tuna. This creates a cheese seal that prevents the bread from getting soggy.
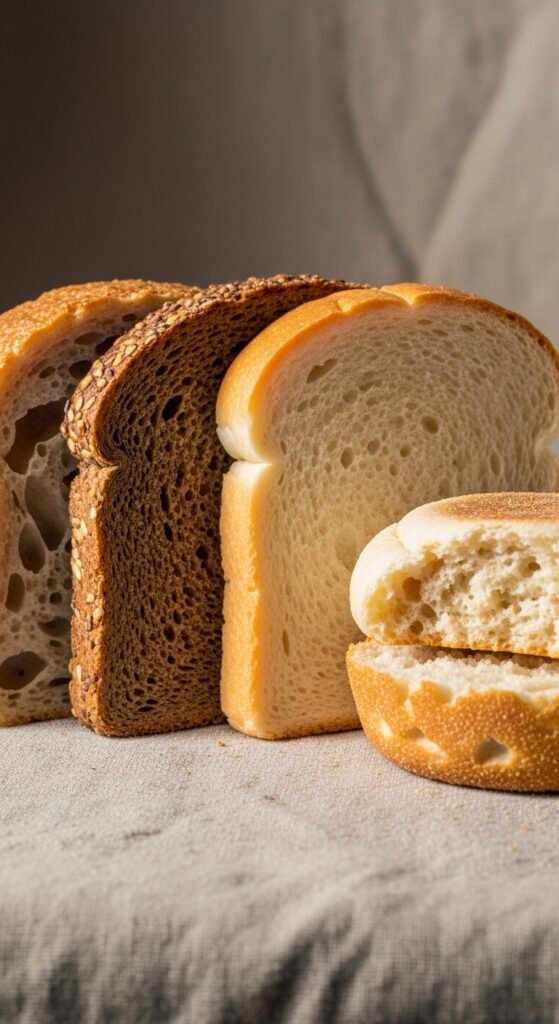
3. The Bread: The Crunchy Vessel
- Rye bread is the traditional choice for a classic diner-style melt. It has a slight sourness that cuts through the rich tuna.
- Sourdough is my personal champion. Its thick, sturdy crust holds up to the filling and toasts to a spectacular crunch.
- Whole wheat or multigrain works, but it adds a nutty flavor that can overpower the tuna.
- Avoid: Thin, flimsy white bread. It will disintegrate under the weight of the filling.
4. The Aromatics & Binders (The Flavor Boosters)
- Mayonnaise: Use full-fat Duke’s or Hellmann’s. Miracle Whip is too sweet. You need fat for flavor and texture.
- Celery: Finely diced for a fresh crunch.
- Red Onion: Finely minced. Soak it in ice water for 5 minutes to remove the harsh bite.
- Dill Pickle Relish (or chopped cornichons): This adds the tang.
- Dijon Mustard: A teaspoon wakes up the entire salad.
- Lemon Juice: Fresh only. The bottle stuff tastes like plastic.
- Fresh Dill or Parsley: For a burst of green freshness.
The Step-by-Step Guide: Crafting the Best Tuna Melt Sandwich Recipe
Alright, put on your apron. We are going to make a sandwich that will make you forget restaurant versions exist. This guide is for two sandwiches (or one very greedy person).
Phase 1: The Tuna Salad (Do This First, Let It Rest)
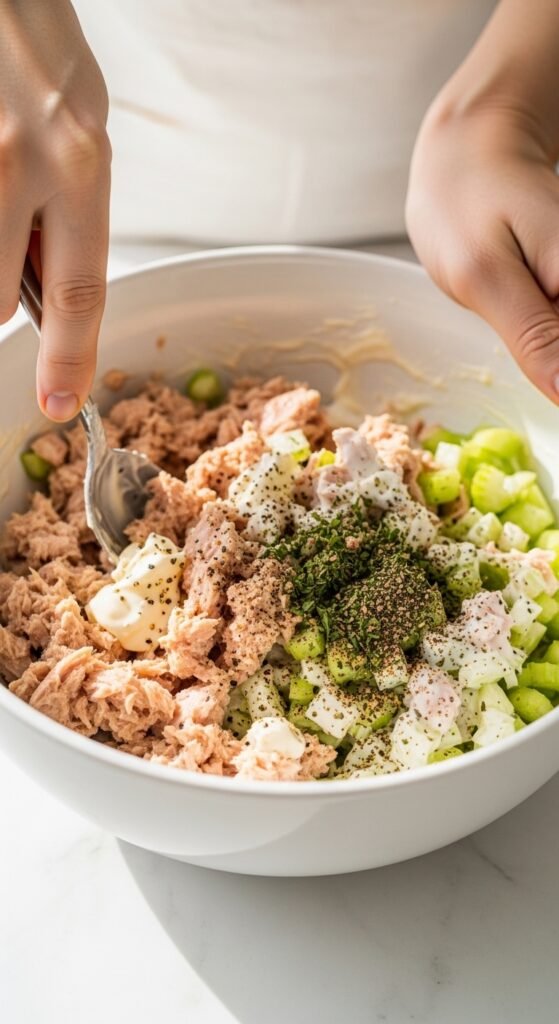
Step 1: Drain the tuna like your life depends on it.
Open your solid white albacore tuna can. Press the lid down firmly to squeeze out every drop of water. Then, using a fork, flake the tuna into a mixing bowl. Wet tuna = sad, watery melt. Dry tuna = concentrated flavor.
Step 2: The Chop.
Finely dice 2 tablespoons of celery (about half a stalk) and 1 tablespoon of red onion. The pieces should be smaller than a pea. Big chunks will fall out of your sandwich.
Step 3: The Sauce.
In a separate tiny bowl, mix:
- 3 tablespoons full-fat mayonnaise
- 1 tablespoon dill pickle relish (drained)
- 1 teaspoon Dijon mustard
- 1 teaspoon fresh lemon juice
- A pinch of kosher salt and fresh cracked black pepper
Step 4: Combine.
Pour the sauce over the flaked tuna. Add the celery and onion. Use a fork to mix gently. Do not mash it into a paste. You want distinct flakes of tuna. Taste it. Does it need more salt? More acid? Add a tiny splash of pickle juice if it feels flat. Cover and put this bowl in the fridge for 10 minutes. This allows the flavors to marry.
Phase 2: The Assembly Line
Step 5: Butter the bread (the right way).
Take 4 slices of sourdough (or rye). Spread softened salted butter all the way to the edges of one side of each slice. Use about 1 tablespoon per slice. This is not a diet sandwich. The butter is what creates the golden-brown crust. Do not use margarine. Do not use oil.
Step 6: Grate your cheese.
Take 4 ounces of sharp white cheddar and grate it on the large holes of a box grater. Pile it up. You want about ½ cup per sandwich.
Step 7: Low heat is your friend.
Place your non-stick skillet on the stove over medium-low heat. Let it warm up for 2 minutes. High heat burns the bread before the cheese melts. Patience, young grasshopper.
Phase 3: The Cooking (The Critical Phase)
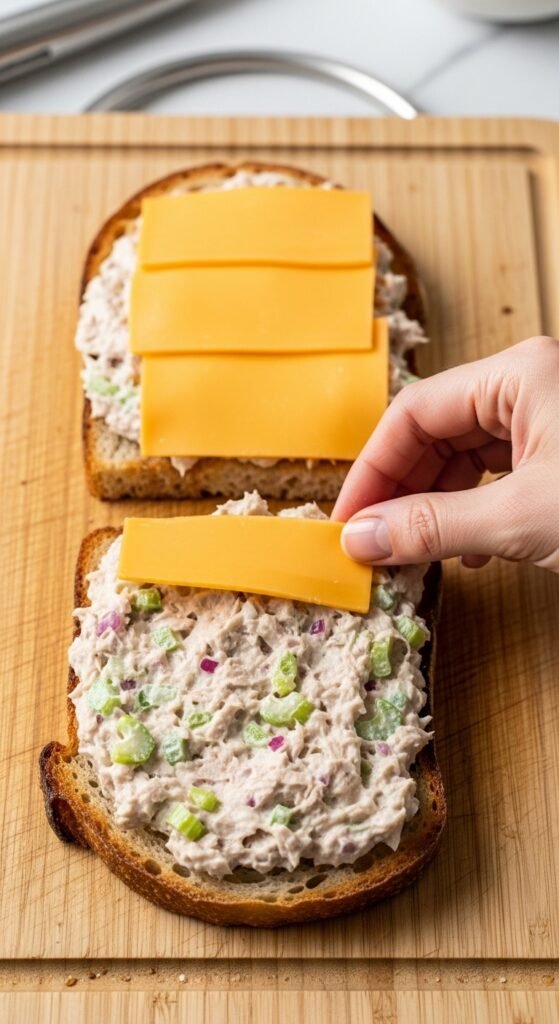
Step 8: The Open-Face Start (This is the secret).
Place two slices of bread, buttered side down, into the warm skillet. Immediately, place one slice of cheese on each piece of bread (if using American) or a handful of grated cheddar.
Step 9: Pile on the tuna.
Take your chilled tuna salad and divide it evenly between the two slices. Spread it gently, leaving a ¼-inch border around the edge. Do not overstuff! A ½-inch thick layer is perfect.
Step 10: Top it off.
Place the second slice of cheese (or another handful of grated cheese) directly on top of the tuna. Then, place the remaining two slices of bread on top, buttered side up.
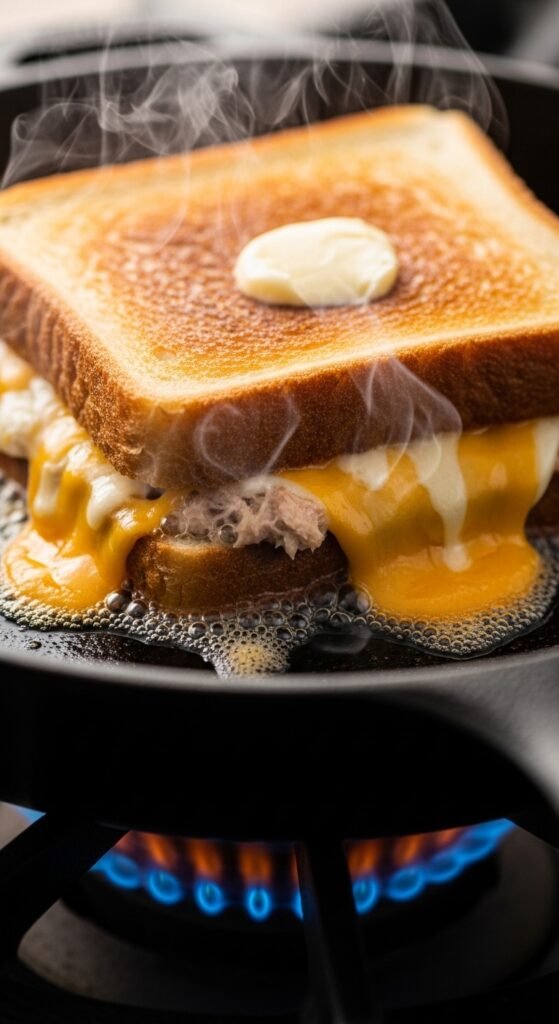
Why this method works: By toasting the bottom bread with cheese underneath the tuna, you create a moisture barrier. The bottom cheese melts into the bread’s pores, preventing the tuna juices from making the bread soggy. You are essentially building a cheese-lined boat.
Step 11: The Flip.
Let the sandwiches cook for 3-4 minutes. Use your slotted spatula to peek at the bottom. It should be a deep, golden-brown color. Not pale. Not black. Golden.
Now, here is the scary part: the flip. Slide the spatula under one entire sandwich. Lift confidently and flip in one swift motion. If the top bread shifts, use the spatula to push it back.
Step 12: The Press.
Once flipped, gently press down on the sandwich with the spatula. This ensures even contact with the pan. Cook for another 3-4 minutes, until the second side is golden and the cheese is visibly oozing out the sides.
Step 13: The Rest.
This is crucial. Remove the sandwich to a cutting board. Let it rest for 90 seconds. Do not cut it immediately. If you cut it hot, the cheese runs out like a broken dam. Resting allows the cheese to set slightly, becoming gooey rather than liquid.
Pro-Tips & Common Mistakes: Saving You From My Failures
I have made every mistake in the book so you do not have to.
- Mistake #1: Soggy bread. Solution: You did not drain the tuna well enough, or you used thin bread. Always squeeze the can.
- Mistake #2: Burnt crust, cold center. Solution: Your heat was too high. Turn it down to medium-low. Good things take time.
- Mistake #3: The filling falls out. Solution: You overstuffed the sandwich. Use a measuring cup if you have to. ½ cup of tuna salad per sandwich is the max.
- Mistake #4: The cheese isn’t melting. Solution: You used pre-shredded cheese (coated in potato starch) or you did not cover the pan. If the cheese is stubborn, put a lid on the skillet for the last minute of cooking. The trapped steam melts the top cheese instantly.
Recipe Variations: Keep It Exciting
Once you master the best tuna melt sandwich recipe, you will want to experiment. Here are three variations that keep my kitchen interesting.
The “Spicy Southwestern” Tuna Melt
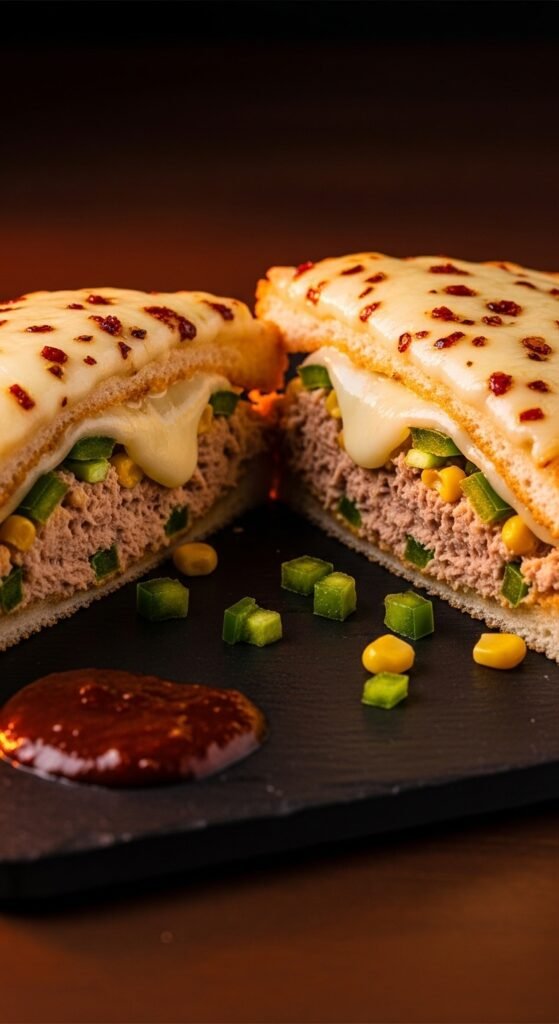
- Add 1 tablespoon of chopped pickled jalapeños to the tuna salad.
- Swap cheddar for Pepper Jack cheese.
- Add a smear of chipotle mayo on the top slice of bread.
- Why it works: The heat cuts through the fat of the mayo and cheese perfectly.
The “Everything Bagel” Tuna Melt
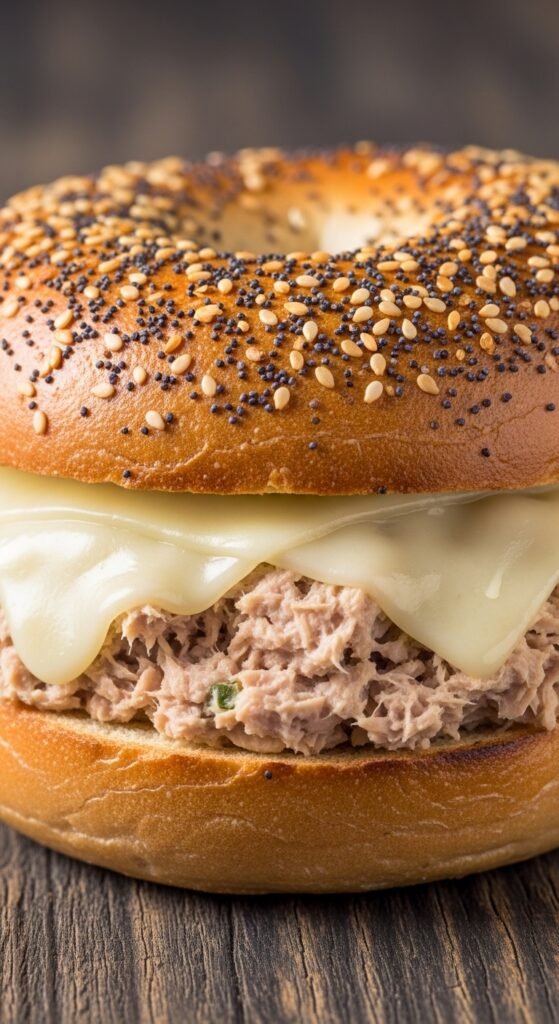
- Use everything bagel seasoning in the tuna salad (1 teaspoon).
- Spread cream cheese on the inside of the top slice of bread instead of butter.
- Use smoked salmon in place of half the tuna for a luxe version.
- Why it works: Cream cheese and smoked fish are a classic NYC deli pairing.
The “Green Goddess” Healthy-ish Melt
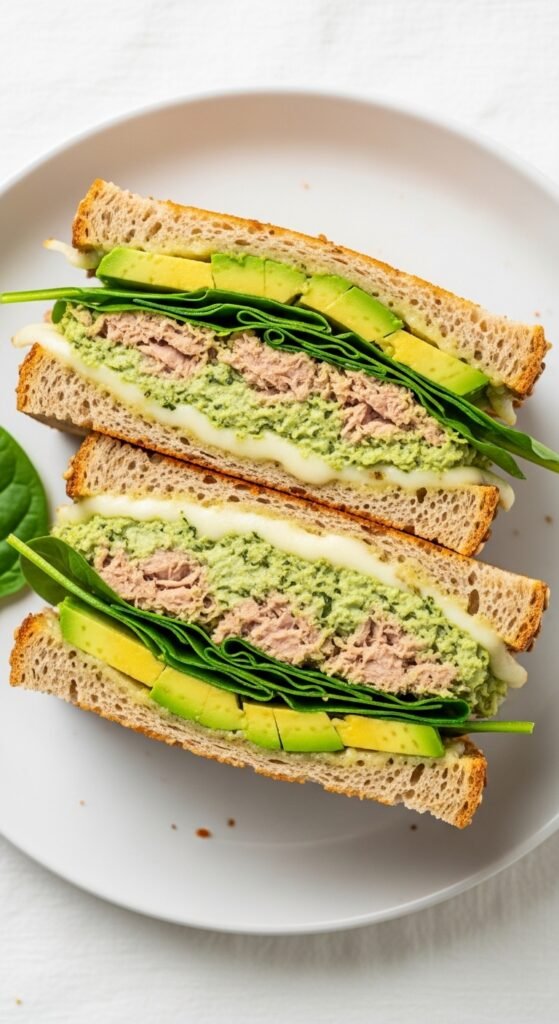
- Replace half the mayo with full-fat Greek yogurt.
- Add finely chopped spinach and fresh basil to the tuna salad.
- Use avocado slices under the cheese.
- Use whole grain bread.
- Why it works: You get the creamy texture with less guilt, plus a vibrant color.
How to Serve the Best Tuna Melt Sandwich
Do not just slap this on a paper towel. Elevate the experience.
- The Classic Diner Plate: Cut the sandwich diagonally (it just tastes better that way). Serve with a handful of dill pickle spears and a pile of kettle-cooked potato chips.
- The Soup Combo: Pair it with a bowl of tomato soup for dipping. The acidity of the tomato against the rich, cheesy tuna is a religious experience.
- The Salad Swap: If you want to feel healthy, serve it alongside a simple arugula salad with lemon vinaigrette.
Why You Should Buy the Recommended Products Today
Look, I am not here to sell you junk. I am here to save you from the heartbreak of a failed sandwich. The difference between a good tuna melt and the best tuna melt sandwich recipe is often just the tools.
- The Pan: That cheap non-stick pan you bought in college? Its coating is failing. It is releasing chemicals into your food. A new ceramic non-stick skillet is PFOA-free, heats evenly, and nothing sticks. Buy it once, use it for 5 years.
- The Spatula: You will use this fish spatula for eggs, pancakes, fish (obviously), and cookies. It is the most underrated tool in the kitchen.
- The Tuna: Stock up on quality albacore tuna. It is sustainably caught, low-mercury, and the flavor is night and day compared to the grocery store brand.
Confidence Guarantee: If you buy these three items (pan, spatula, quality tuna) and follow my step-by-step guide, I guarantee you will make the best tuna melt sandwich recipe of your life. If the first bite does not make you close your eyes and sigh with happiness, you can return the pan. But you will not. You will be too busy making your second sandwich.
The Final Verdict: Your Kitchen Awaits
That rainy Tuesday in my studio apartment? I ate that first melt standing over the sink, because I could not wait to sit down. Crumbs fell into the dishwater. Cheese dripped onto my shirt. And it was perfect.
Cooking is not about Michelin stars or exotic ingredients. It is about transforming humble cans and leftovers into something warm, crispy, and soul-healing.
The best tuna melt sandwich recipe is more than a set of instructions. It is a skill. It is confidence. It is the ability to walk into your kitchen at 10 PM, tired and hungry, and walk out five minutes later with a golden, oozing, crunchy masterpiece that costs less than a fast-food burger.
So, what are you waiting for? Clear off your counter. Tonight, you are not just making a sandwich. You are making a memory.
Go forth and melt. And do not forget the pickles on the side.
Recipe Card (Quick Reference)
- Prep Time: 10 minutes
- Cook Time: 8 minutes
- Total Time: 18 minutes
- Yield: 2 sandwiches
Ingredients
- 2 cans (5 oz each) solid white albacore tuna in water
- 4 slices sourdough or rye bread
- 4 tbsp salted butter, softened
- 4 slices sharp cheddar or 1 cup grated
- 3 tbsp full-fat mayonnaise
- 1 tbsp dill pickle relish
- 1 tsp Dijon mustard
- 1 tbsp celery, finely diced
- 1 tsp fresh lemon juice
- Salt and pepper to taste
Instructions
- Drain tuna well. Flake into a bowl.
- Mix mayo, relish, mustard, and lemon juice. Add to tuna with celery and onion. Mix gently.
- Butter one side of each bread slice.
- Heat skillet to medium-low.
- Place 2 slices butter-side down. Add cheese, then tuna, then cheese, then top bread (butter-side up).
- Cook 3-4 minutes per side until golden brown and cheese melts.
- Rest 90 seconds. Slice diagonally. Serve with pickles.